|
|
|
|
|
|
|
Thanks! As much as I complain about the Model Slipways kits, they shine up real nice.
But they do take some tweaking. Like the warped sides of the fiberglass cabin... you can hide them a little by making the cap rail around the bridge deck a bit wider and straight, fools the eye. And every white metal fitting needs to be drilled out and pinned, with the pin going through the deck... you can see a few of those pins in the underside view. I do wish they'd replace every white metal part with resin... plenty strong, better detail, easier to glue... |
|
|
|
|
|
|
|
|
Center Hatch
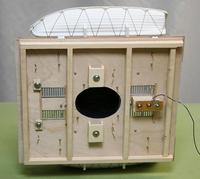
Got the main hatch pretty much done. Not a real hatch on the real boat, but it gives us good access to the model's interior. I showed earlier how I gave up on the kit's materials, and built the hatch with wood framing and skin instead of plastic. Also, the kit gives us no materials or ideas for attaching all the goodies on top... just gluing them on won't work (for long). So everything is built with screw attachments.
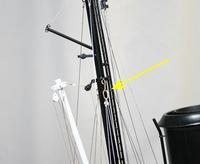
A few comments to go with the pix: MS doesn't give much of a clue about rigging the cargo boom... they also don't give us a winch which would surely be used on a vessel of this size. I just tied the lines off like they were meant to be used manually. Four lines should be seen at the boom's end: Topping lift- hauls the boom up; should be winch-powered. Cargo whip- hauls the load up. Would like be double blocked at least, I just put a single line down to the hook, which I had to make from brass wire. The whip would also be on the winch. Two guys to either side- keeps the boom from slewing side to side when rigged, and can be used to slew the boom by hand (or winch) when shifting the load. There's no place to stow the hook or to tie off the guys, so I added eyes on the deck. When not in use, the boom is hauled up out of the way. And these aren't just fussy scale details. Stowing the boom up helps protect the model, and the guys really do function to keep the boom from rattling around. Mast Stays: Several of the stays attach forward on the hatch, but several more must attach near the gunwale, off the hatch. MS suggests a wee little hook tied on the upper ends of the stays, to be hooked onto the collar on the mast. I could tell that this would be insecure and hard to access, so I put brass hooks directly on the collar, and I'll put a brass ring on the ends of the stays... should be much easier to attach, and is still fairly small. Turnbuckles: Used the smallest RB Model brass turnbuckles- they're great! But beware, they're so small that they're hard to turn, especially when hidden behind other stuff. Note to self: Next time, identify an "up" on the turnbuckles before installing, so that they all turn the same way to tighten! If one of these things comes apart, you have to take everything out and rebuild the stay. Stays: are 0.015" necklace wire, and the eyes are crimped with jewelry ferrules. Used the ferrules on some of the rigging cord too. Cord: Bees' wax is the trick for reducing fuzz. If you use cord that comes on flat cards, it will be all kinky... just drag it under a hot iron, that does the trick. Lamp: As with the foremast, the brass mast is the ground, so only one wire runs down inside. Boats: Used the kit's vac-formed boats and covers. Covered the plastic covers with 1.5" wide masking tape for a cloth look with seams. The covers are secured with cord, and the davit falls are secured to bitts on deck to keep the tension on. They should be in bags in the boat, since it's the crew in the boat that works them! That reminds me, I need to add guys between the davits with man ropes... details, details... ImagesView all Images in thread
|
|
|
Last edited by patmat2350; May 31, 2009 at 01:48 PM.
|
|
|
|
|
|
Man ropes between the davits.
|
|
|
|
|
|
|
|
|
Tiny turnbuckles....
In the wine...  Sorry! Sorry! Looking great, as usual, Pat! 
|
|
|
|
|
|
|
|
|
Tiny turnbuckles, make me feel happy, make me feel fine...
|
|
|
|
|
|
|
|
|
Sing it, Pat!
  Now that song is stuck in my head...   Nice work on the boat though! 
|
|
|
|
|
|
|
|
|
Anchor & Foredeck
Finished most all of the foredeck area.
The anchor winch is more of the dreaded white metal. Dreaded because you have to glue the pieces together, and glues just don't stick well to this stuff. Did my best by cleaning and scuffing the glue surfaces. Didn't want to just glue the assembly to the wood deck, so screws were used through its base, which obliged me to finish the assembly in situ. We replaced the kit's solid cast Hall anchors with nice Robbe articulated parts... this allows the anchor to pull up and seat better in its hawse lip. I wondered about how to secure the anchors... simply gluing them into the hawse pipes is tacky (...sorry). So the chains were attached and pulled up with a wire hook, then fed through the chain stoppers and pinned there... nice and snug and solid. The chains were then looped over the winch with the loose ends glued into the little chain pipe holes in the winch. Won't go anywhere. A few more details were stuck onto the foredeck. The many mushroom vents were rebuilt from the lopsided and stubby pinned cast metal kit parts... new brass tubes with longer pins make for solid installations in some locations; where accessible, I ran 4-40 screws up through the deck to really secure them. It's coming along. ImagesView all Images in thread |
|
|
|
|
|
|
|
|
But wait, there's more!
Rigged the forestay. Again, not much of a clue about how to... so I put a nice RB Model turnbuckle at the stem, necklace wire running up, and a hook on the mast where the stay's looped end can be attached. No need for any elastic... just tilt the cabin forward, and it's easy to install... |
|
|
|
|
|
|
|
|
Mainmast shrouds, & back to drawing board
Spent the evening installing the mainmast shrouds, and learned a few lessons!
I'm using twisted stainless necklace wire with crimped ends... the stuff has NO stretch to it (at least not in human hands)... and I realized that tilting the hatch which the mast is built on only tightens, not loosens the shrouds... So once installed, you can't unhook them! I've got turnbuckles on the shrouds, but loosening those each time is out of the question... so I'll need to figure out how to add some elastic to this system... Also, something didn't work out quite right, and the shrouds are about 3/16" too close to the ship's boats... which means that the life rafts, which are supposed to be mounted on the shrouds, won't fit right... it'd be a major tear-up to fix that, so I'll do like I saw another modeler do-- I'll stack the rafts in the center under the boom, where the 12 pounder gun was mounted on the Admiralty version. Mounting the turnbuckles was almost a problem, but I muddled through it. These need brass wire "U"s stuck through the deck and spread from below. Access to this area is severely restricted, especially with the custom wood framing I installed. Same issue as with several other deck fittings-- if I realized the problem ahead of time, I could have installed the parts, or backing blocks, etc, prior to installing the deck. Really have to think this stuff through next time... |
|
|
|
«
Previous Thread
|
Next Thread
»
| Thread Tools | |
| Similar Threads | |||||
| Category | Thread | Thread Starter | Forum | Replies | Last Post |
| Help! | One more Mini Pleaser question | T6Junkie | Parkflyers | 1 | Dec 23, 2001 05:40 AM |
| Calculating Incidence, one more time | MtnGoat | Electric Power Systems | 4 | Sep 19, 2001 04:58 PM | |
| Last Chance.....One more week for RocketWings.com, It will be closed down soon. | funflyer | Aircraft - Electric - Airplanes (FS/W) | 0 | Sep 07, 2001 09:53 PM | |
| Last Chance.....One more week for RocketWings.com, It will be closed down soon. | funflyer | Electric Plane Talk | 0 | Sep 07, 2001 09:50 PM | |
| OK - gonna try the Cox Viper one more time.... | Steve McBride | Foamies (Kits) | 74 | Jul 13, 2001 05:21 PM | |


