|
|
|
|
|
Discussion
Park Zone F-4U corsair modification thread.
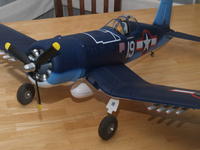
This thread is a place for us to post modifications to the Park zone F-4U corsair.
Iíve already done a bunch to mine and will spill it all here but first the most important one my flying buddy came up with. His model crashed due to radio problems. He suspects the battery shorted out in flight. Regardless why the model crashed there is a shorting hazard in the battery compartment. The lower right hand motor mount screw extends into the compartment. There is piece of foam that serves as a battery placement stop but can either fail or give enough to puncture the battery pack. The fix is to remove the screw and cut off about 3/16 of the tip and put it back then have fun with the Corsair. |
|
|
|
|
|
|
|
|
|
|
wheels
The first modification is a simple ďbolt onĒ , The wheels.
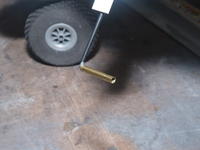
The stock wheels work fine but a little small for scale looks. And will surely flip my model landing at the fields I fly from. ( at the end of the street ) I chose the Dubro 2.75 inch diamond cut wheels. The hub on this wheel is too large for the Park Zone axles but there is an easy fix. A short piece of 1/8 brass tube was bonded to the axle portion of the stock wired with epoxy. Donít forget to scuff up the wire so it sticks good. To hold the wheel on you can either drill a small hole in the tube and insert a cotter pin arrangement or use standard collets. I chose a vinyl cap that has been doing a fine job. |
|
|
|
|
|
|
|
|
The next modification was the cowl.
They did a good job on the cowl shape right down to the cowl flaps.
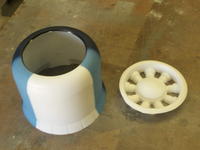
Why would they go to the trouble with the scale three blade prop, spinner and cowl then put a wagon wheel in there for a motor.  It had to go. It had to go.Cutting it out was a simple task and sanding the edges smooth was all that was needed to get it out of there. I formed a radial engine that will nest into the cowl from the back side. I trimmed away some of the edge and removed the spaces between the cylinders with sand paper by block sanding the back side. I shot the ring portion with flat black spray paint, brushed on the silver around the cylinders and finished with a gray motor case. With a few dabs of silicone on the ring I pushed the motor into position with a twist. This cowl is tougher than the Park Zone T-28 and should hold up to abuse better. With the new motor ring acting as a doubler this mod should add to itís durability. |
|
|
|
|
|
|
|
|
The cockpit . .
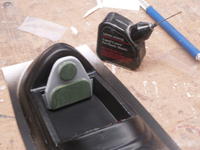
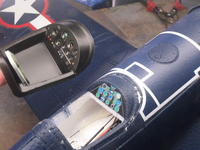
OK so they did better on this one but not quite there for me yet. He is a little flat faced and bland but the size is closer and at least there is a pilot in the plane. The instrument panel, whatís with the green instruments? No matter I can fix it all.
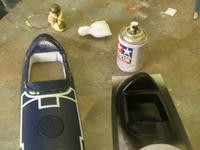
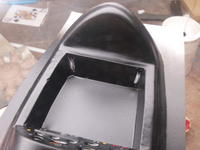
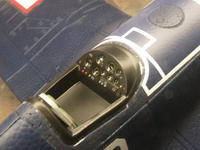
I cut out the cockpit floor using the hole for the stock pilot as the edge limit along the sides. I shot the cockpit insert with flat black and when it dried completely I used a throwing dart to make scratches in the instrument faces. To get the glass look I used 30 minuet epoxy on a stick and added drops until the gauges were covered. After the seat back was painted I scratched away the paint for a good bond and installed it. Pair of scissors was all that was needed to trim the cockpit insert along the edges. Clear silicone is used to bond the cockpit into the hatch hole. Just to be safe I allowed it to dry while on the fuselage to prevent changing the shape of the hatch. The pilot is one of my standard WW2 guys for this size model. To assemble him I sand the back of the figure until the material becomes thin, tracking your progress is easy by holding up the figure up to a bright light. Then I finish the job with a hobby knife. To bond the halves I shoot some plastic cement on the work surface and in a wiping motion apply the glue to the edge of the figure. Align the head first and work toward the bottom. Allow him to dry overnight and the seam will be dry enough to sand. I prefer Tamiya paint for the figures but most model paints will do fine. Silicone across the small of his back will keep him in place against the seat. |
|
|
|
|
|
|
|
|
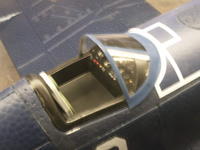
The stock canopy is thick enough to put up with our abuse but itís on the milky side.
I wanted something a little more clear and since I planed to fly the model with an open cockpit so I formed a thicker one with .030 PETG. (The same stuff soft drinks are packaged in.) When bonded in place it makes a handy grip for removing the hatch. Note the pins in the photo will hold the canopy in place while the glue set up. |
|
|
|
|
|
|
|
|
under the wing
Missiles.
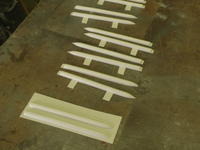
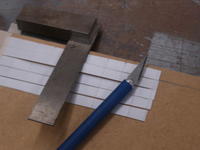
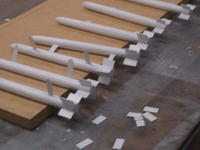
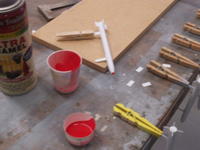
How can you fly a corsair without something under the wing? Missiles are the most visible (and cool) in my book so I went for it. It turns out that they are easier to mount than bombs too. They start with splitting them from the parts sheet in pairs. One side of the missile tube has tabs marked on the sheet and the tube right next to it is the mate . The pairs should not be mixed because they are a perfect match for their mates. Make light weight cuts along the sides of the missile body until you break through. (I took three passes) the plastic has to be thick to make the bond easy. Just a few strokes with a sanding bar will remove any uneven edges but be careful not to thin the tabs. I applied the model cement in the wiping motion like I did the pilot and aligned the halves at the aft end first then at the tip. After drying overnight they were ready to scrape off the seam with the edge of a pair of scissors. The scrap that was removed between the missile bodies was saved and cut into Ĺ inch lengths. I applied the cement by pooling a bit of glue in the work surface and sliding the fins into the pool. One by one I rotated through the 8 missiles until they were all finished. After the fins dried for a while I shot some red paint into a cup then dipped the tips. Clothes pins allowed me to hang them over the table edge. |
|
|
|
|
|
|
|
|
Mounting
Draw a light line just aft of the gear to the servo bottom. Make marks at 1 inch intervals to locate the forward missile mount positions. Use your hobby knife to cut slits in the wing for the tabs on the missiles.
Careful, there are servo wires in the area under the tape. Place the forward mount tab in the cut slit and rotate the missile back to make a dent in the wing. Cut another slit where the dent is and push the aft tab in position. 7 more times and you are done. |
|
|
|
|
|
|
|
|
extended range
What good is having missiles if you donít have the fuel to use them.
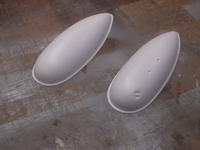
Center line drop tank.  His one is so easy. Use a washer or nut as a spacer to draw a line around the tank halves. Cut on the line and bond them together. Sand the edges even. Bond the pylon to the tank. Sand the inside of the pylon to rough it up and apply epoxy to the inside. Flip it over and quickly put it in position allowing the epoxy to run down the sides and on the belly. |
|
|
|
|
|
|
|
|
There it is,ready to go. I would have painted it to be "more" different but the stickers ruin the finish when removed.
Any hints would be helpful. I'll be back with in-flight shots as soon as "Ike" finishes throwing his fit in the gulf. |
|
|
|
|
|
|
|
|
If you want a set for your Park Zone Corsair the cost is $22 plus $6 shipping in the US.
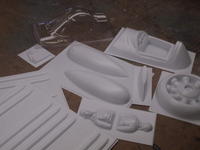
If you are overseas shoot me a PM and we can figure it out. But be aware that it will be in the $20 area so find a buddy to share the expense (there is room in the box for two sets.) A set is: .030 PETG canopy, cockpit insert and seat, pilot figure, Radial engine replacement, 8 missile set and the drop tank with the pylon. Check or money order will be fine If you want to use Pay pal the account is parkflyerplastics@att.net Please be sure to make a note "corsair or F-4U " |
|
|
|
«
Previous Thread
|
Next Thread
»
| Thread Tools | |
| Similar Threads | |||||
| Category | Thread | Thread Starter | Forum | Replies | Last Post |
| F-4U Corsair by GWS | Herb | Parkflyers | 316 | Apr 14, 2004 02:58 PM | |
| F-4U Corsair Video with Himax upgrade | Splash | Parkflyers | 195 | Apr 07, 2004 05:26 PM | |
| Flying Styro F-4U Corsair w/motor, ESC,& Li battery | bruff | Aircraft - Electric - Airplanes (FS/W) | 1 | Aug 05, 2003 09:08 PM | |
| F-4U corsair color scheme | denverone | Scale Kit/Scratch Built | 14 | Feb 27, 2003 06:43 PM | |
| F-4u Corsair w Astro 010 brushless | bruff | Aircraft - Electric - Airplanes (FS/W) | 3 | Apr 16, 2002 12:20 AM | |


