|
|
|||||||||
|
|
Discussion
**The Capricorn is a great trainer, nightflyer, seaplane**
Welcome to the "CAPRICORN EVOLUTION" building tutorial.
Watch these videos:
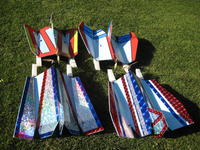
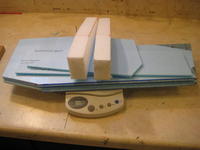
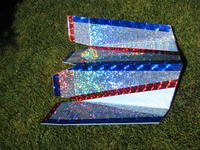
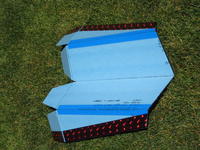
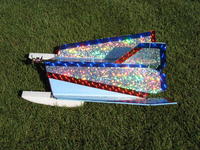
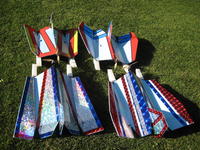
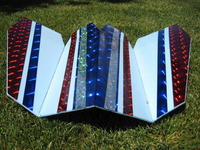
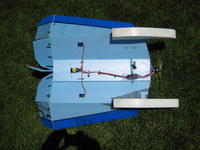
12-19-10 update: There have been a number of recent inquiries about this plane. We have started putting bigger motors on it and flying it off rougher surfaces but the basic concept and design have remained the same. This is a great night plane and trainer. I fly mine mostly as a night plane. Every plane has a story. This one goes like this... We have been looking for a good yard and indoor plane that is still fun for the old guys while being controllable enough for the beginners. It seems that as years go by we have had to travel farther and farther to find wide open spaces to fly because our local land has been developed and our parks have filled with competitive sports. We need some slow planes that are still aerobatic but able to be flown in the smallest of parks, open fields and water ways by unexperienced flyers. The list of planes we have tried is long and includes many of the famous kits and on line build up, cut foam and flat foam planes. I thought the Capricorn would be just another plane and almost stopped part way through construction because the more I built the more strange it seemed. Thanks to encouragement from Chris and Larry I finished the plane and had one of the biggest surprises I have had in years when I flew it. THIS BABY CAN FLY!!! IF YOU DON'T BUILD ONE AND SEE FOR YOURSELF YOU CAN'T SAY I DIDN'T WARN YOU!!!! I call this my origami airplane!!! I had the inspiration that the plane could be made in 3 pieces: The wing including elevons, the rudder and the wing brace. The elevons are cut on the wing and stay on the wing never coming off. The wing is folded without cutting all of the pieces. The wing on the plane in the video had 4 wing sections and 4 elevons making 8 pieces. The new design creates all of these parts without cutting them apart. I got inspiration for an episode of "Mythbusters" in which Adam and Jamie designed and origami lead balloon. I wanted to make the plane affordable by sticking with the BP21 or FC 28-12 motor or equivalent, a 1300 +/- mA battery and a 25A speed control. I also wanted to cut the entire plane out of a single sheet of 2'x4' fanfold foam with very little waste. A second goal is to make it look better than your average flatfoam plane so the experienced flyers in our group wouldn't hang their heads in shame if they got caught with one. A third goal is to hide the ugly servos and in the process protect them from water. I never have gotten used to flat foam planes that have the radio hanging out and stuck with Velcro all over the place. Maybe I'm one of the guys from goal #2 (?????) You don't need a foam cutter to build the plane. A hack saw. a hand saw or a band saw will cut the floats just fine and a sharp razor blade will cut the wings and tail. You can substitute white bead, blue or pink foam for the floats and depron for the wings and it will fly just as well. This plane is not hard to build. After building the prototype I went back and cut a second plane. It took me less than one hour to cut all of the pieces, put on the tape for decoration and reinforcement and bend the foam. The hardest part is finding the fanfold foam or depron, the carbon rods and the EPP foam for the pontoons. If you are just getting started in the hobby here is a suggested list (in post one) for radio gear and parts to buy with links to the parts: https://www.rcgroups.com/forums/show...51&postcount=1 If you click on my avatar it will take you to my blog which is dedicated to helping new flyers get the information they need to get into the hobby. Or click here: https://www.rcgroups.com/forums/member.php?u=36945 Our fanfold foam we got from Lowes, a local hardware store. We had to search to find it. Depron will work fine if you can't find the fanfold foam. The wing pieces can be cut separately if you can't find stock this big. You don't need to use EPP foam in the floats. Blue, reinforced white bead or pink foam will work fine. The 2.5"x24"x36" #1.9 pound EPP foam we used in the pontoons in the tutorial came from www.flyingfoam.com Give Bob a call, he will help you. The carbon rod came from the local hobby store but a link to an online site is in the parts links above. The weight of foam parts including the EPP super strong pontoons is only 4.7 oz. Not bad for a 3.9 ft2 plane when flat and 3.5 ft2 when folded. The light motor and battery possibilities make it possible to make this an ultralight if you want. I have let several new flyers fly the plane. They can fly it surprisingly well. I found that it has such a unique shape that it sometimes confused them. To deal with this and slow it down even more I lengthened the wing. The plans have you cut the trainer but by simply cutting down the wing you can increase the roll rate, speed and performance and have the sport version. You will see pictures of both the trainer and the original mixed through this tutorial. You can tell them apart by the extra angle in the outside edge of the trainer wing. I suggest you build it as a trainer and cut it down as you become more comfortable with the plane. Remember... BUILD IT LIGHT!!!! Sorry about all the pictures and my ramblings but I wanted you to feel like you could see every step along the way and know what I am thinking and why we do what we do. I broke the steps apart in different posts so I can update and modify them as the plane evolves like I am sure it will. I've already added many modifications to this tutorial. It has changed so much since I started that I had to add "Evolution" to the name, so may I introduce the "CAPRICORN EVOLUTION" This plane is similar to other planes that can be found at the following sites. I know the Capricorn Mini and the Aquarius were also designed as smaller versions of the Capricorn and all are copies of the Gemini. Please look at the following threads for videos and more information: https://www.rcgroups.com/forums/showthread.php?t=892016 http://www.wattflyer.com/forums/show...ighlight=robbe https://www.rcgroups.com/forums/showthread.php?t=812352 https://www.rcgroups.com/forums/show...ghlight=Gemini I appreciate and acknowledge the following people: My wife for encouraging me to fly radio control. She says it is a lot cheaper than therapy. Ron who originally said "Lee have you seen this plane?" Larry for the basic design modification and for doing such a good job with the Wattflyer site and being willing to share information. DBacon for a good summary of what Larry said in 527 posts. It is here in post #20. Chris a good friend who has amazing enthusiasm and vision and is always willing to help but wants no recognition. Cliff our lighting expert for teaching me LED lighting All of you who post your pictures and videos in this thread. . ImagesView all Images in thread
|
||||||||
|
|
Last edited by Lee; May 31, 2021 at 11:34 AM.
|
||||||||
|
|
|
|
|
|
|
#2 Schematic
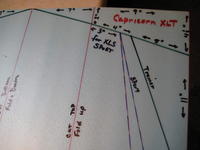
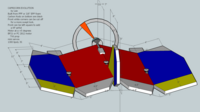
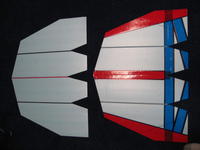
The Capricorn Evolution wing and elevons can be built out of a single sheet of 2'x4' or 24"x48" fanfold or depron foam. There is enough foam in one sheet to also cut the rudder and braces. The fanfold foam on the market has changed. It is lighter in color and weighs significantly less. The new fanfold foam does not have the ripples the old foam did. The new foam is more flexible and you may need to reinforce it more than the old fanfold foam. It has a smooth side and a rough side and has a skin only on one side. It will work but you need to be aware of it's strengths and weaknesses. We are experimenting with carbon rods in the outer wing panels and braces on the top of the wing, where it bends above the pontoons, to add more stiffness to the wing to compensate for the softer foam. Draw all lines on the back side of the sheet of foam. The only exception is the fold lines to make the "W" shape to the wing. This is important so the hinges will bend the right direction. The center of gravity is back 7" from the tip of the nose of the plane. The angle on the wings is debatable but all angle seem to work. What ever angle you choose should be used on all three angles. From what we have seen and tried the plane works with a wide variation in angles. I was able to draw and cut the plane in less than 30 minutes. ImagesView all Images in thread
|
|
|
Last edited by Lee; Mar 06, 2009 at 09:47 PM.
|
|
|
|
|
|
#14 Waterproofing the Radio Compartment
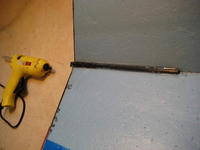
Please refer to post #20 for an in depth description of waterproofing. At this time I am not flying off off water......BUT I do know a little bit. I have flown glow/gas seaplanes for years. I used to be in charge of the seaplane fly-ins for the local club. Mount your radio in a designed dry place if you can. Seal the water tight box with light weight, clear, see through tape so you can look and see if there is water around your electronics. You might want to put cotton or another lightweight absorbent fiber in the radio box to catch the water drops that may find their way into the radio box. You may want the battery in it's own protected area so it can be changed without opening the ESC and receiver box. All of these "boxes" are just partitioned areas of the main radio area. It shouldn't add much weight to add a couple of pieces of fanfold foam to divide the radio area. If you are flying off water the servos will be more out of the water mounted on the top of the wing.......at least until you flip it over in the water. Seal the servos as if they will be dunked in the water......because sooner or later they will be. You may even want to take an old or broken servo and practice different waterproofing ideas then dunk it in a glass of water then take it apart to see how well you ideas worked. I have used a thin layer of silicon spread with a razor blade to waterproof servos especially where the cord enters the servo. I would put some thick marine grease around the servo control arm to prevent water from entering through the gears. Install the servo in such a way that it is protected from the water, especially the spray. Water has it's way of finding it's way into anything. I have recently tried using a little hot glue from a glue gun and doing the same thing. The nice part is I can heat it back up with my old Monocoat iron and get most of it off. Push rods have to move freely so they open the way for water to get into your radio box. I recommend that servos are placed outside your main radio box. Seal the electrical wires with silicon or hot glue where they enter the box where the receiver and ESC are protected. Stick your receiver in the middle of a piece of wide tape then work just enough silicon around the cords and antenna to create a seal and press another piece of tape over the top to seal it before the silicon cures and dries. Silicon should never be put on the receiver or plugs. The taped receiver can then placed in the plane. You could even stick the adhesive side of Velcro to the protective tape to attach it to the plane. This would also work with a hot glue gun sealing the cords wires and antenna as needed. Don't use any more silicone or glue than needed. Usually just a well placed dab will do. We use a similar process when we vacuum bag wings on a much larger scale. The battery can be put in double layered thin sandwich bags and secured with a double wire tie. Put the battery in a designated battery box and seal it with a clear piece of see through tape for a double layer of protection. It's like I said. Water will find it's way into anything. I have taken apart many a servo and receiver to dry them out. Your motor won't be hurt by the water but I would recommend attentive drying and re-oiling the motor after flying. Your motor bearing may corrode and rust. Trying to run your motor under water will overload the ESC and possibly may cause overload damage to your battery and your other electronics. If your radio stops working because of the water DON"T PANIC!!! Open things up dry them out for a couple of days and most of them will start working again. Do not try to use them if they are wet or they may stop working forever. . |
|
|
Last edited by Lee; Aug 31, 2008 at 07:58 AM.
|


