|
|
|
|
Thread OP
|
WildRC Brushless Mini IFO Review
!Introduction
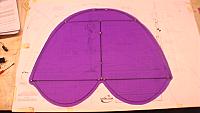
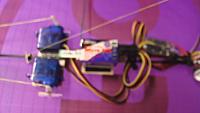
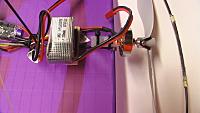
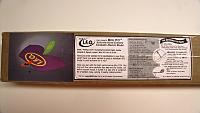
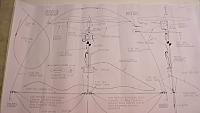
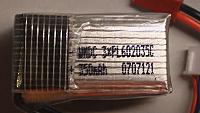
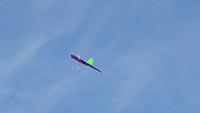
Many years ago I went to my local hobby shop to see what was new. I had not been introduced to electric flight yet, and upon seeing the IFO (Indoor Flying Object) I was intrigued to say the least. I first built the <a href=http://www.wildrc.com/htmlpages/ifomk3.html>MK3</a> which used a brushed motor and NiMH batteries. I loved the way that version flew, and I could not wait to charge up and get back into the sky: It made me look good and was so forgiving. Now join me as I walk you through the build and flight of the Mini IFO. Along the way I will offer some tips to make your experience of the Mini IFO a pleasurable experience. | spec2 | @IMGA0099.jpg |> <b>Wingspan:</b> |< 25.5" |> <b>Wing Area:</b> |< 320 sq. in. |> <b>Weight:</b> |< 3.5 oz. |> <b>Length:</b> |< 20.5 in. / 56mm |> <b>Wing Loading:</b> |< 1.6 oz/sq. ft. |> <b>Servos:</b> |< Hitec HS-50 |> <b>Transmitter:</b> |< Hitec Optic 6 |> <b>Receiver:</b> |< GWS |> <b>Battery:</b> |< Supplied 11.1 and 7.4 LiPo 350mAh |> <b>Motor:</b> |< Wow - 1200 KV 100w 24g brushless |> <b>ESC:</b> |< Wow 10 amp |> <b>Manufacturer:</b> |< <a href=http://wildrc.com>WildRC</a> |> <b>MSRP:</b> |< $85 with brushless motor, ESC and prop !Kit Contents Items in the IFO line cost very little to ship. Everything comes in the kit, and outside of a few pieces of balsa this plane is all carbon and rip-stop nylon. Several design features set the IFO apart from others: a carbon prop guard, mono wheel landing gear, simple hinges, carbon airframe, and an AUW of only 125 grams. The kit arrived about two days after my request, and inside I found a large set of plans wrapped around covering material and carbon framing. @IMGA0054.jpg:The complete kit contents in one small package *Kit Contains *Carbon airframe parts *Ripstop nylon covering *Brushless motor *Brushless ESC *7.4 volt 350mAh LiPo or 11.1 volt 350mAh LiPo (as combo) *8x4.3 prop and prop saver *Motor connectors *All building accessories *Kit Requires *Thin, medium and thick CA *Contact cement *Micro receiver *Two micro servos @IMGA0062.jpg: The full size plans @IMGA0064.jpg: Plans provide plenty of detail @IMGA0055.jpg: All the building materials @IMGA0057.jpg: The electronics I really like the full size plans. The plans, coupled with the written instructions, provide all you need for the assembly. Detailed drawings are also included as well as a supplemental sheet was provided for the brushless setup. @IMGA0068.jpg: Schematics are useful !Assembly Assembly starts with laying out the plans onto something which you can pin them. This is a classic assembly: aircraft building on top of printed plans. I used a large piece of foam core, and it worked just fine. After you have the plans laid out flat, cover them with some plastic to keep them clean and keep the CA from sticking to the paper. !!Wing I can’t say enough about sticking to the instructions. Even though they are very simple, they require attention to detail and sequence. For example, you start with the hinge material which is a hollow plastic tube. It needs to be roughened up on the outside some with sandpaper, but more importantly, it has to be cut and placed on rods before they are glued. @IMGA0081.jpg: Rough up the hinge tube so the CA sticks better I used T-pins to hold the carbon rods into their flexes. The carbon rods are loaded with energy when you flex them, and they can pop off the board. Be careful, and use lots of pins! <div class="dashed"> A word here on the gluing and thread lashing required for each joint. This is the method to use: attach two pieces of carbon with a light CA tack and accelerator, then wrap the joint with Kevlar thread several times in each direction, and then seal the thread with some thin CA and accelerator. </div> @IMGA0082.jpg: The Mini framed Next, flex the easy to install elevons. Tack one end and then flex the rod to the other end. To ensure you are not going to pop off the other end, you can warp the first point with thread and seal before you flex the elevon. @IMGA0085.jpg: Note the hinges were installed in the previous steps. @IMGA0086.jpg: A piece of art! @IMGA0088.jpg: The complete airframe weighing in at 17 grams !!Covering You get several choices of color in the covering: purple, navy blue, red, yellow, hot pink, lime green, neon orange and gold. The covering process requires that you coat the UPPER half of the carbon framework with contact cement. I emphasize “upper” because you want to make sure you keep track of the top and bottom. This stuff holds great, and there is no need to cover more than the airframe. Next, lay the airframe on the flat, stretched out covering. @IMGA0092.jpg: After you have it stuck down, trim the material about a 1/2 inch inside the frame @IMGA0093.jpg: Trimmed and ready Now take a disposable paint brush, and coat the wire on the bottom side and just a little bit inside the frame. Let it dry a few seconds, and then fold the covering over the frame. You can make some relief cuts in the material if you like, but the material folds down very well. Do the same process for the tail. Use your fingernail to press the material tightly into the interior groove along the carbon rods. @IMGA0095.jpg: The lime green tail @IMGA0098.jpg: Note the IFO decal is not a part of the kit. @IMGA0099.jpg !!Electronics Installation You might think that since there is no fuselage per se that hanging the electronics might be difficult, but that is not the case at all. The full size plans provide most of the detail for a good setup. You do have to pay attention to managing the space along the fuselage. Begin by mounting the two servos that will be configured for a elevon radio. Mount the two servos to a piece of supplied balsa along the fuselage toward the back. I used hot glue to mount the servos to the balsa platform (note: Never use hot glue on any carbon components). @IMGA0102.jpg: Mount the balsa to the fuselage with CA I opted for the pull-pull setup and used a doubled up length of Kevlar thread. Lace this through the servo arm and back through the carbon rods installed for the control horns. Do not tack the thread on the servo arm at this trim. Wait until you set up the radio and have all your trims zeroed out. Next, install the radio just forward of the servos. The radio also mounts on a piece of balsa. I used a hook and loop system to secure the radio to the platform and then CA'd the platform to the fuselage. I have not experienced these components becoming loose. The Mini can take a hard hit, and those components will stay put. If they do, use some CA, and you are back in business. @IMGA0107.jpg: Use wire ties to secure the extra lead wires The LiPo battery will need to be as far forward as possible. Use a piece of balsa and some hook and loop to attach the battery up front. The ESC will fall between the battery and the radio and must be secured with zip ties. @IMGA0070.jpg: A 7.4 and 11.1 battery @IMGA0072.jpg: Both batteries are 350 mAh Installing the brushless motor requires that you add the supplied small piece of plastic tubing to the back shaft of the outrunner motor. This way the CA has something to bond with. The motor includes a prop saver for the 8x4.3 prop. @IMGA0101.jpg: The brushless is so much less bulk than the brushed and geared system I attached the motor with zip ties and then CA'd the mount to the fuselage. @IMGA0104.jpg: Note the battery right up front @IMGA0103.jpg: The complete electronics package @IMGA0109.jpg: The underbelly of the Mini @IMGA0098.jpg: Ready to fly! !!Completion The correct CG point is about 10mm behind the tip of the forward portion of the fuselage. Note that with the 11.1 volt LiPo at 30 grams and the 7.4 at 20 grams you will be within a range for the CG regardless of the battery choice. For more dramatic 3D you can move the CG back some. WildRC provides setup instructions for first flights and recommends you not use the higher voltage battery until you have a few flights under your belt. They also recommend that you not do aerobatics with the initial flight setup. *First Flight Setup *2" up and 2" down *Initial hand launch set the trim up 1/8 to 1/4 inch *7.4 LiPo battery *Calm winds For extreme flying the control throws double (use dual rates). *Extreme Flight Setup: *4" up and 4" down (35 degrees) *About 50% expo *11.1 LiPo battery *Calm winds or indoors !Flying The key to flying the Mini IFO is good throttle management. Reduce the throttle in dives and increase to pull up or out of maneuvers, before you know it you will have mastered the IFO and improved your flying skills immensely. Just keep practicing. You might be skeptical at first, but let me say that this is a great flyer that is controllable and predictable. Nothing concerned me, and the well engineered product was a blast to fly. The tail coloration and the IFO decal helps you determine top from bottom. I loved the way it accelerated as it floated through slow flight. Maneuvers were easy regardless of the airspeed. One thing I recommend is to keep working with your trims and to get the IFO flying true. This is difficult with the pull-pull system. Linkages provide more adjustment. !!Basics Be sure your first flights are conducted in low to zero winds. As you get better light winds will not be a problem, but first flights should be in near perfect conditions. Start off your flying using low rates if that is an option. Get the feel of the IFO by flying at half throttle and doing slow turns. There really are no stalls; the IFO will settle more for a dip of the nose. Inverted flight is easy. Remember that altitude is your friend, and as you are learning to fly the IFO, get some air between the plane and the ground. !!Taking Off and Landing I used a hand launch as I typically fly from grass, but I know the IFO will leap into the air from a hard surface, though. A gentle release gets it flying. Landing are more of a harrier to zero rollout. !!Aerobatics/Special Flight Performance There is really nothing the IFO can't do. With proper trims and proper throttle management you can transition into 3D flight and quick hovers. Resetting the CG is limited to your battery unless you unglue the mounts for all items or add some weight. It does not take much if you do decide to add an ounce or two. The rolls are quick and tight and loops are tighter. than In fact, you can get it into a loop or partial edge loop/spin, and it will stay there. !! 7.4 Volt LiPo With the 7.4, it is a gentler plane. With this voltage, you still can perform all of the aerobatics, just at a slower speed. Consider it the beginner battery. Use the 7.4 to warm up and then make the switch to the 11.1. !!11.1 Volt LiPo As you would expect, you get more power with the larger battery and thus more maneuvering options. Rolls and loops are tighter and quicker and acceleration is greatly enhanced. Quickness does require attention, and as you can see, the expo settings are high because of the added responsiveness of the larger battery. The 11.1 adds about 10 grams to the weight of the IFO. Both batteries provide about 10 minutes of flight time depending on how hard you push the Mini. !!Is This For a Beginner? I recommend you have some flight experience before making the transition to the Mini IFO especially with the 11.1 volt battery, but it would not take much time after soloing to be in the market for any IFO product. Consider the <a href=http://www.wildrc.com/htmlpages/tifo.html>T-IFO</a> a great trainer that is docile and a perfect way to experience this excellent line of products. !!Flight Video/Photo Gallery +mini7.4b.wmv:Mini IFO with 7.4 volt LiPo +mini11.1.wmv:Mini IFO with 11.1 volt LiPo @flt2.jpg @flt3.jpg @flt4.jpg !Conclusion The Mini IFO is portable and can fit into your suitcase, trunk or even the front seat. This plane is great for taking to the field on your lunch break or anytime you want to fly. The low mAh battery will easily and quickly charge from your car battery. I can't say enough for the durability and the great flying characteristics. I think there are great benefits to building your own model, and the Mini IFO builds easily in a couple of evenings. But if you don't want to build your own, <a href=http://www.wildrc.com/index.html>WildRC</a> offers the Mini, Classic MK 3 or Trainer IFO as RTF. You cannot beat that if you want to fly shortly after the delivery-man leaves your driveway. Whatever you do, make sure to buy the original WildRC Mini IFO. There are knockoffs out there that have copied Dan Kriegh's well designed series, but they don't even come close to the quality materials and construction. *Pluses *Carbon building is easy *Flies well at both ends of the flight envelope *Durable *Packable into a suitcase *Even with a 350 mAh battery you get great flight times *Two battery versions for transition *Lots of colorful coverings *Just downright fun to fly! *Minuses *Honestly, there are no negatives! ImagesView all Images in thread
|
|
Last edited by Angela H; Jan 18, 2008 at 08:14 AM.
|
|
|
|
|
|
|
|
|
Yea, the Mini IFO is a great front yard/indoor plane. It's my most durable plane but still a whole lot of fun.
IMO though, get rid of the suggested landing gear with thread and just make a carbon landing gear.. Boomers- https://www.rcgroups.com/forums/atta...hmentid=277658 Another example in the yellow one: https://www.rcgroups.com/forums/atta...hmentid=277677 |
|
|
|
|
|
|
|
|
My IFO is the original and still flies with a brushed motor. I think it will be 8 years old this summer but i can't be certain. Still love doing "Falling Leaf" flips. I enjoyed your review Dave and it reminds me I need to take my IFO out to the park, to many trees for my front yard. Mike
|
|
|
|
|
|
|
|
|
Nice review man! I might have to get e one of them!!
|
|
|
|
|
|
|
|
|
Thanks for the review.Well done!
The IFO really is a classic. Mine has almost 400 flight hours on it. The plane that's always ready to fly!! Favorite mods... Rudder.... Flat spins to die for, torque rolls and cartwheel-n-go's. Carbon control rods. rc 
|
|
|
||
|
|
Quote:
|
|
|
|
||
|
|
|
|
Thread OP
|
Thanks for the comments, I really appreciate your support. I agree with the pull/pull but after I did it I took CA and coated the thread to stiffen them.
Should have said cut inside after you fold it over. My old brushed version still hangs on the wall. Gutted, but still symbolic of many great flights. I can remember hanging huge 9.6 NiMH's under it and now look at these little Lipo's - Wow. Gotta love the potential this hobby has with technology |
|
|
|
|
|
Good review Dave.
I don't like the idea of switching between 7.4V and 11.1V for increasing the power. That way you're changing both current and voltage at once and by a huge amount if you keep the same prop. It also means buying two packs if you want both options and the ESC settings may need changing too unless you're using it on auto-detect. A 50% supply voltage jump is a LOT and I'd be amazed if the motor wouldn't perform better for both low and high power if the setups were optimised around either 7.4V or 11.1V packs. If using that motor I'd be inclined to just get the 11.1V pack and reduce the prop size to say a GWS 7x3.5HD for lower powered flight. Aidan |
|
|
|
«
Previous Thread
|
Next Thread
»
| Thread Tools | |
| Similar Threads | |||||
| Category | Thread | Thread Starter | Forum | Replies | Last Post |
| Hobby People VQMDL Tuskegee Airmen P-51C .46 Mustang ARF Review | 78dave | Fuel Warbirds | 59 | Feb 05, 2014 01:47 PM | |
| Sold | F/s Tekin Mini Rage Esc "nip" & 3 Brushless Motors | papamac | Aircraft - Electric - Power Systems (FS/W) | 0 | Feb 10, 2007 01:46 AM |


