|
|
|||||||||
|
Thread OP
|
Build Log
Sumo 3D - Free Plans, Build Guide and Video
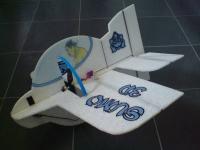
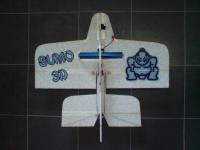
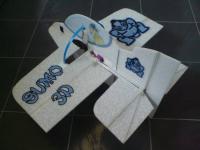
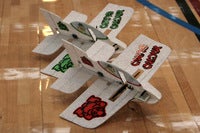
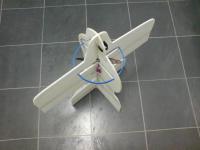
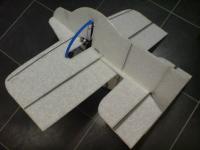
A number of people expressed an interest in my latest EPP scratchbuild, so I thought I’d start a new build thread. For anyone that’s interested in building a Sumo 3D I’ll list the basic order of construction and techniques that worked for me.
Specs : Wingspan : 25½” Length : 22” AUW : 6.2oz (including 2S300 lipo @ 24g) Setup: Motor : KH257 17T (soon to be 1500kv HXT Blue Wonder) Prop : GWS 8043 sf Servos : 3x Bluebird 306 Rx : Spektrum AR6100 Esc : Castle Creations TB9
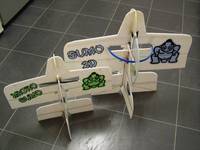
Build Guide in PDF format by RdJay : https://www.rcgroups.com/forums/show...mentid=1542927 Micro Sumo Specs : Wingspan 20" AUW : 92g (3.25oz) Setup : 3x BA3.6 servos 1x Spektrum AR6100 rx 1x 1811-2000 motor (https://www.unitedhobbies.com/UNITE...?idProduct=5358) 1x HW 6A esc (https://www.unitedhobbies.com/UNITE...?idProduct=4318) 1x gws 7035 prop 1x 2S300 lipo
|
||||||||
|
|
Last edited by firetrappe; Dec 21, 2007 at 06:34 AM.
Reason: Micro plans and videos added
|
||||||||
|
|
|
|
|
|
Thread OP
|
Build Details
1. Print the plans, check the scale is correct and tape the pages together using the first page of the plans to help.
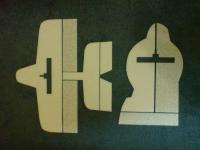
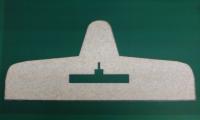
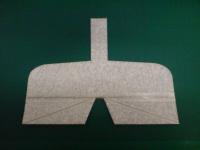
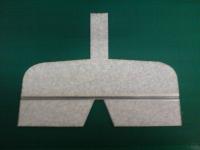
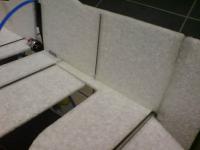
2. Cut the parts out of EPP. I managed to cut all the parts out of 2 sheets of 6mm x 35.5” x 11.5” EPP. The pictures below show that the wing and h/stab were cut in 2 sections and later joined at the aileron hinge line. 3. Cut 45° bevels the full length of the aileron hinge line, elevator hinge line and rudder hinge lines (upper and lower halves of the fus). Then cut bevels in the ailerons, elevator halves and rudder to match. Check the photos in the first post to make sure you bevel the correct side of each surface. 4. Glue 3mm x 0.5mm carbon fibre strips to the bevels you cut on the wing, h/stab and rudder. 5. Join the 2 elevator halves together by gluing another strip of 3mm x 0.5mm carbon along the bevels (use the h/stab to get the spacing between the 2 halves right). Use a length of .032 diameter music wire (I used wire from a Dubro micro pushrod system) to further reinforce the elevator halves. If you look at the photo below you will see it goes from the t/e tip of one elevator half to its l/e root, is bent to follow the hinge line and then bent again from the other elevator l/e root to its t/e tip. The wire is taped to the top surface of the elevator to spread the load put on it during vertical takeoffs. 6. Using strapping tape, create the hinges between the elevator and h/stab and the ailerons and wing. |
|
|
|
|
|
|
|
Thread OP
|
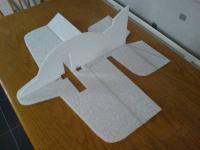
7. Join the wing and h/stab sections together at the aileron hinge line. I cut another bevel in the h/stab section to mate with the bevel already cut in the aileron hinge line. Yes, the bevels shorten the overall length of the horizontal part of the fuselage but not enough to matter.
8. Glue the upper half of the fuselage to the horizontal section making sure that the prop slots are aligned. I marked and cut holes in both sections for the aileron servo before gluing to make life easier later on. Notice that the hole in the wing is twice the width of the servo so that it can be easily fitted (or removed) once the model is complete. Keep the piece of foam you cut out to plug the hole once the servo is fitted. 9. Fit the motor mount tube. I found it best to do this with the motor and prop attached, you don’t want to come to fit the motor and realise the mount is in the wrong place! Aim to position the mount so that the prop will be central to the slot, if the prop bends in flight it’s going to bend backwards, so if it ends up towards the front of the slot it’s better than towards the back. I didn’t build in any down or right thrust and it seems to fly fine. |
|
|
|
|
|
|
|
Thread OP
|
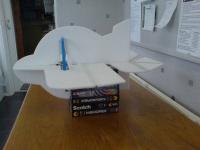
From this point onwards I did most of the build using 2 stacks of old VHS tapes to hold the model upside-down.
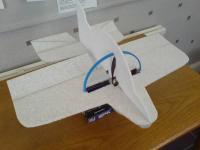
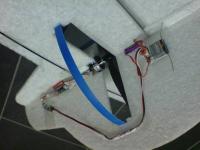
10. Fit the Dohyo (sumo ring  ). Whatever you find or make to use as the prop protector ring the inside diameter needs to be larger than the length of the prop slot (8.5”). Some great ideas for rings in the original thread here : https://www.rcgroups.com/forums/showthread.php?t=703113 . You’ll have to measure the outside diameter of the ring you’re using and cut identical notches in both prop slots so that the ring can be recessed. Take your time with this bit, the ring needs to keep its shape. Having the motor and prop mounted at this stage lets you use the prop to check the distance between the tips of the prop and the edge of the ring are as equal as possible in all positions. Once you’re happy then glue the ring in place. ). Whatever you find or make to use as the prop protector ring the inside diameter needs to be larger than the length of the prop slot (8.5”). Some great ideas for rings in the original thread here : https://www.rcgroups.com/forums/showthread.php?t=703113 . You’ll have to measure the outside diameter of the ring you’re using and cut identical notches in both prop slots so that the ring can be recessed. Take your time with this bit, the ring needs to keep its shape. Having the motor and prop mounted at this stage lets you use the prop to check the distance between the tips of the prop and the edge of the ring are as equal as possible in all positions. Once you’re happy then glue the ring in place.11. Glue the lower half of the fuselage to the model. Depending on the type of ring and glue you’re using it may be easier to combine this stage with the last one to keep everything aligned properly. Make sure the prop slots, ring and rudder hinge line up nicely. It’s more important that these line up than the nose of the model, you can tidy the nose up later if necessary. |
|
|
|
|
|
|
|
Thread OP
|
12. Hinge the rudder. This is done using tape as with the ailerons and elevator. You can fold the elevator back out of the way to make things easier. Check that there is enough clearance between the fuselage and the rudder for the elevator to move freely, trim some foam away where the h/stab and v/stab cross if necessary. Once the rudder is hinged you can gently stand the model on its tail, if the rudder sticks out too much for it to sit nicely then you may need to trim a little off the t/e of the rudder.
13. Strengthening the model. You’ll notice at this point that the model is very flexible. To make it more ‘crash resistant’ and prevent the model twisting from the torque of the prop during vertical takeoffs some additional strengthening is required. The weakest part of the model at this point is the join just behind the aileron servo. To improve this I added a strip of 2” wide x 5” long crossweave tape starting at the rear edge of the prop slot on both sides of the upper fuselage. I then added lengths of 1” wide filament tape from the rear of the prop slot to the rear of the fuselage on all four intersections. Two 9” lengths of 1mm c/f rod were pushed through the horizontal part of the fuselage in line with the t/e of the wing and taped to either side of the fuselage to further reduce flex. A length of 1.5mm c/f rod was similarly pushed through the lower part of the fuselage infront of the motor mount and taped to the underside of the wings to reduce wing twist. 1” wide filament tape was also applied to the edges of the prop slots to prevent the foam tearing in the event of a prop-strike. Finally, to prevent the EPP tearing on less than perfect landings I cut several lengths of filament tape to 6mm wide, these were applied around the edges of the fuselage and nose area. |
|
|
|
|
|
|
|
Thread OP
|
14. Fit control horns. I used Dubro micro control horns glued to 1/64th ply (slofly method) to increase the horn’s contact area with the foam. Any lightweight horns will suffice, just make sure to glue them directly to the foam (peel back hinge tape) and ensure the pivot point between the control rod and horn falls directly over the hinge line.
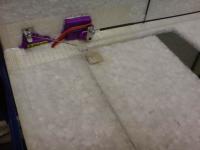
15. Install servos and pushrods. The servos for the rudder and elevator can be positioned anywhere along the centreline of the fuselage. I positioned mine close to the aileron servo to try and keep all the weight as close to the centre of gravity as possible (cog 1” back from the prop seems to work well for me). With my existing setup this allows me to use lipo packs up to about 30g (~1oz), if you intend to use heavier packs then I’d recommend installing the servos further back. I used Dubro micro pushrods and EZ connectors for the pushrods. The elevator and rudder pushrods are 1.5mm c/f rods. 16. Install Rx and Esc. The Rx is attached to the side of the fuselage below the servo cluster with strapping tape. A 12” servo extension was then used to connect the Rx to the Esc. The Esc is attached to the nose of the model on the same side as the Rx with the battery lead passing through to the other side of the fuselage. You can then attach Velcro to the side of the fuselage to secure the battery. Happy Building! FT. |
|
|
|
|
|
|
|
|
Do you have the plans in a non-tiled version?
|
|
|
|
|
|
|
|
|
What a fun airplane! Flys great and looks virturally indestructable!
It's not too hard to envision several of these "Sumo wrestling" indoors or in a back yard.  Posted a link to your thread in the new epp thread. Domo oragato Firetrappe-san 
|
|
|
|
|
|
|
|
Thread OP
|
Thx guys
 Bill, I've just added full sheet plans to the first post for you. Flash, not sure about a VPP sumo, but there is a new VPP design being discussed in Ewo's Amos thread  Dan, I hadn't though of 'Sumo Combat'..I might have to build another one for Flash just to try it out  JimW, It's early days with the Spek system for me but so far I really like it. Flash and myself got a good deal from a supplier in the US that was too good to miss compared with the UK prices. |
|
|
|
|
|
|
|
|
Thanks, firetrappe !!
by the way, just naiden my 3DI. It flew great. I'll post more on that thread. |
|
|
|
«
Previous Thread
|
Next Thread
»
| Thread Tools | |
| Similar Threads | |||||
| Category | Thread | Thread Starter | Forum | Replies | Last Post |
| Build Log | Fly the “NASTY”! Free Plans, Build Guide, and Videos | WaterDog | Foamies (Scratchbuilt) | 1556 | Mar 21, 2024 12:06 PM |
| Build Log | Infineon EPP Bipe - Free Plans, Build Guide and Video | firetrappe | Foamies (Scratchbuilt) | 8777 | Feb 04, 2023 07:42 PM |
| Build Log | “BigNasty” Full fuse, full wing. Free Plans and Build Guide. | WaterDog | Foamies (Scratchbuilt) | 980 | Aug 05, 2019 10:15 PM |
| Build Log | "STS" Seaplane/Airplane Free Plans, Build Guide and Videos! | WaterDog | Foamies (Scratchbuilt) | 834 | Jul 05, 2019 06:38 PM |
| "BIGNASTY" Full fuse, full wing. Free plans, Build Guide. | WaterDog | 3D Flying | 0 | Aug 16, 2005 10:31 PM | |
