|
|
|
|
|
Build Log
The Ritewing Build Thread
The purpose of this thread is to consolidate everything Ritewing related into one simple to navigate thread.
The greatest thing about Ritewing builds is the options to do things "your way" There are so many different techniques and everybody adapts to building these in different manners. I would like for all of us to share info and help keep track of the ever evolving Rite build. I want you to share your build techniques, tips and tricks, your favorite power system, and anything else relative to Ritewings. I'd like to thank everyone who supports Chris and his Ritewings! All of us have made a difference! And Thankyou Chris for not only sharing with us the best flying wings, but also being a friend to us all! You Rock! CAUTION!!! When dealing with high power R/C models there are inherent dangers. Please be fully aware of all dangers before you attempt to build or fly any R/C model. If there is something you don't understand please ask! Some things to keep in mind, These planes can weigh up to four pounds and can travel over 100mph,there is enough energy in these to cause major damage and even death. Please be aware of your surroundings and especially any humans that may be nearby. Things happen quickly at these speeds and there is little time to react. These high power systems have great potential for fires! Most all the equipment we use are being pushed to the extremes of their capabilities. Lipos can make intense flames if ignited! Please be aware of your surroundings, flying in a dry grassy area may not be the best choice. It is advised that a fire extinguisher be on hand at all times. Its very wise to have your receiver powered by a separate powersource, be it a 5cell Nimh rxpack, or a small 2-3s lipo and a bec. In the case of esc, battery, or motor failure this will leave you in control of you model and allow you time to land the model. Keep yours and others body parts out of reach of the prop, there is enough power to dismember a finger! Being that this is a public forum any and all setups suggested are not guaranteed to be successful, please understand and research all equipment before you attempt to fly. You are responsible for your own choices when choosing a powersystem. What works for some may not work for others, be aware the elevation and other variables will affect what a given power system will do. This thread is created by avid Ritewing enthusiast, Ritewing as a company holds no responsibility to what may or may not be suggested in this thread. By understanding this you are responsible for yourself and others safety, proceed at your own risk. Great Ritewing threads! Ritewings in the news and History History lesson of CK and Ritewings https://www.rcgroups.com/forums/showthread.php?t=306952 Need Testers https://www.rcgroups.com/forums/showthread.php?t=425922 Ritewings published in "FlyRC" https://www.rcgroups.com/forums/showthread.php?t=680959 Ritewing published in "RC Sportsflier" https://www.rcgroups.com/forums/show...light=ritewing Ritewing on All Things That Fly, podcast https://www.rcgroups.com/forums/show...43#post9287739 Cks Ritewing Gallery https://www.rcgroups.com/forums/show...light=ritewing Various Ritewing build threads The Mini Demon and FS33 build thread https://www.rcgroups.com/forums/show...light=ritewing Blasting 1950 watt 7 s demon https://www.rcgroups.com/forums/show...light=Ritewing Demon 45 twin https://www.rcgroups.com/forums/show...light=Ritewing https://www.rcgroups.com/forums/show...light=Ritewing CK's 40 Demon w/ 36mm brushless!!! https://www.rcgroups.com/forums/sear...&pp=25&page=10 TL Sicksty! https://www.rcgroups.com/forums/show...light=ritewing Pauls 36 inch Demon build https://www.rcgroups.com/forums/showthread.php?t=584574 Pauls 30 inch unsanctioned Demon build https://www.rcgroups.com/forums/showthread.php?t=525564 Pauls 36 LGT and IYF 44 Slope build https://www.rcgroups.com/forums/showthread.php?t=971566 chuckand's Mini Demon Build https://www.rcgroups.com/forums/showthread.php?t=516389 chuckand's Ritewing 40" TL Build https://www.rcgroups.com/forums/showthread.php?t=501588 chuckand's When less is more (36" Ritewing) https://www.rcgroups.com/forums/showthread.php?t=541024 chuckand's RiteWing 50" TL Build https://www.rcgroups.com/forums/showthread.php?t=482279 IBWingnutz Mini Demon Build With LS motor https://www.rcgroups.com/forums/show...light=Ritewing TaSaJaRa's Ritewing "TL 50" Build pics & video https://www.rcgroups.com/forums/show...light=Ritewing Ab8ug's First Ritewing Build https://www.rcgroups.com/forums/show...light=ritewing BroncoMechs FS48 Sloper https://www.rcgroups.com/forums/show...light=ritewing Reefboys FS36 Lightning https://www.rcgroups.com/forums/showthread.php?t=851398 Ritewing Video Threads https://www.rcgroups.com/forums/showthread.php?t=891665 150mph on 4s!!! http://www.glamisweather.com/seff08/4shighspeed.wmv https://www.rcgroups.com/forums/showthread.php?t=452121 https://www.rcgroups.com/forums/show...mentid=1110816 https://www.rcgroups.com/forums/show...postcount=1161 Random Garage talk and Ritewing discussions Ritewing Rehabilitation Clinic https://www.rcgroups.com/forums/show...light=ritewing Pictures of my Demon Family https://www.rcgroups.com/forums/show...light=Ritewing Ritewing TL 50 ordered! Have a powerplant question https://www.rcgroups.com/forums/show...light=Ritewing The 36 "Light"ning Review and video https://www.rcgroups.com/forums/show...postcount=1087 https://www.rcgroups.com/forums/show...postcount=1161 Making connectors, By TaSaJaRa https://www.rcgroups.com/forums/show...&postcount=146 Official Unofficial Ritewing Meet. We had 7 Ritewings in the air at once. Some awesome videos on the last couple pages. https://www.rcgroups.com/forums/show...=ritewing+meet CK hits 178 at SEFF https://www.rcgroups.com/forums/show...light=ritewing 200 MPH Ritewing Club??? https://www.rcgroups.com/forums/show...light=ritewing Ritewings at AEF https://www.rcgroups.com/forums/show...light=ritewing Methos 36 Sportster experience https://www.rcgroups.com/forums/show...light=ritewing Reefboy's TL50 experience https://www.rcgroups.com/forums/show...light=ritewing Mark Wood is officially a slacker! https://www.rcgroups.com/forums/show...light=ritewing IYF Quick Builds https://www.rcgroups.com/forums/show....php?t=1046727 |
|
|
Last edited by Atom1025; Sep 26, 2009 at 06:16 PM.
|
|
|
|
|
|
|
|
Tips and Techniques |
|
|
Last edited by Atom1025; Mar 14, 2010 at 10:40 AM.
Reason: Update
|
|
|
|
|
|
TL50 Build part 1 Supplies
So here is how every kit comes out of the incredibly well packaged box.( Pics at the bottom)
You get two beautiful wing cores tucked nicely in their beds, two high grade balsa elevon stocks, 3 high quality carbon spars,(spars may vary depending on the model) enough 2mm coroplast to do your bay lids, one motor mount kit, and two cleanly cut wingtips. What you'll need to complete the build: HARDWARE/ BUILDING SUPPLIES Surface control Hardware Buried rods: You'll need at least 2 feet of high quality Gold N Rod, there are many brands and styles to use but I recommend Dubro Lazer with 2-56 hardware. Grab two control horns of your favorite flavor while your at it. Do not use nylon clevis' Only use the metal variety. Exposed rods will require two 2/56 steel pushrods and two control horns of your favorite flavor. Henry's 183: You'll need 2 rolls. One can probably get a 40 covered but get two, last thing you want is to run short of glass in the middle of a build. Link courtesy of Paulvi, can also be found at most Home Depot's in the roofing section. Another option if you feel like experimenting? PaulVi has used this stuff before: http://www.whitecapdirect.com/store/...h=8&text=113YJ 3M90: One can will be fine, Only use 3M90! This is found at Local hardware store or craft store. Gorilla Glue: Used for spars, again at local hardware store. Elmer's PU will also suffice. White is for quick setups brown takes much longer. Its honestly a personal preference, Each has their pros and cons. Goop: Any brand any flavor, they all work the same for the most part, again local hardware store. Ultra light weight Spackle: Found at hardware store. Hot Glue: Optional but comes in handy. Monokote: One roll will cover the top and bottom of a 50. Use contrasting colors, pick one or two other colors to add flavor and contrast. I highly recommend the neon's for accents. (Use any other brand of covering at your own risk! Monokote fits this application best!) ELECTRONICS x2 servos: Don't get cheap here! These servos will be buried and the last thing you want to do is chop up your beautiful wing to fix a stripped servo! Digital servos are highly recommended here as precision is key to a great flier. These are the favorites rite now. You can get 4 for $80 quite often on Ebay or the For sale section... x1 Brushless motor: This is strictly up to you, do your research and figure out what you want. Power systems will be covered in another post. x1 Brushless esc: Again whatever suits your needs. Batteries: Batteries will need to match your motor choice. x1 Receiver: Again, this is the last place you want to get cheap! This is not a toy! Were talking a 2-3lb plane blasting around at 100mph+++. This thing gets small fast! Use something that's trusted. Rx Power Supply: You will need to either run a 5cell rx pack strait to the receiver or Use 2-4s lipo through a BEC When running 2.4 I highly suggest a 6v supply as the servos really pull some juice and you dont want to sag below the rx limits. TOOLS Soldering gun: You will need this to cut the bays, the dremel with router attachment is another option you can use if you don't wish to buy the gun. However the Gun has its benefits. Soldering iron: What we do here is use a screw to replace the soldering tip, this is used to cut spar slots. I'll get into more details later regarding the soldering tools. Razor Knife: You need to get the snap off blade style knife and extra blades, you'll see why later. Strait edge and square: (self explanatory) Plastic Putty knife: Used to apply the glass and filler. Basic stuff: Screwdrivers, sledge hammer, etc. |
|
|
Last edited by Atom1025; Oct 04, 2009 at 10:51 PM.
|
|
|
|
|
|
Build Part 2 Wing Beds
So to start off this build! First of all take a deep breath and quit dancing around like a school girl who's about to get her first kiss. Yes this is extremely exciting but patience is the most important part of this build!
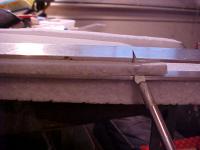
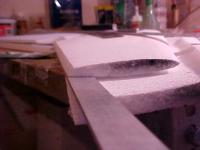
I don't know if I got lucky or CK is that good, but the wing beds are level and need no shimming! Also take note that the wings are almost symmetrical so you will use the bed for the top and bottom, it doesn't matter, there is no need to make two separate wing beds. OK, take note of whats written on the wing beds before you go yanking' them out of the beds and forget whats top and bottom. There should be something written on the top, usually what model, etc. Then on the root (the surface of the wing that will be glued to the mating half) there should be an arrow pointing up. Now go ahead and yank the wings out and mark a big fat "T" on the top towards the tip using a yellow sharpee. Don't worry as this will never be seen once finished! (Black sharpee can be seen through light coverings.) Repeat on the other half. Now you won't sit there and scratch your head wondering what side the top is once the cores are joined. Sure it sounds like a stupid step but it happens all the time! While you got the marker out , mark the top of the root as seen in pic four. Pic five shows why! Now you can play with your cores and run around the house making zoom noises all you want! Next take that sharp razor knife and carefully split the top half of the wing bed off. On a perfectly flat surface, align the two bottom bed half's side by side. You'll notice that one side may be lower then the other by 1-4mm. If its not then lucky you!(Kliques new cores should not need this step but check first and adjust if needed) So your going to have to prop the low half up till the two wing beds are perfectly aligned. This may be the most important step of the whole build! If you get this wrong your wing may never fly rite. Use something sturdy to adjust the height, I will usually use 2-4mm coroplast, ply-sheet, balsa-sheet, thick heavy duty poster board, etc. Whatever it takes to get the halves perfect. Once the height looks good you may or may not choose to join the bed halves, I do not as sometimes spreading the halves is necessary. You now have a perfect wing bed.Your wing will be in this bed for the majority of the build. The bed will help your wing keep its shape and will help you avoid any twist in the wing. I always leave my wing in the bed with weights on the trailing edge when I am not working on it. ImagesView all Images in thread
|
|
|
Last edited by Atom1025; May 12, 2009 at 08:10 PM.
|
|
|
|
|
|
Build part 3 Making your marks!
My process is totally optional but I thought I'd share. The basics still apply if you choose to make your marks after the cores are joined. This is something I learned building Superflys. I forget who turned me onto it but it was a great help. This step can be done after the wings are joined but I find this helps me keep things square! In order to use this to your benefit you'll have to know exactly what gear you are putting in your plane.
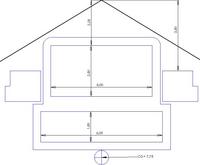
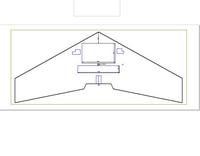
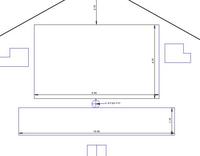
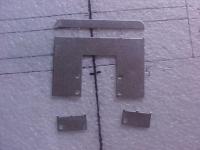
Most folks wait to draw their battery bays etc. on till after the wings are joined. This is totally fine for your average Joe but I am a perfectionist bordering on OCD. I like to mark out my bays before the wing halves are even joined. Why you may ask? I can run my square against the root to ensure a perfectly square line. Also I am not guessing where the spar is located later in the build. Your measurements will vary depending on model and choice of gear. General rule of thumb is get everything as far forward as possible. I have a few templates located in the first post to get you a general idea of gear placement. Servos should be placed as far forward as safely possible. Keep in mind you'll need to sink the about 2mm deeper then the surface of the wing which will allow you to cap the servo with foam. Majority of builds I do now have exposed servo rods. Its easier, lighter and more adjustable. Now place your motor mount on the wing so its leading edge is over the spar. Use your square to get it square and trace it out. Then from the trailing edge of the motor mount measure out 3.125" and make a mark, now measure from the root to the absolute trailing edge 4-5" depending on your taste and make a mark, connect the dots and you now have the prop slot measurements All right, mate the other half of the wing and align the cores. Transfer all marks over to that half and repeat the process. You now have everything marked out on your wing! Adding hood latches: https://www.rcgroups.com/forums/show...postcount=1124 ImagesView all Images in thread
|
|
|
Last edited by Atom1025; Oct 04, 2009 at 10:54 PM.
|
|
|
|
|
|
Build part 4 Joining the halves
Next Step: Before you join the cores, take some wax paper, monokote backing, or any other nonstick material and place it on the wing beds you constructed in the previous post.
The 40 and 50 come with two spar options, one forward one aft. If you want a crazy fast setup that needs a lot of batteries, use the aft option. If you wish to keep it lite and use smaller batteries use the forward option. Take your spar and do a dry fit of the cores, making sure alignment is perfect, you may need to cut down the spar to fit. Once you are satisfied with the alignment, take it all apart. Grab the Gorilla glue and a spray bottle filled with water. Stick the nozzle of the glue in the correct spar hole and give her a good hearty squeeze for a couple seconds. Then stick the nozzle of the spray bottle up to the hole and give a couple squeezes. Stick the CF rod into the hole and work it in and out like a butter churner. Once satisfied repeat the glue and water process on the other half. But before you put the rod in the other half and start churning take your 3M90 spray adhesive and give a full coverage coat on the root of both halves. Now you can start churning the rod into the other half. Smoosh the two halves together. It may take 3 mins or it may take 20 but eventually that 3M90 will grab! Another option is to hot Glue the halves together but you have to work quick and you get no second chances. The 3M90 gives you plenty of time to assure proper alignment. Check the top and bottom repeatedly to make sure alignment is proper. When satisfied place the wing in the bed and set some weights across the trailing edge only. Nothing major, just some books or weight lifting rings, whatever you've got. Let the wing sit for an hour or two, go fly, have a spot of tea, etc. When you come back you'll probably notice that the Gorilla glue has foamed through the wing cores to the surface. No worries! Remove the long razor blade from the knife and place it flat on the wing, slide the blade back and forth against the excess glue and cut it off. Sand with some light grit paper to assure there are no high spots. Voila! This step is now complete! If you have not made your marks for the bays you can do so now. ImagesView all Images in thread
|
|
|
Last edited by Atom1025; Aug 21, 2009 at 12:26 AM.
|
|
|
|
|
|
Build part 5 Leading edge spars
Now the leading edge spars are not a requirement. My CK built TL40 had a single spar and flew just wonderfully. The glass is enough to avoid flexing at over 100mph. If you are looking at breaking the sound barrier, the spars are necessary.
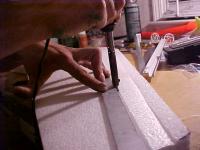
Pick up some cheapo 25-40watt soldering iron or use that old beater you got sitting in the tool drawer. You can use many different screws. However I use a 10-32 socket cap screw that I modified on my grinder. All I can say here is there is no wrong way to go about this. Use whatever hardware you got around the house and some creativity. Do some practice runs on a scrap and check how the spar fits. Adjust it til' you are happy. Grab a ruler/square and mark 3-5" back from the nose. Go to the tip of the wings and measure 2-3" from the trailing edge. Connect the dots and you've got the spar placement marked. I really don't think spar placement is detrimental. As long as its there and it does its job I'm happy. So don't stress off the placement for to long just slap down some marks. I personally try to get the spars under the servos, but that's just me. Now depending on the placement you may cross the internal spar. Nothing to worry about if you do. Just take a dremel and cut through that spot. You will not lose any strength in this area. The spar slots should not be too tight or they could spread and distort the wing and create a hump in the bottom. This can give the plane some strange tendencies while flying. Always check for spar fit, length and alignment prior to assembly. Now take a strait edge and run it along the mark. Starting from the tip to the root. Drag the superheated screw through the core at a steady, smooth, stable pace. When you get to the center pull the iron up and out. Repeat this process on the other side. Check the fit of the CF rod and make sure its level or slightly below the wing plane. If satisfied grab the Gorilla glue and squeeze a 1/16-1/8" bead down the spar slot, remember a little goes a long way. Spray with water and then use whatever to mix the glue and water up. Snap the spars in place. I place the wing top down into the wing bed. I then take some non stick film leftover from monokote and lay it over the spars. I use 1"x1/8" stock aluminum I have lying around and lay it over the spars. with some weights on top. Keeping it in the bed retains the wings shape while the spars are drying. The Aluminum stock and weight basically keeps the excess glue foam from getting out of hand. When the glue is dry I only have to sand the glue foam a little bit. And that's how ya' install the leading edge spars. It's recommended that you put a few layers of Spackle over the spars otherwise you can see it through the covering. ImagesView all Images in thread
|
|
|
Last edited by Atom1025; May 12, 2007 at 09:44 PM.
|
|
|
|
|
|
Build part 6 Cutting the Bays
Here is my take on this process. I prefer to cut the Coroplast lid shelf before I do anything else. The main reason is because its much more difficult to cut the shelf once the bays are cut. It can be done, but I have much less control over the router.
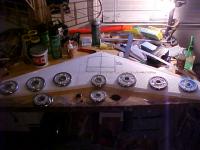
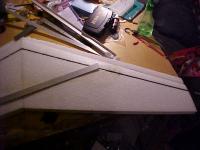
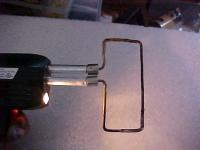
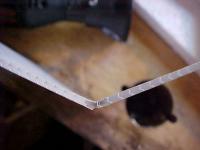
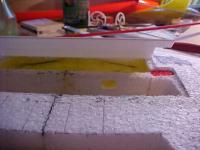
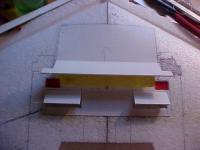
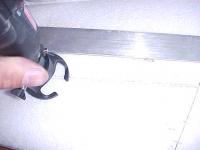
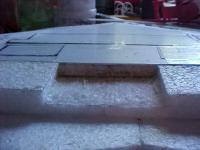
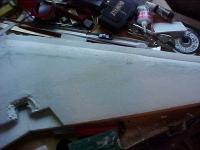
Lid Shelf I have marked the places to be routed with a green marker just so its easier to see in the pics what I am cutting. (Pic one) I set the Dremel router to 2mm depth. I do a few test runs on a scrap to verify the depth is correct. Then I cut in between the lines! Nothing to it! The only spot caution should be taken is at the leading edge an inch to each side of the root at the peak. Do not press down in this area! For some reason the cutter seems to cut deeper in this spot. So just float the cutter over this area! All done with the shelf, only took a few minutes.(pic three) Battery/electronics Bays Now for the bays. You can use the router bit for this or use CK's method. I use CK's method because it cauterizes the foam as it cuts which seems to add some strength. Pic four shows the custom tool used to cut the bays. Its simply a piece of 12g copper wire formed into the desired shape. Nothing fancy! Be sure to get plenty of practice with this tool before attacking the wing. Now practice with the soldering gun on some scrap. You just melt out between the lines. For a first timer you should only take a little bit at a time. Then check the thickness of the floor and and take a little more. The depth of the cut really depends on the batts you plan to use.( Keep the Batts under 25mm thickness.) Now if you so happen to cut to deep, don't worry the fix is simple. Some even do this right off the bat if they know they will need the extra room for batteries and electronics. Basically you cut a shelf on the bottom of the wing just like you did for the coroplast lids. Slap in a piece of coro with some goop or hot glue and your good to go. TaSaJaRa turned me onto a new idea and I gave it a shot. Seems to be effective. You basically spread a thin layer of goop on the batt bay floor and then press a piece of Henery's glass into it then smear some more on top. Sure it adds a bit of weight but the weight is ahead of the CG and you'll actually benifit from this. The added strength will also be a benifit. Pic 7 I forgot to draw out the velcro tabs earlier in the build so in pics 8-9 you can see the added tabs. I basically cut the velcro tabs 4mm deep. There is also an alternative way to do the tabs but I wanted to try something new. Installing the lids This part is easy. Measure out the lid for the battery bay, making sure that the flutes are running left to right. Test fit the lid, once satisfied go about 1/2 to 2/3rds back and carefully cut one half of the flute, look at pic 11 to get a visual. Make sure the door opens wide enough for your batts to fit in. This will be the hinge on your battery bay. I also mark the top of the lid so I don't glue it in backwards. I like to take the leading edge, bend and hold it for a bit, basically forming it to the shape of the airfoil.(pic 12) You can now use a hot glue gun to secure the lids. Pic 13 The electronics bay has the same principle but instead of having one large bay door, you should cut smaller access panels as shown in pic 16. The picture should be pretty self explanatory. This method was noted to add a bit more strength to the center of the wing compared to one big bay door. Glue the lid on, and your finished with the bays! Optional The antenna can be permanently secured in the wing by making a slit and tucking it in or you can use a plastic tube available at the hobby shop, same stuff thats in the gold N rod. Before glueing the lid on, make a groove with your dremel from bay to tip(pic 17-19) Do not glue this tube in until the Golden Rods are secured, but before the lid is attached. Later when your ready to install the gear use some music wire, etc. to fish the antenna through the tube! Replacing a reciever is now simple! ImagesView all Images in thread
|
|
|
Last edited by Atom1025; Jun 10, 2007 at 01:16 AM.
|
|
|
|
|
|
Build Part 7 Servos and Gold n Rod
For this step I use the dremel. I take a needle and poke it through the top until I hit the spar. I then mark the depth of the needle and use that to gauge the depth setting on the cutter. Then I cut between the lines. You want the cut as deep as possible without hitting the spar. Note the extra notch I made for the servo wires and mount tabs. (pic one)
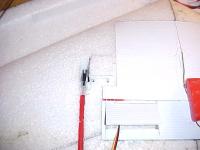
OK, now I will cut the Gold n Rod slot. I use the same tool that I use for the spars as they are roughly the same dimensions. Now putting this next step into words is tough so just look at pics three and four. Basically I prop up the trailing edge of the strait edge so that the cut will taper off towards the end. I want the rod to exit at 3" forward of the trailing edge. Now cut off roughly one foot of the Gold n Rod. Hook up the linkage to the servo. The linkage is easy but may confuse the first timers so I will do a quick review. There should be a short threaded rod, a clevis, and a band that holds the clevis shut. To make things easier you should have some 2-56 nuts as well but they are not required. Put the assembly together as shown in pic six. Then grasp the clevis and turn the threads into the inner rod. You may need to use needle nose pliers as the rod is hard to grasp. Now you will need to snip the horn off just above the second hole. Be sure to leave as much meat as possible as strength around this hole is detrimental. Clip the clevis to the servo horn. The hole on the horn may need to be enlarged slightly. You don't want any play in the linkage, but you don't want any binding neither. Its a fine line. The horn and linkage should be at least 1-2mm blow the surface of the wing. Slide the red sheath over the rod. Dry fit the servo and Golden rod. At this point make sure your servo is centered and moving freely. I will move the stick from corner to corn to make sure there is no binding. Now with the rod temporarily in place measure up 2-2.5" inches from the trailing edge and make a mark on the red sheath. Slide the red sheath off and snip it at your mark. The red sheath is now the correct Length and will not be cut anymore. Now remove the servo and shoot some hot glue or goop on the bottom of the servo. Press it into place and hold firmly for a minute till the hot glue dries. Do not get any glue on the moving parts! Now shoot a small bead of hot glue down the Gold n Rod slot and press it into its place. Also use a scrap of red sheath and prop up the back of the rod to add height. (pic 11) To finish it off. cut a scrap of foam and glue it over the servo. Take your blade out of the snap off knife and slide it back and forth over the wing to remove the excess foam.(pic 13) Your servos are now installed! ImagesView all Images in thread
|
|
|
Last edited by Atom1025; May 13, 2007 at 01:34 AM.
|
|
|
|
|
|
Build part 9 Prepping for Glass
So now is the time when you want to go through and fix any holes blemishes, or low spots.
If you haven't done so yet, go ahead and trim the excess spars hanging off the tips with a dremel and cut off wheel or hack saw. Now this step is optional, your average plane you would bevel the balsa elevon. Which is fine. If you prefer this method then go for it. However I prefer to cut the bevel on the trailing edge of the foam. Do what ever you are comfortable with. Take the lightweight Spackle and a putty knife. Use this to float over the spar slots, holes, or anything else you think needs it. Keep in mind that as the wing sits now will act as a mirror once the glass is installed. Everything will reflect through to the surface. So its really up to you how clean you want the finish. I like to lay my float on thick and then sand it smooth and level, Otherwise it could sink/shrink a little on you and you'll have to float it again. This stuff is almost weightless so don't hold back! The key areas to float on the bottom are the spar slots. Float them sand them and then move to the top. The top shouldn't have much to float other then the antenna tube, if you used one. Take a good look over the surface and float any imperfections. I like to go a little farther then required and chamfer each side of the gold n rod. I only do this for looks it has no noticeable affect on the plane. I just take some Spackle, and use a round object and drag across it to get that half pipe shape. Sand a little when finished. Take a black marker and outline the bay doors and where the hinge is. This will help you find where to cut once the glass is on. If you forget this step its next to impossible to find the bay doors again. Spray some 3M90 on first and then tape the bay doors closed. This will keep you from fighting the doors popping open while glassing. Take a piece of scrap coro and block the servo horn and linkage. Spray around the servo with 3M90, then use some tape to cover the exposed linkage. Strapping tape is good for this application, but use what you have. I put two layers of tape down to add some firmness to the area. You'll also have to take the wing bed and cut some slots in it where the Gold n Rod will sit when the core is top side down. Take a look at pic 11 to get the idea. Basically take your time to inspect the wing and fix whatever you see now, once the glass is on there is no going back! ImagesView all Images in thread
|
|
|
Last edited by Atom1025; May 16, 2007 at 03:49 PM.
|
|
|
|
|
|
Build part 10 Glassing the Model
For this part of the build there is no wrong way to do this! Everyone will have there own take on it. Do as you see fit!
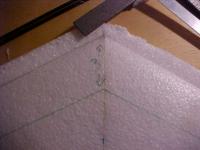
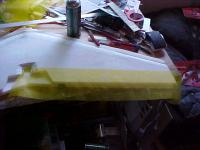
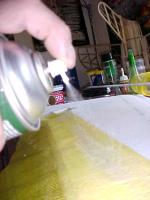
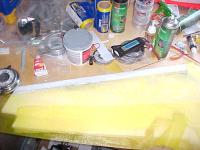
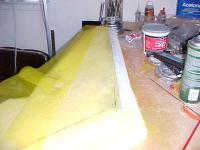
I highly recommend watching the video for this process, as seeing it in action replaces 1,000 words. I am going for a lite build so I am not overlapping anywhere, only one layer across the whole thing. For your average build you'll want to double up the glass in key areas. Only double up ahead of the CG! You only need a single layer behind the CG, anymore then that will make it more difficult to achieve the CG. I'll usually put two layers on the bottom starting at the battery bay up to the nose! Also note that in the video Chris overlaps every layer of glass, that is fine to do but we have discovered overlap should be kept under a 1/4"- none at all. Please work in a well ventilated area! This glue is strong!!! Its not a good feeling! (pic one) So I'll start at the bottom. Flip the model top down in the bed. Be sure the surface is clean and free of debris. I wipe it down with a damp cloth and let it dry. Cut two pieces of glass, one for each half of the trailing edge.(pic two) Place it so three inches, approximately half of a 6" piece is hanging over the trailing edge. Now only work with one piece/one half at a time, you don't want to get ahead of yourself. Make sure your 3M90 is open all the way to high,(twist the lid till it points at the H). Hold the nozzle 2-4" from the surface and give good spray across the piece of glass. (Pic 3) Be aware not to spray the glass that overhangs the TE. This is important! Now take your plastic putty knife and work the glue into the pores of the glass. Just slide it across the surface at an angle.(pic4) Try to only work side to side or the weave could snag and distort. If you look at the weave in the light you can see that the pores are filling in. They don't all have to be filled, but this is what you are looking for. There is a fine line between to much glue and not enough but the only way to learn this is from first hand experience. Now repeat on the other half of the wing. Cut and lay your next layers of glass.(pic5&6) Keep the overlap under 1/4" or no overlap at all. Repeat the above process of glue and putty knife. Then repeat this process up to the tip.(pic7) For extra strength under the bay, place a second layer perpendicular to the root, from the battery bay to the nose. This will strengthen under the bay greatly. Now measure from the nose back 2" and from the leading edge of the tip back two inches then cut a strait line from mark to mark as shown in pic 8 & 9. Do this on both halves while the glue is still wet!. You can put the leading edge cap on after you glass the top. I however put mine on now since I am trying to avoid any overlap. Do this however you see fit. Now set some weights across the trailing edge and let it sit for a minimum of 3 hours. All night if your not in a hurry.(pic10) Now when its dry, it should not feel tacky at all, this is the greatness of 3M90. You'll have to trim around the motor mount and make relief cuts where necessary. Its a lot like trimming in covering film really.(pic11) Now spray the trailing edge bevel with 3M90 and start by working the glass flat against the bevel. (pic12) Now continue to work the trailing edge cap over to the top.(pic13). Make a relief slit along the Gold n rod(pic14). Now just like you did on the bottom spray the whole cap down with glue and float it with the putty knife. Repeat on the other half. Then continue towards the nose just like you did on the bottom. Again measure back 2inches from the nose and 2 from the leading edge of the tip and cut off the glass like you did on the bottom in pic 8 & 9. Now place it back in the beds and put your weights on the trailing edge while the glue cures for a minimum of 3 hrs. Once cured you will cap the leading edge like pic 16 & 17 shows. When thats set you have to trim around the motor mount, cut off the excess from the tips, and inspect all the glass to make sure there are no bubble. Look especially close at anywhere that is wrapped such as the TE cap or LE cap, and around the motor mount. If a bubble is found hit it with more glue and press it down flat. All done! ImagesView all Images in thread
|
|
|
Last edited by Atom1025; May 16, 2007 at 11:29 PM.
|
|
|
|
|
|
Build part 11 Finishing touches
So I could go through the whole process of covering but I see no need. However here are a few tips.
Do each wing panel separate, there is no need to fight the covering trying to get it all in one shot. Cover half the wing and then cut the battery bays open on that half, then repeat on the other half. The Henery's over epp can take a lot of heat so don't be afraid to turn it up. However don't leave the iron in one place, always keep it moving. Don't worry about the seam on the leading edge, It is recommended that you put a strip or two of electrical tape across the leading edge. This will protect it when you go chopping through weeds. Installing the electronics is simple enough, I see no need to cover that part. But if you have any questions regarding this ask away. Once all the bays are cut, I like to use some clear 3M storage tape across the hinge of the bay doors. This will keep the wear and tear down to a minimum from repeated opening/closing. I also like to tape around the edges of the bay doors to keep the covering from ripping or coming lose. The pics below cover the hinging process. When installing the vert stabs, you can use goop, hot glue or a combination of both. I mount the winglets so they are centered on the tip vertically, so there should be equal amounts on the top and bottom. The point of the stab will extend 1/2" ahead of the leading edge. ImagesView all Images in thread
|
|
|
Last edited by Atom1025; Jun 09, 2007 at 02:45 PM.
|
«
Previous Thread
|
Next Thread
»
| Thread Tools | |
| Similar Threads | |||||
| Category | Thread | Thread Starter | Forum | Replies | Last Post |
| I got some Fan Fold what to build thread part II started by emoone!!! | Don Sims | Foamies (Kits) | 188 | Jan 23, 2010 09:28 PM | |
| Build Log | RiteWing 48-FT build thread | theclaw | Slope Soaring | 46 | Dec 09, 2007 09:53 AM |
| Mountain Models Tantrum Partial Build Thread.. | Tram | Parkflyers | 142 | Apr 03, 2004 11:41 PM | |
| My Bobolink Build Thread (very Colibri like) | Jim Poor | DLG Hand Launch Gliders & F3K | 65 | Dec 10, 2003 05:48 PM | |
| Switchback re-build thread (or What the $#*& was that!) | Biggles604 | Parkflyers | 17 | Jun 23, 2003 09:34 PM | |

