|
|
|
|
|
Download
The 4Q |
|
|
Last edited by UAVPilot; May 24, 2008 at 03:52 PM.
|
|
|
|
|
|
|
|
Introduction And Plans
Hello all
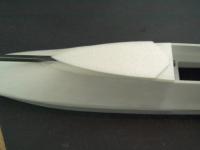
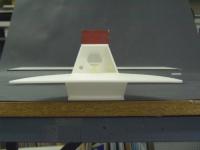
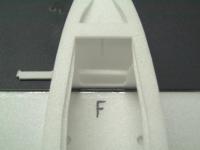
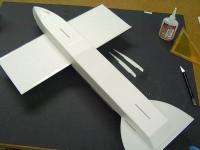
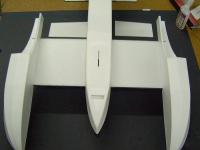
The 4Q was developed after the Hydro Foam was first introduced. The story on it can be read on this page of a thread. In post #44 (note who posted right after me)I said that I would give away the plans for free. Well, After a long wait, and a lot of work, I am finally able to do it. The 4Q does not use the same aero dynamic principles that the original Hydro Foam uses, and does not fly near the same. Believe it or not. A properly built and setup Hydro Foam can be used as a trainer, because of it's self stabilizing ability. The 4Q does not do this at all. It goes where you point it and stays where you left it. It flies like a pattern plane in most ways. What the 4Q does well is , smooth pattern like flying, snap rolls that will freak you out. Great vertical performance if built as shown. And some of the best water handling of any Hydro so far IMOP. It will harrior real nice and slow down just fine. Not much on hovering. So this is definitely not a plane for beginners to fly, much less build. Plans This design was first draw on poster board. I built a couple from the templates, then took the templates to my good friend Dick Rankin. He scanned each part and traced it into CAD for me, then used a machine he has at his work to cut a few kits. After a few changes and a lot of work we finally have the plans.  He did a great job with them, and took him much longer to do all that then it did for me to design it in the first place (look back at the thread and see the time difference between the time I said I would draw the plans and the time I said I was finished). He did a great job with them, and took him much longer to do all that then it did for me to design it in the first place (look back at the thread and see the time difference between the time I said I would draw the plans and the time I said I was finished).This is why I ask that all that download them at least donate a few dollars to His PayPal account at drankin@lonestarbox.com . I am not getting nothing for this but I at least think that he should for his hard work. Cause i didn't pay him nothing ( he did of course, get to keep a kit  ) )I also ask that the plans DO NOT be posted any where else. You are free to post a link to them and this build thread but please do not re post them. Also, you may take the plans and have someone cut them for you if possible, But under no circumstances are the plans or any kits to be sold to the general public. Tim from E-foamies has the right to cutting kits from the plans and they will be available soon. So good luck to you and happy flying/ boating  Can you figure out why it is called The 4Q? Download plans below .......................................... ImagesView all Images in thread
|
|
|
Last edited by UAVPilot; Apr 15, 2011 at 10:37 PM.
|
|
|
|
|
|
Motors
There are only a few motors that will work for the 4Q, and only a few props.
Here are a few that I have tried. First, my 12 turn of 24 awg home made CDrom motor, still my all around favorite. I buy most of my parts here > http://www.strongrcmotors.com/ < Strong also carries a HFM motor that works real well at the bottom of the page here > http://www.strongrcmotors.com/Motors.htm < Basically the same motor can be bought from Custom CDR here > Custom CDR < Or you can buy the kit and build your own here > Custom CDR kit < Another great motor that we have tried on the Regular Hydro Foam that worked really well but on two cells instead of three is from E-foamies here > Micro Dan < I am really interested to try that motor on the 4Q with three cells and a smaller prop. The 4Q really grooves well in the air with a LittleScreamers "Park Jet" Micro OUTRUNNER and a APC 6x4 or especially a APC 6x5.5 prop. Props Props that work are the GWS DD 7 x 3.5 . My motors will over drive that prop and make it sing (literally) at full throttle. If your combo doesn't do that , then your not getting enough RPM out of your setup For more speed but less thrust the APC 6 x 4 is a great prop. Gives more ground clearance also. This one will not cavitate at full throttle like the 7 x 3.5 prop does. The APC 6x5.5 prop will really make the performance shine with a motor and speed control that can handle the extra current draw of that prop (about 18 amps). The 4Q really grooves with that prop well. 8 inch props will not work. They apply to much torque to the fuselage and do not give enough ground clearance. ...................................... ImagesView all Images in thread
|
|
|
Last edited by UAVPilot; Jun 08, 2007 at 12:59 AM.
|
|
|
|
|
|
Test Flight
At this point, I like to do a quick test flight to check things out before I commit to a paint job.
The more control deflection the better. Doesn't really need any Expo except maybe in the elevator. The CG is 2.25 to 2.75 inches back from the leading edge. It really has a large range in the CG so feel free to experiment. If it take a lot of forward stick to fly inverted , then it is to nose heavy. A small amount of forward stick inverted is normal though. AUW should be around 8 oz's without the battery I have flown mine up to 12.5 oz's with the heaviest battery and it still flew fine with no bad tendencies. Everything should trim out level to start with. The 4Q really likes speed and grooves real well. The tail will tend to wag in windy conditions, that is normal. The 4Q will also fly slowly in a nice harrier mode, but the ailerons become almost useless and it requires rudder to turn well. High speed snap rolls are outrageous, fact is, you can make it spin so fast with full control deflection you would think that the sponsons are going to fly off! Water handling is by far the best of any Hydro out there IMOP. The 4Q does not have any roll stability built in to it, so you will always have to be on top of it when you are flying. It goes were you point it and it stays where you left it. |
|
|
Last edited by UAVPilot; May 28, 2007 at 10:12 PM.
|


