|
|
|
|
Thread OP
|
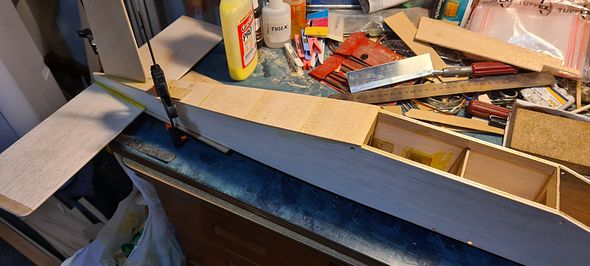
The pushrods could not have come out better, 4mm carbon fibre tube and a couple of Dubro 2/56 rods, Zed bends at the servos and quick links the other ends, and the pushrods are straight, no bends or kinks from the servos to the control horns.
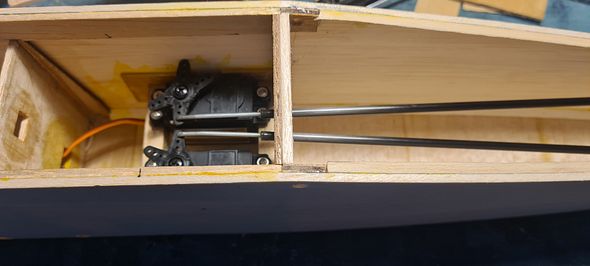 Everything is going together perfectly, and a neat setup too. The elevator exit is free and none binding at full deflection up and down, I have also wet the balsa around the exit with thin CA to strengthen the edges of the exit hole. The rudder hits the elevator at full up, so I will take 3 - 4mm off the bottom rear of the rudder, the rudder is about 4mm lower at the bottom because of my earlier mistake so releaving the bottom of the rudder will bring it back close to the orignal size. 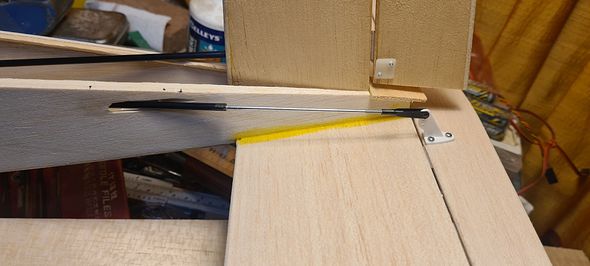 There is almost no play in the drive from the servo arm to the control horn, and what there is you can't see. The rudder has a little over 45 degrees throw each way, better to much than not enough, end points and expo will adjust to whats needed. 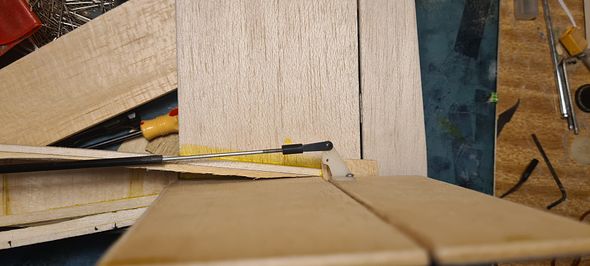 The carbon tubes are both the same length, I thought it would look nice exiting the fuse the same distance. Clading the top of the fuselage is the last construction here till the final fit out, so after the top decking, the wings. |
|
|
|
|
|
|
|
|
|
Thread OP
|
Just finished closing in the fuselage, last things to do are, a little sanding on the edges, smooth in the rudder pushrod exit, make and fit the strake in front of the fin and dowels, cosmetic work mainly.
 Fuselage stiffened up a lot now it's closed in, all construction is done, bits and peices left ot do. Two new switch harnesses arrived in the post today, haven't used one for 10 years, been flying electric for that long. The bits and peices left to do on the fuselage are, mount the switch harness, make exits for the receiver antennas, glue and pin the hinges, fit hold down dowels for the hatch cover, mount the throttle servo and run the pushrods for both the throttle and nose gear, fit the nose leg and mount the engine. After all that is done, prepare, finish and paint the fuse.......................... listing what needs to be done to finish the fuse, I've realised I have done the easy part already. I hate finishing, I'm not good at it. Anyway, I start the wings this weekend.  Dave |
|
|
Last edited by iflylilplanes; Sep 09, 2021 at 10:45 PM.
|
|
|
|
|
Thread OP
|
I've started the kit of parts for the wings. Changes to the wing construction will not change the shape of the wing, but the covering will be pulling down between the ribs on the upper open area. I could not see any reason to have a fully sheeted wing (the price of balsa being what it is), so I'm going to sheet the top only of the D box and use cap strips from the spar to the 1" wide trailing edge sheeting, the bottom of the wing will have cap strips from the leading edge to the trailing edge sheeting, the centre of the wing will be sheeted as you would normaly do on a wing of this construction.
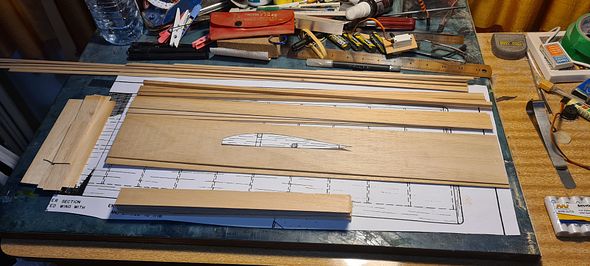 Most of the parts for the wing, only need to make the ply wing braces and shear webing. And of coruse, I've left some DNA in the plane. 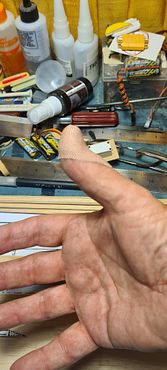 Happened while cutting the cap strips using a balsa stripper. Dave |
|
|
|
|
|
|
|
Thread OP
|
The Wings Begin.
Bruce, look, I know how to make ribs other ways.
Spray adhesive used to glue the modified rib template to 1/8" ply, made two ply patterns, carved, sanded and CA rubbed into the edges to harden them. Cut 20 x 1/16" and 2 x 1/4" balsa peices and sandwiched them between the ply patterns with 1/8" threaded rods, nuts and washes clamping the lot together. Then the sanding started, I sanded and sanded, checked with a strait edge for level and sanded some more, cut the spar notches with a razor saw and micro file. 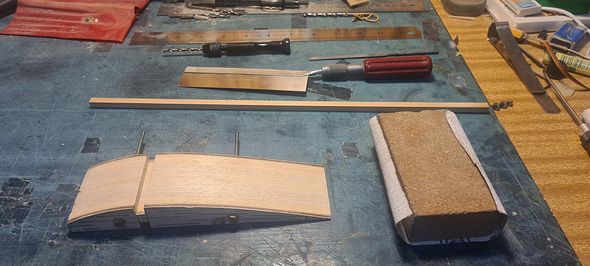 The finished ribs and the tools used to form them. Four of the ribs on the left had issues, a touch short in the front, I'm going to add a little to the front of them, clamp and sand them back to shape, no need to make new ones all over again. 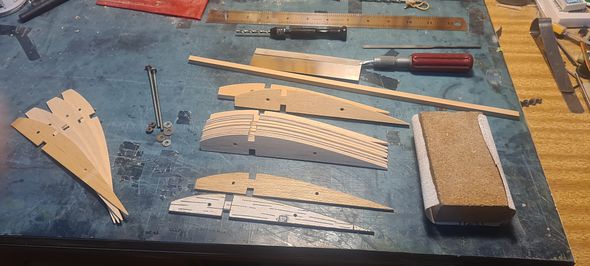 The wing build is going to go fast, 22 ribs, 1 hour from paper template to finished. Dave |
|
|
|
|
|
|
|
Thread OP
|
After fixing the four short ribs, I layed out, pinned and glued the 1/2" wide lower leading edge sheet, 1" trailing edge sheet and cap strips with the lower main spar over the plans, aliphatic resin the glue of choice here and weighted down till the glue dryed.
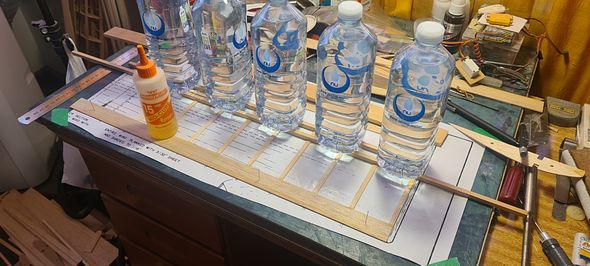 I'm liking these bottles of water as weights, and handy if you need a drink too. I marked on the plans indicators at the front and rear of each rib, these showed when the lower sheeting is pinned in place on the plans, so you know where the ribs need to line up when gluing/locating them in place. A little gluing gymnastics here, a quick squirt of accelerator on the front and rear sheeting where the ribs go, I then put thick CA on the first and last 1/2" of the ribs and aliphatic resin between and in the spar notch, then put the rib in place and hold in place as the CA sets, this helped with the speed of the build, being able to locate the ribs correctly and with glue drying.  All the ribs glued in place, upper spar is just sitting there for the photo, an hour and a half work here. Dave |
|
|
|
|
|
|
|
Thread OP
|
Gene, I've been building RC aircraft since 1973, there are a lot of different ways to build a wing. I worked out to cover the Coachman's wings as per the plans would have cost at least $28.40 AU and that is for just four sheets of 3/32" x 4" x 48" that's $20.88 US. Why spend all that money when all you have to do is move the lower spar forward and use cap strips, so far the only wood I had to buy for this build was 2 sheets of 1/8" for the fuse sides and a sheet of 3/16" for the tailplane, all the rest came out of my scrap box and sheets I've had for over 10 years.
The construction I'm using on the Coachman wing is the same as the wings on my Quiet Advancer 2M glider, (but with cap strips), that glider was built in1985 and still doing well in competition today. Experience comes over time, I know there are purist's out there would say it's not original, but we are aeromodellers, we build from kits, plans and design our own, we see changers that can be made to an aircraft's construction that work, I like to do that. I'm not trying to preach here, just passing on what I do, if it helps others, great. I learn new things every day from other builders, you showed me something new I haven't seen before with your landing gear axils I may use in the future. That's what these forums are all about. I still think I may be going overboard with this log, there are over 50 photos so far with explanations of what I'm doing in the build , nobody has complained so far . .
|
|
|
|
|
|
||
|
Thread OP
|
Quote:
It's all part of aeromodelling. Dave |
|
|
|
||
|
|
|
|
|
Thanks guys. I was well aware of the d tube wing and cap strips,( i have built my share of them) but could have saved some weight on my Coachman when building the wing.I just never thought about doing it. Thats why i like these build threads. There are many ways to do things....Gene
|
|
|
|
|
|
|
|
Thread OP
|
In my other build, "Playmate" (it will be finished after the Coachman's finished) I've made a small change on the wings as well, I added false ribs on the leading edge to cut down on the covering sag on the fully open wing construction. You can do anything, you are only limited by your imagination.
|
|
|
|
|
|
|
|
Thread OP
|
The last of the shear webs fitted, leading edge fitted, top trailing edge sheet fitted and a ply incert where the wing hold down rubber bands go over the trailing edge, I may put a ply incert on the leading edge as well, the balsa on the leading edge is soft. I've fitted shear webing in the first 5 bays from the centre out. the root bays are filled with 1/4" balsa, this give a larger gluing area for the dihedral braces, the rest of the shear webs are 1/16".
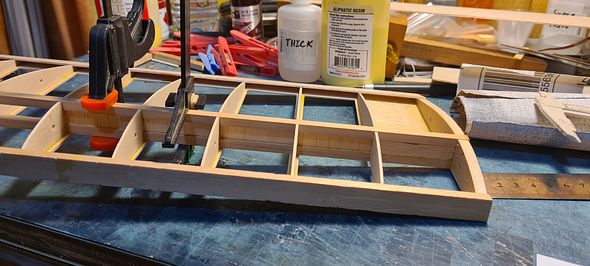 The last two shear webs clamped in place while the glue dries.  Paper pattern for the ply dihedral braces, should give the 1 3/4" under each tip, one each front and rear of the spars and one 10mm high behind the leading edge. I'll hold off and not bother with loging the port wing, it's just the same as the starboard. When both wings are ready to join thats when you will see the port wing. Dave |
|
|
|
|
|
|
|
|
I recall looking at the plan for the RC when it first showed up in RCM. And I thought at the time that the use of the fully sheeted wing was quite excessive. Especially on such a compact size model. So your conversion to a D tube with capstrips option is almost certainly something I'd have done as well. And in fact given how thick the wing is even with the conversion to D tube with cap strips I would likely have opted for 1/16 instead of 3/32 as well. And to make up for the very slight reduction in overall strength I'd have selected my more medium grade sheet stock. It's just not that big of a model. Yet Don Dewey chose to use fairly big model material sizes throughout the design. I'm thinking that he stocked a lot of lighter Contest grade wood in his shop....
|
|
|
|
|
|
|
|
Thread OP
|
Sorry Bruce, I forgot to mention I used 1/16" for the ribs, caps and D-box sheet. I built larger models that only used 1/16" balsa for this type of construction.
|
|
|
|

«
Previous Thread
|
Next Thread
»
| Thread Tools | |


| Similar Threads | |||||
| Category | Thread | Thread Starter | Forum | Replies | Last Post |
| Build Log | VOK 2021 Royal Coachman build. | X30PILOT | Vintage & Old-Timer Designs | 44 | Jul 12, 2022 09:15 PM |
| Discussion | Second half 2021 Build - ABAK | BMatthews | Vintage & Old-Timer Designs | 64 | Feb 04, 2022 08:25 PM |
| Discussion | Scratch building the Royal Coachman | gene6029 | Balsa Builders | 103 | Aug 05, 2021 11:23 PM |
| Help! | Marutaka/Royal.60 Oscar build plans | bob48 | The Builders Workshop | 1 | Jan 14, 2018 09:13 AM |
| Discussion | Royal Coachman | starcad | Vintage & Old-Timer Designs | 76 | Aug 31, 2012 02:44 PM |