|
|
|
|
Thread OP
|
Build Log
Futaba FP Ultimate Sailing Radio Build
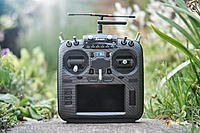
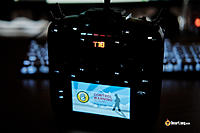
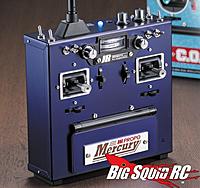
I have been pondering what my ultimate radio for sailing would be for a long time. As many know, I love the whole vintage vibe and look. But in a radio, I still need modern functionality. I REALLY want a Jumper T18 radio, but it isn't even the SLIGHTEST bit vintage looking. T.C. suggested the AMAZING JR Colt, but it comes with an amazing price tag too, if you can even find it... JR has another cool offering, the Mercury. I can't find any for sale though. I also see complaints that for the prices these both sold for, they missed the mark with less than retro quality...
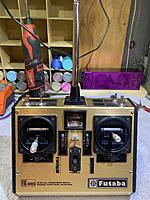
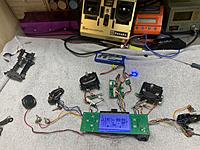
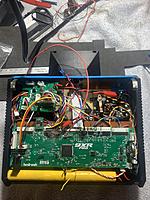
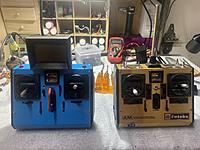
The functionality and features of my Turnigy 9XR-Pro are AWESOME, and more than I will ever need. But it is a funky looking and feeling transmitter. It has sat collecting dust for a few years now. Probably my favorite radios of all time are the gold Futaba FP transmitters. It was the radio I always wanted but could never afford when I was flying back in the '80's. About a week ago I won one on eBay for $7. It is PRISTINE! So nice, I bought another to abuse. So after a lot of research,, and a couple threads thinking out loud, I finally have a course plotted. I am going to make a serious attempt to stuff the guts of the Turnigy into the Futaba. After a lot of thought, it will be better than an Arduino based conversion. Teardown was interesting. I took the Futaba apart first. Pretty straightforward. SUPER well made. The only place where the moderns do it better are plugs. Pretty much everything inside the Futaba is soldered directly to the board. Makes it so a full teardown without unsoldering, is impossible. I took the Turnigy 9XR-Pro apart, got discouraged at how stuffed it all is in there and by all the supporting parts, so I put it back together. It had some issues though. The voice had stopped working before, but it was still making noise and beeping. After reassembly, it was completely quiet... Also the case plastic is cheap and there were some broken screw holes. Not stripped out, but a couple split and one post actually broken off. So I just sighed, committed fully, and completely gutted it down to just the components and reassembled those. Of course it didn't work. But after a bit I figured out the issue and can now power it back up fully. I have a bunch of interesting problems to solve. But for now, let's just post up some pictures! ImagesView all Images in thread
|
|
|
|
|
|
|
|
|
|
Thread OP
|
I want to take the Futaba back apart so bad and get to stuffing it... But it really is perfect. If it turns out I have to modify the case to the point stuff has to get cut and filled in, my plan is to use the other case. Then vynal wrap it. I will use the clean case to scan the logos and graphics.
Gimbals... I like the Futaba pot gimbals well enough. They feel period correct LOL, but they aren't the really desirable open metal cage vintage. Would it really be worth upgrading to a set of Hall based gimbals? Again, I do like the ratchety feedback and feel of the throttle on these. And if I wanted I could actually put in two ratchet throttle sticks... The Turnigy gimbals come pretty close to fitting right into the Futaba case. The screw spacing looks like it might be the slightest bit off, and the ring may not fit as nicely. So it may take a little work or a different gimbal. Is it really worth the effort? Or stick with the Futaba gimbals? I am leaning towards the Futaba ones right now. This will probably never be a "race" radio anyways. |
|
|
|
|
|
|
|
Thread OP
|
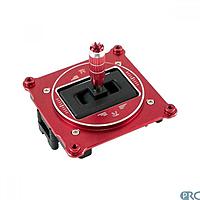
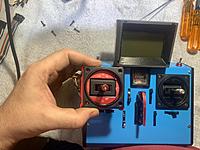
So, I ordered a pair of the FrSky M9-R red racing gimbals. They will take the radio to a new level of funky for sure. And match the planned red backlight mod. Slightly more than the M7, but not enough to make a difference. So yeah it might kinda kill a bit of the vintage vibe, but I think I can make it work. The black ones would blend in better, but not sure blending in is important for this...
The center portion is correct, in fact it seems that 48mm is the standard pretty much across the board. But the mounting holes do not match up. No surprise there. Now it LOOKS like the inner screws do match the Futaba holes pretty closely. The Futaba is 44mm, and these look like they are 43m, but it is not a dimension specifically listed on the diagram. Hope it works well enough. I have a couple threads up on OpenRCForums hunting out various bits of information needed to proceed. I charged the Futaba TX pack up last night, and might even have managed to save it! Probably wonít be using it in the finished radio though.. No indication of life in the radio. I was getting power past the fuse, but didnít dig any further. It isnít worth the effort. Hopefully the switch and power meter are good. I will verify those, probably check the switches and pots, then gut the rest. I wanted to see what the gimbals were powered up at. But once I saw no power, good enough excuse to order the Hall sticks. Anyways time to get a hackin!!! |
|
|
Last edited by BiggsDarkLighter; Aug 18, 2020 at 01:37 PM.
Reason: Relevance, ordered parts.
|
|
|
|
|
Thread OP
|
So I am an idiot, and/or Futaba engineers are smarter than the average monkey... I tried again last night to power up the Futaba while still wearing its original internals. Nothing. First, I still thought the battery was cooked. But after a couple re-peak cyclesit was getting a nice rock solid 10.8 volts. And while I couldn't find ANY reference to 9 cell pack voltages, 1.2 x 8 is 10.8. So it "seems" this pack is okay.
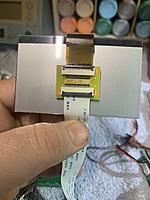
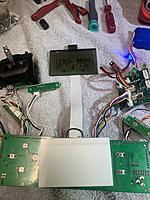
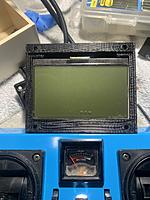
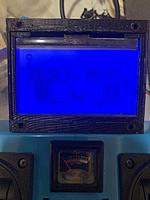
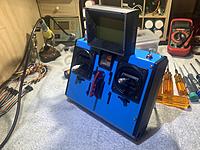
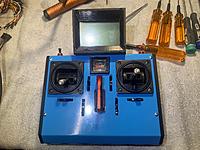
Since it has a nice and compact holder, it would be nice to save it. The holder is also part of the support for the sliders and main switch. Keeping it solves more problems than trying to fit the Turnigy pack. I have another FP-FG Transmitter arriving today, maybe. Tracking shows it has gone back and forth a couple times between here and the main hub... Anyways, its battery pack is powering that transmitter up. So if this one doesn't hold a charge, hopefully that one will. So with the battery charged up, I poked about inside with a multimeter for a while. Power going to the meter, check. Ground, nope. Where does ground go? Grey wire off to the side, eventually trace it to the module pins. Huh, I wonder. Pop the module in, everything powers up...  This old radio might still work after all! Wouldn't really surprise me, it is beautifully made inside. I doubt I have a matching crystal set though, and not even a clue if I have a receiver. I don't have a 2.4 RF module that fits, and defiantly don't feel like modding one in to check just for kicks. This old radio might still work after all! Wouldn't really surprise me, it is beautifully made inside. I doubt I have a matching crystal set though, and not even a clue if I have a receiver. I don't have a 2.4 RF module that fits, and defiantly don't feel like modding one in to check just for kicks. The module bay is the next set of problems to solve. Not sure what my plan is there yet... There are basically four solutions, each with their pros and cons. But I won't bore you guys with rambling about them and making this post 5x longer.  Nobody will likely read it all through anyways HAHA! Nobody will likely read it all through anyways HAHA! I have the new guts powered up with the LCD extension harness. That wasn't straightforward. The cables that arrived were flipped. One set of contacts on one side, the other on the other. It didn't work. Since I thought I just ordered one cable, but got twenty, I wondered 'Well what if...?" I peeled the stiffener off of one end, folded the contacts over, and stuffed that funky part into the adapter board. It took some doing. I also discovered that I had to power the system off on each attempt to initialize it. Took about a dozen attempts to get all the connections lined up, and finally it powered up. That board will be the weak point... A good jostle and screen could go out. nfhill (Nick of NicksDesign) is working on an AWSOME solution! He made a pocket in the LCD holder for it. He redesigned the holder to fit the original LCD screen, and came up with a much cooler way to secure it too. The bezel design isn't quite finished yet, but it is coming right along! I am hoping to end up with two workable designs and prints. One will mimic the power meter bezel closely. The other will accentuate the top into a sun-hood. Working on a few more tricks and ideas to make this a very different re-imagining from Vikar's inspiration! But can't give everything away in one post... 
|
|
|
|
|
|
|
|
Thread OP
|
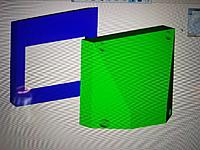
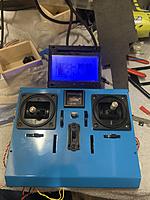
Yep, up on top. We used Vikar's lcd mount (shown above) as a rough blueprint, and Nick made a new file to better wsuit my needs. And it mimics the Futaba power meter bezel in style.
I thought about other spots, like down where it was in the original 9XR-Pro radio. But unless I used a smaller screen (long boat from China) it would creep too much into sliders and trim spaces. I may do another (and a second "parts" radio is arriving today) and mount the main screen here, and an FPV screen up on top. But more likely not. This is most likely only going to be used for sailing. |
|
|
|
|
|
|
|
Thread OP
|
roryf's question made me realize that I hadn't linked to my inspiration for this build! This short thread really got my creative process going! And added a pic of that radio below.
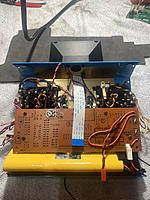
I am making lots of progress! I reskinned the second donor radio, and it turned out looking VERY nice! (I will post pictures when I reassemble it next.) I repurposed the original Futaba mainboard to plug the Futaba TX pack into. Reusing its fuse and the trimmer pot for the analog meter. I have a JST plug coming off of it plugging into the Turnigy RF/power board. Everything works as expected, until I add the meter in. Not going to try to hunt that issue down here though, working through that on the OpenRCForums. I have both wiring diagrams and proper schematics now at least though! I reused the Futaba mainboard as it attaches nicely to the stock gimbals, the traces face the gimbals too, so I can safely mount stuff to the other side and use some of the stock circuits to simplify stuff. Not sure if I will mount the Turnigy mainboard to that, or the backside of the case. To the Futaba board will likely be easier. Seller sent me black M9 gimbals, not the red ones. And they are some trouble to fit. And I had cut the wires off the original ones too closely. The second donor radio had insanely stiff gimbals, but wiring was untouched. I stripped it down and then soaked each gimbal in alcohol. One freed right up, the other took a couple hours and a lot of stick fiddling to get it free. Hopefully all is goof with the pots, if not I will play the swap game again with the other sticks. I will likely still install red M9 gimbals, once I get some. But they will require new surrounds to be designed and made up, and new holes drilled in the case. Lots of little parts coming. Got some materials to hopefully make wiring the gimbals in easier. And an illuminated RGB encoder switch for some bling, and practicality. If I can eliminate needing to get the navigation buttons to the outside of the case, I eliminate a LOT of extra work and probably wiring. I have come across some issues maneuvering with the sticks through the menus, I am hoping the encoder solves that. If not fully, then the original switches will be left soldered to the mainboard and could still be used. Really the only reason to contemplate attaching the Turnigy board to the back of the case... Also have some red switch bezels to match the NOT RED gimbals...  Oh well. I am sure that will get fixed. Oh well. I am sure that will get fixed.
|
|
|
|
|
|
|
|
|
I like it! Have you seen the Jeti products? They have a nice big screen up front up top just like this: http://www.jetimodel.com/en/katalog/...produkt/DS-12/
Fingers crossed my parents saved one or two old Futuba tx's from when I was a kid and I can try a similar build. Just ordered my Creality CR10 so lots of projects lines up! |
|
|
|
|
|
|
|
Thread OP
|
Thank you roryf! I have seen the Jeti! I like the idea of them, but looking inside I can't see the justification for spending close to $600 on one. Maybe if on were in my hands, its quality would be better than it looks. Not impressed though from here. Where Jeti shines is in their electronics side and in their redundancy systems. Super important on an aircraft with hundreds of hours of build time invested in it.
As for the Futaba's, they are all over eBay! For basically nothing. My first donor radio was $7.99, and near mint. Second one a good bit rougher, about $20. I have a third one on the way, all in I think it was $30. Why bother? Well most of these do not come with all the sliders populated. And the last one on the way has a solid non-module back. I should easily have parts on hand to build a second nice radio. And the last one I am leaving the electronics fully intact and just getting it working. Probably just put a module back on it and add a 2.4ghz module. But I want it working so I can do some testing on the meter and how the system powers up and charges etc. It comes with a charger. As I have been cannabalizing the other two, I have come across some "how did they set this up?" questions I can't answer without one still fully intact. But yeah these days $100 buys you some serious radios. And $200 gets you gold quality radios. Spending any more than that (kinda like I am doing here) you need to have a really good excuse, or have money to burn. Radios costing $500 and up that are going to be near water? Really hard to justify. When I am done, chances are I will probably have $200 to maybe $300 into this. But that is also taking into account the design costs since I can't design and print the 3d stuff myself. And for what I want, that is worth it. Would I pay much more? Nope. But this is a fun project and I am learning new things. 
|
|
|
|
|
|
|
|
Thread OP
|
Lots of progress, and a small disaster... First the progress!
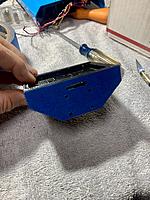
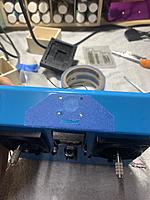
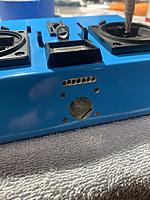
I have ended up with three of these Futaba radios now. So I picked the ugliest case and wrapped it in vinyl! I also picked that one as it has the least amount of switch holes drilled in it. I need at least one hole in a custom spot, and I don't think I will be using more than a few switches. I got the correct FrSky M9-R racing red gimbals! They feel so so nice and are going to look pretty awesome in this project! They are a little ways away though, as it isn't a direct fit. I can either mod the gimbal mounting plate, or have new surrounds made up and drill matching holes in the case. The pictures tell most of the rest of the story, except for the small disaster. I can't figure out how it happened, but I fried the mainboard. I had been testing it at each step of the way and had it powered up in the Futaba case several times. Then it freaked out and wouldn't power on right. I have spent the past few days trying to diagnose it. With help on the OpenRCForums, I have come to the conclusion that the 3.3v bus fried something and is now shorted to ground. Pretty sure the processor got cooked in the process of trying to track it down too. I am at a crossroads here... Either I try and get another 9XR-Pro radio, discontinued and at the mercy of eBay, or I take a step back and use a more readily available FlySky/Turnigy 9X radio. The 9X requires some additional support boards, some tricky soldering, and is a much less capable radio. But I can get spare mainboards for $20, and right now a whole radio for $40. ImagesView all Images in thread
|
|
|
Last edited by BiggsDarkLighter; Sep 05, 2020 at 02:43 AM.
|
|
|
|
|
Thread OP
|
Ugh, it only uploaded one of the pictures... Okay fixed now!
|
|
|
Last edited by BiggsDarkLighter; Sep 05, 2020 at 02:44 AM.
|
|
|
|
|
Thread OP
|
Thank you! I did pull the trigger on a 9X setup... I found one already modded and with the Smartie parts board in it. The 9X is easy to find, but that board isnít. I am watching a a 9XR-Pro too that I will likely try and win. The 9X was a sure bet, the Pro was a wait and see gamble.
Besides I already have enough bits I donít have to undo anything. I can just as easily make two lol. |
|
|
|
|
|
|
|
Thread OP
|
Well the wait and see gamble paid of too, so now I HAVE to build two of these! I won the 9xr-Pro auction.
 There bids were stacking up but they were all around the $20 mark. I suspected the reserve was above $70 as I had missed out on it at $67 the last time it had gone up. I threw the absolute max in I could afford, in the last few seconds and sniped it from the lowballers. It only cost me $75, and I was willing to pay twice that, so a double win! It is coming with a long range RF module I don't really need. I can probably sell it and recuperate most of the cost on that radio... I just added all the bits up, let's just say that this is not a "budget build." There bids were stacking up but they were all around the $20 mark. I suspected the reserve was above $70 as I had missed out on it at $67 the last time it had gone up. I threw the absolute max in I could afford, in the last few seconds and sniped it from the lowballers. It only cost me $75, and I was willing to pay twice that, so a double win! It is coming with a long range RF module I don't really need. I can probably sell it and recuperate most of the cost on that radio... I just added all the bits up, let's just say that this is not a "budget build."  I am now just shy of $500. So my willing to spend budget is blown. But I didn't plan on frying the mainboard. And that does include two sets of hall gimbals (I didn't send the black ones back), three Futaba radios, and two replacement donor radios... I am now just shy of $500. So my willing to spend budget is blown. But I didn't plan on frying the mainboard. And that does include two sets of hall gimbals (I didn't send the black ones back), three Futaba radios, and two replacement donor radios... So the amount feels better when I realize I can already (mostly) build two radios with what I have on hand, and in the mail. I can't take any credit for the 3d printing or design side of things, that is all nfhill's (as he is known here) doing. He did an amazing job! And that price is likely to jump up again too... I have two more solutions needed to finish this project. The FrSky hall sticks are going to need new surrounds, and drilling templates for the case. I plan on simplifying from the Futaba design slightly, these won't have the raised inside ring. If they are flat, then they can be sanded easily on my glass work surface and polished glossy to come pretty close to the finish on the original plastics. For the moment, using the Futaba sticks will be the starting point. The next solution needed, is a decision on the RF module bay and radio back. My solid back off the last Futaba, kinda solves the need for a bay (I can just go internal), or allows me a simpler mounting surface for a bay. If I build both radios, one will defiantly have a bay. I am thinking that it may be time for me to make the plunge though, and get a 3d printer. While the LCD mount was too complicated for me to design, I can probably get most of the way there on the other two parts. While the money saved wouldn't pay for the printer, it would put down a good chunk of it. |
|
|
|
«
Previous Thread
|
Next Thread
»
| Thread Tools | |
| Similar Threads | |||||
| Category | Thread | Thread Starter | Forum | Replies | Last Post |
| Discussion | Futaba FP-S10 sail winch drum servo | AGENTWON | Sailboats | 3 | Jan 30, 2024 10:23 PM |
| Discussion | What would the ULTIMATE sailing radio configuration be? | BiggsDarkLighter | Sailboats | 28 | Nov 04, 2020 09:56 PM |
| Build Log | Build log of Ultimate FP (CompyFP) | GFBurke | Micro Helis | 801 | Sep 24, 2009 09:16 AM |
| Discussion | What will be your ultimate FP build? | Tootired | Micro Helis | 12 | Sep 18, 2009 02:22 AM |
| Discussion | Futaba FP-S25 Sail winch | Usagi_Chan | Sailboats | 3 | Jun 13, 2008 03:00 AM |
