|
|
|
|
|
Build Log
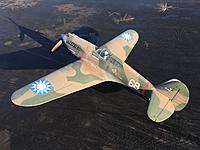
FMS 1400mm P-40B (Hawk 81-A2) Scale Improvements
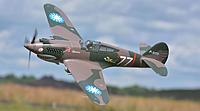
I've just finished nearly four weeks of improvements to my FMS 1400mm P-40B. Obviously this is a (nearly) RTF foamie, and not scratch or plans built.
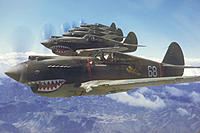
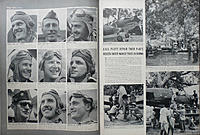
However, nobody seems to post or even read build logs on the "electric warbirds" forum -- plus, this particular forum does include this: "design and building techniques, research" which this build log will be about. I might have posted on the actual FMS 1400 P-40B thread, but I didn't want to hijack it. What warbird fan didn't watch John Wayne in "The Flying Tigers" as a kid? While pretty much fictitious from start to finish, with some of the worst movie special effects ever (since it was rushed into production during the early stages of US involvement in WWII), it nonetheless encouraged me to read books on the American Volunteer Group (AVG). A better production was the slightly later "God is My Co-Pilot" about Robert L. Scott, but his experiences are nearly all from the post-AVG period once absorbed by the Army Air Force. And he flew P-40E's. The AVG actually flew an expert version of the P-40B/C known as the Hawk 81-A2, although the differences are small. While I like both early and later P-40's, I've always found the early "long nose" style to be particularly elegant -- as "right-looking" an airframe for its period as even the Spitfire was for the RAF. Obviously the Spit had much longer legs development wise, but nonetheless, one can only imagine how excited early Hawk pilots were by their planes. The FMS 1400mm version has been out for a while. When first introduced, the "earth" color was kind of a yicky tan-pink. Eventually this was corrected to a very acceptable color. While there has always been some debate about the colors, the best information is that Curtiss only made a "reasonable attempt" to duplicate official RAF dark green and dark (or was it light?) earth, and used "off the shelf" (and easily obtained) Dupont paint colors which were a good, if not exact, match. The jury still seems to be out on the lower gray. I don't think it's wrong, but certainly in many photos it looks much lighter -- light gray or even off white, much as US planes had their undersides painted when operating in the Panama Canal Zone during WWII. On the other hand, I wasn't all that crazy about the "stickers" on this model Probably the best graphics are the shark mouth, which is actually a water slide decal. But the Chinese stars are a bit translucent. The mascot "Flying Tiger" is poorly represented -- this was actually a large decal furnished by the Disney Studios and had much more color going on. The serial number on the rudder (which was applied in China at the CAMCO assembly shop) is much too large, as is the white "77" on the side. Then you have large areas of clear material between sections of graphics, which I don't love. I also had my doubts about the "Hell's Angel" graphic as well. So while I decided the paint was done well enough that it didn't warrant total repainting, I knew the stickers had to go, and I knew what would happen when I pulled them up. I also had to decide on a new markings scheme -- I still wanted AVG of course, but would I still do a Hell's Angel, or perhaps one from the Adam & Eves for example? There is a nicely restored Hawk in AVG (Adams & Eves) color and markings at the Naval Air Museum in Pensacola, which I've drooled over (and crawled under). When doing models like this, I find that I get overly obsessed with the markings, I suppose as a result of being a graphic designer. I also enjoy adding details, but tend to add those that I find interesting or unique, or those which offer an unique challenge in pulling them off. Which is to say I don't add every detail, or even close. I don't compete and few at my local flying field will really know what I added or didn't add. So I'll be covering what I learned in my research and then some ideas in how I executed them. I've already learned quite a few new (for me) things about these early Hawks, which is a great part of scale modeling. There may not be much new here for many of you. However, as I used to say about professional seminars, if you went for two days and came back to the office with even one useful idea or approach, then it was worth it. |
|
|
|
|
|
|
|
|
|
|
I'm guessing most of us, at lease once, have harbored the fantasy that it might be possible to carefully lift off the stickers without disturbing the paint below.
That usually passes pretty quickly, and I've found it's best to just peel them off and hope that the paint comes away completely. Around this time, I start thinking I need to get color matched paint over at Home Depot. I love working with the BEHR flat interior latex. I've had some colors get matched so closely that I couldn't believe it (like my FW ME-262) -- other times it's "dark green" and that's about the extent of the match. Well, the latter proved to be the case here. The "earth" color came out nearly perfect only after two attempts. The dark green was attempted three times (on different dates) and not good at all. Gray that has any blue or red component is extremely tough to match (true in color printing as well) and this gray is no exception. It turned out too dark and not red enough. Through experimentation I found that an approximately 50/50 mix of two of the dark greens came fairly close. For the gray, it was simply a matter of adding white and tiny bits of red until it came close. In my experience, there are a couple of ways to proceed -- I try them based on the situation. if the edge between paint and "no paint" (where sticker pulled off) is kind of hard, you can either fill up to that edge, or bring the edge down. One way to do the latter is to use a soft cloth and rub isopropyl alcohol along the edge which gradually removes some paint. To built up, I usually have some medium flat gray around that I use as "primer" -- a few coats eventually builds enough thickness that you can lightly sand along the edges with some 180 and then 320 wet/dry and end up with a pretty smooth transition. I usually brush on the first coat or two of color right out of the jar. But to get a more seamless color transition, I think some with about 33% windex and airbrush, fading out towards the kit paint. In this case you have to mask, which is a pain if you want to airbrush -- I used vellum to cut the masks and yellow Frog tape as necessary. When satisfied, I sprayed with satin Polycrylic, which often darkens the latex a little and then re-evaluated the results. I started on the rudder, since it was a fairly small area and I was positive the too-large serial number was coming off one way or the other. But here's a "fun fact" -- the camo pattern on the cloth-covered rudder was actually reversed for some reason. Had I done the rudder later in the process, I would have probably masked it off and repainted that way. But since what I did turned out nicely, I decided to leave well enough alone. Meanwhile I stared pulling off all of the fuselage stickers as well as the Chinese roundels. I decided I could work right over the shark mouth waterslide decals as they are very thin. ImagesView all Images in thread
|
|
|
|
|
|
|
|
|
Which AVG ship to portray?
So I purchased my usual selection of reference books and spent a lot of time poking around on the web, and eventually settled on "another" Hawk from the Hell's Angel squadron -- No. 68, as flown by C.M. "Chuck" Older. Older went on to score even more kills with the AAF, and became an attorney after the war, and then a judge in California. His eventual legal claim to fame was presiding over the Charles Manson trial.
I chose this plane for several reasons: - extremely well documented, including in color - interesting variation on shark mouth, almost looks like "laughing" - No. 68 graphically interesting to me - Hell's Angel squadron logo exceptionally large, and even documented in close range While I was plugging away at the paint-patching of the sticker removal areas, I gradually began the process of drafting all the necessary graphics in CorelDraw. I did not redraft the Disney tiger -- I found the best representation on the web (and best resolution) and then cleaned it up in Photoshop, as well as drafting a cut-outline of the edges. I used photographs as well as the exceptionally well-done (and well-researched) illustrations by Thomas A. Tullis in his book "Tigers Over China: The Aircraft of the A.V.G." He has excellent text explaining color issues upon which I relied as you will see. I highly recommend this book for those of you especially into AVG history, colors and markings. ImagesView all Images in thread
|
|
|
Last edited by MrSmoothie; Dec 26, 2019 at 09:36 PM.
|
|
|
|
|
|
So I was talking about details that I think are interesting. So here's one.
There was a myth for years that these Hawks came delivered to China with RAF roundels on the wings, which were painted out, and then smaller Chinese roundels added further outboard. It turns out that only one was delivered that way. The camo pattern was applied at Curtiss using huge rubber mats as masks -- these masks included a round space cut out of where the dark green would have been, to help the RAF apply their roundel in the right position. I thought that would be subtle, but interesting. And since the earth latex proved to be such a good match, it wasn't that hard to do. I also noticed a really large area of earth on the inboard section of the port wing panel with no dark green at all and felt I should extend the pattern. The kit's wing camo pattern is not very scale to begin with so no big thing. Meanwhile, I also got going on repainting all the spots on the fuselage where stickers were removed -- red ID band, No. 77, Disney Tiger, Hell's Angels... This took a while. There were also some odd interruptions in the camo pattern around the canopy, so I did some painting to visually smooth out those lines. In all these cases, I never painted more than an inch or so past where the stickers were removed, but then lightly blended the color out into the pre-existing color. The vast majority of the model remains in the original paint. On the undersides, I painted the gear doors and wing joiners gray, once I got a decent match. I also masked off and sprayed all four wing LED lenses, so that only the teardrop remained transparent. ImagesView all Images in thread
|
|
|
|
|
|
|
|
|
Another "fun fact" -- while the FMS P-40B comes with a centerline drop tank, the Hawk 81-A2 was not equipped for a drop tank, or centerline bomb for that matter.
|
|
|
Last edited by MrSmoothie; Dec 26, 2019 at 11:18 PM.
|
|
|
|
|
|
Rear View Panels (and filler caps)
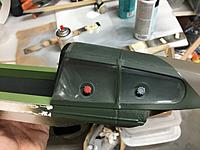
I referred earlier to details I think are interesting. Well how about this? On the Hawk, there were two holes cut into the port side rear view plexi, to access a gas filler cap (forward) and oil filler cap (aft). I can't think of another plane that did anything like this. Judging by the visible paint staining on most of the AVG Hawks, they didn't do the most tidy job and I can only guess that the cockpit could reek of fumes!
One of my pet peeves is how foam "gators" under cockpit plexi. So I cut cover panels from styrene, which also gave me the opportunity to paint them correctly. Often guys paint these rear view panel areas zinc chromate or British interior green. But in fact, they were pained with the adjacent camo colors. I curved the styrene around a brass tube to get it to conform better and then used UHU Pur contact glue to adhere. First you have to get the canopy and rear view plexi off (they are separate). I learned a terrific trick on a Hobbysquawk F4U thread -- run a little lighter fluid into the glue joint and in seconds, the glue will release. At least on the models I have tried, the lighter fluid does not affect the area paint (of course, the paint where the glue was comes up). However, I make no guarantees -- check an unseen area first. I have done this on the Freewing 1600mm F4U, this Hawk, and other models. The gas and oil caps were created in Tinkercad.com, and then printed on my Aynet A8 3D printer. The gas cap was red, while the oil seems to have been gray or silver. I had to cut the holes into the plexi -- this was tedious but doable. As furnished, the holes are simulated by a depressed area. I'll move into more cockpit details next. ImagesView all Images in thread
|
|
|
Last edited by MrSmoothie; Dec 26, 2019 at 11:46 PM.
|
|
|
|
|
|
Starting interior
Keeping with my mantra of covering all interior foam, I made panels for all sides from .010 and .020 styrene sheet. I painted this with a less yellow green to approximate "British Interior Green." It was probably even darker and duller in reality, but once covered with a a canopy, some color intensity is lost.
I decided I did not want to make a complete cockpit on this one, as the waist-level "floor" is a fairly integral part of the cockpit hatch structure. This would certainly make things easier for my pilot figure which would only be a "bust" -- my last few projects involved arms and at least the upper sides of the legs. The "floor" was covered with black styrene, which was painted matte dark gray for a feeling of depth. My pilot figure is based on the RAF Spitfire pilot 3D model by Max Gruder sold on CGTrader. com. His files are great and worth every penny. AVG pilots initially had what appeared to be tan or khaki flight suits with black fur collars and tan cloth helmets. Clearly different helmets were used--some had cloth covering over the earphones, while others exposed the black-painted earphones. AVG pilots also used dark brown leather jackets, which are very typical for our WWII pilot figures. The latter was probably more common as months went on, but I decided on the tan flight suit just for something different. The 3D design incorporates a Mae West life preserver, so I painted it a dull yellow -- although I have seen no evidence at all that AVG pilots ever used Mae Wests. Am I wrong about this? I printed the pilot with 0.5mm wall thickness and no infill at all (hollow). They weigh next to nothing. I use Tamiya acrylics to paint these figures, but first I give them a liberal coat of SEM brand high build primer - this does a great job of filling the bulk of the print layer striations without obliterating detail. It's expensive stuff, but a can lasts a long time, it works great, dries super fast, and sands very easily. I eventually found some photos of AVG pilots wearing their oxygen masks -- they were the early style you almost never see that have a bladder below the mask that fills and flattens. I made this out of two ovals of styrene, creased down the centerline, and then filled with spackle to approximate the shape. There were three additions to the mask -- two look like filters. These were cut from plastic tube and glued to the existing O2 mask. The headrest was carved from balsa, filled, and painted. Initially I used black, which was certainly used, but more often than not, in the color photos, brown leather seems to have been used. More cockpit details to come... ImagesView all Images in thread
|
|
|
Last edited by MrSmoothie; Dec 27, 2019 at 11:22 PM.
|
|
|
|
|
|
Mr Smoothie,
Very nice. This has been one of my two favorite WWII fighters. When I was about 3-4 years old my mother drew simple pictures of airplanes for me. They all had the sharks mouth, she would have been in her early teens during the war. I also watched those AVG movies as I got a bit older. The P-40b/c is what I see in my mind when I think of as an early WWII fighter. Rich |
|
|
|
|
|
|
|
|
"Flying Tigers" with John Wayne
Thanks guys!
Yesterday, for fun, I pulled up "Flying Tigers" on Amazon Prime video (one of the free movies). I was very surprised at the quality of the print, probably looks about the same as if you saw it in the movie theater in 1942-- certainly better than any print I've ever seen on TV. I watched about half before I had to do something else. It's about as bad as I thought. But there are some interesting things. There's a great panning shot, actual AVG footage, of a trainer landing, but in the foreground you can clearly see a trio of Hawks -- no. 53, then one that hasn't gotten a number or even shark teeth, and then finally no. 40. 40 is particularly interesting as you can clearly see the circular "masked off" area for the larger RAF roundel. Immediately following is a P-40E (probably painted just for the movie, and reasonably correct) landing, followed by actual footage of AVG No. 43 landing, shot from below. Also interesting that sometimes when they needed to show a formation of Japanese bombers, they used some actual film, but other times, footage of a formation of Douglas A-20 Havocs. While the actual footage is mostly grainy, the production footage is very sharp. They made a half-dozen or so full size mockups of the Hawks for the home base scenes -- these are pretty funny if you look closely -- no compound curves (such as bottom of cowl), visible cables supporting the landing gear struts, gaps between the canopy windscreen and the cowling. I especially like the one inch gap between the rudder and vertical stabilizer! ImagesView all Images in thread
|
|
|
|
|
|
|
|
|
Maiden + One!
I'm jumping the gun a little, but I had to share that my Hawk had maiden (plus one) this morning. The weather has been nice, but generally too gusty. I thought I saw a window for first thing, between sunrise and possible fog, and the onset of too much wind. I got lucky and had perfect flying conditions with little to no wind straight down the runway.
I promised myself not to rush and checked control direction, throws, Lemon stabilizer response direction, and did a range check. First flight just needed some up trim, but I think the CG is right on as axial rolls required almost no compensation The ailerons were touchy, even on low rates, so I made a mental note to reduce throws. Once satisfied, I flipped on the gyro with 25% gain and it flew perfectly so I landed that way. It was cool to see my gear drop in staggered delay, as per the real plane (more on that later) -- I dropped full flaps but kept speed up a bit more than probably necessary -- I was NOT going to stall on my first landing. Touched down on the mains (on the runway) and let her roll out. I had a Floureon 4s 4500 lipo and flew for about five minutes. Later, I made a second flight with the Lemon switched on from the start. I still felt there was more aileron travel than necessary, but other than that, the flight was perfect. Maneuvers were smooth and easy and it looked outstanding on low fly-by passes. Again, I kept speed on landing, but slower than the first. At the time the wind started to pick up and I thought wouldn't it be nice to stop while I was ahead? While I put the wing .30's and pitot tube in for the glam shots, I left them off for these two flights just to be safe. |
|
|
|
|
|
|
|
|
I found another video on Amazon Prime: https://www.amazon.com/Fei-Hu-Story-...o%2C174&sr=1-2
Lots of good pics. This is the most accurate film I've seen on the subject. CR |
|
|
|
|
|
|
|
|
Re: Fei Hu ~ The Story of the Flying Tigers
I watched this documentary on Prime just last week and very much agree with you. Good interviews, decent footage, and accurate. If there's a better one, I'm waiting to learn about it. |
|
|
|
|
|
|
|
|
Interesting (to me) details
As I said, I only added details that I found interesting or which would be interesting to execute.
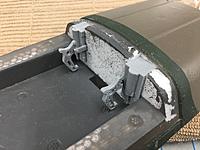
I think it's kind of neat that the Hawk had two .50 cal. Brownings in the cowl, located such that the gun butts were visible in the cockpit, along with their charging handles. When you think about it, it's kind of like a WWI fighter, such as a Sopwith Camel. I found a nice photos of the interior of a recently restored/recreated P-40C (utilized parts of a Pearl Harbor P-40), and decided to see if I could make the parts in Tinkercad.com and then 3D print. I then did the same with the sliding canopy crank. I'd have done throttles, but my cockpit "floor" is above where the throttles would have been located. I added various similar placards to fill some empty spaces. The instrument panel was developed from a photograph which I corrected for perspective distortion and then printed out on premium matte printer stock. The top portion of the pilot's seat was made from sheet styrene and tube, then glued to the base. ImagesView all Images in thread
|
|
|
|
