|
|
|
|
Thread OP
|
Night Seven
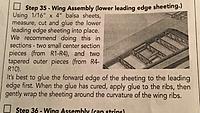
Lower leading edge sheeting…
The instructions are sparse because there is no one way to do this. I’ll provide a little guidance 1) Use the structure to mark the cut locations. Important because slight alignment issues. Like the curve of the balsa sheet 2) Don’t forget the wing hold tab. 3) Be sure to leave half of the edge of rib R4 exposed so there is a place to glue the angled outer leading edge sheeting. 4) The balsa grain runs the length f the wing I use CA to set the leading edge and aliphatic for the other joints. |
|
Last edited by GRW3; Aug 22, 2019 at 11:27 PM.
|
|
|
|
|
|
|
|
Thread OP
|
I’d rate it good, like you would find from Sig, understand though, no kit manufacturer can provide perfect wood like you would chose yourself (if you could find large supplies to peruse). Gone are the days of hobby shops having rows of those blue/white Sig balsa boxes.
|
|
Latest blog entry: Prop Reamers
|
|
|
|
|
|
Thread OP
|
Night Eight
Continuing with the thoughts from the question and answer above, let’s talk about balsa.
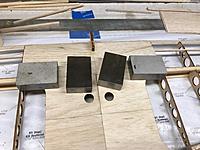
Like I said, no kit producer can provide perfect balsa, so you need to inspect your wood and plan accordingly. Most of the 1/16”x4” balsa in this kit has a variation in grain across the width, with one side tight and one side open. Open grain is easier to bend, a plus when you have bend it around the ribs. Tight grain is good for guitar tops, if it’s spruce, but here it’s just stiff but that is OK at the spar. When you fit the leading edge sheeting, align it with the leading edge, not the spar. You want the balsa grain perpendicular to the ribs, not at an angle. It bends best that way and reduces the chance of a split. Use a good straight edge when you cut. For long runs, find a way to stabilize it. I have a big lead weight but that’s not necessary. The 1*2*3 blocks could work or a couple of bricks. When cutting at an angle, cut so that if the grain grabs the blade, it pulls away from your part. Once again, don’t force the cut. Multiple pulls that cut cleanly are preferable to one that crushes the balsa. In a lot of ways, model building is an organic process. The actual places to which you are fitting the freshly cut part may not be quite as straight. Be ready to sanding boards and blocks to get the best fit. ImagesView all Images in thread
|
|
Latest blog entry: Prop Reamers
|
|
|
|
|
|
Thread OP
|
Night Ten
Finished up the wing construction last night. Not a lot new here other than the Japanese knife. You don’t need it a lot but it’s really useful when you do. I got mine off Amazon.
Tonight I’ll be setting up the workshop to start on the fuselage. ImagesView all Images in thread
|
|
Latest blog entry: Prop Reamers
|
|
|
|
|
|
Thread OP
|
Night Eleven - Transition
The wing construction is finished but the wing work is not. Basically, I now have a roughed out structure that needs to be worked to the final shape. The wing profile shape is shown in the fuselage plans. The first effort will be to trim off excess wood, remove so excess glue and fill the little gaps here and there. I will then give the filler a good amount of time to fully set before starting the final shaping process. I will revisit the wing as needed. The ailerons also need final shaping.
So after finishing the wing construction, there is some amount of waste and debris around. Now is the time to clear off the building board. I find a small whisk broom perfect for this job, just sweep everything to the edge of the building board and into the trash can. The really big pieces of scrap, primarily the remainder of the laser cut sheets, will go into the organic recycle can. The useable extra balsa will be kept handy until the build is finished. With the building board clean, I can now put down the fuselage plans. Unlike the wing plans, I didn't cut these. I use the expensive blue tape because it just works so well and it comes off clean. |
|
Latest blog entry: Prop Reamers
|
|
|
|
|
|
Thread OP
|
Night Twelve
Family dinner made this a short work night but that was not a problem. Tonight I had to separate all the fuselage lite ply frame pieces in preparation for building the internal fuselage frame. The only construction was laminating three assemblies needed to build the lite ply frame.
Also got some expected build supplies. ImagesView all Images in thread
|
|
Latest blog entry: Prop Reamers
|
|
|
|
|
|
Thread OP
|
Night Thirteen
Tonight I started putting the fuselage puzzle pieces together. When installing the wing hold down assembly, a slight taper on the bottom of the tabs that go into F5 can make it a little easier.
The first two fuselage construction steps call for taking time to allow the joints to set. I used the waiting time to start roughing out the wing. The instructions direct finish sanding after construction but there was is no need to wait. Getting ahead of the effort allows for more care. |
|
Latest blog entry: Prop Reamers
|
|
|
|
|
|
Thread OP
|
Night Fourteen
Tonight I finished the fuselage crutch. I used some amount of clamping force while the glue set but I took them off while the glue cured to keep their weight from effecting the alignment. I lined up the crutch with the plans. Adding the weights held the crutch aligned while the glue cured.
Technically, the next step is to glue the balsa fuselage sides together. However, the next big step is setting up the radio and?motor system for this plane. I like to be ready when I’m building the fuselage because a lot of the installation can be done as it goes along. This is when access is easiest. Doing it at the end is not exactly like building a ship in a bottle but t can be awkward. Also, I’ll be looking for other items that I’ll want to do sooner rather than later. I’ll note these things as I find them. Note: this is another instance of personal preference. I’ve been building models since the early ‘60s, so I have some reasoned preferences. I think you can build this model just fine using the plans and instructions if you don’t already have your own techniques. |
|
Latest blog entry: Prop Reamers
|
|
|
|
|
|
Thread OP
|
Day Fifteen
Scattered showers kept me home today, so I did work in a couple of segments. After coming in from breakfast at my favorite Jalisco, I put the fuselage sides together. I have a long straight edge (Sig) that I used to ensure the bottoms of bot fuselage sides were straight. I used the 1*2*3 blocks to weight the straight edge down. I used SIG-MENT model airplane glue (ah the memories) because it sands so well. I used T-pins to fix the pieces in place while the glue dried. In the Texas summer warm garage* it didn’t take long. Before removing from the board, take time to smooth the glue joints.
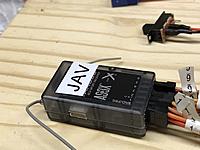
The next thing I did was get the motor and radio system” ready. I had a NIB Spektrum AR636 that I had to register, update and set the basic flight program (flaperons). Then I bound it to my DX8G2. I checked all the servos for function. Finally, I connected up the motor / speed control / BEC system. Everything is working like it should. After the electronics, I removed most of the remaining fuselage parts from the balsa and light ply sheets. I glued up the formers and the tailwheel support. Next - Tailwheel mount - Mount motor / speed control / BEC system - Start radio installation ImagesView all Images in thread
|
|
Latest blog entry: Prop Reamers
|
|
|
|
|
|
Thread OP
|
Night Fifteen
Oops…
The best laid plans of mice and men are oft to go astray… I think working with the 46 to set up the radio finally engaged my attention about size. Taking a break from the afternoon effort, I decided that the first I needed to do was check the motor box. It’s both too long and too narrow. Now I have to come up with a solution. This is modeling … |
|
Latest blog entry: Prop Reamers
|
|
|
|
|
|
Thread OP
|
Night Sixteen
Modeling!
I've been doing this a while, so, to me, this is just par for the course. While this kit would be good for most novice builders, the engine/motor installation is not cut and dried (because, in reality, it's hardly ever cut and dried). This plane is not a Park Flyer, so if you're building it, you probably are a member of a club. If you're new to building, be sure to reach out to one of the club's builders for advice and help as needed. We love to help new people join the ranks of builders. As a new model builder, you might not have the tools seen below (unless you're a wood worker then probably have better tools). I figured the best way to make a motor mount was to just make a plywood stack. I actually found some Ľ" AC ply at the LHS (two sheets, I bought both) but I was prepared to get some at Lowe's. The base plate for the kit motor mount is the right size for the E-Flite 46 mount, so I used that to lay out a pattern for the six (6) pieces needed to make the 1˝" motor mount. I used my Dremel Scroll Saw to cut out these pieces. I was not seeking perfection, just reasonably close, the mount will evened out later. This is the bigger of the two scroll saws that were offered by Dremel. It has a much bigger opening and it's a lot quieter. This scroll saw easily cuts Ľ" plywood, just take a little time. You could do this with a jig saw but be aware they make wider cuts so adjust your patterns. After I cut the six blanks, I got out my drill press, with vise, to cut out the central hole. Technically, you only need to do one to clear the back side of the E-Flite 46. However, I'm debating about how to rout the motor control wires, so I cut the hole in all six pieces. These holes, cut clean and straight, will be used to align the pieces. You could do this step with drill too but I would find some way to hold the pieced firmly (not freehand). I glued the top two pieces together with epoxy. This is the primary motor mount. After the glue cured, I marked the location for the four motor mount bolt holes on the face of the mount. I then put the motor mount block and the next one to be behind, and put them in the drill press vise to drill the motor mount holes (use the thread body on the blind nut to size the drill). Then I used the drill press and a small hole cutting bit to counter sink the seats for the blind nuts. I increased the size of the bolt clearance holes in the back up block to allow for alignment. I mounted the motor to set the blind nuts and then test fit the pieces together. The third block proved sufficiently deep to cover the bolts. I stacked all the pieces (with motor) taped them together and did a test fit to the firewall to confirm 1˝" was enough. It was. I then removed the motor and epoxied all the blocks together, using the central hole for alignment, and clamped it together to let it cure. ImagesView all Images in thread
|
|
Latest blog entry: Prop Reamers
|
|
|
|
|
|
Thread OP
|
Night Seventeen
Finishing the Motor Mount …
Tonight I worked around my main R/C club meeting. Before the meeting, I got out my small belt/disk sander to smooth the sides and round the corners of the motor mount. When I got home, I cut out the vent holes and epoxied the motor mount in place. I also cut some hardwood braces that I will use when adding the balsa sides. Finally I did a minor cleanup of the building area. It’s something you need to do as you go along. Making things work out is part of the modeling experience. ImagesView all Images in thread
|
|
Latest blog entry: Prop Reamers
|
|
|
|
|
|
|
Thank you for a great build thread!
I, for one, really appreciate your excellent build thread!
Frank |
|
|
|
«
Previous Thread
|
Next Thread
»
| Thread Tools | |
| Similar Threads | |||||
| Category | Thread | Thread Starter | Forum | Replies | Last Post |
| News | Robinhood 80 from Old School Model Works | Jim T. | Giant Scale Airplanes | 11 | Apr 01, 2021 11:43 PM |
| News | Robinhood 25 From Old School Model Works | Jim T. | Electric Plane Talk | 106 | Jun 21, 2020 02:34 PM |
| Question | Old School Model Works Wayfarer Glider | RonT | Balsa Builders | 7 | Oct 21, 2018 09:13 PM |
| Discussion | Old School Model Works Wayfarer Glider | RonT | The Builders Workshop | 0 | Oct 20, 2018 12:43 PM |


