|
|
|
|
|
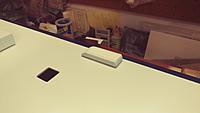
Need some roof pieces
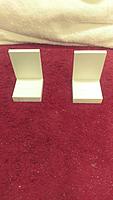
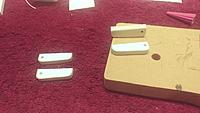
Need something to break up that big flat white roof. How about 2 a/c units. Started by cutting out some 1/4" thick plastic pieces and glued a few together to start the build. Pics below.
Bob |
|
|
|
|
|
|
|
Getting the pilot seats started
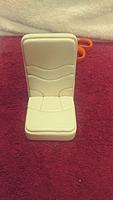
I know, maybe I should focus on one thing at a time. But while I ponder the a/c units....might as well start the 2 pilot seats. After building all the seats in the Malibu model I know this can take some time. So why not start now? Pics below.
Bob |
|
|
|
|
|
Burning pencil lead and eraser
I will use some 1/16" thick plastic to create the different puffy shapes that make up the top layer of the seats. Once cut out each will be covered separately in vinyl and put back together like a puzzle. Doesn't sound that difficult, but it takes time, a lot of it. Pic below.
Bob |
|
|
|
|
|
And so it begins again
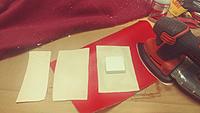
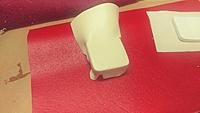
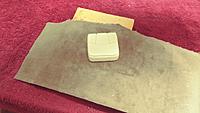
Once the shape of the plastic bases is good, time to cover them up. To make the vinyl easier to work with it helps to get rid of most of the material backing on it. A leather expert would break out a knife for this scivving procedure. For this vinyl I found it a lot easier and faster just to use my mouse sander on it. Once the material is thinned down it is much more stretchable and easier to work with on small parts. Pics below.
Bob ImagesView all Images in thread
|
|
Last edited by xx29l9; Dec 10, 2021 at 01:36 PM.
|
|
|
|
|
|
|
Practice on one makes the next one?
Easier? Working on the first captain seat learning how to make it easier for the next one. Starting to add some details and when the cushions are all done I'll add some piping around the edges and that will hide some of the edges. Pics below.
Bob |
|
|
|
|
|
Getting a little better and quicker at this
I keep working on these seat parts and getting a little quicker and better at making these pieces. Puffy pieces done on one of the backrest pieces. Looks good. No piping yet, soon. Pic below.
Bob |
|
|
|
|
|
I like what I see
Plugging along on the seats still. Just finished the 4 armrests and put the piping around all the current pieces. Still need the seat bottom wrap around put on and build the pedestals, but had to put fhe armrests on to see what it looks like....pics below.
Bob |
|
|
|
|
|
Captain chairs are done. I think
Put the bottom skirt and piping around both chair bottoms. I'm done with them, at least for now. We'll see what/if I do with seat belts and the power seat switches. Need to move to something else for now. Shiny objects....
Bob |
|
|
|
|
|
Awesome work mate, I understand your desire to move to Shiny pieces next, we all like those
 . .Keep up the great work. Kurt |
|
|
|
|
|
|
|
|
On to the steering wheel.
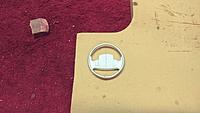
Thanks Kurt....I just keep plugging along as time allows. Next up, the steering wheel. I previously bent some aluminum rod around a socket to get the right size of wheel. Started working with some 1/4" thick plastic to make rhe middle part. Thought it looked pretty good until I was about done with it and then I noticed it wasn't centered as good as I hoped. So, started out on part #2 and it turned out much better. Glad I took the time for 2nd part. Used a small round file and put the finger indents around the bottom side of the wheel. Center piece has lots of curves and round edges. Glued the 2 parts together and hope to dip it all in black Plasti Dip soon for the covering. Pics below.
Bob |
|
|
|
|
|
One thing leads to-
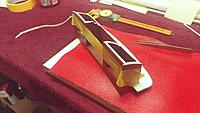
Covering the steering wheel in Plasti Dip didn't work for me. I thinned it out real good but could not get a consistent/thin coating over the wheel. Luckily it pulled off easily and I put several coats of flat black paint on which worked out. Then moved on to building the steering column and put the driver seat in place with a driver figure sitting in it to help figure out the height. With the driver and passenger in place I also put the front ceiling storage/tv cabinet in place and hmmm. Seems to be sitting too low with the people sitting in their chairs, would cut into their vision out the front. Did I miss the height measurement on that cabinet by that much? Apparently I did, quick trip out to the big moho with a tape measure and then back into the garage. Took 9mm off the top edge around the cabinet to raise it up to where it's supposed to be. Looks much better now, glad I found it now before more work would have to be done. Pics below.
Bob ImagesView all Images in thread |
|
Last edited by xx29l9; Jan 04, 2022 at 11:54 PM.
|
|
|
|
|
|
|
1 more piece down.
Still just plugging along. I really can't start putting all these pieces together and glued down until I can get the exterior shot with clear...which I'm at the mercy of the weather. And its cold outside. So I keep building these odds and end pieces. Below is a pic of the main roof vent cover for the microwave/oven. Will get some blue paint on it soon.
Bob |
|
|
|
|
|
Nice mate. I admire your patience and sheer crafting skills. It's a pain waiting on the weather but I'm sure your patience will be rewarded when you get it done.
Cheers Kurt |
|
|
|
|
|
|
|
|
Back at it.
Thanks Kurt. I really want to finish that exterior paint job so I can throw all these random parts at it. Covid sucks. Enough about that. Worked on 2 thin cabinets that sit above the driver and passenger. And figured I better finish off those a/c covers. Work in process. Pics below.
Bob ImagesView all Images in thread
|
|
|
|
|
|
Sometimes you build something to build something else
The roof access ladder grabbed my attention for some reason. So why not make one? Made a plastic form to make 2 ladder rails as close to a copy of each other I could. Making the 4 steps took extra time since drilling the holes turned out to be an issue trying to get them centered. Took making 6 to get 4 good ones. Won't be able to mount it till that darn clear coat gets shot on. But I like the mini build so far. Pics below.
Bob ImagesView all Images in thread |
«
Previous Thread
|
Next Thread
»
| Thread Tools | |
| Similar Threads | |||||
| Category | Thread | Thread Starter | Forum | Replies | Last Post |
| Careful! | MATT DAMON---Confiscate All Guns Now | traceyl | Life, The Universe, and Politics | 99 | Jul 15, 2016 05:53 PM |
| Gallery | Astoria, OR | chum444 | Scale Boats | 42 | Oct 11, 2015 07:14 AM |
| Gallery | A few pictures of Astoria, Oregon & Ft Stevens | DavidPDX | Aerial Photography | 8 | Jun 23, 2012 10:30 AM |
| Ultra small Motorhomes? | lrsudog | Life, The Universe, and Politics | 30 | May 27, 2003 10:21 AM | |


