| Thread Tools |
| This thread is privately moderated by Aerospacer, who may elect to delete unwanted replies. |
|
|
|
|
|
Discussion
Micro SkyHunter FPV Build
Bolstered by my fixed wing FPV success with the Multiplex Shark, I began to consider something else to try in the fixed wing category. One plane that I had considered before was a Mini SkyHunter. From forum threads and reviews, I couldn't tell if this was a good choice or not. Then along came a micro/nano (depending on who was selling it) SkyHunter 780mm wingspan version both virtually the same and design, just different foam material and color.
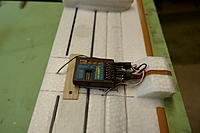
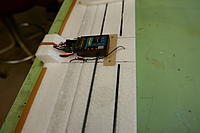
I selected the white Micro SkyHunter from Eachine that included all the servos, motor and ESC, adding the Eachine TX-03 AIO FPV cam like I am using on my Multiplex Shark to round out the package. I then read through the threads here on RCG for both the RMRC Nano SkyHunter and the Eachine Micro SkyHunter seeking ideas that might optimize the build. When the kit arrived, I casually inspected it to see what additional detailing seemed appropriate as I put it together. First I wasn't too impressed with the elevator servo cover. It was a very bulbous vacuum formed plastic piece that gave the impression that it could blank a fair part of the elevator surface behind it. So I peeled the cover off and also made some room along a side of the servo pocket to store some of the excess lead wire leaving only enough length to reach the left tail boom. The short little pushrod wasn't running squarely between the servo arm and elevator control horn, so I flipped the Z-bend to the inside of the arm. This flipping of the rod Z-bend was used to get more squared alignment on the wing for the aileron pushrods as well. Without a cover to protect the elevator servo, I decided to make some sub fins for the tail booms to serve as tail skids and add some vertical fin area to potentially help lessen the tail wag people reported the plane can exhibit in flight. I made the sub fins out of 1/32" plywood and tabbed them into the foam joiner under the tail of the booms. I also made some plywood tabs to tie the ends of the horizontal stab more ruggedly into the pockets in the tail booms. Another detail I often do is to very lightly sand smooth any mold flash off the horizontal stab leading edge and cover it with some packaging tape. Lastly, I took the outer plastic sleeve off the servo extension wire and inset the plug assembly into the horizontal stab along side the boom joiner. Moving onto the wing assembly, the two panel halves butt ends weren't flat to each other, so I lightly block sanded until the gaps at the leading and trailing edge closed up. I selected a Lemon Rx 7-channel gyro stabilized receiver as my flight control. I wanted to do a Flaperon setup on my Spektrum DX9 transmitter so I wasn't going to Wye connect the aileron servos to a single receiver connection. The elevator servo lead also comes in along the wing, so the only receiver connection from the fuselage is the ESC which had lots of spare length. So I mounted the receiver to the under side of the wing. There is a piece of 1/32" plywood glued to the wing that the isolation pad for the receiver is stuck to. The two diversity antennas for the receiver are embedded in the wing at 90 degrees from each other. The tail booms align to the wing with only a pair of shallow foam nubs on each side. I decided to use the plywood tab detail as I had on the horizontal stab to enhance the alignment and strength of the connection. Lastly, the leading edge received aerodynamic detailing by eliminating the mold flash with a light sanding and covering with packaging tape. Moving onto the fuselage, I wanted my FPV cam to overlook the nose, so I fashioned a mount for the TX-03 that is embedded into the back of the canopy. The power for the VTx/Cam is going to be separate from the motor battery. I mounted a 1S-600mAh battery on the under side of the canopy so it stays with the cam whenever I need to un-hatch to get at the motor battery. I put a horizon sight on the nose in front of the canopy to provide pitch/roll reference against the horizon in my video display. Lastly, I found that Banggood had an optional molded belly pan for the Micro SkyHunter so I fitted that to the underside as skid protection in lieu of trying to tape over the compound curve of the foam belly. My setup for this plane is intended to support aerobatic and proximity flying of 8-10 minute duration. With the stock motor and prop I found it producing about 115-120 watts on a 70% charged 3S (25-30C rating) LiPo. By past experience and my style of throttle management, it looked like a 1000 mAh battery should suffice for that mission. The all up weight of the plane with batteries is 390 grams. That puts the wing loading at about 15.5 oz/sq.ft. For a plane with this wingspan, chord and flat bottomed airfoil, it probably is not going to be much of a floater/glider. With my controls setup to implement flaperons, maybe I'll get some additional low speed lift to execute hand launch and belly landing with a bit anxiety while flying under the FPV headset. ImagesView all Images in thread
|
|
|
Last edited by Aerospacer; Jul 01, 2018 at 03:31 PM.
Reason: wordsmithing
|
|
|
|
|
|
|
|
Thanks for the info!
I just posted over in the nano thread how I like this plane. Be sure to tell us how those sub fins work out... |
|
|
|
| Thread Tools | |
| Similar Threads | |||||
| Category | Thread | Thread Starter | Forum | Replies | Last Post |
| Build Log | Eachine Micro SkyHunter 780mm - full review / build log / owners' thread | Arxangel | FPV Aircraft | 457 | Aug 21, 2023 01:43 PM |
| Discussion | Eachine Micro Skyhunter 780mm Fpv Airplane PNP With Camera | rank | FPV Aircraft | 93 | Nov 04, 2018 03:43 AM |
| New Product | Eachine Micro Skyhunter 780mm Wingspan EPO FPV RC Airplane | BG Tobey | FPV Aircraft | 254 | Sep 05, 2017 12:05 PM |
| Review | Eachine Micro Skyhunter FPV - RCGroups Review | Nikolei Zinsli | FPV Aircraft | 23 | Jul 18, 2017 03:35 PM |


