Horizon Hobby E-flite Timber 1.5m BNF - RCGroups Review
Horizon Hobby E-flite Timber 1.5m BNF - RCGroups Review
Introduction
| E-flite Timber STOL | |
| Wingspan: | 61.0 in |
| Length: | 40.9 in |
| Wing Area: | 559.5 sq in |
| Weight: | 50.3 oz |
| Wing Loading: | 7.45 oz/sq ft |
| Servos: | (6) 9g Micro |
| Radio: | Minimum 6 Channel DSMX/DSM2 |
| Battery: | 2200 to 3200 mAh 3S LiPo |
| Motor: | 10 BL Outrunner 1300 kV |
| Prop: | 12x4 2- blade |
| Transmitter: | Spektrum Dx18 G2 & DX6e |
| Manufacturer: | E-flite |
| Available From: | Horizon Hobby through your local hobby shop |
| Street Price: | $249.99 BNF Basic, $219.99 PNP |
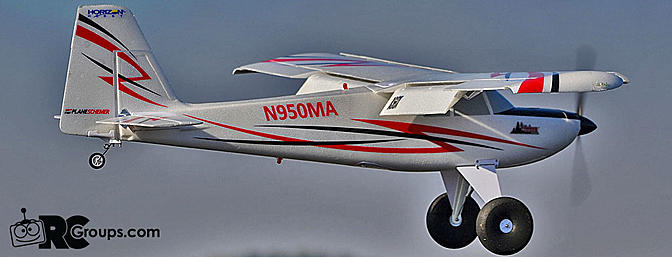
My name is Mike and I love flying off of the water. I live on a lake and I absolutely love anything that will float and fly off water. I first saw the new E-flite Timber at SEFF 2016 and I was hooked. Here was a great looking plane with Tundra tires and STOL capabilities that came complete with its very own set of floats. I had to have one ASAP. When the chance to review the Timber came up, I jumped at the opportunity and broke out in my happy dance. Though the dance is probably not suitable for public consumption, my wife knew immediately that a new review model would soon appear on our doorstep.
Well my favorite delivery driver has just left a very large package on my doorstep. Sure enough, there is a new E-flite Timber in the house!
Let's get started building and get this baby in the air.


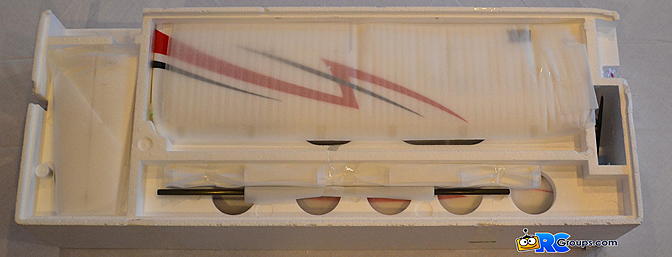
Kit Contents
- Z-Foam Fuselage, Wings, Floats, and Tail Group
- Motor, ESC, and Servos Pre-Installed in the Fuselage
- 2-Piece Wing with Aileron and Flap Servos Pre-Installed
- Pre-Hinged Ailerons, Flaps, Elevator, and Rudder
- EDO Style Floats with Dual Water Rudders
- Spring Suspended Landing Gear with Tundra Tires
- 12x4 2-Blade Propeller with Spinner
- LED Landing Lights, Strobes, and Beacons
- 21-Page Illustrated Instruction Manual

Required Parts
- Minimum 6-Channel Spektrum Transmitter (BNF)
- 3S 30C Lipo Battery - 2200 mAh to 3200 mAh
- Lipo Battery Charger
- Phillips Screwdriver
- Medium CA or Foam-Tac Glue
Parts Supplied by Horizon for this Review

For this review, Horizon Hobby supplied an E-flite 2200 mAh 3S 30C Lipo battery.
Assembly
The 21-page illustrated Instruction Manual details the brief assembly process for the PNP and BNF versions and it gives important programming instructions for the various Spektrum transmitters that will bind to the system. The manual also contains important information on arming and operating the SAFE Select receiver system in the Timber.


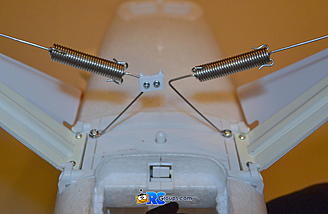
Landing Gear
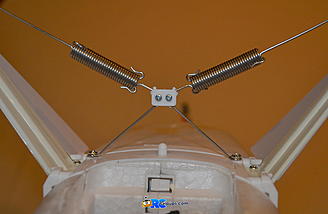
The assembly process began on page 5 of the manual. The first order of business was the landing gear. Each gear leg fastened to the fuselage with two machine screws and the suspension wires were fastened to the fuselage with pan head screws. I found that using a little soap or lip balm helped lubricate the screws and eased their installation into the plastic fuselage plate. The last step was to bolt the suspension wires together with the central bracket and plate.
Horizontal Stab/Elevator
The next step was the mounting of the Stab/Elevator assembly to the fuselage. The longer screws were used for this step and the shorter screws were saved for the floats. I found that putting some lip balm on the screw threads eased the screw installation process and prevented stripping the screw heads. It was a bit fiddly, but installing the left stab/elevator half first made it easier to insert the right half elevator joiner into place.


The next step was connecting the elevator pushrod, but the illustrations and description in the manual for connecting the pushrod did not match the hardware supplied with the kit. The manual showed a threaded pushrod and clevis, but the Review model had a 90 degree bend pushrod and snap on clevis. The supplied hardware was easy enough to install, but any future mechanical centering of the elevator would require removal of the wing to access the pushrod end at the elevator servo.


Wing
With the fuselage completed, the next step was the wing assembly. It was time to decide whether to install the wing slats or fly the Timber without them. After some soul searching, I came to the realization that the primary reason for buying the Timber was the STOL performance capabilities. I have plenty of aerobatic planes in my hangar, but I don't have a STOL plane. Slats it was!
The first step was to pair up the correct wing half with its correct wing slat assembly. The slats were marked on the bottom as "R" or "L" and the markings were located toward the wing centerline. I started with the right wing half and the right slat assembly. The mounting slots in the wing surface were covered with a flexible foam tape that was easily peeled away. Even though I had decided to install the slats, I choose to use Foam-Tac glue just in case I later decided to remove them.


Once the slats were firmly in place, it was time to prepare the wing halves for mounting to the fuselage. It was important to note the orientation of the wires as they exited each wing half. The aileron servo leads and the wing tip light leads were oriented toward the leading edge and the flap servo leads were oriented toward the trailing edge of the wing.

Final Assembly
There were a lot of wires to fit inside the fuselage, so it seemed very important to clean up as much as possible before mounting the wing. The first area of concern was the receiver antennas. The short antenna was not even close to being straight and the longer antenna was just laying loose in the fuselage. I used a short length of coffee stir stick to slip over the short antenna to keep it straight. The longer antenna was secured to the fuselage side with my favorite Scotch Multi-Task Tape.
-
 Receiver antennas bent and jumbled
-
 Short antenna in a stir stick and long antenna taped out of the way.
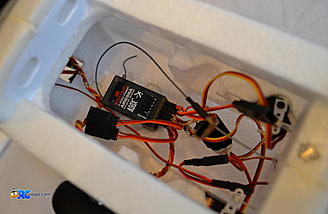
Since the SAFE Select receiver was mounted deep within the fuselage, bind plug access was going to be very difficult, so a 6" servo lead was inserted in the receiver bind slot and the other end was hot melt glued to the fuselage side. There were still a lot of wires to stuff into the fuselage, but they could now be carefully positioned toward the front of the fuselage compartment.
-
 Bind plug extension in place on the fuselage side
-
 Servo and lighting leads connected and ready to be positioned.
Once the wires were tucked out of the way, the wing easily slid into place. The nylon wing bolts were tightened, and the build was done!
SAFE Select Programming
The next step was to decide on whether to utilize the SAFE Select feature on the Timber. The normal bind procedure results in only the AS3X being active. The SAFE Select bind procedure results in SAFE mode being active all the time. Since I planned to use this plane as an everyday sport plane as well as a trainer for my grandkids, I decided to make the SAFE function switch selectable. That is, using the procedure described in the manual, The Timber could be flown in AS3X mode or in SAFE mode with the simple flip of a switch.
After carefully following the SAFE Select bind procedure, I tried to assign a switch on my DX18 to activate SAFE. After several tries, I could not get the switch function to work. The Timber was "stuck" in SAFE mode. After much investigation, I finally discovered the deep dark, undocumented secret for programming the SAFE Select switch.
The Throttle, Rudder, Aileron, and Elevator MUST ALL BE SET AT 100% TRAVEL on the transmitter or you cannot program the switch.
I had previously programmed dual rates and exponential on my DX18 and had the flight functions set to low rates. When I flipped the rates to high (100% travel) the SAFE Select switch programmed on the first try. Easy Peasy when you do it right!
Here is a short Horizon video on programming the Timber receiver. The video shows programming AS3X only and then programming SAFE Select enabled. The final segment shows how to program a switch to engage SAFE Select. However, even this Horizon video did not mention the 100% travel secret requirement.
| E-flite Timber BNF Basic and PNP with Floats SAFE SELECT and Bind Process (1 min 36 sec) |
Completion
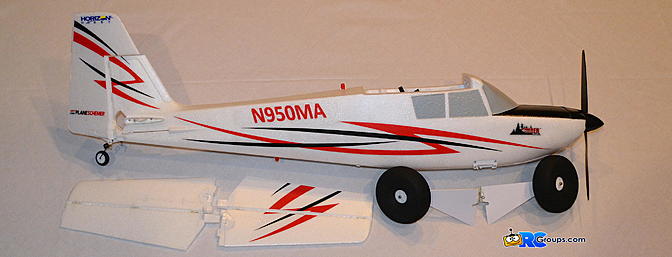
The completed Timber weighed 2 lbs 5 ounces, with the 2200 mAh battery, RTF. The plane balanced perfectly at 60mm back from the leading edge of the wing with the battery installed all the way forward in the battery compartment.
I set the control surface throws to the following recommended throws:
Ailerons - +/- 35mm High Rates, +/- 22mm Low Rates Elevators - +/- 22mm High Rates, +/- 16mm Low Rates Rudder - +/- 30mm High Rates, +/- 20mm Low Rates Flaps - 35mm Full Flaps, 20mm Half Flaps
I then set the transmitter countdown timer for 7 minutes and had it start and run at any throttle setting above 20%.
The motor pulled 35.3 Amps and indicated 403 Watts static power at WOT. The power level calculated out to 174 Watts per pound. This Timber should have plenty of power!
Flying
The E-flite Timber is advertised as a STOL plane with AS3X stabilization and SAFE Select capabilities. It should take off and land in a short distance, fly rock steady, and self level and limit travel to help beginners learn to fly. Let's see if this Timber lives up to the hype.
Taking Off and Landing
Slow takeoffs and landings are the heart and soul of a STOL airplane and the Timber excels at both. Takeoffs with full flaps occurred in less than 2 feet and landings on grass were less than 6 feet. The Timber surprised me with its power. I had to throttle back and push the stick forward to level off after full power takeoffs with full flaps. The slotted flaps were amazing. They not only helped slow the Timber down, but they also helped smooth the airflow over the rudder and elevator to keep them flying and effective even at extremely slow speeds. The oversized Tundra style tires and the sprung undercarriage helped smooth out even the hardest carrier landings. The Timber was easy to taxi on our fabric runway and even taxied well through the clumpy grass with full up elevator to keep the tail nailed down.
Aerobatics
In AS3X mode, I found that the Timber was a very capable sport model. It was able to easily perform all the typical sport model aerobatic maneuvers, and it had plenty of power and control to even perform a 3D hover. Rolls, loops, inverted flight, stall turns, snap rolls, and figure eights were all easily accomplished. With the STOL strips in place, inverted flight took a lot of down elevator, but there was enough travel left to perform outside loops. The AS3X limited the spins a bit, but that wasn't all bad.
Is This For a Beginner?
Absolutely! The SAFE technology was developed specifically to help beginners learn to fly. In SAFE mode, the Timber will self level and limit attitude changes to prevent unintended loops or inverted flight. With a SAFE Select switch enabled, the Timber can be flown in normal AS3X mode and switched into SAFE mode as needed. This is a great aid to help beginners transition as their skills increase and can even be used as a "Panic" button to help recover if the beginner becomes disoriented.
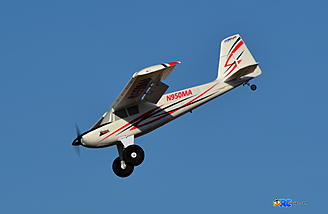
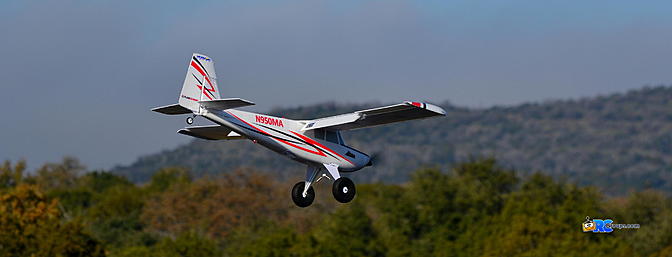
Flight Photo Gallery
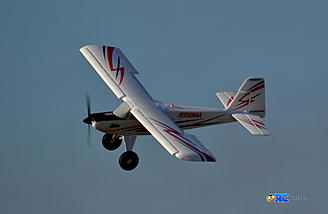
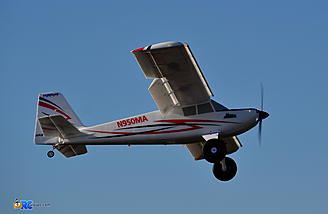
The E-flite Timber looked great in the early morning Texas sunshine. Jesse Webb was behind the lens of the Nikon while I was having all the fun on the Dx18 sticks. Here are some pictures from the first flights of the E-flite Timber on its Tundra tires.


Flight Video
Jesse Webb was again on duty manning the video camera for this one. He commented that the slow and easy flying Timber was a lot easier to keep up with than most of my other review projects.
| Horizon Hobby E-flite Timber 1.5m BNF - RCGroups Flight Demo (13 min 3 sec) |
Conclusion
This new E-flite Timber is a real winner. AS3X stabilization makes it an easy flying sport model and SAFE technology makes it perfect for Beginner pilots. SAFE Select allows the pilot to choose between AS3X stabilization and SAFE modes with the simple flip of a switch. The leading edge slats are supplied separate from the wing and can be installed or left off at the flyer's discretion. However, once they are installed, they cannot be removed. The Timber STOL strips and the slotted flaps allow this plane to fly at amazingly SLOW speeds. With just a little practice, takeoffs and landings can be accomplished in some crazy short distances and the oversize Tundra tires with their sprung suspension can smooth out any landing surface. The ample power of the E-flite 10 motor gives the Timber surprising vertical punch and very nice sport flyer performance. The LED landing lights are bright enough to be seen even in brightest daylight and the LED beacon lights and LED navigation lights are especially nice. However, it's the wing tip strobes with their double flash that add a truly unique full-scale touch to the Timber.
Pluses
- AS3X Stabilization Keeps Things Smooth
- SAFE Mode for Beginners
- SAFE Select for Access to Both Modes
- True STOL Performance
- Leading Edge Slats and Flaps Included
- Ample Power
- Tundra Tires and Sprung Suspension
- Bright LED Landing, Nav, and Strobe Lights
- Floats Included (Covered in Part 2 Review)
Minuses
- Elevator Clevis Different from Manual
- 100% Throw Required for SAFE Select Switch Programming
Timber on Floats
Now that the first portion of the E-flite Timber Review is complete, its time to break out those great looking EDO-style floats and get this Timber ready for some Winter water flying. Look for the second half of the E-flite Timber Review coming very soon to RCGroups.com.
Thanks
I'd like to thank Horizon Hobby and E-flite for providing the Timber for this review. Thanks to Jesse Webb for helping with the photos and video, and thanks to Matt Gunn for his editing assistance.
Last edited by RCG_Jason; Dec 14, 2022 at 10:57 AM..| Thread Tools |
|
|
|
|
|
My review of the Timber after 5 Flights
Amazing, i built it in under an hour without the the front wing guards and bound in safe mode followed the instruction and it flew perfectly in trim amazing after flying an assasin wing and hand lauch slow flyer albatross. it was easy in gusty winds took off right away and landing was intuitive. I can not say enough about it so far.
negatives - when on the ground a gust of wind pushed it over and broke 2 little plastic stops on the landing gear, the strength is on the up down pressure but not the outside pressure. easy fix and i ordered a replacement i think was 1.99 you have to turn it upside down to put the battery in so the upper surface is already get marked up. and the once you have the battery in you almost have to put your hands in the prop path so seems like a saftey issue. so far i have not been able to program the safe mode switch. Seems straight forward in the manual but i have tried and a couple guys at the field tried and it does not seem to work a a newer DX6. I am sure it is something simple and i will get it. None of the negative take away from the shear fun of flying in safe mode so slow you could walk beside it. If you want to learn and have anything other than absolute beginner level and even that with a teacher would be good. Happy Timber Flyer fior sure!!!! |
|
|
|
|
|
|
|
|
Thanks for the review! It was extremely helpful and very informative. Looks like that I'll be adding this one to my fleet in the near future.

|
|
|
|
|
|
||
|
Thread OP
|
Quote:
The float portion of the Review is now live at: https://www.rcgroups.com/forums/show...CGroups-Review McD |
|
|
Last edited by kingsflyer; Mar 17, 2017 at 09:02 PM.
|
||
|
|
||
|
|
Quote:
I would suggest you remove the spring limiters inside of the coil as that improves ground handling and prevents the springs from breaking on a hard landing. Glad you enjoy the plane ... I absolutely love flying my Timber. 
|
|
|
|
Last edited by Lou; Feb 13, 2017 at 09:15 PM.
Reason: spelling
|
|


|
|
|
|
|
Safe Mode Switch Programming for Timber
Thanks McD for the tip,
I will try to program the switch as directed in your review and I am sure it will work. I know I have dual rates so I am sure it would be on low rates just by Murphy's law. I will report if I have success. |
|
|
|
|
|
|
|
|
Ordered one earler this week along with some 2200 bats. Can't wait for it to show up.
|
|
|
|
|
|
||
|
|
Eflite Timber Safe Mode switch setting on DX6Quote:
I had the flight mode (high low rates) and the channel 5 gear set to the same switch. as soon as switched to channel five gear to f switch it worked first time. Regarding the saftey issue of loading the battery from the bottom; I had my throttle cut set to the bind button as that is what I was showed somewhere along the way. I have now set the throttle cut to the A switch and added custom voice so I know for sure the prop will not start turning when I plug in the battery. This plane is for beginners and I think this should be in the manual. Maybe it is and every one but me already knows this but just for the record if you are starting out learn this and avoid some stiches. Thanks again for your help. kingsflyer |
|
|
|
||
|
|
|
|
Thread OP
|
Not a problem. Glad you got it all sorted out.
Now let's get some serious Timber flying time logged! McD |
|
Latest blog entry: LEDs on my T-28
|
|

