RCGroups Review of the RA Cores Mini Yak-55
RCGroups Review of the RA Cores Mini Yak-55

Big Fun Little Airframe!
| Product: | RA Cores Mini Yak-55 |
| Retail price: | $24.95 Un-Painted/ 54.95 Painted |
| Wing Span: | 22" |
| RTF Weight: | aprox. 90g |
| Airframe Construction: | 6mm EPP |
| Motor: | C1822 Micro brushless Outrunner 2100kv (14g) |
| ESC: | TURNIGY Plush 6A /.8bec/6g |
| Servos: | New Power 5g Servo-1/ New Power 3.7g Servo-2 |
| Battery used: | Glacier 210MaH 2S |
| Receiver: | Lemon RC/ Spektrum compatible |
| Available from: | RA Cores |
This version shrinks the Yak55 to a 67% size that allows it to be used in a smaller indoor venue, I also flew it in a 5-8mph wind with no problems at all. With the power system that came in the "Completer Pack" it has plenty of power for the most aggressive 3D maneuvers out there. I had no problem at all putting her thru her paces, and had plenty of power left to spare!
RA has done a great job of shrinking the paint scheme of the larger 32" version down to give the mini the same great looks as the original!
In this review I will go over the build ( what little there is), flight characteristics, and even how not to do a couple things! Lets dig in!

What's In The Bag?
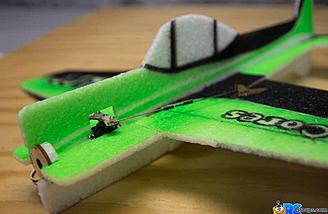
The Mini Yak comes in a pretty small package containing the carbon fiber reinforcement rods, 6mm EPP foam that has been laser cut for a perfect fit on the finished airframe, servo rods, servo horns, and motor mount. Mean Joe opted for the painted version, so mine came in a nice neon green Mini Yak-55 paint scheme! You can get this airframe painted or unpainted and it comes in a variety of colors to choose from. Its a little more of course for the painted version, but it looks great and Mean Joe didn't have to paint it!
I picked up the RA Cores Completer Pack that comes with everything you need to complete your airframe minus the battery and glue. I liked this a lot because it kept me from the arduous task of trying to figure out what power system I was going to put on this beast. And I will tell you that RA has done his homework on it because this system is a perfect fit for the Mini Yak! Once finished the all in ready to fly weight was 92.5g. That's perfect for indoor huckin!
You can check out my un-boxing Video here for more information on what's included:
| RCGroups Un Boxing of the RA Cores Mini Yak 55 (5 min 47 sec) |
The Build
I feel a little bit misleading calling this one a build; it goes together so quick and easy that it just doesn't seem to do that word justice. All of the parts fit together perfectly and the manual was super simple to follow along with. The first page of the instruction sheet was the addendum section for the Mini Yak. The rest of the sheets where the build instructions for the original Yak-55. So it was a breeze to figure out, and went pretty fast. Anyone with any experience building these profile foamies should be able to have this one done in no time at all. I used Foam Tac by Beacon Adhesives and Foam Safe CA from ZAP Adhesives with foam safe kicker for my build. I would recommend both of these products for any work you are doing with foam. They work fantastic!


The included carbon fiber rods and flats are pre-cut to fit in the slots on the wings, so you wont have to worry about that step. I noticed that the nose strengtheners that come on the 32" version were left out of the Mini version so I just used a piece of left over carbon fiber rod I had from an other build and added them to the nose section on mine for good measure. I don't think that it is really needed, but if you have some extra rod laying around why not?
Tips, Tricks, and Oops
One of the things that I have found to be a big help with getting a good bevel on the control surfaces on this type of foamie airframe is to take a trip to the hardware store and pick up a sanding block with a 45 degree angle on it. It makes it super easy to get the right angle every time, and also insures that the cuts are uniform from one to the next. For about 3-5 bucks its something you will use over and over.


Ok so now comes the point in the review that Mean Joe makes a confession.... (a.k.a. the oops)
I was working on the control rods for the Mini Yak and I admittedly made a rookie mistake. To build the control rods on this one you take two of the included metal rods with "z" bends measure the fit and join them with one of the included straight metal control rods. To do this you put the rods against each other in the right position touch a little foam safe ca with kicker on them to get them to join then use two of the small pieces of shrink tubing to go over where they over lap. I would humbly suggest that you do this away from the plane!
What bone-headed Mean Joe did was to put them together and then tried to shrink the shrink tubing while it was on the plane. The result was is a very pretty blue/green flame that melted a large section of the rear horizontal stab enough that it was unusable. (:>/
So here is yet another tip. Keep the extra 6mm foam that is left when you punch out the pieces for the build to use for repairs! A little bit of cutting, measuring, and foam tacing, and she was good as new! (well almost)

I did also take a bit more of that left over carbon fiber rod that we talked about earlier and added it to the tail section just to make sure it was sturdy enough. Again not sure I needed it but I had it right there so I went for it.
Ready to Go!
I have to say again that this build was very straight forward and easy to complete. With a flat surface to build on, and a little bit of time, you should be able to have this one in the air in no time flat! Minus the build mistake I had her put together in about an hour and a half. So not bad at all! That being said I would make sure to let it dry over night so that the glue has time to set up good and solid.


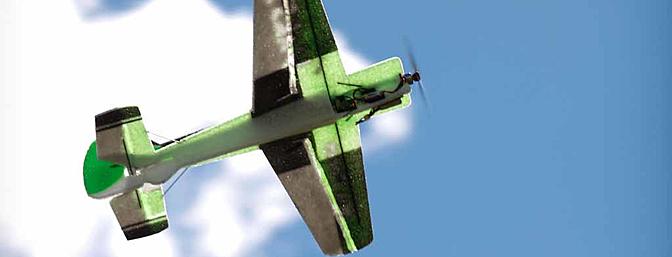
In The Air!
RA Cores hit it out of the park with the Mini Yak-55! This thing flies great! Even with the repairs I had to make she flew all the maneuvers I tossed at her very well, and with the recommended 2s 210MaH battery packs, I was getting about 5-6 minutes of flight time. I can see where this one is going to become a go to plane for indoor huckin in a small venue. I noticed no bad tendencies at all once I had her in the air. She is light weight and has plenty of power with the recommended set up to make even the most hard core 3D pilots happy. And she looked good doing it!


Flight Video
| RA Cores Mini Yak-55 - RCGroups Review (3 min 11 sec) |
In Conclusion
In conclusion I have to say that you wont be disappointed with this Mini flyer! The build is straight forward and it flies great! If you are getting ready for indoor season early I would suggest that you put the RA Cores Mini Yak-55 on your short list of 3D aerobatic airframes! Blue Skies and Calm Winds ~Mean Joe
Shout outs
Mean Joe wants to give a special shout out to Jim E. for helping capture some pics and vids for this review! Thanks and again buddy!
I also want to give an extra special shout out to my beautiful Wife for shooting some video and being my support system! With out you I could not accomplish anything I do and your never ending love and understanding is something that I could not make it with out! Much Love!
More Info
For more information on the Mini Yak-55 and what was used for the build check out these links!
Last edited by RCG_Jason; Jan 10, 2023 at 09:22 AM..| Thread Tools |

