|
|
|
|
Thread OP
|
cargo hold installed
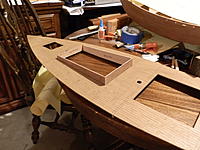
I lined the deck for a planking effect with a Sharpie and added some butt joints.
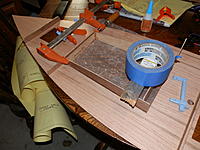
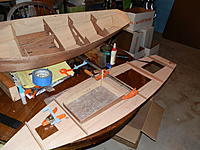
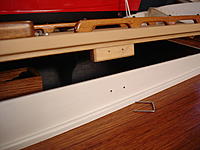
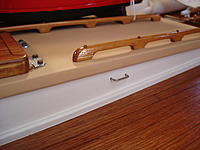
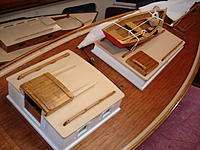
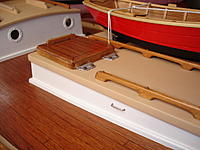
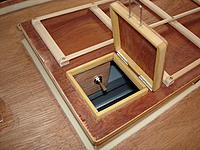
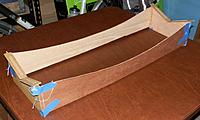
The deck was then used to hold the cargo hold pieces in good alignment for gluing. The deck was placed upside-down and the tops of the cargo hold pieces were down on the table where they could be set level to each other. The cargo hold box was then glued to the deck at the corners only. Next the deck lines on the box will be used to glue the box in all the way around. It's going easily if not quickly. I'm thinking of holding the covers down with those tiny super magnets and putting some plastic foam strips in to seal the openings. I'd appreciate thoughts on this topic. Gary, how did you secure the covers? |
|
|
|
|
|
|
|
|
|
|
Securing Hatch covers
Hi Paul, Those planking lines are a nice touch. Securing hatch covers, "darn details". I would certainly welcome creative innovation here, but will show you what I did for "Irene", and my other boats as well. The covers are held by U shaped pins made from .040" stainless steel welding rod (tig rod). I bend them all over the same pair of pliers, so they are consistent in size. I drill the holes with covers in place using a bit held in a pin vise. Friction keeps the pins in place. They are easier to put in place if one leg is left longer than the other.
The wooden pieces fit well, and I have not made any effort to create a gasket or seal. Irene seldom takes water on deck, it does happen of course but I have yet to find water inside. Magnets. You mentioned magnets. I gave these some thought, but worried that they might upset the ship's compass and lead Bear off course.... |
|
|
|
|
|
|
|
|
More on Hatches
I will throw in some more on hatches. The cabin top on "Irene" and the aft deck cover are held same way as the cargo hold cover. I've placed another small, hinged hatch in the aft stbd corner of the cargo cover. This provides quick, easy access to the radio power switch mounted safe & dry below. The foredeck hatch cover is hinged also. These hinged hatches are secured with U pins as well. Irene's companionway hatch slides just like a full size boat, a fun detail, but tedious to build. Suffice to say that my other boats have glued in place dummy companionway hatches.
|
|
|
|
|
|
|
|
|
Looking good.
|
|
|
|
|
|
|
|
Thread OP
|
A little more progress
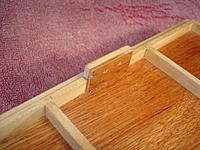
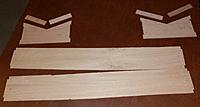
I've laminated strips of doorskin for the fin trunk and the long sail winch beams. The cabin side ends were mitered to avoid exposing the end grain. The cabin has been tacked in place at its corners.
A nice dump of powder snow prevented more effort. Skiing comes first 
|
|
|
|
|
|
|
|
Thread OP
|
The fin trunk is going together. The vertical 1/4 x 3/4 pieces have been glued to one side. Now this assembly is getting a layer of fiberglass. Next the other side will get a layer of 'glass, then the two sides glued together, the horizontal 1/4 x 3/4 strips glued on, and finally the top glued on. I thought the whole inside surface of the top would be covered with epoxy to waterproof the entire interior of the trunk.
|
|
|
|
|
|
|
|
|
|
|
|
|
|
|
||
|
|
Quote:
I had the plans printed out at a printshop at full size, this required a large (industrial) machine which prints one line at the time, the largest sheets took close to an hour to print. I'm not complaining about the price; once the guys at the printshop had figured out it was for a model boat and not a full size one, I actually got a discount. Regards, Jan. |
|
|
|
||
|
|
|
|
Thread OP
|
chines and plywood stand
It's great to hear of others starting! Please keep us informed.
I'm gluing the chines with epoxy. Where there were small gaps blue masking tape was laid inside the hull to keep the glue under control. The tape peeled easily away from the hardened epoxy. I had a six inch length with a gap of about 3/16" and glued in a piece of a paint stirring stick. A stand was built from doorskin ply. BTW this plywood is extremely splintery. I'm getting lots of slivers in my fingers. Added May 29, 2019 This stand has been flimsy and disappointing. Now I would do one with a 1 x 6 inch base plank and 1 x 6 end uprights cut to fit the hull and padded. |
|
|
Last edited by Paul~; May 29, 2019 at 08:24 PM.
Reason: uploaded photos twice
|
