|
|
|
|
Thread OP
|
Discussion
Bvm t-33
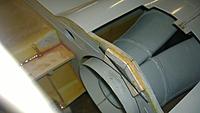
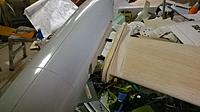
I've started working on a BVM T-33 I've had in the corner for a number of years, at least 7 or 8! The kit I acquired was partially built, the inlets are in and the main formers. No wing joiners yet though. First step is to reinforce the main former per the current instruction booklet.
|
|
|
|
|
|
|
|
|
|
Thread OP
|
The stock plastic flex plates are a known weak spot on an 18-20 pound plane and are no longer available. BVM does sell some CNC routed carbon plate replacements for about $50. I have plenty of machinery
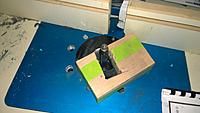
 so I ordered a $25 hunk of carbon plate from McMaster Carr, made up a wood pattern and did a little pattern routing after cutting the blank on my radial arm saw with a carbide blade. Oh yeah, this also allows me to customize them to fit some Robart air retracts I already own - a + so I ordered a $25 hunk of carbon plate from McMaster Carr, made up a wood pattern and did a little pattern routing after cutting the blank on my radial arm saw with a carbide blade. Oh yeah, this also allows me to customize them to fit some Robart air retracts I already own - a +
|
|
|
|
|
|
|
|
Thread OP
|
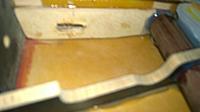
Next up, these wings are ancient original foam cores with balsa sheeting. There is a bit of carbon reinforcement under the skin in the form of a 1/4" wide strip top and bottom but that is known to be not enough. The recommendation is 2 1/8" plwood spars from the top skin to the bottom skin. One needs to catch one edge of the spar tub and the other needs to bridge the flap / aileron cutouts. I made the cuts with a 1/8" spiral cutter in my dremel equipped with a router base.
|
|
|
|
|
|
|
|
Thread OP
|
Time to join the wings to the fuse, the front joiner tube is held at the root in a ply rib and at the rear by a neat little custom supplied carbon / end grain balsa / carbon former. You hold the wing to the fuselage with tape, check the dihedral with a straight edge at the airfoil high point and apply your glue - V-poxy in this case.
|
|
|
|
|
|
|
|
Thread OP
|
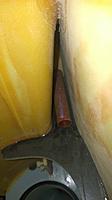
Finally the rear joiner, how the hell do you get glue in there? Pretty easily actually! Pull the tube off the spar and apply a bead to the outside of the very end, the tube slips into the ply former so this bead will secure that end.
Push the tube all the way home being sure it is in the ply root rib. Now reach in with a long V-poxy or Aeropoxy nozzle and apply a thick bead straight down the tube. Then simply grab the end with two fingers and rotate it 180 degrees until the glue piles up on the former face. There is some additional structure to go in but that is all for now until the glue cures and that magic moment comes when you see if the wing actually slips off the tubes <g>. |
|
|
|
|
|
|
|
|
lucky dog.....thats a dream kit for me. youll do her justice!!!
|
|
|
|
|
|
|
|
Thread OP
|
Some hours later the wings did come off, there was a little spot of glue that bonded to the root rib
 but a little force and off it popped. Pretty big jet! What you see with 2 of the three gear, strut and wheels is 5.5 pounds. I'm predicting 18.5 pounds RTF but a little force and off it popped. Pretty big jet! What you see with 2 of the three gear, strut and wheels is 5.5 pounds. I'm predicting 18.5 pounds RTF
|
|
|
|
|
|
|
|
Thread OP
|
Maybe I'll move along on this one now. This is one of the more complicated BVM builds and I swear I've spent weeks staring at those wing joiners before I pulled out the glue gun
 I think the rest will move along, tip tanks and flaps are next... I think the rest will move along, tip tanks and flaps are next...
|
|
|
|
|
|
|
|
|
man that's Purdy, id love to do one in flite metal....
|
|
|
|
|
|
|
|
|
Nice project , Chris! It will have an impressive presence per its size.
I know you're aware of the health issue with carbon fiber bits; especially when impregnated with resin. They can penetrate ones skin pores & cause internal problems, I understand. Its worse with Spectra & such. Take care to keep the shavings/cutting dust from exposed skin.  Have Fun. Can't wait to see your usual hi quality conversion. Phil |
|
|
|
|
|
|
|
Thread OP
|
Time to mount the tanks. Pretty well thought out procedure. There is a 1/4" balsa and a 1/8" ply jig piece provided which slip over the wing tip (you glue them together with Ca), this assembly with the rounded ends fits the recess in the molded tank exactly. The wings are pre-drilled to accept 1/4" * approx. 3" solid carbon rods. There is also a balsa block pre-drilled for the rods which slips in on the tank side. The jig pieces have the die-cut airfoil hole oriented such that the built in washout is compensated for and the tanks will fly at the right angle.
Not totally done yet, obviously. The procedure is to slip the jig pieces on the wing, insert the carbon rods, slip on the block, bring the jig into contact with the block and tack Ca it in place. Remove the assembly and apply more Ca (the tanks are removable in the end). The block portion then needs to be tapered slightly with a block to fit the recess. Once everything fits right the balsa and carbon rod assembly gets glue in the tank along with a poly ply tab. The poly ply tab protrudes over the wingtip and a single screw into a birch plug holds the tank in place for flight. |
|
|
|
|
|
|
|
|
Jf?
Hi Chris,
great building thread, you're the man! And which unit do you wanna install?  Anyway i can tell you, that if you remove the spinner fairing of the inlets and install straight walls, then move the fan mounts 5-8 cm back, the future will bring a deeeeeep whooosh! So it's then your decisison to have a missing link and fly open duct, or roll a thin piece of plywood as small tube between the inlets and the fan, and you might have the very first "Whooooshing" T-33. And i know a really good power unit for that beautifull bird!  Here a origin JF-120 ECO and the 590 KV on 14s will bring you  And because saving much weight compared to the origin VIOf, the moving back of the fan is OK for the COG, especially if you take bigger batt's. BR Rainer |
|
|
|
|
|
|
|
|
Looks great.
I need to finish my to do list and get working on mine. Though I do need to stretch out the build as its gonna cost the same as 2 building seasons worth Maybe I should have you start making 2 of every new part you make  Any particular reason you have brakes on this one? |
|
|
|
«
Previous Thread
|
Next Thread
»
| Thread Tools | |
| Similar Threads | |||||
| Category | Thread | Thread Starter | Forum | Replies | Last Post |
| Found | BVM Mechanical retracts F-80 / T-33 | Frank Feldhaus | Aircraft - Fuel - Jets (FS/W) | 3 | Oct 05, 2016 05:25 AM |
| Wanted | BVM F-80/T-33 Main Duro-Strut Set | gambok | Aircraft - Fuel - Jets (FS/W) | 1 | Apr 12, 2016 01:46 AM |
| For Sale | BVM T-33 Full kit | Lear45 | Aircraft - Electric - Jets (FS/W) | 2 | Jan 06, 2016 02:36 PM |
| For Sale | BVM F-80/T-33 Main Duro-Strut Set | Ken Lapointe | Aircraft - Fuel - Jets (FS/W) | 1 | Oct 29, 2015 05:58 PM |
| Mini-HowTo | Halloween Curse on BVM T-33 | CRCJA | Electric Ducted Fan Jet Talk | 36 | Nov 10, 2006 02:08 PM |

