|
|
|||||||
|
|
Multiplex Shark RR Electric Elapor Foam Plane Review
!Introduction
@Shark.jpg
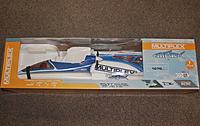
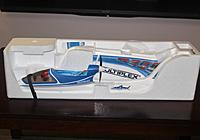
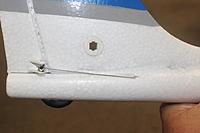
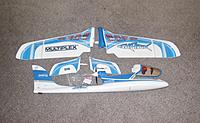
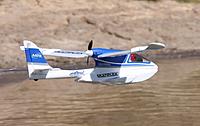
| spec2 | | @Shark 025.jpg | Wingspan: |< 42.1" | Wing : |< Two Piece with cambered airfoil | Total Surface Area:|< 256 sq in | Weight: |< 18 ounces | Length: |< 34.25" | Servos: |< Two MS-12015 Multiplex servos | Transmitter: |< Hitec Optic 6 2.4 GHz | Receiver: |< 6-Channel Optima 6 2.4 GHz | Battery: |< 3S 850mAh (Recommend 950) | Propeller: |< 5.5 x 4.5" | Motor: |< Permax BL-O 2816-1450 brushless motor | ESC: |< Multicont 12A | Manufacturer: |< Multiplex | Available From: |< Fine Hobby Stores Everywhere | Price RR Version: |< $159.99 (Receiver Ready) Multiplex makes a number of excellent foam planes using their Elapor (trademark) foam. The first thing I noticed in taking the parts out of the box was the strength of this plane. It should be able to handle the accidental abuse of a beginner and still be able to fly. Should it be broken it can be glued back together and there is more on how to do that in this review. My plane was still in perfect shape at the end of this review but I have worked with Elapor for years and find it easy to repair if the need arrives while taking a lot of hard landings and minor crashes with no damage. The Multiplex Shark is designed to be flown with FUN in mind from the beginner to the expert. With optional accessories flights can be started from the land, the sea or the air (hand toss). The motor is located behind and above the wing in a protected position. The kit as sold is designed to be a three channel plane with throttle, rudder and elevator controls. The RR means it is Receiver Ready so the pilot needs to supply his own radio system, flight battery and charger. The Shark is also designed for those that want to add ailerons. The aileron bays are already in the wing and the ailerons molded into the wing. They can quickly be cut free on their ends to become functional. The servo bays are under wing decals so a hobby knife allows access to the aileron servo bays and channels for the aileron servo wires. Ailerons can be controlled with a 4-channel receiver using a Y-harness. Thus in a few minutes with the aileron upgrade option it can be upgraded from a basic three channel plane to a more aerobatic four or five channel plane. Should a pilot have a really bad accident and want to return the plane to pristine condition they sell spare parts to replace what ever is needed. While the shark resembles several planes designed for Beginners with its optional parts discussed in the body of this review it can be customized for a variety of flying experiences. With varied throttle it can get ten minute flights and that is without motor off gliding which is one of the things I like to do most with my Shark. (She will thermal in strong lift.) The Shark is very portable and can be kept in the trunk of most cars and flown in a small park during lunch breaks or on the way to or from work with no at site setup time other than installing the battery. Accessories can be swapped in a matter of seconds. This plane has a lot to offer both the Beginner and the Expert looking for a fun plane to fly. Multiplex used their experience with the famous EasyStar plane to create this plane that can be modified as the owner's skills improve. A plane with options to increase the fun, the versatility and never become boring. Learn all about the Shark in this review and see if you agree with me that Multiplex hit their goal very nicely! @RR.jpg @RR.jpg @RR.jpg @RR.jpg @Shar 026.jpg:The parts come nicely packed and can be stored and transported in this box. @Shar 028.jpg:The protective tray pulled out of the box. @Shar 029.jpg:The vertical stabilizer and rudder came ready to fly. @Shar 027.jpg:The instruction manual in four languages. @Shar 030.jpg:Side view of the motor, prop, spinner and fuselage @Shar 031.jpg:A view looking back at the motor from the front. Good motor cooling with this setup. @Shar 037.jpg:The ailerons are marked on the wing and can be cut out and wired to have working ailerons very easily. @Shar 036.jpg:The cockpit with pilot covers the rudder and elevator servos, the ESC, receiver and battery. @Shar 033.jpg:The blue section is the wind saddle on the fuselage and the white area is the cockpit. @Shar 034.jpg:The cockpit comes with the servos and the ESC connector all in place and ready to connect to a receiver. !Kit Contents *Kit Contents *Canopy *Fuselage with Vertical Stabilizer & Rudder *Two wing panels *Two tail panels *Wing retainer screw *Two sets Hook and Loop tape *Two micro MS-12015 servos *Brushless Permax BL-O 2816-1450 motor *Brushless MULTIcont BL-12 SD ESC *Screwdriver *Allen Key and set screws *Instruction Manual @Shar 040.jpg:Here are the parts to the kit laid out for inspection. *Additional Items I Supplied *6-channel Optima 6 receiver *6-channel Optic 6 transmitter *3-cell 850 mAh LiPo battery *Balanced LiPo battery charger *Optional Float *PROMOTED FEATURES *Powerful brushless motor *Robust Construction *Benign flying qualities as sold *Clear canopy with racing pilot *Ready to Fly in minutes *Aileron upgrades *Optional protective landing skid *Undercarriage with wheels option *Snap on Floats option *Multilights option *Original box doubles as transport and storage box !Optional Equipment for the Shark *Optional Equipment Available Separately *Aileron Upgrade Set *Shark Under Carriage Set *Shark Floats Set *Shark Landing Skid *Multilight with 5 LEDs *Combo MULTIcharger !Assembly Multiplex's Elapor foam is a great material for making planes. It has proven durable and comes with a smooth finish that handles both paint and decals well and can look great for years of operation. Glue is NOT NEEDED for the assembly of the Shark. However, if repairs are required it requires that you use the glues they recommend. Do not use epoxy! It will break free of the surface during use. Do not use white glue as it will also break free from the surface while in use. DO USE Medium Thick CA and Kicker for repairs should repairs be necessary. Zacki Elapor is recommended if available to you as the adhesive of choice. Here is a quote from the instructions. Ignore this at your own risk if making repairs! "Please be sure to use cyano-acrylate glue exclusively, preferably in conjunction with cyano activator (kicker). We recommend medium-viscosity cyano. This is the procedure: spray cyano activator on one of the Elapor parts; allow it to air-dry, then apply cyano adhesive to the other part. Join the parts, IMMEDIATELY position them accurately, and wait a few seconds for the glue to harden." You only have a few seconds to align the parts so practice fit them before you apply the cyano to the surface of the second part. !!Construction Time It was promoted that the plane could be RTF in ten minutes. To me that means assembled and radio installed. It doesn't include time to read the instructions or charge the battery. I took the challenge and assembled the plane as fast as I could. I later took it apart to shoot pictures of the assembly. I will post my assembly time here. Before starting the stop watch I laid out all of the parts and read the instruction manual. I could have done the assembly without reading the manual and would have done it correctly. *Assembly Time *Assemble wing and attach to fuselage: 45 seconds *Install full flying horizontal stabilizers into fuselage: 20 seconds *Connect and install receiver: 2 minutes and 10 seconds *Bind and program transmitter: 5 minutes and 25 seconds *Install battery and balance plane 1 minute and 10 seconds *Total to RTF: 9 minutes 50 seconds *This is one of the very few times I have been able to assemble something as quickly as advertised! !!Fuselage The fuselage comes with the rudder and elevator servos, motor and ESC already installed. It is ready to have the wing and tail surfaces installed. !!Radio Installation I removed the canopy and installed my selected receiver into the fuselage. I plugged the rudder, elevator and throttle connectors into the proper channels for my radio system. With my receiver bound to my transmitter I made sure the rudder and elevator servos were centered. I later tested that the control surfaces were moving in the proper directions and were properly centered. If I was a beginner and wasn't certain what the proper direction for the control surfaces should be I could check the drawings on page 17 of the manual and I might become more confused. SERIOUSLY: PLEASE NOTE: Drawing D is correct on the rudder for how we set up here in North America. Drawings E & F are for other areas of the world. Here in North America we use Mode 2 and the elevator control is on the right stick and the throttle is on the left stick. The drawing of the transmitter in picture E should be showing the right stick and not the left stick being moved for how we fly here in North America. In drawing F the left stick should be moved to control the throttle and turn the propeller for Mode 2. The drawings are for Mode 1 pilots in other parts of the world. !!Wing Assembly The right and left wing panels slid and fit together and then fit onto the top of the fuselage in the wing saddle. Molded mounds on the bottom of the wing halves fit into the fuselage. The wing is secured in place there with one screw that can be secured with the supplied screwdriver. They caution not to over tighten the screw. @Shar 038.jpg:The right wing has the white receiving box for the connecting rod in the left wing. @Shar 039.jpg:The left wing has the metal connecting rod mounted in it. @Shar 042.jpg:The wing sections are sliding together. mounds in the center section will fit into molded spaces in the wing saddle. @Shar 043.jpg:The wing haves have been slid together and the wing is ready to mount to the fuselage. @Shar 032.jpg:The wing saddle in the fuselage has molded spaces for the mounds molded into the bottom of the wing to align the wing with the fuselage. @Shar 049.jpg:A single bolt installed through the hole seen in this picture secures the wing to the fuselage. @Shar 044.jpg:With the wing attached and the tail sections ready to install. The wings can be removed and taken apart by reversing the process and they and the rest of the plane can be stored and transported in the original box. !!Tail Insert the left hand tailplane into the space for it on the back left of the fuselage. Next push in the right hand tailplane until it snaps into position. @Shar 035.jpg:The horizontal stabilizers snap together after the connecting rod from the left one goes through this mount and controller. @Shar 045.jpg:The left side of the stabilizer installed through the mount. @Shar 046.jpg:The tail installed with the right half snapping onto the connecting rod from the left side. The tailplane can be removed for storage and transportation. Just press the outboard end of the locking lever on the right hand tailplane and pull the panel out and then remove the left panel. !!Completion @Shar 048.jpg:The assembled plane as viewed from the tail. @Shar 047.jpg:The assembled plane as seen from the nose. The recommend battery size was a 3-cell 950mAh pack. I didn't have a 950 size pack so I first tried a 1300mAh size pack. Even placing it all the way back in the battery area the Shark was quite nose heavy with that battery. I had a 3-cell 850mAh pack and tried that next. Moving it forward yet not all the way forward I was able to get the plane to balance on the recommend C/G and that is the pack I used in this review. If you have to buy a battery pack for your plane I recommend getting a 3-cell 950 mAh pack. The Center of Gravity was found by balancing the plane on raised points under each wing. The battery can be moved and that adjusts the plane's weight. By very quick trial and error I was able to obtain the balance point using my 3-cell 850mAh battery pack as described above. I later marked the location inside the fuselage for where to locate the battery pack. I have always found the balance points on Multiplex planes to be an excellent place to balance the plane for the initial flights and often I keep it right there as is the case with the Shark without the float. The C/G position is shown in drawing B on page 17 of the instructions. *The instruction manual recommends the following control movements for the Shark: *Rudder: 13mm side to side *Elevator: 10mm up and down Dual Rates were not given. (These adjustments were not made in the timed assembly but rather done later with the transmitter.) !Optional Accessories *Reviewer's Note I was advised by Multiplex that they were out of the floats and I said I would buy one and be happy to do the review. I ordered the float immediately and got one. However, by the time the plane shipped they were also out of the other accessories described below. I searched a number of US hobby websites and could not find any of them in stock and none were expected until late October. I reviewed the plane as sold and with the optional float that I bought and I describe what I observed with another pilot who had the optional landing gear on his Shark. !!Optional Working Ailerons The instruction manual on page 12 lists optional item # 65165 as the aileron upgrade set. In my internet search I found only a very few stores selling the Shark listing the aileron upgrade set and none had it in stock. The upgrade set includes two Hitec servos, the control rods and the aileron control horns. I think the aileron control rods and the aileron control horns should have been included with the Shark. (If necessary add the cost of those parts to the cost of the kit so they are immediately available.) The option to add ailerons will be there when the parts come back into stock. The more seasoned pilots will probably be able to add their own control horns to the ailerons and make control rods and simply purchase the small ailerons by themselves. !!Shark Landing Skid @Landing Protector.jpg:The Shark Landing Skid $5.99 This is designed to protect the bottom front section of the plane from damage on landing. When available I will get one to use for landing on hard surfaces that aren't suitable for the use of landing gear. It easily fits onto the bottom front of the Shark and is equally easy to remove. (Not available for this review.) !!Shark Undercarriage Set @undercarriage.jpg:The Shark Undercarriage Set $16.99 @undercarriage.jpg This is designed to allow the Shark to takeoff and land from hard ground or pavement and ideally using a runway. The undercarriage has two fixed main gear landing wheels and it snaps into place in the bottom of the fuselage. I saw a Shark with landing gear when visiting an out of town flying field. I talked with the pilot and saw it is was very quick and easy to install or remove them as they just snapped into a slot in the bottom of the fuselage. The plane tookoff and landed several times while I was at the field and even did some touch and goes. The gear worked fine every time. (I observed the gear in use only, no stick time with them for this review.) !!Shark Float Set @Floats.jpg:The Shark Float Set $19.99 The float comes nicely packaged with a bag of five round weights taped inside the box between foam and the side of the cardboard box. These weights are to be installed into the five round holes on the float. I used medium thick CA and kicker to secure these weights into the molded holes, one per hole. Like the wheeled undercarriage set above, the float set is secured in place by snapping it into the bottom of the Shark's fuselage. The float set turns the Shark into a float plane for taking off and landing from water but I think it would also work on smooth snow or lawn grass that is trimmed short and if the grass is wet I suspect it would work even better. (I have tested it off of short fairway like grass and it worked, but I have not tested it off of snow.) I have had a number of planes with floats and wheel options and this is one of the easiest, quickest and most affordable water float options that I have had the pleasure to operate. The transition back to a land based plane just requires unsnapping the float. With the Float unit attached the C/G should now be 2mm behind the aluminum wing spar. I recommend that you check the C/G carefully the first time the float is used. I just want to caution that whenever flying off of water a recovery method should be available that doesn't involve swimming. A boat or a fishing pole to cast and recover are two of the most popular recovery methods should the plane become stranded on the water. !Flying !!Basics The plane as sold is a three channel basic trainer/Sunday Flyer with throttle, rudder and elevator control. It can be flown as a trainer by a beginner or a nice relaxing Sunday flier by more experienced pilots. Its small size makes it easy to transport ready to fly and to fly from a small area such as an open unoccupied park, football field or a baseball diamond etc. However, just because she comes with only three channel control doesn't mean she has to be flown sedately. I will discuss that below under aerobatics. The "sedate" flying requires using only a little over half throttle. She flies very nicely in a glide or at lower throttle. Flying at limited throttle made the Shark a beginner friendly plane. !!Taking Off and Landing Flight can be started with a hand toss forward, using the optional wheeled undercarriage on a hard surface or from water using the optional float attachment. No matter which method is being used I always started the flight going into the wind. My first flights were started with hand tosses and she proved to be an easy plane to launch with 3/4 throttle and a firm level toss forward. I observed the Shark with undercarriage with wheels takeoff into the wind. Those I observed while visiting another field looked to takeoff easily and all takeoffs were uneventful. Most were performed smoothly and actually looked like a scale plane taking off. A couple were full throttle slam starts and she jerked up into the air rather quickly but not gracefully on those takeoffs. I have not yet been personally able to fly with the landing gear yet. I recommend several hand launches and takeoffs before taking off using the float. Using the float let the plane build up speed and when the plane gets on "the step" give some up elevator. At that point a little up elevator is needed me break the adhesion with the water surface and go into a climb. I like to climb straight into the wind to twenty feet or more before I start a turn and that has worked very well for me. My basic landing format remains the same whether I am going to slid in on grass, land with the wheels or with the floats. I do a three leg landing. I fly down wind, cross wind and then turn into the wind lined up with where I plan to land. I slowly reduce speed with my plane headed into the wind and do a slight flair before touchdown and then reduce throttle significantly or off with touchdown. I never make a sharp turn with reduced speed or at the last moment. I prefer to power up and fly around if necessary. By landing into any wind my plane stays relatively level on her home leg and I have had no trouble with landings. !!Aerobatics/Special Flight Performance As discussed above she is sold as a three channel plane. Rudder, elevator and throttle controlled planes are generally not known for their aerobatics. The Shark does excellent loops and has the power to do very large loops and can also do small loops. She can fly pretty tight turns for rudder controlled turns. I have flown her in tight circles around myself changing altitude but remaining at the center of her circles almost as if she was a control line plane. Flying her at the local park she is fun to fly real and imaginary slalom courses. She flies pretty fast at full throttle especially when keeping her in close to myself. I have great fun just bobbing and weaving around the park as quickly as she will turn and using elevator extremes to fly small "Mad Mouse" (The "Mad Mouse" was a small roller coast type ride with cars that held two people. The ride had a very small foot print but a lot of movement.) patterns around myself. Out at the reservoir she is fun flying close to the ground up and down in the bowl terrain around Mud Hen Cove. Snapping on her floats takes only a second and then she can land and takeoff from the water and not just fly over the water. So many of my large planes I need to fly at an established field and often in the established pattern at the flying field. It is fun to fly the Shark and just dart where ever I want to direct her. When the option aileron packages come back in stock even more wild flying options will be available. !!Is This For a Beginner? YES! As sold with the throttle, rudder and elevator control the plane makes a very nice trainer for a beginner, especially those who can limit their use of the throttle while learning. I recommend some flight simulator time and the help of an expert but the plane can be a very nice trainer for the person who has throttle control. I recommend Mastery of flight with the plane as sold being accomplished by a Beginner before the optional aileron servos are added to the Shark. As discussed above, Elapor is a tough foam and can be glued back together if there is a crash. If necessary Multiplex sells the separate parts so the Beginner can get back in the air quickly even if they experience a crash. !!Flight Video/Photo Gallery @Shark 017.jpg @Shark 016.jpg @Shark 006.jpg @Shark 008.jpg @Shark 010.jpg @Shark 013.jpg @Shark 020.jpg @Shark 021.jpg @Shark 024.jpg Video flying the Shark at a small park in Modesto.
!!With the Float @vent 044.jpg @vent 052.jpg @vent 070.jpg @vent 040.jpg @vent 046.jpg @vent 047.jpg Video flying the Shark with the float at Mud Hen Cove.
!Conclusion She assemblies quickly as advertised! She can fit in the trunk of my car and be ready to fly at a moments notice. With small stick movements she can be a very steady Sunday Flier. With full stick movements and slamming her around she can be a blast to fly in even a relatively small space. Just don't limit your thinking as to what she can do and she surprises you with just how agile and fun she is to fly and that is before getting to the accessories. If you live near the water I think the float is a must have. She is easy to fly off of the water and to land on the water as can be seen in the video above. As is to be expected the top speed is a bit slower and she is slower to respond with the float installed but she is still very fun to fly. I have seen, but not flown the Shark with main gear and it allows one to fly and land on runways and she handles that well. She is good for the beginner and the experienced flier as well. !Pluses & Minuses *Pluses *The plane is quick and easy to assembly *The plane can be stored and transported in the original box *The plane looks nice in the air and up close *Nice options with the aileron upgrade, landing gear and float *The Elapor is thick and rugged and should hold up well *The plane flies great as a rudder/elevator/throttle only plane *Minuses *Aileron control horns and rods not included with plane for the aileron upgrade *The options were all sold out at the time of this review !Thanks My thanks to Multiplex for supplying the Shark for this review. I want to thank Jeff Hunter for his assistance with this review and our editor Angela for her assistance as well. ImagesView all Images in thread
|
||||||
|
|
Last edited by Michael Heer; Oct 09, 2014 at 10:35 AM.
|
||||||
|
|
|
|
|
|
|
Saved by author for possible future use.
|
|
|
|
|
|
|
|
|
Thank you very much for taking the time to post a super review. I want one.
Dave |
|
|
|
|
|
|
|
|
What size prop does it take?
Ooops, I found it...5.5". Will a 6" fit? Similar size to the EasyStar or smaller? |
|
|
|
|
|
||
|
|
Quote:
I saw this and thought it might make a nice replacement for my aging, yet still supurbly flying EasyStar. I've gotten into FPV so that'd be me end goal with it. After more review it looks to be a bit small for full flown FPV setup. It doesn't seem it's available as a kit either, so I'll likely just stick to my ES and let this one pass me by. To bad, it is cute and I like the easy add on landing gear and float set. |
|
|
|
||
|
|
||
|
|
Quote:
John More details if you'd like, even a photo. PM if want more...... |
|
|
|
||
|
|
||
|
|
Quote:
|
|
|
|
||
|
|
|
|
|
This looks like a possible replacement for my late lamented Easy star 1. I fly from a canal boat so being able to take the horizontal stabiliser off will help with storage. Not sure whether the float option will be all that useful as the canals are often bordered by tall trees and I need to find a stretch thats pointing into wind. But as its an option there may be times when could be dead handy.
Has anyone tried getting into tight spaces with the floatplane option? Does the addition of the floats affect handling at all? Terry |
|
|
|
|
|
||
|
|
Quote:
John |
|
|
|
||
|
|
|
|
|
I watched a 'promotional' video of it taking off and landing on (calm) water and it did fine. Perhaps more power???
|
|
|
|
|
|
|
|
|
So you wonder who the jerkbag is that thought, "You know what would make this model 'pop'? A model pilot figure!"
Like, they made a module for a landing skid, and a module for running on water... The thing on top is also a module, but the best they could come up with for that section is "toy figurine"? |
|
|
|
|
|
|
|
|
It does fly a bit different with the float attached but no problem. Some float planes easily develop a pendulum effect with the floats on but no such problem here and probably because the float is right up next to the body. You can see multiple takeoff and landings with mine and I installed all five of the included weights that came with the floats. We needed to dial in a bit of up elevator and Jeff thinks four of the weights might have been enough. But quite honestly she performs very well off of water and the handling difference is just the additional up elevator.
As stated in my article I used an 800mAh battery. 1300 made her very nose heavy (without the float). If you use a bigger battery be prepared to counter balance. Good Flying! Mike H |
|
|
|


