|
|
|
|
|
Contest
Scale Build-Off 3 - 103 inch Dornier 24k Lasercut kit Prototype No.1
The parts are arriving today for the D0-24K and I’m getting ready to start the build. I want to give a quick rundown on how I plan to go, first, though. I plan to start with the fuselage. It’s the key to the rest of the build. It will be built in halves, left and right, then later be joined into a full structure. I expect, with the precision laser work by Gary and the engineering by Bart, that the initial assembly will go quickly. The fun begins when I have to start sheeting the fuselage with the 1/16” skin. With the thin skin I’ve decided that using a traditional planking method of narrow wood strips will not work well so I’m going to use large sheets of the wood instead. The forward part of the fuselage should not be too much of a problem since it is a pretty consistent shape with few compound curves. The rear fuselage, with it its upswept shape will be more of a challenge. I’ve been thinking about this for awhile and think that I will probably use bands of sheet wrapped around the fuselage between formers. More on that, later.
Before I start the actual assembly of parts I want to trace at least three formers so that I have their shape for future use as jig cradles and in the design for my proposed two piece fuselage modifications. Once I’ve cut the few extra parts for the split fuselage I plan to install them into each half and then continue to treat the fuselage as one piece. After joining the two fuselage halves and having done most of the sheeting, probably just down to the chines at this point, I can then separate the split halves for final finishing, as far as I can go. I’m going to leave the bottom of the fuselage open as long as possible in order finish any interior details that need doing. Doing it this way will ensure that the fuselage skin shows minimal transition at the split point and is then less noticeable. The split area will be located under the removable center gun turret and two thumb screws will be accessible in a 3 ½” diameter well, which should be enough for mine, and most other’s hands to fit into. Anyone with really big hands may find this a little tight, I suppose. That’s it for now. Any part of my plans may change as I go along, so it’s on with the build. Jim |
|
|
|
|
|
|
|
|
|
|
I'm watching this one as well
Bruce |
|
|
|
|
|
|
|
|
Clocked in Jim ,
It will be very cool to see my design turning in reality here. Mailman arrived yet ?  Cheers, Bart |
|
|
|
|
|
|
|
|
Stepping Aboard! Very cool!

|
|
|
|
|
|
|
|
|
Bart, thanks for posting those renders. It's hard to picture how everything goes together without the actual parts to see. I still haven't decided how I will do the skin sheeting. I'm thinking that it would be good to at least do some on each half before joining them, to give the structure some rigidity, or just wait until the sides are joined and do the whole thing while the structure is in cradle jigs. It will be easier to decide when I have the fuselage in front of me.
As far as having the parts right now, there was a mix up at the post office and the shipment was not delivered but I'll pick it up tomorrow and the build will be on its way. Jim |
|
|
|
|
|
|
|
|
Bart, that sounds good on the renders, as I go along. It will make the thread more interesting and pretty unique compared to most.
The parts are finally on my "work bench". The fuselage is going to be so long that it wouldn't work on my usual work area so I picked up a shelf plank, 8' x 18", and that will serve the purpose. The rest of the airplane components can easily be built on my regular work bench. The parts, laid out on the work bench, are pretty impressive. There must be 500 parts there. I wonder how long it would have taken me to do all those by hand? I've done a lot of scratch building in the past but this will be my first experience with a short kit like this and also for building an airplane with no plans. I think that this is going to be a fun build. I didn't get a chance to get started tonight but tomorrow I'm going to get with it. Jim |
|
|
|
|
|
|
|
|
Wow that looks like a beautifully cut kit very detailed and well though out.
Good luck w/ your build, Bruce |
|
|
|
|
|
|
|
|
Jim ,
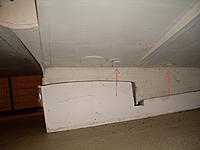
Here someting i want you to think about. The real Do24 had a ventilating system for the step so the plane would get on step more easy. This would be a great addition to this model too as we tend to fly it of mirror flat lake's  I attached some pictures of this subject . . Cheers, Bart ImagesView all Images in thread
|
|
|
|
|
|
|
|
|
Thanks, Bart. Gary and I were talking about this the other day so I am definitely going to see how it would work out
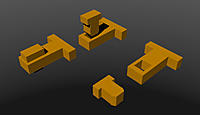
I started some preliminary construction today, getting the extra parts made up for my split fuselage mod. The parts are all cut (doing it with a jig saw makes me appreciate the laser cutting). At the split, the rear split former is glued to the H33 former. The forward split former will stand alone but will be keyed into the top and bottom keel pieces. On the forward split former I'll add a narrow doubler along its edge to give more gluing surface for the fuselage skin. The split formers are keyed together with CF pins and there is a set of magnets at the lower corners on each side to keep the forward and rear fuselage sections together as tight as possible. Thumb screws will bolt the two sections together. The split former assemblies will be installed along with all the other formers. After sheeting the fuselage, the forward and rear fuselage halves can be separated and a sheet of 1/64" ply will be added to each face to reinforce and water seal the halves. The mod will add 4 ounces to the airplane weight. I hate to do it but I think that having a fuselage that I can get into my truck will be worth the weight penalty. Jim ImagesView all Images in thread
|
|
|
|


