|
|
|
|
|
Build Log
58" Eastbourne Monoplane by Peter Rake
This will be the build log
Here's what I've found so far in addition to Pete's drawings: Eastbourne Aviation Company Monoplane The E.A.C. Monoplane was the first of four designs to be built by the Eastbourne Aviation Company of Eastbourne, Sussex, which was founded by F. B. Fowler, who took his Royal Aero Club Aviator's Certificate No. 175 on 16th January, 1912, flying one of his own flying-school's Bleriots. On 29th October, 1912. Mons. E. L. Gassier, a Swiss pupil of the school, passed the tests for his certificate No. 350 using a Bleriot also. An interest in designing led Emile Gassier to join the Company and, assisted by Fowler, he drew up a single-seat tractor monoplane which was built during 1913. The engine chosen was the three-cylinder 35 h.p. Anzani radial, which was mounted on the nose of a rectangular-section fuselage, the deep belly of which tapered to a horizontal knife-edge at the tail, and which was metal-covered as far back as the rear of the cockpit. A one-piece elevator was fitted, operating below the cut-out in the rudder, which was strut-braced to the top of the fuselage in the absence of a fixed fin. The parallel-chord wings were mounted just below the upper longerons, and were unusual in that inter-connected ailerons were embodied in place of the warping more commonly employed in monoplanes at that time, and this eliminated the twisting strains inherent in the warping system. The result was a great improvement in flying characteristics. The flying wires were connected to an under-fuselage cabane, relieving the undercarriage of such additional stresses, while the landing loads were taken by the wires supported by the struts in front of the cockpit. Springing of the undercarriage axle was devised by allowing it to move vertically in slots cut in the vee-struts against rubber cord in tension. The Anzani engine drove a Rapid propeller of 7 ft. diameter. The machine was very pleasant to fly; anticipated private orders were prevented by the War. SPECIFICATION Description: Single-seat tractor monoplane. Wooden structure, fabric covered. Manufacturers: Eastbourne Aviation Co. Ltd., Eastbourne, Sussex. Power Plant: 35 h.p. Anzani. Dimensions: Span, 29 ft. 2 ins. Length, 21 ft. Wing area, 135 sq. ft. Performance: Cruising speed, 50 m.p.h. |
|
Last edited by Old_Pilot; Dec 31, 2013 at 03:55 PM.
|
|
|
|
|
|
|
|
|
I think that looks great! That would be a really nice model to cover in silk, which would also add to the authentic look of a woven skin.
The pull-pull is really easy to do. You can use a nice strong thread. Let's use the rudder as an example. Drill a small toothpick sized hole in your control surface. Stick a toothpick through and clip it off at the desired length. I like to put it exactly halfway through the rudder and then clip off the pointy ends at around 5/8" or so on either side. On your servo, use a pivot arm with two sides, since this will be pull-pull. Make sure you use a good quality servo that doesn't have recentering problems. I suggest Dymond. Start with one end of the toothpick in the rudder. With a drop of CA glue on the toothpick end, wrap the rigging string a number of times around the toothpick and let that dry a bit. Then pull it through the fuselage and thread it through the outermost hole in the opposite side of the pivot arm on the servo, (just one pass through the hole), then thread it back through the outermost hole on the other side of the pivot arm, and then back to the rudder, and do the same thing, drip CA glue on the other side of the toothpick and wrap several times around and let that dry. Make sure it's reasonably taut. Now, it's fixed on the rudder end, but still adjustable on the servo end. When you're happy with the exact centering of the rudder servo (recycle power a number of times to make sure), then drip either epoxy, CA glue, or your choice, in the holes of the pivot arm that the thread passed through. When dry, voila! You have your pull-pull set up done. I have used dental floss with success in the past. Or any good strong thread that doesn't easily stretch. Rigging string for a model tall masted sailing ship would work too. Or thread that is used to sew leather perhaps. On all that other rigging, that's going to be a real chore. You could set this up for a tail-feather 3 channel flyer if you don't want to mess with wing warping for ailerons. |
|
|
|
|
|
|
|
|
You're not kidding about flight time.
It's warm today, but with 22 mph winds, and 20 mph average for the next 10 days' forecast, I don't know how in the heck I'm supposed to have any air time. I believe my best chance will be to maiden the Vampire jet in Albuquerque. This would be a powered flight, on landing gear wheels. That way, if something doesn't go right, I could settle back down on the wheels and make corrections, instead of being committed with a no-gear bungie "do or die" launch. The contest is over end of March or something, isn't it? |
|
|
|
|
|
|
|
|
Yea! I'm getting ready to build my own Eastbourne (the Hobby Lobby kit). I don't know what kit, if it even is a kit you are using but I will be looking closely at this thread anyway. Are you planning on putting ailerons on this bird? The wing should be big enough for a micro-servo.
Sub-scry-bed! 
|
|
|
Last edited by Fly Wheel; Dec 31, 2013 at 06:19 PM.
|
|
|
||
|
|
Quote:
|
|
|
Latest blog entry: Light weight adjustable airplane cradle
|
||
|
|
|
|
|
|
|
Latest blog entry: Light weight adjustable airplane cradle
|
|
|
|
|
|
|
There's always indoors...
|
|
Latest blog entry: OS Super Gemini 300 Review (November...
|
|
|
|
|
|
|
...A jet indoors?
That would have to be a pretty big building. There is an old B-17 hangar in Plainview, TX that I hear the local club gets together to fly in sometimes. But I'm not sure about maidening a jet in it. Well, I will try. If I don't make it, I don't make it. But I will try. The winds here are pretty notorious, so I will almost definitely have to travel to maiden it. |
|
|
|
|
|
|
|
|
It only has to fly long enough to pose for a picture.
|
|
Latest blog entry: OS Super Gemini 300 Review (November...
|
|
|
|
||
|
|
Quote:
 I'm already getting ideas from this thread for mine, for example the pull-pull system. The HL/AC kit uses a pull-pull for the rudder, but I think I may also apply it to the elevator as well, as this is the method used for all the control surfaces on the real plane. P.S. Builderdude, the Eastbourne used ailerons, one of the first monoplanes to do so 
|
|
|
|
||
|
|
||
|
|
Quote:
I know the original had ailerons, and it looks like OP is planning to also. I was suggesting that he could increase dihedral and not do ailerons if he so desired. 
|
|
|
|
||
|
|
|
|
|
Charlie,
From my point of view preparing the design for publication is more important. Laser cut parts are already available for those wanting them, but the design has yet to be proven. Despite looking for it on the photos, sketches and 3 view I can see no evidence of an external rudder linkage, so the plan shows an internal arrangement. Far and away the best material for closed loop cables and rigging on a model this size is nylon coated beading wire. Nylon coated trace is good too but often comes in strange colours. Pete |
|
|
|
|
|
|
|
|
Pete,
Aha ! I was guessing about the Eastbourne being kitted.......this is a proof-of-design build for publication....gotcha. Though I'd talked to you about it earlier, I really had not planned on an external rudder linkage. I can keep it internal, per the plans (or something really, really, close), though I think that the linkage should be accessible without having to cut the covering once installed. C |
|
Latest blog entry: Light weight adjustable airplane cradle
|
|
|
|
|
|
|
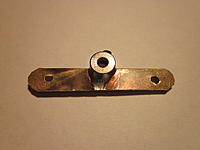
Rudder Linkage/control horn
Well, that worked better than I'd hoped ! didn't end up with gloppy solder !
Saw cut a notch (.063 blade) in a 1/16" diameter wheel collar about halfway through, just opposite the set screw, then soldered a piece of .015 brass shim stock into the groove. Drilled out the center hole so the rudder post would fit. Made two of them just in case. Took about 10 minutes once I'd decided how to do it (that took two days) ! Planning for split wire links so the brass won't cut the control cables. |
|
Last edited by Old_Pilot; Jan 02, 2014 at 07:49 AM.
|
|
|
|
|
|
|
New toys
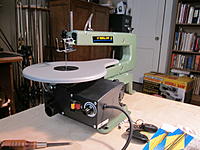
Broke another band saw blade this morning......the little butt weld that joins the two ends just doesn't hold up to the work hardening as the blade goes around the idlers....got tired of paying Sears $25.00 for blade sets, so I picked this up on sale at local Harbor Freight for $49.00...(6) blades are only $4.00......and the little magnifier/alligator clamp set was $3.00.....
No excuses now |
|
Latest blog entry: Light weight adjustable airplane cradle
|
|


