|
|
|
|
|
Horizon Hobby ParkZone Albatros D. Va BNF Review
!Introduction
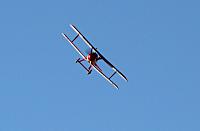
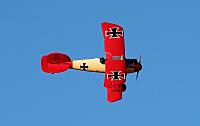
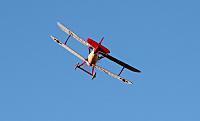
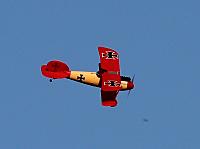
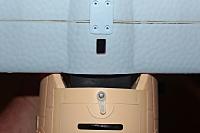
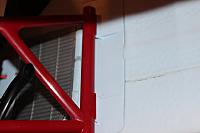
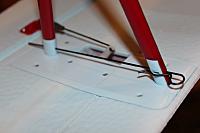
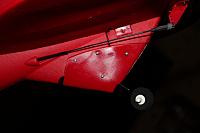
| spec2 | | @P51 153.jpg |> <b>Wingspan:</b> |< 42.3" top wing |> <b>Weight:</b> |< 43.4 oz. |> <b>Length:</b> |< 35 inches |> <b>Propeller:</b> |< 10 x 8 |> <b>Servos:</b> |< 2 digital & 2 analog servos installed |> <b>Transmitter:</b> |< Spektrum DX7s |> <b>Receiver:</b> |< Spektrum AR600 |> <b>Battery:</b> |< 3S 1800mAh 15C LiPo |> <b>Motor:</b> |< 960kV-480 electric Brushless |> <b>ESC:</b> |< EFL 30A Pro SB Brushless ESC |> <b>Manufacturer:</b> |< <a href=http://www.parkzone.com>ParkZone</a> |> <b>Available From:</b> |< <a href=http://www.horizonhobby.com/products/albatros-d-va-wwi-bnf-PKZ5980>Horizon Hobby</a> |> <b>Price:</b> |< $249.99 BNF The ParkZone Albatros D. Va showed up in the hands of another pilot at our flying field and it: "Looked Marvelous!" I started tracking it with my camera and took some pictures and loved what I was seeing. The plane handled well and had plenty of power to perform nice aerobatics including loops, rolls, S turns, spins and more. With nice scale looks and good performance already known factors for me I jumped at the chance to review it. No surprise during this review just more details. I love this plane. Now for the rest of the story. @n17 050.jpg:Flying east into the rising sun returning from another dawn patrol. !Kit Contents *Kit Includes *Top wing with two servos installed *Bottom wing *Fuselage with motor, prop, ESC, two servos and pilot with scarf installed *Landing gear and wheels *Wing struts and hardware *Instruction manual *3-cell 1800mAh LiPo battery pack *LiPo Charger |spec | @alb 005.jpg |spec | @alb 011.jpg | @alb 012.jpg |spec | @alb 002.jpg | @alb 003.jpg | @alb 004.jpg |spec | @alb 009.jpg | @alb 010.jpg | @alb 014.jpg |spec | @alb 013.jpg | @alb 016.jpg !Assembly I!Wing The wings came fully assembled but they needed to be attached to the fuselage and struts needed to be attached between the outer sections of the wing. These wing attachments to the fuselage are discussed below in the Fuselage Section. !Fuselage !!Installing the Lower Wing and Landing Gear onto the Fuselage Per the instructions I started with the bottom of the fuselage facing up and the lower wing facing down. A tongue in the front of the lower wing slid into the front of the wing saddle and the back of the wing was secured to the fuselage with two 3 x 10mm screws. @alb 018.jpg: The tongue slips into the front of the wing saddle and the back of the lower wing was secured with two screws. With the lower wing installed the landing gear was then assembled following the instructions. The landing gear is made up of metal and plastic parts and they are held together with four 1.5 x 6mm screws at the axle cross piece. @Alb 011.jpg:The landing gear struts slid onto the axle and were secured to the plastic simulated shock absorbers with two screws to each side. @Alb 003.jpg:After the struts were assembled I slipped on a spacer, a wheel and a wheel collar on each side of the axle. @alb 019.jpg:The wheel is secured with the screw in the wheel collar on a flat spot on the axle. The landing gear has four metal wire pins that fit into the fuselage and these metal mounts were then secured in place with four mounting brackets that were secured with two 2.5 x 8mm screws each. @alb 015.jpg:This is one of the four molded mounts in the fuselage where the landing gear struts are secured. @alb 006.jpg:Some pins slipped right into place and others required some real effort on my part to get them to go in all the way. @alb 001.jpg:Plastic parts were secured over the bent wire with screws on each side of the wire on all four mounting positions to secure the landing gear to the fuselage. !!Mounting the Top Wing onto the plane The Cabane struts have two plastic parts at the top that slip into L brackets molded into the wing. Once in the wing's L brackets the Cabane struts were rolled into position. The Cabane struts were then secured to the side of the fuselage with two 3 x 10 screws to each side of the fuselage. With the top wing now secured to the fuselage I plugged in the two servo wires into the two female plugs extending up from the fuselage. It was now time to install the outer wing struts. @Alb 006.jpg:Installing the Cabane struts into the L bracket on the underside of the top wing. @Alb 002.jpg:With the Cabane struts secured in the L bracket the struts were secured to each side of the fuselage with two screws. The outer wing struts install into the top side of the lower wing just as the Cabane struts were secured into the upper wing only this time there is only one piece and one L bracket per wing side. The outer wing struts were rotated up and slipped into mounting pieces on the underside of the top wing and there they were secured to the top wing with a retainer pin on each side. Very simple process and a nice design for the assembly. @alb 007.jpg:The outer strut installed in the L bracket and being rotated up into position. @Alb 008.jpg:Once the outer strut was in proper position with the mounts from the upper wing the strut was secured in place with the retainer pin. !!Radio Installation Since it was necessary to move the rudder to one side to install the vertical stabilizer and elevator I decided to bind the receiver before installing the vertical stabilizer. A binding extension wire runs from the receiver into the battery bay that is accessed in the front bottom of the fuselage. I connected the supplied binding plug into the extension wire ant with my DX7s transmitter by me I connected the flight battery pack to the ESC and bound the receiver to an available channel on my transmitter. Once that was complete I held the rudder over for a hard right turn and disconnected the battery pack from the ESC with the rudder extended out hard to the right. @Alb 009.jpg:The binding extension wire is in the battery compartment in the front underside of the plane. After the Albatros was fully assembled and the elevator control horn connected to the elevator control rod; I came back and made sure all the servos were moving in the proper control directions. !!Tail The horizontal stabilizer slid onto the back of the fuselage in a molded form that nicely aligned the horizontal stabilizer with the fuselage and the wings. The stabilizer was then secured in place with one screw that is mounted right under the rudder when it is in the neutral position. Since I had it turned out to a hard right position I was able to install the mounting bolt through the vertical stabilizer and into the fuselage. With the stabilizer secured in position I connected the elevator control rod to the elevator control horn on the elevator. @alB 003.jpg:The one bolt that secures the horizontal stabilizer can be partially seen under the rudder. The last portion of the assembly required a decision by me of which tail option to use. A plastic tail piece with a tail skid is one option and would be more scale like. The other option allowed me to install a steerable tail wheel to my Albatros. The tail skid piece is secured to the underside of the fuselage with four supplied 1.5 x 8mm screws. The tail wheel mount required me to disconnect the rudder control horn and snake the top of the landing gear wire from below, through a slot molded into the vertical stabilizer and then place the top of the wire into the rudder control horn position and secure it by reattaching the control horn back into position and securing the plastic tail wheel mount under the fuselage with that optional mount using the four supplied 1.5 x 8mm screws. @Alb 010.jpg:The mounting area on the tail accepts either a piece with a skid or a piece to secure a tail wheel. @Alb 012.jpg:Pick the tail gear that you want, skid or tail wheel. @alB 001.jpg:Using the tail wheel required removing the rudder control horn and installing the wire into the rudder for steering and re-securing the control horn over it. @alB 002.jpg:The landing wheel wire is secured behind this plastic housing at the bottom of the fuselage. !!Completion With the battery charged I installed it into the battery bay on the front underside of the fuselage and checked to make sure the plane had the proper Center of Gravity (It did!) and adjust the throws on my transmitter to make sure they matched the recommendations for both low and high rates. !Flying !!Basics The Albatros has four channel control with throttle, ailerons, elevator and rudder. The plane can be flown without using the rudder but I strongly recommend that you use the rudder and use it sometimes without the ailerons as I get slides from my Albatros that seem very appropriate for a World War I fighter plane. Flying with a combination of ailerons rudder and elevator give the best control and allows me to fly the Albatros very smoothly with small movements to wild with full throttle and full stick movements. With low rates and flown smoothly she handles like a nice Sunday fighter, I mean flyer. Put an SE5a in the air and we can have a great mock dogfight. In fact ParkZone has thought about just that possibility. They sell Sonic Combat Modules that let you have combat between the Albatros and the SE5a. I have used their previous combat modules sold for prior planes and they worked very well. If I find an opponent with an SE5a I will see if he is interested in getting the modules and mixing it up with our planes. I am sure it will be fun from past experience with other planes. On basic flight the motor supplies lots of power at full throttle and I prefer to adjust the throttle and mix slow flight with full throttle flight. It gives slightly longer flight times and to me it makes the fast bursts seem even faster than just going full out for long periods. !!Taking Off and Landing As with any biplane cross wind takeoffs and landings in a strong breeze can cause the down wind side of the bottom wing to touch the ground at times. I avoid this by taking off and landing into the wind and have had no problems doing so. Takeoffs can be achieved in 15 feet or less or done more slowly can be done in a more scale like fashion. I fly off of dirt as seen in the video and off of pavement. I only fly off of grass on occasion and have not yet done so with my Albatros. Landings have been smoothest when landing with some throttle on and this is especially true in soft dirt. I don't land with the motor off but those that due tend to nose over a bit unless they properly flair just before touch down. She is not a hard plane to takeoff or land into the wind. In a mild cross wind the rudder has proven effective in letting me steer the plane down the runway. In a higher wind it is fun to make passes down the runway while holding against the rudder alone against cross wind. However when landing I will try to make a landing as straight into the wind as I can. !!Aerobatics/Special Flight Performance With its four ailerons the SE5a appeared to me to be a bit more agile in turning when I observed it flying by itself. However, when chasing an SE5a or being chased the Albatros proved to be very agile in our mock combat exercises. As stated in the introduction the Albatros has proven to be a very acrobatic plane. At full throttle and starting from a shallow climb I can do nice back to back aileron rolls. A nice large half loop transitioning to a dive with an S-turn looks great. With power on low a vertical dive with spin looks like a death spin. To get out just apply throttle, counter rudder and up elevator. (I was sure to give myself a lot of air space beneath my plane when first trying this trick.) I started flying a little bit higher and performing stunts at lower speeds and obtained some waddle in the air that looked realistic to my eye for how I thought a real Albatros might have flown. !!Is This For a Beginner? NO! This plane is recommended for an intermediate or better pilot. The detailed undercarriage (landing gear) is made with a combination of plastic and metal parts and is not designed for the kind of abuse many beginners would inflict on the landing gear. The plane is well behaved and an experienced pilot should have no problem handling the Albatros D. Va. !!Flight Video/Photo Gallery *DAWN PATROL: Sunrise The first six pictures below were taken within a half hour of sunrise which can make for some interesting lighting. The rest of the pictures were taken mid-morning. This is a very photogenic plane and looks very pleasing to my eye throughout the flight. |spec | @n17 048.jpg |spec | @n17 050.jpg | @n17 051.jpg |spec | @n17 053.jpg | @n17 054.jpg | @n17 055.jpg |spec | @P51 151.jpg |spec | @P51 152.jpg | @P51 154.jpg |spec | @P51 155.jpg | @P51 156.jpg | @P51 158.jpg |spec | @P51 160.jpg | @P51 159.jpg |spec | @P51 161.jpg <iframe width="620" height="360" src="http:// www.youtube-nocookie.com/embed/Q_vLwsxO2_A?rel=0" frameborder="0" allowfullscreen></iframe> +Albatros.wmv:The Albatros flies an early morning mission shortly after sunrise. !Conclusion I have found the ParkZone Albatros to be a very fun plane to fly. It handles nicely but flies differently from any of my other ParkZone fighters and that includes the SE5a which I don't own but have flown several times. In my normal flying I experienced no problems with the handling or performance of the Albatros. If I am flying too slowly and make too sharp a turn, I have stalled my Albatros but recovered easily as I did this with altitude that allowed for recovery. Just flying normally I have had no control problems at all. I think she looks great as sold but I appreciate the many colorful paint schemes posted by E-Zone members. I will paint the display engine on my Albatros to give added realism to my plane. !Pluses and Minuses *Pluses *Assembly was quick and easy. *I like the designed hinges for connecting the struts to the top wing and lower wing. *The pins made connecting the outer struts to the top wing very easy and I don't notice them in flight. *The plane to this beholder looks great on the ground or in the air. *Easy to grab and take to the field ready to fly. *Optional tail skid/wheel depending on your flying field *Minuses *One or two of the four landing gear assembly pins took real effort for me to push into the fuselage. !Thanks My thanks to Dick Andersen with the media in this review, ParkZone/Horizon Hobby for supplying the Albatros for review and our editor, Angela, for her assistance with this article. ImagesView all Images in thread
|
|
|
Last edited by Michael Heer; Nov 22, 2012 at 09:29 PM.
|
|
|
|
|
|
|
|
No! It can be flown at what appears to be scale speed! It can also be flown much faster. Up to the individual pilot to decide. Mike H
|
|
|
|
|
|
|
|
|
This is a very good review. My experience matches Michaels perfectly, right down the the landing gear pins being hard to push into the fuselage. I also have the PZ SE5 and they are indeed different so don't think that buying the second plane is the same experience
Paul |
|
|
|
|
|
|
|
|
Gents: i mostly have ww2 warbirds in my hanger(all electric pz and e-flite) I love my albetros the most because it's different than all the others i have.The alby is just a relaxing pleasure to fly. Also it flies very well-slow flybys at eye level are just beautiful. I have never regreted a penny spent on buying the pz alby. i LOVE MY ALBY SO MUCH -I DONT CARE WHAT THE WIFE SAYS-I MIGHT GET A TATOO OF IT ON MY SMELLY -HAIRY LITTLE BODY

|
|
|
|
|
|
|
|
|
Great review, and dead-on. I have 60+ trouble-free flights on mine, as of this morning--quite a " looker" against a sunrise and broken clouds. It can be flown very scale, looking for all the world like the reproductions flying at Old Rhinebeck. I can't wait to see the third in the series!
|
|
|
|
|
|
|
|
|
Sadly, no. I doubt it would be a triplane, Camel or Nieuport, for balance reasons. I know most people doubt they'd do 2 German planes in a row, but I wouldn't be shocked to see a D-VII, which I think would fly (and sell) well. If it's not a D-VII then a SPAD, I think. I'll make room for whatever it is!
|
|
|
|
|
|
|
|
|
Michael can you take some measurements of the radiator tube that sticks up on the top of the wing? Close up pictures would be nice too as I had a mid air last week with my son and that is the only part missing from the wing after I repaired the damage with glue. Since I had some dents I ended up weathering the wings to help cover up the damage

|
|
|
|
|
|
|
|
|
jrtubb,
Here you go. Hope this helps. Matt Andren Parkzone/Hobbyzone Product Development Horizon Hobby. |
|
|
|
|
|
Excellent, that is what I was looking for! Wish I could just buy this part instead of a complete wing. This plane is great and survived our mid air better then any balsa plane I had from the 90s! Even my son's Firebird did fine considering the impact and altitude we were at. Please keep making great products!
|
|
|
|
|
|
|
|
|
Thanks Matt for responding so quickly to the request. This really is a nice flying plane. Hopefully I will get a couple more chances to fly her again this year. I am in the process of of finishing up some indoor reviews but hopefully we will have some nice weather this Saturday and the Baron can get in a flight or two this weekend. Mike Heer
|
|
|
|
«
Previous Thread
|
Next Thread
»
| Thread Tools | |
| Similar Threads | |||||
| Category | Thread | Thread Starter | Forum | Replies | Last Post |
| Horizon Hobby ParkZone F-27Q Stryker BNF Review | Tram | Flying Wings | 11 | Feb 06, 2020 05:00 PM | |
| Horizon Hobby ParkZone Ultra-Micro F4U Corsair BNF Review | Spackles94 | Micro Ready-to-Fly | 18 | Aug 01, 2012 11:09 AM | |
| Horizon Hobby ParkZone Mk IX Spitfire BNF with Retracts Review | Michael Heer | Electric Warbirds | 18 | May 13, 2012 08:28 PM | |
| Horizon Hobby ParkZone Ultra-Micro Pole Cat BNF Review | sun.flyer | Micro Ready-to-Fly | 18 | Feb 08, 2012 12:37 PM | |
