|
|
||
|
Thread OP
|
Quote:
The motors are the coreless motors like the ones used in micro R/C helicopters. I got these with the kit from Scale Model Castings, but you can find them just use Google.com and search on coreless motor. How will it resist water? That is the best question......there are very tiny o-rings, super tiny, and that gets pushed down on the shaft between the propellor and motor. Liberal amount of silicon grease and we will see how it lasts. @War Fish Thank you Paul. You will be at the regatta in Texas this weekend right? Take lots of pictures! |
|
|
|
||


|
|
|
|
|
|
|
the pager motors have the rear sealed and tight shaft tolerances, so water doesnt really hurt them. i ran my sub to around 4 feet depth and for several minutes at a time and those motors are fine without any extra sealing needed. if Rick added o-rings, i'd use them anyways for extra protection.
|
|
|
|
|
|
|
|
Thread OP
|
I mentioned earlier about when the arms were being built that I messed up the holes while pinning them. So in my brilliant way of thinking, I tried epoxy, that did not hold, so I thought (it gets more scary than this!) if I put a drop of solder on the broken hole, that would fix it..... I know that the casting white metal is a low temperature metal and somewhere I thought I could be under the the 500 degree F that I would be safe, well not so. I melted the piece. Later I will post pictures. I have a couple of ideas how to fix it, one is make a mold with the potters clay and cast a new arm (there was enough white metal on the sprue that I could do this) or two, get some square brass rod and fabricate it. I have a little time.
|
|
|
|
|
|
|
|
Thread OP
|
Bgnome, thank you! That is a very nice offer. If you are going, I do not see many pictures of the basket (too late for me, but others will thank you), more shots of the under carriage particularly near the front. Close up of the arms. I did my railing even, but one side does not match the other (that is another area I have seen a lot of changes) - the railings are stowed, all of the underwater shots that I have seen show the decks minus railings. Like the Gato, some people put railings on because that is how most of the pictures have them, but there are those that do not put them on because while on patrol they were stowed. I put railings on because I can! Sorry for the digress there, I know the light bar! Good shots detailing the corners, hinges, and how close or far from the bow cage protecting the cameras, that would help!!
Bgnome, if you don't make it that is O.K. No pressure alright? |
|
|
Last edited by tchalfant; Oct 04, 2012 at 06:30 PM.
|
|
|
|
|
Thread OP
|
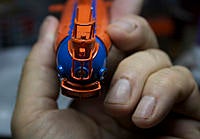
I have arms!
I decided to use some square brass and make the replacement for the melted arm. I could have made a mold, cast the new arm, and life goes (several hours later) on or cut a piece of square brass, drill a couple of holes and your off and running much quicker.  I also trimmed back the two plates closer to the arms. It was easy to do, I just used my flush cutting diagonal pliers. then rounded the edges.  Now I will paint and create the beam detail. |
|
|
|
|
|
|
|
Thread OP
|
It was bothering me that I forgot to pickle the metal and the thought of another layer of paint made me shudder. So, I stripped most of the paint off and dipped it in ferric chloride acid to etch the surface. This gives a better bond to the primer and paint.
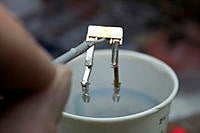 It is in the solution for only a few moments. You will see it slowly get darker. When you are done - no definitive answer on that one - I soak it in a water with sodium bicarbonate (baking powder). There will be a reaction of the acid still on the part and the water which has been made basic with the sodium bicarbonate. Swirl it around to make sure all the acid is neutralized. It will come out something like this. 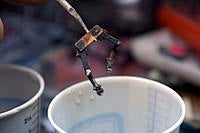 Rinse in fresh water and let dry. Now it is ready for paint. Also in the kit is some pierced brass, one narrow strip and two larger ones. These go on the undercarriage with the arms. 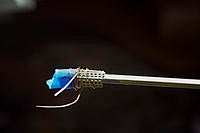 I used a piece of square brass that was the same size as the protrusion coming off the bow end of the keel (the protrusion is where the arms will attach). secured the pieces to the brass square. soldered the brass pieces together. Will clean up and paint as well. |
|
|
|
|
|
|
|
Thread OP
|
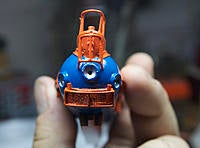
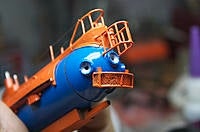
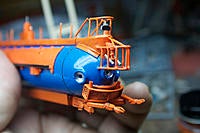
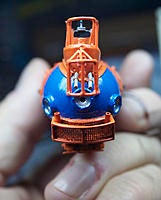
Attaching the perforated cage and test fitting the arms, I noticed that the arms bracket was sticking out from the end. The first two thoughts that came in my head is considering narrowing the bracket or cutting the cage back. Then it came to me that I could cut two slices in the cage that would clip onto the bracket.
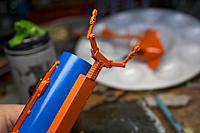 I also drilled a hole through the bracket and put a pin in to secure the arms. 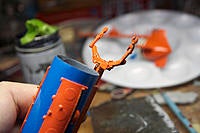 Another view of the pin and cage. 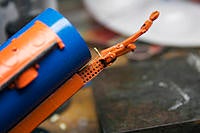 I can not help but enjoy how this looks- exploring the deep. 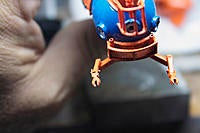 More views. 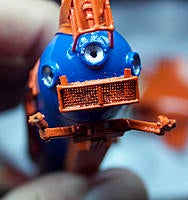 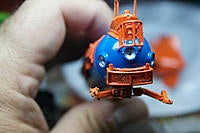 I need to save up my pennies for the RX and to work on the ballast piston and the lenses for the viewing ports. |
|
|
|
|
|
|
|
Thread OP
|
Working on some more things to knock off and break.
The cage above the top of the cameras. 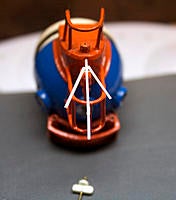 To the blurry left is the sonar (Sept. 13th posting) and on the right parts for the camera assembly. It was a whim to see if I could do this and it worked! 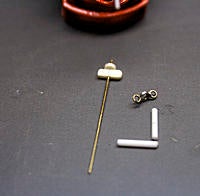 Here the parts are put together. I will clean up and paint.  When it is assembled, I will get more pictures. |
|
|
|

|
|
|
|
Thread OP
|
I need to re-do the top of the camera cage. I attached it to the dimple thinking that is what it was in the casting for, but my mistake. It actually gets attached to the edge of the deck as it begins the it's curve or another way to explain it is about 2mm above the dimple that I attached it to.
I see from another posting that you can get this sub for 20% off - that makes this kit $80 -I thought it was a fair price at $99 - now that is a deal! Check it out http://www.scalemodelcastings.com/ |
|
|
|
|
|
|
|
|
I keep following this build wondering if I am adventurous enough to take on this little guy. It would look amazing to have on a cradle of my huge icebreaker and launch with one of the cranes. Then disappear below the waves!
You're really doing a great job on it tchalfant! I have decided I cannot solder well enough to take on making this functional! I have a scale model castings kit I need to get started and do a product review for, so far all the castings look great, should be interesting to see it come together, I'll certainly keep an eye on your progress, this is a really neat looking unit! Keep up the good work Cheers G-O |
|
|
|
|
|
|
|
|
HI,
@ tchalfhant, THANKS a lot for the answer |
|
|
|
«
Previous Thread
|
Next Thread
»
| Thread Tools | |


| Similar Threads | |||||
| Category | Thread | Thread Starter | Forum | Replies | Last Post |
| Build Log | HMS Diamond Type 45 1/96 Scale | type45 | Scale Boats | 84 | Mar 22, 2013 06:12 PM |
| Discussion | Type 212 scale 1:96 | MFR | Submarines | 19 | Dec 28, 2012 01:54 PM |
| Sold | Deans Marine HMS Skirmisher � 1/96 scale | hampboats | Boats (FS/W) | 6 | Jun 08, 2012 03:02 PM |
| Discussion | 1/96 Aluminaut | SilentHunter | Submarines | 7 | May 31, 2011 07:13 PM |
| 1/96 scale Russian Typhoon model for sale. | Nemo | Submarines | 1 | Aug 21, 2005 03:35 PM | |