|
|
|
|
|
Thunder Tiger Mini Titan E325v2 FBL 450 ARF with CF Blades Review
<center>
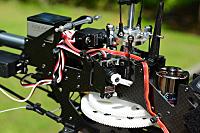
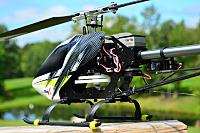
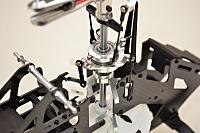
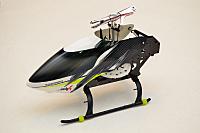
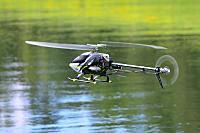
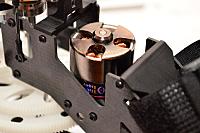
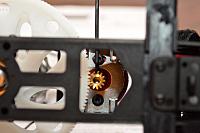
<img src="https://www.rcgroups.com/forums/showatt.php?attachmentid=5143635&stc=1"> <br> <table> <tr> <td width="500" align="left"> This new incarnation of the popular E325 Mini Titan V2, features a number of improvements over its predecessor. The most obvious difference is the flybarless head, but also featured is a torque tube driven tail right out of the box. There are a few different combos available, including the kit with blades, the kit with motor, esc, and blades, and then the same two combos but with the Mini Titan already assembled for you in ARF form. All versions come with a nice set of carbon fiber main blades, and the motor/esc that comes bundled is from Ace. The version I am reviewing is the stand alone ARF version, although I added in the same motor and ESC that comes with the combo kit. </td> </tr> </table> </center> !Kit Contents | spec2 | | @mt2.jpg |> <b>Main Rotor Diameter:</b> |< 29.3" (745mm) |> <b>Main Blade Length:</b> |< 12.8" (325mm) |> <b>Tail Blade Length:</b> |< 63mm |> <b>Weight:</b> |< 22oz (624g) |> <b>Transmitter:</b> |< Futaba 8FGS |> <b>Receiver:</b> |< Futaba R6203SB |> <b>Gyro:</b> |< Ace GT-5 |> <b>Cyclic Servos:</b> |< Futaba S3153MG |> <b>Tail Servos:</b> |< Futaba BLS257 |> <b>Battery:</b> |< Pulse 2200mah 65C 3S |> <b>Motor:</b> |< Ace OBL 29/37-10H |> <b>ESC:</b> |< Ace BLC-40 / Hacker X70 SB Pro |> <b>Manufacturer:</b> |< <a href=http://www.ttamerica.com>Thunder Tiger</a> |> <b>Available From:</b> |< Hobby Retailers |> <b>Price:</b> |< $279.99 - $359.97 | @mt7.jpg <center> | spec | @box1.jpg | @box2.jpg <table> <tr> <td width="600" align="left"> The Mini Titan arrived safely, boxed in an outer shipping carton. Opening up the MT's box revealed an egg crate style container that held the few main parts of the MT, the main body, tail, canopy, and blades. From a quick visual inspection, all that was required was to attach the boom and blades and the MT would be ready for electronics to be installed. </td> </tr> <tr> <td width="600" align="left"> The instruction manual is the same version that comes with the kit. This way you are covered if you decide to take the MT apart, whether it be for maintenance or from an unexpected "landing"... </td> </tr> </table> | spec | @boxcontents.jpg | @accessories.jpg <table> <tr> <td width="600" align="left"> Also included in the box was a foam blade holder, detailed instruction manual, velcro strap, assortment of allen wrenches, and a tube of thread lock. The boom supports and other miscellaneous hardware were sealed in a poly bag, as was the canopy. Thunder Tiger included a swash leveling tool and a pushrod sizing tool to help with assembly (if you choose to build it from a kit). </td> </tr> </table> </center> !Required Equipment <center> | spec | @electronics.jpg <table> <tr> <td width="600" align="left"> As mentioned earlier, the version used in the review was the bare bones kit that only came with blades. Therefore the rest of the items must be purchased separately. The motor and ESC used for the review turned out to be the same ones that are provided in the combo kit. <br> <br> Provided for the review were the following items to complete the Mini Titan. <br> <br> <b>Cyclic Servos -</b> <a href="http://www3.towerhobbies.com/cgi-bin/wti0001p?&I=LXSNP0&P=7" target="new">Futaba S3153MG</a><br> <b>Tail Servo -</b> <a href="http://www3.towerhobbies.com/cgi-bin/wti0001p?&I=LXWYU9&P=7" target="new">Futaba BLS257</a><br> <b>Motor -</b> <a href="http://www3.towerhobbies.com/cgi-bin/wti0001p?&I=LXAGJA&P=V" target="new">Thunder Tiger OBL-29/37-10H 3700kV brushless outrunner</a><br> <b>ESC -</b> <a href="http://www3.towerhobbies.com/cgi-bin/wti0001p?&I=LXAGJE&P=V" target="new">Thunder Tiger BLC-40 40A</a><br> <b>Gyro -</b> <a href="http://www3.towerhobbies.com/cgi-bin/wti0001p?&I=LXBMEB&P=7" target="new">Ace GT-5</a><br> <b>Receiver -</b> <a href="http://www3.towerhobbies.com/cgi-bin/wti0001p?&I=LXARPB&P=ML" target="new">Futaba R6203SB</a> <br> <br> Provided by me:<br> <br> <b>Batteries -</b> Pulse 2200mah 3S 65c<br> <b>Transmitter -</b> Futaba 8FGS </td> </tr> </table> </center> !Building <center> | spec | @airframe1.jpg | @airframe2.jpg <table> <tr> <td width="600" align="left"> Now I know what you are thinking. It's an ARF, and I should probably take it all apart to check that everything is thread locked together. Normally I would agree, and in fact this is exactly what I thought as I started final assembly. I tested a few screws, and discovered that they had been thread locked in place. I think that the distinction should be made between a kit with subassemblies and an ARF. A kit will quite often contain subassemblies that are required to be disassembled to add thread lock. I have a feeling that these subassemblies are just a method for the manufacturer to ensure that all parts are there. With an ARF, the heli has been assembled with the directive that it will be flown straight out of the box. So, based on the few screws I tested, and talking to other owners of the ARF version, I decided to take them at their word that everything was thread locked. I have many flights on the MT now, and am pleased to say that nothing fell off! </td> </tr> </table> | spec | @airframe3.jpg | @airframe5.jpg | @tail1.jpg | @tail2.jpg | spec | @tail3.jpg <table> <tr> <td width="600" align="left"> The first thing to do was to attach the boom. Of all places this was the step that I ran into an issue. To insert the boom, the screws in the boom clamp must be loosened. The majority of the screws in the MT are all button heads that require an allen wrench. I quickly found out that these screws are very soft, and for some reason the factory had tightened up the boom clamp screws so tight that I stripped a couple of them when trying to remove them. This was a little frustrating to say the least, but after a little work with a stripped screw removal tool, I had them out and was able to scrounge up some spares. </td> </tr> </table> | spec | @airframe4.jpg | @stripped.jpg <table> <tr> <td width="600" align="left"> The rest of the final assembly happened very quickly. Once the boom was secured I attached the boom braces, and popped on the canopy, and that was it! It was now ready for electronics. One other thing I wanted to show was the swash level tool and the pushrod sizing tool. The swash level tool makes it easier to level the swash when setting up your transmitter. The push rod sizing tool makes it very easy to get all your pushrods to the right size before putting them on the Mini Titan. </td> </tr> </table> | spec | @assembled1.jpg | @assembled2.jpg | @tools1.jpg | @leveller.jpg | spec | @linktool.jpg </center> !Electronics <center> <table> <tr> <td width="600" align="left"> The electronics install was very straightforward. I initially mounted the servos using the included grommets, but found there to be way too much play. I dug out some extra washers and hard mounted the servos instead. I mounted the motor to the plate and installed it into the Mini Titan. I was pleased to see that the designers had kept the end user in mind, and had made sure that the motor pinion was easy to adjust or replace by providing key holes in the side frames to slide tools through. </td> </tr> </table> | spec | @motor.jpg | @motor2.jpg | @pinion.jpg | @pinion2.jpg <table> <tr> <td width="600" align="left"> The GT-5 fit perfectly between the side frames, leaving all of the plugs easily accessible, including the ports for Spektrum satellite receivers. I mounted the receiver on the underside of the mounting plate using double sided foam tape. Following the instructions, I mounted the ESC to the underside of the main frame tray, using a combination of double sided tape and zip ties. </td> </tr> </table> | spec | @esc.jpg | @esc2.jpg <table> <tr> <td width="600" align="left"> I installed the tail servo per the instructions, and snapped in place the wire pushrod. With everything in place I tested the balance and found the MT to be tail heavy. To remedy this I moved the ESC up under the nose of the canopy. Unfortunately it was still tail heavy, so I grabbed some scrap carbon fiber rod and made up a slightly longer pushrod. This enable me to slide the tail servo as far forward on the boom as possible. Combined with the heavy 65c battery, this finally balanced the Mini Titan. I made the new pushrod by gluin in a few inches of threaded rod into each end of the carbon fiber tube, and then applying some heat shrink and thin C/A over each end to prevent fraying. </td> </tr> </table> | Spec | @tailservo.jpg | @tailservo2.jpg <table> <tr> <td width="600" align="left"> I programmed the Mini Titan with a linear pitch range of +/- 10 degrees, and followed the instruction manual for throttle settings. Everything is laid out clearly in the instruction manual, so setup is fairly easy. All that was left at this point was to take it out and put it in the air! </td> </tr> </table> | spec | @electronics2.jpg </center> !Flying <center> | spec | @fly1.jpg | @fly2.jpg <table> <tr> <td width="600" align="left"> <b>The Gyro Saga</b><br> <br> This was the first time I had been exposed to the GT-5, and right off the bat I was impressed with the touch pad interface and bright screen. Navigation is extremely easy, and I was browsing through menus comfortably in no time. However, the GT-5 proved to be difficult for me to set up, and this was largely in part to the instruction manual. I was completely perplexed initially, and enlisted the help of some of the Team Thunder Tiger guys at Joe Nall to see if we could get it set up. We experimented for a little while, but couldn't get anything that felt good. Luckily, my good buddy Gary Wright had figured out the puzzle that was the GT-5, and had been using it successfully on all of his machines. After talking at length with Gary, we decided that we would play around with it at a fly in we were both headed to in Virginia. To say that Gary has the GT-5 figured out is an understatement, after the first test flight he already had the GT-5 performing better than any of us. By the end of the weekend, we had the GT-5 set up extremely well, and I was finally able to see what the Mini Titan could do. Thanks to Gary's explanations, I also had a much better understanding of how flybarless gyros function in general, which made troubleshooting so much easier. Of course, Gary's tweaking didn't stop there, and we ended up adjusting a few more things to get it really locked in. I knew that Gary had started writing a plain English, practical guide to the GT-5, and I urged him to complete it. A few weeks later I got an email with the draft version, and it did wonders as far as educating me in general on how flybarless gyros work. Even if you don't have a GT-5, I highly recommend you read the guide, which can be found on Thunder Tiger USA's web site <a href="http://www.ttamerica.com/team/team-tips-heli.html" target="new">here</a>. </td> </tr> </table> | spec | @fly3.jpg | @fly4.jpg <table> <tr> <td width="600" align="left"> <b>Initial Flying</b><br> <br> Now that the gyro was sorted out, the fun began! Being a small helicopter, the agility on the 450 is incredible. It has a very quick, snappy feeling to it, and it didn't take long for me to get comfortable flying it. I didn't find any bad habits, and it flies just as good inverted as right side up. Fast forward and backwards flight is uneventful, I found that the Mini Titan tracks extremely well. It really is a joy to fly, and inspires confidence in the pilot. Despite it's size, it has a precision feeling to it that I've only found with larger helicopters. </td> </tr> </table> | spec | @fly5.jpg | @fly6.jpg <table> <tr> <td width="600" align="left"> <b>Another Little Bump</b><br> <br> By the time I was really starting to have fun with the Mini Titan, the temperature outside was soaring into the low hundreds with high humidity. With the ESC tucked under the canopy, the heat proved too much for it, and several times the thermal protection tripped, killing power mid flight. I should have paid more attention to the ESC, and unfortunately it ended up quitting altogether mid flight, causing a crash. I can say from experience now that the Mini Titan is very easy to repair! This happened right before IRCHA, and once again Gary came to the rescue with a Hacker X70B that he had in his spares box. Sitting in the hotel room one evening at IRCHA, with the blades removed and an optical tach in hand, we programmed the new ESC with head speeds of 2200/2600/3000. With the Hacker's governor feature, I was able to get a comfortable five minute flight at 3000 rpm. </td> </tr> </table> | spec | @fly7.jpg | @fly8.jpg <table> <tr> <td width="600" align="left"> <b>Many Flights Later</b><br> <br> Despite the few little bumps in the road, the Mini Titan has become the heli that I drag around with me everywhere I go. It's just too much fun, and I'm much more relaxed flying it than something bigger and greener! Even during the few issues that I had, I wanted to get through them because I could see that the Mini Titan was a good solid 450, which it has proved time and again through the many months of flying it now. None of the problems I had were the fault of the Mini Titan itself, and it waited patiently for me to sort them out, and rewarded me with an awesome flying machine. </td> </tr> </table> <table> <tr> <td width="600" align="left"> <b>What About Beginners?</b><br> <br> I think that the Mini Titan would be great for beginners. With the low parts count due to the flybarless head, and the parts availability from many of the top heli retailers, a beginner could have great success with it. Put some training gear on it, dial down the rates, and they would be good to go. The nice thing is that the Mini Titan will advance with your skills, and you'll not likely ever reach a point of wishing that the Mini Titan could do more. With machined aluminum parts covering most of the heli, there is simply no need for any upgrades - it performs extremely well right out of the box. </td> </tr> </table> </center> !Video/Photos <center> | spec | @fly9.jpg | spec | @fly10.jpg | @fly11.jpg | spec | @fly12.jpg | @fly13.jpg | @fly14.jpg | spec | @mt1.jpg | @mt2.jpg | spec | @mt3.jpg | spec | @mt4.jpg | @mt5.jpg | spec | @mt6.jpg | @mt7.jpg | @mt8.jpg | spec | @mt9.jpg | @mt10.jpg | spec | @mt11.jpg | @mt12.jpg | spec | @mt13.jpg | @mt14.jpg <a href="http://www.youtube.com/watch?v=Uaz88DP5yIQ" target="new">Youtube Link</a><br> <iframe width="640" height="360" src="http:// www.youtube.com/embed/Uaz88DP5yIQ" frameborder="0" allowfullscreen></iframe> </center> !Conclusion <center> <table> <tr> <td width="600" align="left"> The flybarless Mini Titan V2 is definitely a winner. From it's beautifully machined aluminum parts to its fantastic flight characteristics, it would be hard to find a 450 to beat it. With all the different options available when purchasing the kit, you can be sure to get exactly what you want. I'm impressed with the ARF configuration, and the fact that it has held together perfectly without me having to go through every nut and bolt. First and foremost I am a heli pilot, and if you see me out flying chances are you will see me flying the Mini Titan. </td> </tr> </table> <table> <tr> <td valign="top"> <b>Pros:</b><br> Minimum Assembly Time<br> Great Performer<br> Excellent Support and<br> Parts Availability </td> <td valign="top"> <b>Cons:</b><br> Over Torqued Screws<br> Soft Button Heads<br> Can Easily Become Tail Heavy </td> </tr> </table> </center> ImagesView all Images in thread
|
|
Last edited by Angela H; Oct 04, 2012 at 02:36 PM.
|
|
|
|
|
|
|
|
|
that control arm gauge is just the coolest!
|
|
Latest blog entry: www.gunnphotoservices.com
|
|
|
|
|
|
|
Sounds like you got a bad motor. Thankfully I haven't had such problems and my motor continues to run strong, even after an unintentional underwater excursion!
|
|
|
|
|
|
这是什么品牌的飞机? 台湾生产的? 说明书上有繁体中文
|
|
|
|
|
|
|
|
|
Good review & great piloting skills
Please consider novices to heli flying.
After all you do suggest with a few tweaks it is suitable. So for the uninitiated: Does 450 mean 450 mm bladespan? What was the cost? What's global availability like? Also you did strike some serious building problems not least of which was a difficult to achieve balance with the attendant DIY solution. Then a failed ESC due to heat - surely that's something that should just not happen. Better ESC choice, improved positioning or heatsinking - you don't tell us. My reaction was "potentially great kit spoiled by sloppy attention to detail by manufacturer but a BUY anyway". |
|
|
|
|
|
||
|
|
Quote:
 Basically any beginner should be comparing helicopter specs to see if they are roughly the same size machines or look at forum categories to see where specific brands are being discussed. Basically any beginner should be comparing helicopter specs to see if they are roughly the same size machines or look at forum categories to see where specific brands are being discussed. I would think the costs depended on what you want to install in this particular model as you added your own electronics, hopefully with decent electronics and comparison shopping, you put it together for around $500-$600. It would have been nice if he added up the cost for his components as the tail servo he used I priced out at $100. Might not have been the best place to shop but I might look for a lower priced servo. Maybe that one was top of line. A quick search on the Internet shows you can buy this from a wide variety of places. How convenient that is for some folks around the globe, I would think each person would have do a search like I did. Thunder Tiger is a pretty widely known brand and I believe their E325 class has been out as long as the Align 450 if I recall correctly. Funny about your reaction to the kit. Comments I see from users in a variety of forums indicate the mini Titan is a very good stable helicopter to learn on and easier to work on than the comparable Trex 450 and its clones. The balancing issue is a concern but that is first I have read about it versus some other threads I have been reading. Might do some more research on it. As for the ESC, I see a lot of folks replacing the Ace ESC with something. If I purchase this kit, it will be without the motor/esc combo. I have been looking a wide variety of kits to purchase and no matter what I read, you better be prepared to work at the helicopter build/setup. Someone is always replacing something in any kit I have read about. Something isn't quite right and you to spend time to figure out before getting dialed in to fly. |
|
|
|
||
«
Previous Thread
|
Next Thread
»
| Thread Tools | |
| Similar Threads | |||||
| Category | Thread | Thread Starter | Forum | Replies | Last Post |
| Sold | Thunder Tiger Mini Titan E325 3D Heli brand new NEW PRICE | d12bn | Aircraft - Electric - Helis (FS/W) | 8 | Jun 20, 2012 07:48 AM |
| Discussion | Thunder Tiger mini Titan 325 Cobra | noobhelipilot | Electric Heli Talk | 1 | Mar 29, 2012 02:05 PM |
| Sold | One New Thunder Tiger Mini Titan V2 Heli (450 Size Helicopter) | Buzz_Man | Aircraft - Electric - Helis (FS/W) | 0 | Mar 03, 2012 09:02 AM |
| Build Log | Thunder Tiger Mini Titan E325V2 Build Log | Skaluf | Mini Helis | 1 | Feb 01, 2011 08:08 PM |
| Sold | Thunder Tiger Mini Titan E325 ARF w/Motor, ESC, Gyro & Servos Cheap!!! 250!!! | FlMuPhi198 | Aircraft - Electric - Helis (FS/W) | 6 | Dec 21, 2009 07:17 AM |


