|
|
|
|
|
Oh that right, you live in that part of the country that actually has seasons as opossed to california with an almost endless sunshine.... Sorry could not help it. But you will have it finished in no time, I spent a year on mine, but I did build my own WTC. Keep you eye out for the airbrush canisters of propellent, I'm always lookin for a good deal on them
also did you get the propellent attachment from subtec for the cans? you will need one Jcopter |
|
|
|
|
|
|
|
|
|
|
In post #28 I mentioned I used epoxy to secure the control surfaces inside the tail cone. Epoxy may be overkill as they are CA'd on the exterior. But I figured I will not have access to that area. You should use a marine epoxy which is resilient to water. Regular epoxy may not do, read the epoxy package. Once I applied the marine epoxy, since it takes 2 hours to cure, I kept rotating the tail cone so the epoxy did not drip and basically stayed where it is supposed to. Like I said, probably overkill and I am no submarine expert.
Last night I added Bondo filler around the base of each control surface where they meet the hull to fill in any gaps. I sanded those areas down this morning. Hope to get the tail cone attached today and more work on the lower hull. I was reading through the rest of the directions. There is no mention of how or when to install the bow! I know it should be installed after the bow planes are installed which is page 10. I'm sure I can figure this out. Jcopter... I looked back at your pics of Skips's boat and now see that the bow is attached to the upper hull. So that clears that up. Any pictures of the free flooding holes on the keel on the Marlin or any other subs anyone can provide? |
|
|
Last edited by ken_nj; Nov 20, 2011 at 11:38 AM.
|
|
|
|
|
|
Instructions page 9
Reading ahead on page 10 I have to drill holes in the keel. Figured it would be easier to drill without the tail cone getting in the way. It's says to drill 11/32" holes 1/4" apart. It was easier to lay them out with a 3/8" hole 5/8" on center which put a distance of 1/4" between each hole. I drilled in small increments working my way up to 3/8". I'll spare you every pic so I'll just include a few.
On to attaching the tail cone. This was troublesome. It was difficult getting the proper alignment looking down the shaft at the target mark on the tape. So, I removed the wooden alignment plug TP1. I had to slightly sand the right side of the cone even though the tail cone looked properly aligned sighting down the sides of the hull. I had to do this since the tabs were on the hull for the tail cone which prevented any sanding. Most likely the hull joint for the tail cone was not 90 degrees to the hull centerline. I then had to slightly enlarge the left side of the hole in the shaft support since I drilled it the same size as the housing. NOW the shaft housing was aligned on the hull centerline no matter what angle I looked at it. To secure the shaft housing to the support I added a section of plastic to hold the housing in place. ImagesView all Images in thread
|
|
|
Last edited by ken_nj; Nov 21, 2011 at 12:18 AM.
|
|
|
|
|
|
A little bit of everything today
Sanded the hull joint for the tail cone and applied more filler.
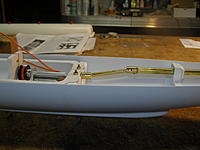
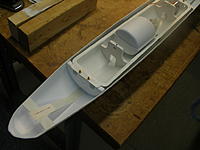
Grinding and sanding down the bow halves to fit each other. Fitted the rudder and aft dive plane. Installed the motor and positioned the pressure hull in the lower hull. Attached the motor to the shaft. To me the pressure hull seems to far forward. The rear of the pressure hull is 9 3/8" from the tail cone. Any thoughts on this? |
|
|
|
|
|
|
|
|
Don't know about the subtech PH in the marlin, I used my own
But When I was building mine I did a lot of research and do not remember anyone complaining about the WTC placement. check the photos I posted maybe you can tell from them, or someone else may know. Jcopter |
|
|
|
|
|
|
|
|
In the photos you posted, the first group, third pic, top pic, you can see the keel area appearing just behind the PH. Mine has a lot more keel area showing than what Skip's is showing. Hope to talk to Skip soon, my questions are accumulating.
Working on the square cutouts, vents, that are along the upper hull. For those vents that are even down the length of the hull, I used this jig I made. It just slides along the deck and gives accurate upper and lower lines the same distance down from the deck. I'll have to measure and mark the vertical lines manually. The forward vents curve downward, will deal with them later. |
|
|
Last edited by ken_nj; Nov 21, 2011 at 10:30 PM.
|
|
|
|
|
|
You are right, kinda tricky on a cylinder. I just finished laying out all of the vents. Getting some coffee, turning up the music and going to start to drill, grind and file away. I'll show you the rest of my procedure once I get the vents on one side all done.
The Marlin is nothing compared to a WWII boat. Not sure what vents you need on a modern boat. |
|
|
|
|
|
|
|
|
I told ya!! use an Iron & a rectangle piece of K&S Tubing, but Nooooo you had 7 hours to kill. I laid all the holes on mine out, and practiced on some scrap, got it down, and presto in less than 1 hour "I" had all mine done. And best of all, every hole was exactly the same size!!!!
Jcopter |
|
|
|
|
|
|
|
|
Therapy for a Tuesday ...
Hey Jcopter. I did not have 1/8 x 1/4 brass, and when I was at my LHS, all they had was rod and tube's.
So the first hour was 9. The second hour I completed 15. So the starboard side is almost done at 24/31. I should have it done tonight at this rate. Kicking @ss! Have to deal with styrene fuzzies on the edges. Maybe I'll find a piece of brass, heat it with a heat gun and clean the edges up. Will test on scrap first. Was also debating about running a Dremel drum sander on the inside of each vent to thin the plastic down so it does not appear so thick from the outside. |
|
|
|
|
|
|
|
|
It's all in the music...
Put on some old Aerosmith on my iPod and rocked out. Really got me going. Besides, wanted to get it done for Last Man Standing at 8. I took me 95 minutes to complete the port side. That comes out to about 3 minutes per vent. Kick @ss again.
Done with vents! Tomorrow might do some more upper hull cutouts. Dive planes and some other things that I can see on pictures. Have to start planning my electronics purchase. Have to go back to the other boat I'm working on also. So tomorrow will be another busy day. Not almost done. Besides all of the misc stuff to do as part of the kit, going to do other things that will be slowing this project down. I'm going full tilt on it as much as I can right now, it will eventually slow down soon. |
|
|
Last edited by ken_nj; Nov 22, 2011 at 08:39 PM.
|
«
Previous Thread
|
Next Thread
»
| Thread Tools | |
| Similar Threads | |||||
| Category | Thread | Thread Starter | Forum | Replies | Last Post |
| Discussion | New guy here with a question about older radio and converting to electric from nitro | cfiiman | Electric Plane Talk | 22 | May 11, 2011 02:03 AM |
| Build Log | Subtech Marlin | Jcopter | Submarines | 0 | Oct 30, 2007 04:50 PM |
| Albacore by Subtech | speleopower | Submarines | 7 | Apr 16, 2005 08:30 AM | |
| Subtech's Tee Valve | himszy | Submarines | 4 | Dec 21, 2004 12:37 PM | |


 Some pics came out better without a flash. My glasses sometimes make small things I am working on looked curved so I am constantly removing my glasses to check my work. I can do it without the glasses, but I wear them anyway.


