|
|
|
|
|
Horizon Hobby ParkZone Mk IX Spitfire BNF with Retracts Review
!Introduction
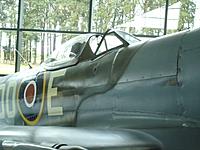
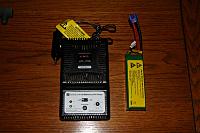
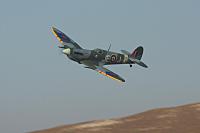
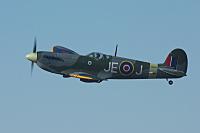
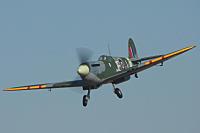
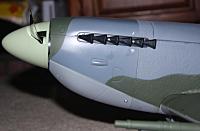
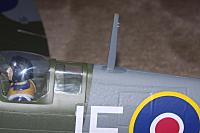
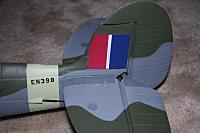
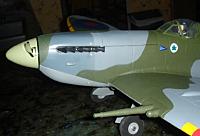
| spec2 | | @PKZ5780.jpg |> <b>Wingspan:</b> |< 43.2" |> <b>Center of Gravity:</b> |< 2.55" behind leading edge of the wing |> <b>Weight:</b> |< 41.1 oz. |> <b>Length:</b> |< 37.3" |> <b>Servos:</b> |< 4 submicro servos installed |> <b>Transmitter:</b> |< JR 11X |> <b>Receiver:</b> |< Spektrum AR600 installed |> <b>Battery:</b> |< 3-cell 11.1V 2200mAh 25C Lipo |> <b>Motor:</b> |< 15 size 960Kv Brushless installed |> <b>ESC:</b> |< 30A Pro SB Brushless ESC installed |> <b>Retracts:</b> |< Electric retracts are optional |> <b>Manufacturer:</b> |< <a href=http://www.parkzone.com/Products/Default.aspx?ProdID=PKZ5780>Parkzone</a> |> <b>Available From:</b> |< <a href=http://www.horizonhobby.com/products/default.aspx?ProdID=PKZ5780>Horizon Hobby</a> |> <b>Price:</b> |< $249.99 BNF For years I have been requesting a new improved ParkZone Spitfire. With the continued improvement of their releases of fighter planes I just knew they would do this plane justice with a new release. Finally, they announced it as "Coming Soon", then they posted flight videos and a short review video. I viewed those videos multiple times per week during my "breaks" at work as the wait for the release continued. Then I learned I would be getting to review the Spitfire! |spec | @fir 010.jpg |spec | @fir 016.jpg | @fir 017.jpg |spec | @fir 018.jpg | @fir 020.jpg | @fir 023.jpg |spec | @fir 022.jpg | @fir 013.jpg !!A Brief History of Johnnie Johnson Johnnie was born in Barrow upon Soar in Leicestershire, England on March 9, 1915. He grew up in the East Midlands and pursued studies and was trained as a Civil Engineer. As a young man, he was active in sports and hunting. While playing Rugby he suffered an injury to his collar bone that complicated his becoming a fighter pilot tremendously; the broken bone was wrongly set and thus healed out of place. He applied to join the RAF before the war and was declined initially on medical grounds. However, after war was declared on September 3, 1939, he applied again, and due in part to the shortage of pilots, he was accepted this time. However, his injury flared up during his training and early flying career. As a result, he missed the initial fighting in Europe and then missed flying in the Battle of Britain. He eventually became very active in flying and fighting over Europe from early 1941 to September 1944. He participated in the Battle of Normandy, Operation Market Garden and the Battle of the Bulge. During this time he became the most successful Western Allied Ace against the Luftwaffe. He had 34 air victories and seven shared victories, three shared probables, ten damaged, three shared damaged and one destroyed on the ground. His last air victory was in September 1944 although he kept flying till the end of the war and later in the Korean War. He remained in the RAF until he retired in 1966 when he retired as an Air Vice Marshal. During his training in 1939 Johnnie stalled and crashed his Spitfire during a practice landing doing a ground loop, braking off one landing gear and forcing the other up through the wing. Unfortunately, he was wearing his shoulder harness too loose and wrenched his shoulders. This injury revealed that his earlier rugby injury was improperly set and was a continuing problem. His accident was excused due to the "short airfield" but Johnson felt he was one mistake from washing out at that point in his career. Johnson's shoulder made flying the Spitfire very painful, and he was given an option of an operation to correct his shoulder or he could be an instructor flying a Tiger Moth. Obviously, he opted for the surgery but that caused him to miss the Battle of Britain. He resumed flying in early 1941 and got his first kill on June 26, 1941 when he downed a Bf-109. By this time he was a formation leader and proved to be an excellent flight leader. In March 1943 as an acting Wing Commander he took over the Canadian Wing. The wing initially resisted being lead by a Brit but he won them over with the force of his personality and his leadership. At this time he was flying his Spitfire Mk IX. From April to September 1943 he scored 14 kills and his Canadian wing became one of the highest scoring allied fighter wings. Since most of his kills were in the Mk IX Spitfire it is entirely appropriate that Johnnie Johnson's famous markings are found on the new ParkZone Spitfire. They have honored a legendary pilot and his exceptional plane. The pictures on the left below are from the Evergreen Aviation Museum in McMinnville, Oregon. Those on the right are my ParkZone Spitfire. If the pictures on the left look familiar its because I have used them in a previous review. Then they showed differences, here they show how much the model looks like the museum plane. @Air_M-101.jpg @ips 006.jpg: @Air_M-098.jpg: @ips 013.jpg: @Air_M-092a.jpg: @ips 020.jpg: !Kit Contents BNF *The Kit Includes: *Fuselage with motor, Spektrum receiver, ESC, pilot, rudder & elevator servos installed *Spinner and Propeller *Foam horizontal stabilizer *Wing with two aileron servos installed and attached to the ailerons *Fixed landing gear and wheels *Instruction manual *3-cell 2200mAh 25C Lipo battery pack *Balanced charger for battery pack *Additional Items Supplied by ParkZone for the Review: *10-15 size main landing gear electric retracts (EFLG100) *Pre-bent landing gear struts for the retracts (PKZ5717) @fir 006.jpg:The bent struts used with the Spitfire retracts and the plastic housing covers used with them. @fir 007.jpg:The retracts used with the Spitfire. Neither the main struts nor the wheel struts are used with the Spitfire. *Items I supplied: *JR 11X transmitter *The Promoted Features Include: *Spektrum™ AR600 DSM2/DSMX receiver, installed *4-channel control – throttle, elevator, aileron and rudder *15- sized BL outrunner; 950Kv, installed *E-flite® 30A Pro Switch-Mode BEC brushless ESC, installed *Servos, installed *Dual aileron servos for precise control *Designed to accept E-flite electric retracts (EFLG100), sold separately *Durable Z-Foam™ construction *20mm cannon, exhaust and cockpit details *Authentic Johnnie Johnson World War II trim scheme *Includes 3S 2200mAh 25C Li-Po battery *Includes 2- to 3-cell DC variable rate charger !Assembly !!Radio Installation The receiver came installed in the fuselage. I added the Y-connector for the landing gear and used the binding plug to bind the receiver to my JR 11X transmitter. To bind the receiver to my transmitter, I plugged in the battery pack to the ESC to power up the receiver first. Next, I turned on my JR 11X while holding in the binding plug on the back of the transmitter, and then let go of the button. A few seconds later they were bound together. I powered down the receiver, turned off the transmitter and removed the binding plug. To check everything out I turned on the transmitter and then connected the battery pack to the ESC. I had control of the rudder and elevator. In normal operation I always turn on the transmitter first and turn it off last. !!Wing This is a one piece foam wing, and it came assembled with the exception of the landing gear and the cannons. The cannons are secured to each side of the wing using two small screws per cannon. Fixed landing gear is supplied with the kit, and the instruction manual did a nice job of explaining how to install the fixed gear. I received the optional electric retracts and installed those into the wing. @fir 027.jpg:The guns mount to each side of the wing using two screws from the front. The main metal struts are removed from the electric retracts and replaced with the bent metal struts (purchased separately) designed for use as the Spitfire retracts. I lightly tightened these and then set them aside. I removed the plastic plates that came on the wing mounted over the retract bays and set the screws aside for use with the retracts. I removed the landing gear doors from the "fixed" struts that came with the kit and snapped them into place on the struts for the retracts. I transferred the wheels and the wheel locks as well. Two servo wire extensions came mounted in the wing for the retracts and are primarily hidden by the radiators on the bottom of the wing. I plugged in the first electric retract and pulled the excess wire back through the radiator and up through the top of the wing. The connector section of the servo wire is under the radiator and a minimum amount of wire is in the retract bay. I connected the retract Y connector to the receiver and moved the retracts down and set the retracts into the retract bay. My initial positioning of the landing gear strut did not line up with the proper position for proper alignment on the runway. I pick up a retract and loosened the two Allen nuts in the side of the retract and straightened the wheel and again secured the Allen nuts. Holding the landing gear in the retract bay, I cycled the gear up and down. It worked as designed. I placed the partial plastic covering that came with the bent struts over the electric landing gear and secured both the retract and the plastic cover plate into position with the four bolts that had held the original covering plate in position. I repeated the process with the retract on the other half of the wing. My landing gear installation was complete. @fir 024.jpg:A servo extension wire came installed on each side for the retracts. @fir 025.jpg:On the left, the standard landing gear with tire, and on the right, the pre-bent retract gear. @FW 001.jpg:The electric retract was trial fitted with the gear down and adjusted to make sure the wheel was aligned properly to run down the runway. @FW 003.jpg:With the bent gear in proper alignment the plastic cover that came with the bent gear piece was put in position. It and the electric retract were secured with four bolts. @FW 004.jpg:The retract properly mounted in place and the landing gear door snapped onto the strut. @fir 026.jpg:The gear retracted into the wing. +Spittyretracts.wmv:The Spitfire retracts in operation. !!Tail The rudder came installed at the end of the fuselage and was connected to the servo via a control rod which was also connected separately to the tail wheel. I had to adjust the rudder a bit by adjusting the clevis, and in doing that I got the tail wheel so that it was straight when the rudder was straight. That was a very simple procedure. The horizontal stabilizer comes in two haves with the elevators attached and hinged. One carbon fiber rod goes through the fuselage and into both halves of the stabilizer, and they both fit into a plastic housing at the back of the fuselage. That assures proper alignment. As the horizontal stabs were slipping together a plastic box slid into a larger plastic box from one side of the elevator to the other. This joins them and lets the control horn on one side control both sides of the elevator. I connected the elevator control horn to the control rod and slipped the plastic tubing up over the connector to help keep the clevis snapped closed in flight. The tail section was installed and good to go after adjusting rudder into proper position as described above. Elevator was right where I wanted it and needed no adjustment. @fir 017.jpg:One control rod controls the tail wheel and the rudder as shown in this picture. I recommend you confirm they are aligned before adding the horizontal stabilizer to the fuselage. @ips 012.jpg:You can see the square elevator connector in the center of the picture. !!Fuselage The only assembly I had to do on the fuselage was installing the decorative antenna behind the cockpit. It just snapped into place and was firmly attached to the fuselage. @ips 011.jpg:The decorative antenna just snapped into place on the fuselage. !!Completion I mounted the wing onto the bottom of the fuselage and in the process, connected the two aileron servos to the aileron Y-connector. I had previously connected the two electric retracts into the supplied retract Y-connector, now I carefully tucked the extra wire into the fuselage. The wing was secured to the fuselage with two pins on the front center of the wing going into two holes in the front of the fuselage. The back of the wing was secured with two supplied metal bolts. @ips 015.jpg:The wing was secured by two pins in the wing going into two holes in the fuselage. Two metal bolts secured the back of the wing in place. Per the instruction manual I confirmed the C/G was 2.55 inches back from the leading edge of the wing by balancing the plane upside down at that location on my finger tips. My plane balanced there with the battery installed and nothing else was required by me to balance the plane. I checked that the control rods were all plugged into the outer most hole on the control horns for all control surfaces. For the servo arms I made sure the control rod was connected to the middle hole for the elevator and the outer hole for the ailerons and rudder. I next checked that the throws of the ailerons, rudder and elevator were in the proper direction and with the proper amount of movement using dual rates per the chart below. With the plane ready to fly with the battery installed I performed my pre-flight check and cycled the landing gear, checked the directional movement of all control surfaces and tested the motor operation. My Spitfire was ready to fly. *Control settings *Aileron: High Rate 15mm up/down: Low Rate 11mm up/down *Elevator: High Rate 14mm up/down: Low Rate 10mm up/down *Rudder: High Rate 25mm left/right: Low Rate 18mm left/right !Flying !!Basics The Spitfire has four basic controls and the optional retracts. It has proportional control of the throttle, ailerons, rudder and elevator. In basic flight she can be flown with as little as half throttle and just using the right stick with ailerons and elevator but turns are smoother when using the rudder as well. I would describe her handling as being closer to a trainer plane then your typical warbird but this has been true of most of the recent ParkZone fighter planes. I found no bad handling traits in my flying of the Spitfire. As with any plane speed should be maintained at a reasonable level, especially while turning. At a safe altitude I intentionally made slow turns such as an inexperienced pilot might make and found the plane handled it surprisingly well. I was able to induce stalls intentional when trying but they were at such a slow speed I would never have them accidently happen to me. When she did stall I was able to recover quickly. I found she climbed well and in standard set-up handled a high speed dive with full throttle very well both right side up and upside down. I was very pleased with her basic handling. !!Taking Off and Landing As shown in the first video below with the wheels properly aligned and installed on the retracts the plane tracks nice and straight. I just apply throttle and slowly run up the throttle and when I judge the speed to be right I just give a touch of up elevator and she jumps into the air. For my landings I like to fly with power on until I touch down and I give a slight flair at the time of touchdown to land on all three wheels (or as close as possible) at the same time. Landing this way I have had no nose overs thus far but I have flown from pavement or packed dirt and have not yet flown from grass. For all flights for this review there has been no issue with takeoffs or landings. I recommend flying the plane all the way to the ground with some power on and killing or greatly reducing throttle at the time of touchdown. Fortunately, the fields I fly at are situated so that I can take 0ff and land into the prevailing breeze most of the time and seldom have to deal with a cross breeze. One my one landing with a strong cross breeze the rudder helped me hold my course and I straighten the rudder at touchdown so that my tail wheel was straight. I had to add a little bit of turned wheel after touchdown to track straight down the runway but it handled very nicely. !!Aerobatics/Special Flight Performance This ParkZone Spitfire has been easy to handle as described above and this continued into basic aerobatics. She made nice axial rolls, loops and split Ss. She can make a slow victory roll and it looks just like one from the movie "The Battle of Britain." Using ailerons rudder and elevator I can do a good barrel roll but I am working to make it even smoother. I have chased and been chased by a ParkZone 109 and together they look almost full scale at times; especially if the 109 is flying with the wheels off. As sold the Spitfire has good power with the included 25C battery and reasonable speed that looks very scale like to my eye. I had no negatives in performing aerobatics but I always made sure to keep her speed up. For a warbird I found her to be easy to fly but don't try and fly her too slowly. !!!Battery Performance My BNF Spitfire came with a 3-cell 2,200 mAh 25C Lipo battery pack. That battery pack supplies good power to the plane and I had only good flights with no problems using it. However, I have a number of 3-cell Lipo packs from 1800-2200mAh from ParkZone and E-flite planes over the last few years. When accidently using an older 12C 3-cell ParkZone pack the plane didn't perform as well as with the 25C pack. Additionally, either the ESC or the motor made a clicking sound when at full throttle with that pack. The solution was easy, I only use the 25C packs with the Spitfire. My point being check your batteries and make sure they properly supply sufficient power to the plane. I found the 25C pack supplied all the power the Spitfire needed even at sustained full power flight. I have not used any four cell packs in my Spitfire and wouldn't recommend anyone try with the standard ESC that comes with the Spitfire. !!!Jerry's Hopped up Spitfire Jerry, AKA Airman74, at RCGroups brought his hopped up Spitfire to the MRCC Fun Fly. He had switched from the standard prop (9.5x7.5 PKZ1012) to the prop sold with the ParkZone Extra 300 (10.5x9, PKZ5101). He also advanced the timing 25%. He changed to a silver spinner and added some bright tape to the bottom of his wing to keep orientation of his Spitfire on cloudy days. When he first made these changes he burned up the 30 Amp speed controller that came with the Spitfire. He was lucky that it happened near the ground and the plane wasn't destroyed when it came down. (The 30 Amp ESC works fine with the supplied prop per my testing.) He replaced his ESC with the E-flite 40 Amp Pro Switch-Mode BEC ESC (EFLA1040). As you can see in the "Escort Duty" video below his plane with the new prop and ESC was much faster with the standard motor and battery than mine was using the standard prop and 30 Amp ESC that came with the Spitfire. (The spinner and tape modifications were just cosmetic.) So if you feel a need for speed be sure to go to the 40 amp ESC if you go to the ParkZone Extra 300 prop. That and advancing the timing 25% made Jerry's plane a lot faster for very little time or effort. !!Is This For a Beginner? A beginner should have no trouble assembling the plane and its basic flight is well behaved and predictable. However, I would recommend it as a great second plane and not a first plane. For the first plane I recommend a basic trainer with a wider stance with the landing gear. If a student insisted he wanted the Spitfire as their first plane I believe the beginner could be successful with it, but I wouldn't recommend it for that purpose. !!Flight Video/Photo Gallery |spec | @FW 055.jpg |spec | @FW 047.jpg | @FW 048.jpg |spec | @FW 049.jpg | @FW 054.jpg | @FW 056.jpg |spec | @FW 058.jpg | @FW 068.jpg | @FW 071.jpg |spec | @FW 075.jpg | @FW 076.jpg |spec | @FW 079.jpg +Spitfire1a.wmv:The Spitfire flying with standard equipment. +Escortduty.wmv:Two Spitfires escort a Multiplex Cargo to ward off a Zero. Video features some high speed passes by Jerry's hot propped Spitfire as discussed above. !Conclusion I really like the new ParkZone Spitfire. The retracts were easy to install and and work great. As long as I flew at a reasonable speed (ie: Not to slow!) I had good control of the plane and experienced no stalls or control problems. The standard equipped plane had the speed I expected and to my eye she looked very scale in the air. As discussed above for those that want more speed Jerry's change of prop and ESC with advancing the timing 25% made his Spitfire must faster than my standard equipped Spitfire and that was while still using the supplied 11.1V 25C battery pack. So if you feel a need for speed it is easy to do but please don't just change the prop as Jerry did initially as it burn out his original ESC when he advanced the timing and changed the prop. One of my favorite movies is "The Battle of Britain", and the victory roll over the airfield from the movie is burned into my memory. I can perform that roll with my Spitfire and it looks to me to do it just as scale as could be. I even got out my DVD of the movie to watch it anew and I am doing that roll. (I know the Mk IX is from later in the war.) That roll alone would be enough for me but she looks good with every move I make although there is still room for improvement with my big barrel rolls to make them as smooth as they should be every time. Additionally, the retracts work in the direction they are suppose to on the full size plane and the details and color scheme look great. I am very happy with my Spitfire as is but in time I may upgrade the speed control, change to the 10.5x9 prop and advance the timing. However, for now I am very much enjoying her just as she is. *Pluses *Authentic color scheme *Good scale lines and details for the MK IX *The optional electric retracts work in the proper scale direction *She is a nice flyer for the intermediate pilot *She can perform good deal of aerobatics for the more experienced pilot *Minuses *Retracts when down are not in scale position (Per pictures) but this trade off gives more control and stability to the landing gear *Pilot doesn't look English to me ImagesView all Images in thread
|
|
|
Last edited by Michael Heer; Nov 08, 2011 at 09:54 AM.
|
|
|
|
|
|
|
|
"Pilot doesn't look English to me"
He's not supposed to look English; He's Canadian! 
|
|
|
|
|
|
|
|
|
No Michael!
He lead the Canadians but he was English.  Read the Bio I included. Mike H Read the Bio I included. Mike H
|
|
|
|
|
|
|
|
|
Very nice review, and very much in-line with what I found as well. Thanks for the time and effort it took to get this together. Even though I've had my Spitfire since they day they were available in the US, I still enjoy reading reviews as thorough as this one. Thanks!
|
|
|
|
|
|
||
|
|
Quote:
|
|
|
|
||
|
|
||
|
|
Quote:
Anyway, great review, and a terrific model; I bought one the week it came out, and installed the electric retracts too. Lots of fun! |
|
|
|
||
|
|
|
|
|
Nice review. I have it and fully agree. If I were to do things over again, well...
Do yourselves a favor if you want to save some money! The plane is fine, very good in fact. If you get bored of a rather docile airplane fairly quickly, just buy the "Replacement Airframe" and some better electronics. Whenever I get a parkzone plane now I do this. The reviewer even stated an upgraded ESC is in need regardless of any level of upgrade. I can also tell you from experience that Parkzone servos are fairly unreliable. And for the (minorly abled) modelers, much less expensive retract units abound. I will list my preferred substitutions of such parts on my blog in the coming days as to help eliminate all the guesswork. |
|
|
Last edited by restlessswind; Nov 08, 2011 at 11:15 PM.
|
|
|
|
|
|
Ryram Z you are correct. Flying it stock the included speed controller is fine. Restlesswind you are also correct. For just about any motor or prop upgrade the ESC will likely need to be upgraded.
I am hoping Jerry will jump in and post how he advanced the motor 25% and share that with those that want to do it. Mike H |
|
|
|
|
|
||
|
|
Quote:
 Nice review by the way. Thanks for showing the LG conversion insuch detail. Cheers Mike |
|
|
|
||
|
|
|
|
|
Hey Michael !!!! Great review!!! Very thorough ! As per your usual :-)
Here's how to advance the timing : it sounds hard at first, but once you do it, it's really not that hard, so here goes ,,,with battery disconnected from ESC move throttle to full up position, now plug battery into ESC , wait about five seconds until you hear 2 sets of fast ringing tones, this indicates your now in programing mode, once you hear these fast tones move throttle stick to center position , wait five seconds until you hear a single beep, this means your in menu 1, you want to be in menu 3 to adjust motor timing, so with throttle stick still in center just keep waiting until you hear 3 beeps, this will mean your in menu 3, when you hear these 3 beeps advance throttle back up to full, it will now go through the different choices within menu 3,, first you" ll hear 1 beep, which is 5deg timing, you want to keep waiting until you hear 5 beeps in succession which is selection for 25deg timing, once you hear those 5 beeps, move throttle stic back to center,onve you've moved it back to center you'LL hear 2 beeps confirming the programing change, then just unplug your battery and that's it!!! Easy huh???,, if your using the e flite pro 40amp ESC with the blue metal case, you may find it comes stock out of the box with LOW voltage cutoff set to 70% cutoff of starting battery voltage. You"ll know if it's set up this way when you plug battery in and when ESC arms you"ll hear the little song played. I'd highly recommend setting it to 3cell cutoff, and here's why : at 70% cutoff, if your battery is only partially charged , the ESC could cutoff at too low a voltage for your lipo and damage it. Sooooo,,,,rto change programing to 3 cell cut off,just like above proceedure, with battery unplugged, move throttle stick up to full ( just like before ) no plug in your flight battery, wait 5 secs until you hear the 2 sets of fast tones, now move stick to center position, wait 5 secs, you"ll first hear 1 beep meaning menu 1, now quickly move stick back up to full, after a couple seconds first thing you" ll hear is 3short beeps indicating 3cell cutoff, if you keep on waiting it"ll go next to 4 short beeps, indicating 4 cell cutoff, and it"ll keep on going on down the line. But you" want first selection of 3short beeps, so as soon as you hear those 3short beeps move stick immediately back to center, where it"ll then beep twice indicating successful completion of programing. To confirm, just unplug flight pack, move throttle back to zero throttle position and plug flight pack back in, you should now hear 3 short tones when it's arming instead of the little song. Hey MIchael,,, I had a GREAT time flying with all you guys out there, I'm already planning on attending your event out there in 2012. Great bunch of guys!!! Really enjoyed meeting all of you!! I especially enjoyed that formation flying with Jeff and the guy flying the cargo plane,, that was a HOOT !!!! |
|
|
|
«
Previous Thread
|
Next Thread
»
| Thread Tools | |
| Similar Threads | |||||
| Category | Thread | Thread Starter | Forum | Replies | Last Post |
| Discussion | Parkzone Spitfire Mk IX Thread | bdshort | Electric Warbirds | 14500 | Jan 19, 2024 10:36 AM |
| Discussion | Top-Flite 1/7 SPITFIRE Mk IX Tail Pics | Jsutherland8 | Your Plane Photos | 0 | Mar 26, 2011 01:53 PM |
| HL's new spitfire Mk-IX | Ben74 | Foamies (Kits) | 1 | Jul 01, 2003 05:07 PM | |


