|
|
|
|
|
Build Log
New BVM Electra ARF...
This is my second BVM Electra, the third I've built but this is the first with air gear. My trusted old camo Electra met its doom at SEFF 2011 on a low landing approach that grabbed the tall grass and cart wheeled sideways. It wasn't so bad it couldn't be fixed, maybe 20 - 30 hours total to get it back to near perfect but those are hours I couldn't spend building my new one (already ordered in the color choice I always wanted and sitting in my garage). So at that point I decided to gift it (minus fan) to a good buddy who has wanted one for some time, I knew he had the skill to fix and fly the paint off of it so there you have it, the need to start building!
I want this new Electra to be my dream plane, not just the way it flys but this time I am opting to modify a few things to make it easier to assemble/disassemble as well as handle grass and short runways. What do I mean, well the Electra has a belly pan used to access the main retract servo and tighten the wing bolts, not a bad design but one I'd like to skip. To do this, I'll use the new rear spar clamps developed for the BVM eBandit (which use top-mounted heli-coils) instead of the face-mount blind nuts (like the Electra mounts) so I can tighten the wing spar bolts from the bottom of the plane, through small access holes just big enough for the allen wrench. Of course that's also part of the reason for the air gear, so I don't need to access the main retract servo through the belly pan but also because I want to fly off grass without worrying about bending the wire struts. They do take a fair amount of abuse but I feel real struts look better and take far more abuse and of course with struts, you need heavier retracts than mechanical (IMO) hence the air. While I have air, why not add brakes! Short runways aren't an issue anymore as I can just hit the brakes and stop in 20 feet. Finally, to make it easier to disassemble, I want to make the stabs un-bolt from the bottom, rather than through the fuse rear after removing the exhaust pipe, I'll do this by simply reversing some of the existing parts, you'll see as I move along. So there it is, call me crazy for wanting an Electra after now owning an eBandit but even Pablo who loves his eBandit, said how much he missed the Electra after flying my old one for the first time in months of not flying one. The Electra also has a size advantage, that being just small enough to fit in most SUV's with the wings mounted, meaning no assembly/disassembly. I am making all these mods for air shows and possibly travelling by air with a BVM Jet Case, the quicker to take apart the more willing to pack it up and head to more jet events, maybe even on the left coast next year, we'll see... Jack |
|
|
|
|
|
|
|
|
|
|
Day #1
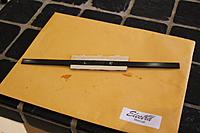
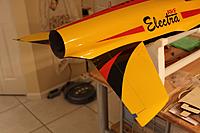
I always start by cutting any/all holes and sanding an sharp edges but now BVM almost makes this unnecessary by cutting pretty much every hole except the canopy hooks and wing anti-rotation pins (which they really need to leave to the modeler for the tightest fit during building). Sanding the edges isn't needed anymore either, they are clean and painted so there really is nothing sharp anymore. Every time I get my hands on the parts out of the box I marvel at the finish, the paint is flawless and how they hide the seam is remarkable, you couldn't ask for a better made product IMO. This one is the Striker scheme, a close cousin to the Yellow/Black/Red Bandit color scheme I fell in love with and did an electric Bandit two years back, this is the color I would have wanted for my first Electra, I guess part of the reason I'm building it... The next thing is the nose gear door, that and the belly pan are cutouts that need to be done by the builder. I opted for the dremel and a cutting wheel versus the back saw I used the first two times. While it left a clean, straight line, it took a little while and was easy to scratch the paint so I figure the dremel (unless it goes wild) should be easier and quicker. BVM marks the four corners of the cutout area, you just use tape to set the lines and cut away, the door is then cut in two to form the front gear door and main door. BVM also uses offset hinges on the main front door and a nice wire torsion "spring" to close the door. It's very cool but I've broken the offset hinges too many times and will now use regular pin hinges with 3/16" button head screws to ensure the doors are very durable (as well as an air cylinder for the main front door. I decided to build the wing mounting formers up and check the fit of the wings and glue in the formers, this is an important part of a well flying plane. This is also where I swap out the stock clamps for the eBandit clamps with the heli-coils (facing down). You can see from the parts that there is a wood former glued to a carbon impregnated one, then the clamps bolt on (you need to tap the holes with a 4-40 tap). These clamps hold the wing spars n place, in essence holding the wings on the plane but also keeping them in perfect alignment with the fuse and each other. I find it easier to have this cure upside down where it's easier to verify the wings are lined up with the fuse and stay that way while the Aeropoxy cures over night... Jack |
|
|
|
|
|
|
|
|
Day #1
More pics... ImagesView all Images in thread |
|
|
|
|
|
|
|
|
Day #2
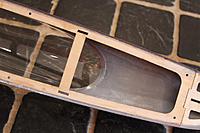
Front Landing gear goes in next, this is done by assembling the front formers, gear plates and gear all together to slide in and glue in a single component. I really like the look of struts and aluminum wheels, I'm glad I sprung for the extra bling and ordered the gear this way. The front gear has been installed and the formers glues with Aeropoxy and now with the wings in place and formers glued, the wings can be set aside and the formers carefully glued all along the point where they meet the sides and bottom of the plane, it's important as this is where all the strength comes from and there is a lot of force at 200 MPH. While the glue was drying I decided to put the intakes together and glue them, it didn't occur to me until after that I forgot to wrap them in carbon tow, no biggie, I can do it after they dry. I also started messing with the stab mounting components, to see how easy it would be to mount with bolts through the fuse bottom. Turns out by simply adding some wood to form a channel and a plywood top for the blind but that normally goes on the bottom of the tray that holds the stabs in-place, I could in essence flip the normal bolt on from inside to the new bolt on from the outside design. This required only a little modification and will need me to drill the four holes necessary using a Dremel with a right angle attachment. I think the modification will be well worth it though, nothing worse than having to take out the thrust tube to get to the stab bolts normally. I haven't had to do this except for once but as I said, maybe more travelling using a Jet Case versus taking the trailer, with gas prices the way they are it's cheaper to fly now. Along with the spar mounting plate getting glued in (using the spars to hold it in position as in the picture), the vertical fin mounting former needs to get glued in, it holds the front of the spar mounting plate and between the two parts, gets its correct position from the other part. Take care to glue the spar mounting block, I decided to do it in two parts, the rear first while the block was held in-place by the vertical fin former then from the other side, which didn't move once the first side glue joint dried... The canopy was cut and glued next, some folks wait until the canopy hooks are installed and the canopy is attached to glue in the canopy as this fits better, I like the rigid feel of the canopy already glued as I feel it goes on firmer and holds tighter when installed by guing the plastic first, latches later method. The canopy is optical-grade plastic, use care to avoid finger prints and scratches and tack it on in two spots with CA until you can run Vpoxy around the entire edge (my choice of glue), then brush the bead flat so it covers the canopy edge and canopy hatch for a good glue joint that won't come off at high speed... Jack |
|
|
|
|
|
|
|
|
Man, I love it! Here's my new one,not an arf, still awaiting fan/rx installation. Can't remember if I showed it to you at SEFF or not?
Bill Davenport AMA 28141 |
|
Latest blog entry: Disclaimer For All Purchases From...
|
|
|
|
|
|
|
Day #2
Even more pics... |
|
|
|
|
|
|
|
|
Nah, I'm good but not that good :-) John Monaghan, the guy that built Mac's
B-29, did the finish in PPG auto paint. I did come up w/ the scheme  Here is a pic of John showing me the bottom of it... Here is a pic of John showing me the bottom of it...Bill Davenport AMA 28141 |
|
Latest blog entry: Disclaimer For All Purchases From...
|
|
|
|
|
|
|
Day #3
Today I only did a little work on the Electra, a lot of gluing of all the formers and making it very neat took some time. I also managed to get the holes drilled through the bottom of the plane (through the stab plate glued into the fuse) to bolt on the stabs, this modification is going to work out great. I doubled the stab carbon spars with 1/8" plywood so the blind nuts can be used and installed them on the plane to test fit. Once installed, I also test fit the stabs and glued them onto the carbon spars with Aeropoxy. Once this dries overnight, I'll unbolt the stabs and remove them with the carbon spars now glued in. The anti-rotation pin and elevator horn will be all that's necessary to finish them, I have to wait until the servos come in later this week... Jack ImagesView all Images in thread
|
|
|
|
|
|
|
|
|
jack....you suck! thats a GORGEOUS model!!!!!!!!!!!!!!
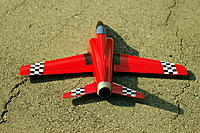
bad bill....awsome scheme!!!!!!!!!! mac has some cool toys for sure. im hoping to make it back to seff next year. missed the last 2. jack....tell rob he better come to CA jets next year (you too for that matter) i need to get some stick time on one of these beauts...maybe its a bad idea...because then id probably want one really bad  insanely good craftsmanship. insanely good craftsmanship.im not sure if you saw the electrolyte articles in fly rc the last couple months, the red one was mine. ive got a new fresh kit to start from...its a 1/3 scale electra  flies extremely well too. and with 400W on a 40mm...it does 120mph....and its a 20" ws flies extremely well too. and with 400W on a 40mm...it does 120mph....and its a 20" ws  probably as close to a electra as ill ever get probably as close to a electra as ill ever get 
|
|
|
|
|
|
||
|
|
Quote:
Jack |
|
|
|
||
|
|
||
|
|
Quote:
How do you see that little thing? It looks like a Bandit clone, pretty slick! Who makes it? Jack |
|
|
|
||
|
|
|
|
|
Bret Becker.....he makes the glass parts and foam cores. really cant buy one
 gets small....REAL fast  imagine flying a electra at 360mph...and thats about what its like. 120mph x3 for size change....and thats how it looks in the air imagine flying a electra at 360mph...and thats about what its like. 120mph x3 for size change....and thats how it looks in the air 
|
|
|
|
«
Previous Thread
|
Next Thread
»
| Thread Tools | |
| Similar Threads | |||||
| Category | Thread | Thread Starter | Forum | Replies | Last Post |
| Build Log | BVM Electra ARF build and modifications | ralf dvorak | Electric Ducted Fan Jet Talk | 44 | Jun 10, 2017 09:53 PM |
| Discussion | BVM Electra ARF | Kevin Murray | Electric Ducted Fan Jet Talk | 26 | Jun 12, 2014 08:13 PM |
| Discussion | BVM electra/Air blue gear. | skyhawk | Electric Ducted Fan Jet Talk | 0 | Apr 25, 2011 05:55 PM |
| For Sale | BVM Electra ARF (RTF) - $4200 | chw757s6640 | Aircraft - Electric - Jets (FS/W) | 11 | Mar 12, 2011 10:01 PM |
| For Sale | BVM Electra ARF coupon | RicVaughn | Aircraft - Electric - Jets (FS/W) | 0 | Oct 09, 2008 08:43 PM |


