|
|
|
|
Thread OP
|
Build Log
RC Aerodyne 500-sized UH-60 Blackhawk
Not sure if one has already been done on this particular heli, but I happily received my 500-sized Blackhawk fuselage from RC Aerodyne yesterday.
 Mechanics will be a T-Rex 500e that was purchased and built by me. No crashes ever... I had a hard landing and had to replace the Torque Tube gears but that was is. Mechanics are in excellent condition. Stock Align servos, motor, and ESC. Tail servo is a Futaba S9257 and the gyro is a Futaba GY-401. Power is a 6s 3300 mAh pack and guidance is provided by my new Futaba 10CHG. Mechanics will be a T-Rex 500e that was purchased and built by me. No crashes ever... I had a hard landing and had to replace the Torque Tube gears but that was is. Mechanics are in excellent condition. Stock Align servos, motor, and ESC. Tail servo is a Futaba S9257 and the gyro is a Futaba GY-401. Power is a 6s 3300 mAh pack and guidance is provided by my new Futaba 10CHG.It was double-boxed and both the outer and inner boxes were pristine. Apparently UPS gave their gorillas the day off so I had no issue with the box. I carefully and lovingly remove the beautiful fuselage from the box and the first thing I noticed is that the rear hatch that covers the tail mechanics was hanging off the fuselage. All the screw holes on the left side of the hatch were cracked and broken.  The rest of the fuselage was perfect except for some minor cracks in the fiberglass where the bottom forward-facing windows are. I called RC Aerodyne and explained the problems. I didn't want nor expect them to ship another fuselage as it would cost the both of us a fortune in shipping. Plus it wasn't like it was broken in half. The guy asked me what he could to do "make it right". I said if you can just send me another hatch for the rear of the heli that would be perfect. He then asked if I ordered a light kit for the Blackhawk and I said no, I didn't. He said he'd "take care of me" and I assume that means I get a free light kit. I told him it wasn't asked for nor expected, but most appreciated. The rest of the fuselage was perfect except for some minor cracks in the fiberglass where the bottom forward-facing windows are. I called RC Aerodyne and explained the problems. I didn't want nor expect them to ship another fuselage as it would cost the both of us a fortune in shipping. Plus it wasn't like it was broken in half. The guy asked me what he could to do "make it right". I said if you can just send me another hatch for the rear of the heli that would be perfect. He then asked if I ordered a light kit for the Blackhawk and I said no, I didn't. He said he'd "take care of me" and I assume that means I get a free light kit. I told him it wasn't asked for nor expected, but most appreciated.The build looks pretty straighforward. I'm assuming I'll have to adjust my throttle and pitch curves to deal with the extra weight of the fuselage. I'll post pics once I get started. I'm VERY excited about getting this in the air! |
|
|
|
|
|
|
|
|
|
Thread OP
|
Got some work done this weekend. Unfortunately the instructions provided by RC Aerodyne leave a lot to be desired. One major items is how to mount the tail assembly (that contains the flex drive) into the fuselage. I could use epoxy but that would make things quite permanent. I could rig up some wood blocks but that might be more trouble than it's worth.
There's also no mention of how to adjust the two tubes that make the tail assembly. They are missing the teeny tiny small nuts that will tighten the tubes into the plastic housing. The grub screw is in plastic and the smallest amount of torque has already stripped it out. Finally the heli tail assembly mounted to the tubes would spin freely no matter how much I tightened the screws. I had the bright idea of drilling a hole so the little plastic piece that the tail fin used to mount into would sit in the hole, preventing it from sliding around. I did that only to find there was a pre-drilled hole in the OTHER side of the tube, but it was inserted into the plastic block. Sigh. Now I see why in big bold letters it says, "Meant for advanced builders". Anyway, here are some pics of the assembly thus far. ImagesView all Images in thread
|
|
|
|


|
|
|||
|
|
Hi Mike
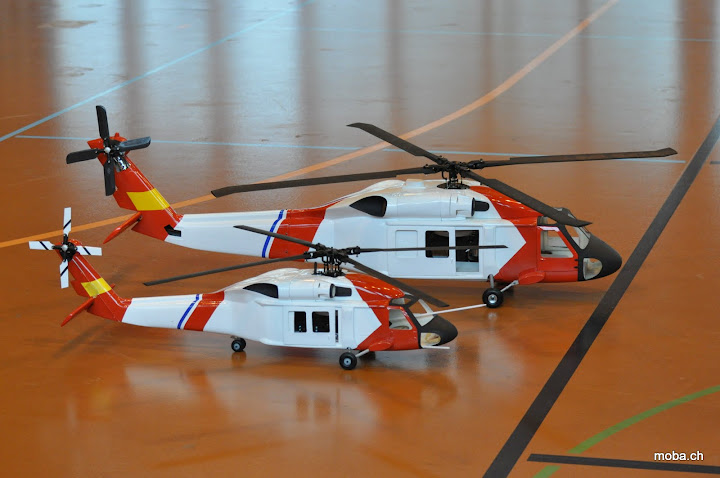
Thanks for the previous report, I look forward for more tips and pictures! I'm building right now also a Firehawk in the 500-class. Here you can see my building report (in german, sorry  ): http://www.moba.ch/firehawk ): http://www.moba.ch/firehawk(and here are pics, usually much more progress than the report: https://picasaweb.google.com/www.mob...irehawk500TRex) It flies very well, here's a video from one off my first flights:
At 1:56 I lowered the head speed to much (under 1200rpm), so the tail turns itself around  The only problem was the CoG, I need two packs of 6S 3000mAh in the front to put the heli into balance. For this reason I have made the front removable. Cheers Marcel |
||
|
|
|||
|
|
|
|
Thread OP
|
Hi Marcel, that's one thing I'm a little worried about... that T-Rex 500 has a pretty high headspeed so I'm really going to have to lower the throttle curve. Right now it's at a flat 80% on my Idle-Up curve so I'll keep reducing it until I get a good balance between flight performance and not worrying about it falling out of the sky.
Thanks for the pics - your Firehawk is beautiful! |
|
|
|
|
|
|
|
Thread OP
|
I only got a little work done tonight. I robbed Peter to pay Paul and used nuts from other parts of the kit. Glad there were extra screws, as they sure do strip easily. Tightened everything I could on the tail tube assembly but the stupid screws holding the plastic onto the fiberglass boards are an odd hex size (Phillips on everything else... why why WHY did you put those screws there?!). 1.27mm seems too small and so does 0.050". Everything else is too big. They are only a little loose and the nuts seem to be Loctited in place so it should be fine.
Removed the tail servo from the heli and once I saw that mods will need to be made to the servo mounting box, I gave up and came inside. I didn't sleep well last night and I don't have the patience to modify the servo mounting box tonight. I also noticed in the instructions there is no mention to where the servo needs to be mounted. None whatsoever. No marks on the wood, no slots for it to fit in. Nothing. Also no mention of where to put the mounting blocks for the heli chassis. Guess I need to screw them into the mechanics, line it up in the fuse, and mark/drill holes. I'll try to get back out there tomorrow and get some more done. No pics tonight; nothing really to show. |
|
|
|
|
|
|
|
|
@Wade1
In the front is my Jayhawk 500 before the conversion to Firehawk  Backside is a Jayhawk in the 600 class (really big for a six hundred), in february we made the first flight - but not very long, the flex drive was broken (in the middle)  But 2 weeks ago we were back in the air: https://picasaweb.google.com/Kusisbilder/Jayhawk02# @Mike Thank you for the flowers I fly with the 4 blade head from smartmodel and the scale blades on it with 1400-1500rpm. Thats enough for scale flying and some deep speed flights  But I have mounted the Scorpion 3026/1000KV motor to come down with the head speed. Mike, I put the tail servo into the mechanics. Thats a very good way, very easy to adjust and the weight goes forward. Put everything far forward as possible, the tail is heavy. Here you can see: https://lh6.googleusercontent.com/_5...0/DSC_7821.JPG And on the other side I put the servo in for the elevator: https://lh5.googleusercontent.com/_5...0/DSC_7355.JPG https://lh6.googleusercontent.com/_5...0/DSC_7677.JPG Head up, when the Hawk lift off for the first time, all the stress was forget Cheers Marcel |
|
|
|
|
|
||
|
|
Quote:
Take your time, Mike. It's not a race, and if you plan out each step, the build will be more enjoyable. Jim |
|
|
|
||
|
|
||
|
Thread OP
|
Quote:
Thanks for the reminder to slow down.
|
|
|
|
||
|
|
||
|
|
Quote:
Jim |
|
|
|
||
|
|
||
|
|
Quote:
|
|
|
|
||
|
|
||
|
Thread OP
|
Quote:
I got a little more work done last night, but also created more work for myself. My new rear tail cover and light kit came yesterday. I didn't know you don't drill fiberglass and while drilling a hole for a light, the drill bit cracked the gel-coating of the hole I was drilling and made a mess. So I cleaned it up with my Dremel tool and I'll be heading to Michael's today to pick up some olive drab paint.I also mounted the servo into the servo mount box. I had to grind away some wood to make it fit. Finally, I removed the tail boom and landing gear from the mechanics and installed the mounting blocks. I dry-fitted the mechanics into the fuselage. Some modifications of the rear cover will be necessary for it to fit over the mechanics. I'll also have to mount the battery very low to get it to clear the front-top cover. I'm still frustrated, but at least I'm making progress. The next step will be to glue the lights in place, then mount the tail mecahnics. |
|
|
|
||

«
Previous Thread
|
Next Thread
»
| Thread Tools | |


| Similar Threads | |||||
| Category | Thread | Thread Starter | Forum | Replies | Last Post |
| Question | RC Aerodyne 450 Uh-1 questions | jwhitacre | Scale Helicopters | 45 | Mar 12, 2012 07:40 AM |
| Build Log | Remodeling the RC Aerodyne/Heliartist 450 UH-1 | SidewaysLS4 | Scale Helicopters | 176 | Jan 29, 2012 12:13 PM |
| Sold | 60 size UH-60 blackhawk fuse | rcshirt | Aircraft - Fuel - Helis (FS/W) | 1 | Jun 10, 2010 09:59 AM |
| Build Log | Here it is. This ones for you Jfruge... Century E raven, UH 60 Blackhawk!!! | Eibo Morakinaga | Electric Heli Talk | 21 | May 13, 2007 10:13 AM |
| UH-60 Blackhawk 3 views wanted | Ken Lapointe | Electric Heli Talk | 1 | Dec 13, 2002 09:53 AM | |