|
|
|||||
|
|
Discussion
Back to basics: Glassing n' Bashing a Foamie F-100
EDIT: I have test flown and begun fine tuning the F-100 Super Sabre "as of July 2014". This build was not an extensive amount of work - however, it WAS spread out over many years due to inactivity and losing interest a few times. I am so glad I was able to finish her, she flies great and looks right in flight with that classic F-100 Super Sabre outline in the sky.
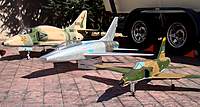
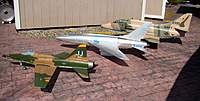
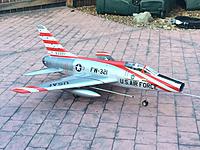
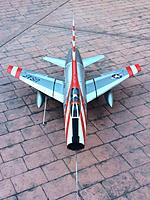
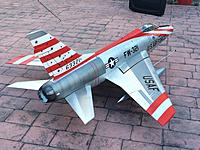
Final Configuration as built and tested: HET 700-68-1200 - Castle Creations HV Edge 120 - Jetfan 90, 9 blade EDF and Tamjets housing for cooling - 10s 4000 to 5200mah packs - 85A / 3300 watts up in the mountains, 3800 watts at sea level (I've flown both density altitudes, no sweat either way). From Oct 2010: I am heavily modifying and glassing a "Fly Fly / Hobby Top Gun F-100". It's a very basic sort of kit for an EDF, but it has some very good "bones" as far as a scale airplane project goes. Aside from the fact that it is foam, it is a pretty good outline of a scale F-100 and it is a very nice size (large). Problems (for me) are Grand Canyon size panel lines that have to be filled anyway in the glassing process... and extremely blunt / thick trailing edges on all flying surfaces. Those can be fixed when I cap the trailing edges in balsa as I always do when I glass foam for durability reasons. The gear mounts retracts are unusable and the stabilizer control is un-airworthy and there is no rudder control but all these things will be addressed in the "kit bash" build. The inlet ducting can use some work with certain areas opening up too rapidly inside and a light weight coating on the exhaust thrust tube to smooth it out a little. The landing gear will use electric Eflite .46 size landing gear retracts, Tamjets struts and the nosewheel strut from the Freewing SU-35 with some slight mods. I'll be using MPI wheels for the mains, 2.75" and be making gear doors all around and heavily modding the landing gear placement and also shortening the fuselage for a scale signle seat F-100D size. I'm using one of Keith Spark's canopy kits and will convert the airframe to a single seat model. I may take some of the forward of fuselage length off to make it look right, as the foam kit is built as a two seat version. Power will be a Tamjets 90 EDF shroud and a Jetfan 90, 9blade rotor and a HET 700-68-1200KV motor on a 4000mah 8s pack. Should be appx. 2800 watts and 9 pounds of thrust. I estimate all up flying weight to be appx 10 pounds. Control will be ailerons, elevons, rudder, nose wheel steering, gear, and throttle. I'll probably mix in some aileron crow for drag control on approach and activate the elevon portion of the elevators when the aileron crow is activated by the flap channel (no actual flaps, as I'll keep it light weight). I'll be putting landing lights in, Afterburner ring lights, and a "Sound System". Yes, sound. See this thread for some background: https://www.rcgroups.com/forums/show....php?t=2085759 There is some talk in this thread of a lot of different schemes - however - I've decided on one and have used Callie Graphics for the insignia and some details. Though I sincerely love the SEA camouflage scheme on the HUN's, I have too may camouflage airplanes already  I'm going with a "metal" scheme.. a vintage 1958 scheme of the 494th TFS from France and later the UK. Here are some pictures of the airframe to compare size with my 90mm El Bandito (3000 watts) and my Turbine Tamjets A-4F (19 pounds of thrust). The Fly Fly F-100 is a good subject and a nice size. I'm looking forward to the project. I'm going with a "metal" scheme.. a vintage 1958 scheme of the 494th TFS from France and later the UK. Here are some pictures of the airframe to compare size with my 90mm El Bandito (3000 watts) and my Turbine Tamjets A-4F (19 pounds of thrust). The Fly Fly F-100 is a good subject and a nice size. I'm looking forward to the project.All told I can fill up 12 channels of control in the F-100. Two channels for elevon control, two channels for spoileron control, one rudder, one seperate nose wheel steering (so I have separate steering trim from rudder trim and also can shut off steering in flight, a nice feature on some of my other planes), one throttle, a second throttle for the sound system (not necessary but better for slower scale jet sound spool up), Gear up/Dn, Sound system start up and shutdown, Afterburner Lightoff, Landing Lights. That's 12 channels. The landing lights on a separate channel will work as a slave to gear operations - gear up and gear down is off and on - but a seperate switch can over ride the gear up/dn slave so that if wanted some additional lights can be on while in flight or they can be turned off while on the ground such as when turning off the runway. A little "bling" for a foamy can go a long way  Basic build thread in RCG is here: https://www.rcgroups.com/forums/show....php?t=1124911 ALSO ADDED: Last few photos are of the jet as of July 2014, having flown successfully. This build stalled out but was re-started in March 2014 and completed in July 2014! The Jet was successfully flown first and documented in this thread on July 31st 2014. A great conclusion to a looooong protracted build! Thanks to all the fellow F-100 Super Sabre builders out there in RCG who provided many encouraging words and ideas that gave me the motivation to finish her into a flying model that will soon be considered an "everyday flyer" after a few more trim flights and transmitter mix adjustments. EDIT: AUGUST 2014 Test Flight #3 and #4 Video
ImagesView all Images in thread
|
||||
|
|
Last edited by Eddie P; Oct 06, 2018 at 12:18 PM.
|
||||
|
|
|
|
|
|
|
Ducting, etc.
Here are a few pictures of the ducting work in the F-100.
I had asked Rodger "Air Sally" if he had any thoughts, as he's the "duct man" in a lot of projects and has had many successful goes at improving performance of EDF's through better ducting. Jepe models is also pretty active with modifying these Fly Fly kits into better models via light glass finishes and improved ducting and hardware. |
|
|
|
|
|
|
|
|
Jepe's "Fast Foam" site, with his glassed Fly Fly models. No F-100 yet!
http://www.jepe.org/indek.htm |
|
|
|
|
|
|
|
|
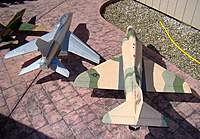
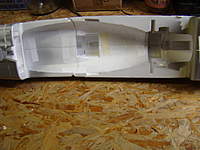
Yeah, I haven't decided yet what they are really doing in the vicinity of the wing where the cheater duct comes into the scene. They really widen out the duct ahead of the wing - but without the wing on I'm just guessing that the duct in fact does increase in area too much over the wing, as the wing has a very large section of it molded out to form the lower part of the duct.
I think the fan is 2/3 aft along the fuse mostly due to the fact that they are trying to make the airplane balance better with the batteries forward under the canopy, and the fact that they made this kit for a 2 seater with a long nose. A single seater could have probably had the fan right over the mid chord of the wing and still balance easily. As it is foam, there is not a whole lot of room to fit the packs in various places due to the bulk of the foam formers, etc. It's just a guess. |
|
|
|
|
|
|
|
|
I sanded off the first coat of spackel on the airframe. It needed a follow up coat over the panel lines again to fill voids and indents. I believe I will leave most of the paint on. My reasoning is that if I sand the paint off, then spackel to make the surface smooth for glass and then glass, the resin will soak into the surface and basically replace the weight I've saved on the paint with more weight in resin. The paint effectively seals the surface, all I really need to do is fill some of the larger voids with spackel, smooth well and it's good to glass. It will be 6 one way, a half dozen the other not counting time spent. This is a foamie bash after all, I am telling myself to hold the horses and be realistic on the time I spend. I'm mostly just telling myself the above to justify saving hours and hours of sanding and filling to get the glass coating under way and move on with the build. At the end of the day I may in fact be an ounce or three heavier but I'll save time I do not have to spend. I'm convinced, anyhow

|
|
|
|
|
|
|
|
|
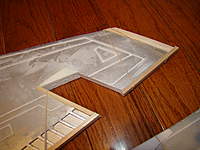
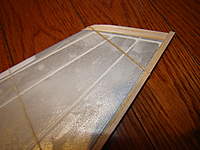
I've been capping the trailing edges and tips of the stabs and wings. I've modified the vertical and horizontal stabs to remove the same amount of material in foam that I've added in light weight balsa capping. Then I'll sand the airfoil to taper down to a 1/8 inch trailing edge thickness.
Stock configuration has a trailing edge well over 1/4 inch thick, and approaching 1/2 inch in some areas. This is pretty devastating to aerodynamics, though I'm sure the benefit is more strength and it's easier to make in the mold this way for a bare foam model. The wings have the ailerons going all the way out to the tips in the stock config. I'm changing this to have the wing tips fixed, and I'll bring the ailerons inboard to the scale location. This is to add durability to the ailerons and wing tips mostly in hangar rash and tip strikes ont he runway. The ailerons on the outboard of the wing could lead to more trouble later (stripped aileron servos, etc) than it will take to fix it now and it will be a little more scale anyhow. I'm not adding flaps. I'm keeping it simpler and lighter. I'll mix the ailerons to reflex upwards on the flap channel, for drag on approach. |
|
|
|
|
|
|
|
|
Following with interest!
FYI - Parkflyer plastics makes a scale intake upgrade kit and cockpit upgrade for this model. I used his upgrade piece on the nose of my FlyFly F86. http://parkflyerplastics.com/cart/in...ex&cPath=28_48 Might save you some time... you can glass right over it. I just finished the HobbyTopGun (formely FlyFly) L-39 and I covered it with Econokote directly on the foam. Turned out pretty nice... although you can still see the foam through the covering when you're looking up close. |
|
|
|
|
|
||
|
|
Quote:
Thanks for the support, I've got the Keith Sparks canopy and nose radius inlet kit in hand, it's very nice. I'm having fun with this kit bash so far, it's nice to have such a large and well formed canvas to work with. I still haven't decided on the paint scheme though... |
|
|
|
||
|
|
||||
|
|
Quote:
Set up conservatively on 6S.
|
|||
|
|
||||
|
|
|
|
|
She's progressing well. I'm on my way back home from vacation right now and should start again soon. So far I've:
*Filled all the voids (and panel line trenches) with light spackel and sanded *Got my Sparks canopy and inlet fairing *Capped the trailing edges, tips and leading edges with balsa *Sanded a few of the panels for trailing edges to be about 1/16 inch to 1/8 inch, tapering narrower at the tips. *Re-oriented the ailerons to be a little more scale by leaving the wing tips fixed and bringing the ailerons more inboard. There will be plenty of aileron authority available but the wing tips will be more durable this way and it will look better. *started looking at my landing gear plate mods for the Eflite electric units I have. After I get the wings sanded and tapered for the balsa caps I can go over the model with a thinned out final spackel coat, sand and then lay the glass. I will probably glass the model after I join the fuselage (it's in 4 parts). I originally thought about glassing fuselage panels and then joining the panels later but this jet is set up for having very good access to the fan by just removing the wings. All I have to do is widen the battery compartment a little for easier access to the 8S 4000mah packs before assembly. There is no significant reason to not have everything joined up and sanded pretty before glassing. I'll get better transitions and a better "looking" seam if I join everything up before glassing. One thing is for sure, if final fit and finish is no object, I'm sure this model could be unboxed and flying in less than 2 days. All my work is going into the components (gear plates, controls, rudder mod) and then the fit and finish. Looking at the ducting... I'm thinking I might leave it as is and just try to mainly clean up the cheater duct. The more I look at the inlet the more it looks to be smaller than 80 percent. I will try my best at making a measurement later this week. |
|
|
|
|
|
||
|
|
Quote:
 It seems like you have her set up perfectly - any faster and she would not really look right in the air. Scale like is the way on something like this. Very well done!! It seems like you have her set up perfectly - any faster and she would not really look right in the air. Scale like is the way on something like this. Very well done!!Are you thinking about doing the Mig 15? |
|
|
|
||
|
|
|
|
|
Eddie,
I'm really looking forward to your progress. I know it's going to be done well, whatever products or techniques you decide on. I picked up a tip a while back that I like a lot. It's a mix of Durhams watter putty (found at Ace, True Value or OSH) with light weight spackle and water to make a sort of pancake batter for finishing. It sands better than the spackle alone and you can apply it with a brush. Also, I used Krylon H2o white paint and had to sand it. It turned out to wet sand very well. It was a happy accident.  This is what I used those things on. It was quite a bit of work, but you can't tell it's foam.  https://www.rcgroups.com/forums/atta...mentid=2700497 |
|
|
Last edited by Steve C; Oct 24, 2010 at 02:01 PM.
|
|
|
|
|
|
Holy
 Steve, that's a Robbe Aero Commander, isn't it? Looks amazing... Is this a different one than the speed 600 powered one you and your dad brought to the Reno grass fly-in we had years ago? Steve, that's a Robbe Aero Commander, isn't it? Looks amazing... Is this a different one than the speed 600 powered one you and your dad brought to the Reno grass fly-in we had years ago?I'll have to try the putty trick. This is the second time I've seen it, and if you have done it too, then I'm starting to be convinced. How well does the water based Krylon white dry? Thanks for the thoughts. I'm thinking I have a lot of options now. |
|
|
|
| Thread Tools | |
| Similar Threads | |||||
| Category | Thread | Thread Starter | Forum | Replies | Last Post |
| Discussion | Back to Basics - Understanding the Raw Deal of the New Deal | MtnGoat | Life, The Universe, and Politics | 0 | Sep 15, 2010 09:59 AM |
| Going back to basics :) | Dogzilla | Flying Wings | 3 | Jul 17, 2005 04:20 AM | |
| Back to basics... | msmith | The Builders Workshop | 6 | May 28, 2005 05:49 PM | |
| Get back to basics!!!!! | Stef | Foamies (Kits) | 0 | May 31, 2003 08:37 AM | |
| Fiber Glassing a Walmart foamie - To do or not to do? | Steve Wrona | Foamies (Kits) | 0 | Jun 26, 2001 05:41 PM | |






 wonder why the fan is so far back .

