|
|
|
|
Thread OP
|
Build Log
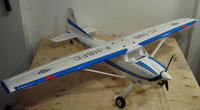
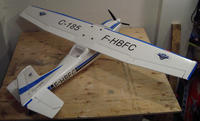
e-domodel...CESSNA 185 SKYWAGON...L/G & FLOATS...
e-domodel SKYWAGON purchased from... rc castle
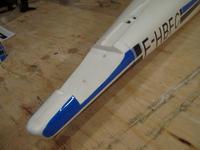
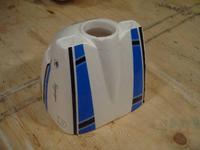
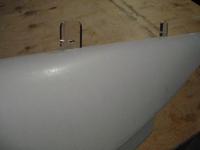
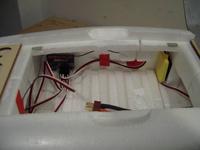
I bought this one to float fly mostly, but will maiden L/G. Boxes were taped together and wrapped in plastic. No damage noticed as of now apon delivery. Cowl and spinner are foam. I guess no nose overs or a plastic spinner will be in order. elev and rudder servos pre-mounted out back. aileron servos pre-installed in the wings. All servos with extentions run. Tape hinges & horns pre-done. Aileron linkages done. Struts are wire, covered with foam. 2 piece wing, solid metal wing tube. Flap servo bays molded in. No servos or hardware supplied. Motor mount is acrylic? I don't know about the look of this...hmmm Motor mounted and esc free floating around the fuse. 2 magnetic foam hatchs underneath one for the batt / electronics & the other for the rear servos. Wish it came without the decals applied. Ended up with a few small wrinkles and some big ones on the struts. And more care could have been taken on the rudder stripe to contour the ribbing if I did it myself. The floats look really nice. the water rudder is pre-installed. Alot nicer shape than the ones I saw for the multiplex Mentor. rc castle supplied 2 spare props. Thanks for that! Gotta whip it together as I have another build. Cheers  Brent ImagesView all Images in thread |
|
|
Last edited by BrentP; Sep 01, 2009 at 08:56 PM.
|
|
|
|
|
|
|
|
Wow looks pretty nice. I wish it came without the decals, gonna have to remove those to paint.
How is the foam quality? Close to multiplex? Makes all the difference. My seawind was made out of crap but love my minimag and t-28, Multiplex has good foam. That motor mount looks like it will be trouble after a nice hard bump on the motor. Had to replace my t28 mount after it cracked on a prop strike. Can't wait to see a video of it flying. If you can :-) |
|
|
|
|
|
|
|
Thread OP
|
I have only really seen the multiplex floats up close, and am no foam expert, but it does seem and feel similar.
The decals will probaly start to come off as the ends are curling. I will maybe paint the same scheme as they come off, but can't be bothered to spend much time on this now as I have other builds and need it ready for a float fly sept 27 (fingers crossed for good wheather that day). Brent |
|
|
|
|
|
|
|
Thread OP
|
I wanted to do onboard vid but didn't want to remove any foam if I didn't have to.
Decided to remove a side window. Used a utility knive to break through the glue between the foam and window. It came out easy with only a couple knicks in the foam. Using vecro on the dash and camera and taping some foam shims to the camera it sits pinned between the floor and cieling and vercroed to the dash board. That should be the most time consuming part of the build LOL. I will set the camera for a shot out the side window too, but this will require some foam to be removed from the floor (camera is too tall). Removing the foam will have to be done through the side window, kinda a ship in a bottle thing, so I'll do that later. And took care of the messy part, gluing in the tail feathers with the supplied 2 part glue. It says that the glue is "modified" so I guess epoxy won't work on this foam like guys have told me about the multiplex foam? 
|
|
|
|
|
|
|
|
Thread OP
|
Rigged the elev/rudd linkages. The dual push/pull off different holes in the elev servo arm to differnt holes on the 2 elev horns seems to work ok.
As long as the throw won't be too far they move basical equal. However I feel the elev push rods are short. The clevises are just making thread. And I can't cheat the servo arm off centre as the throw is not equal when the servo throw has to move too far off centre. I'll go with it though... it's a foamie LOL. I added heat shrink safeties to the clevises. Used sticky-back velcro to mount the receiver, ESC and BEC (there is a seperate BEC hard wired to the ESC). The battery tray was loose, so I took it out and will glue it in after I see where the balance is at. Bolted up the L/G. The tail wheel was not free wheeling so I drilled it out a bit. The plastic nut to hold the tail wheel was barely screwed on. After drilling out the wheel I used some lock tight on the plastic nut and tweaked the last turn with plyers. The motor screws were also barely finger tight so out they came for some lock tight as well. I tested the electronics thus far (no prop or ailerons) and all works. What's that noise, oh my stomach growling LOL. Lunch Time  . .
|
|
|
|
|
|
|
|
Thread OP
|
The cowl is to be glued on with the 2 part glue.
Magnets would have been good. I didn't have any so I sparingly used silicone so I can remove the cowl. The motor shaft was tooooooo long so I cut some off. The wing was a bee-otch to bolt on 1st time. The blind nuts were clogged with glue or cross threading because the wood plates the blind nuts are attached to aren't glued to the cieling great but once together the bolts pin everything together firm. The strut wire is attached to the wing with a Z bend. There is a 90 degree bend at the fuse end. The 90 degree bend plugs in a hole in acrylic embedded in the foam..... and that's it  ....so how is it going to stay in the hole when the wing flexes....throw me a friggin bone here, how's that gonna work ....so how is it going to stay in the hole when the wing flexes....throw me a friggin bone here, how's that gonna work  . .It says in the instructions not to attempt to fly the model without the struts too LOL. My fix was a piece of dowel glued in behind the stut (the strut plugs in from the front). I used a plastic washer, any washer sould do, to act as a stop against the formed foam at the fuse strut mount. I used very small zip ties between the washer and the strut foam and around the wood dowel to pin the strut wire in it's hole so it can't come out. The washer should protect the foam from the zip tie cutting in and slipping off the 90 degree elbow. To disassemble simple cut the ties and use new ones each time out (their cheap) The plane is quite rigid all buttoned up. CG and battery tray next. ImagesView all Images in thread |
|
|
|
|
|
|
|
|
Looks great. Crazy motor mount. Need the struts and you may want to reinforce the outer wing. Saw a video on YouTube where the wing flexed Way up causing a crash. Be added some cf rods and it flew pretty nice. But it does seem pretty underpowered on takeoff from water. Was gonna put a nice size turnigy motor in it( when I get one) didn't happen to weigh the motor did ya? :-)
Does look nice sittn on floats. Even if it's a foamy. Lol I'm still at that stage and it looks nice. Think it's the cheapest way I'm getting a .40 size anytime soon. Rc is expensive. |
|
|
|
|
|
||
|
Thread OP
|
Quote:
Sorry I did not weigh the motor. I wasn't going to bother with CF to stiffin the wing but after assembling the floats it is pretty heavy and the wing load may be too much so I will do as you suggested and add CF. The weak spot is right where the cut between the flaps and ailerons is. BTW I will not do the flaps at this point. It should slow down fine with all the drag from the floats etc. One blind nut for the rear float mount cross threaded (guess it was in stalled crooked) and pop out  . .I had to cut away some foam in the battery bay and pain stakingly use needle nose to get it back in with epoxy applied to the blind nut as I re-installed it. That sucked! Hope to get some CF this morning. |
|
|
|
||
|
|
|
|
Thread OP
|
I did the carbon fiber tubes to strenghthen the wings.
I used 4 mm O.D 60mm long tubes. I cut vee notches the width and length of the tube with a knive and then used a similar size dowel with some sand paper wrapped around it to sand the grooves so the tubes fit near flush. BTW I did use epoxy to glue the tubes and it worked. Test first on a scrap from the vee notches to make sure. NillSpace, thanks for bringing attention to the wing, as it got me to look at it more. Yes between the large cut for the ailerons and the servo bay there is not much material in that area. If the wing broke it would split right along those areas. So thanks again. This was my 1st time doing this to a foam wing and it really made a huge difference to the rigidity. The floats are ready, except the included clear plastic cover to protect the water rudder servo is not tall enough, atleast not tall enough for the included servo  . .Will try to scratch something for that. The wing went on alot easier the 2nd time but you have to be careful starting the threads. IMPORTANT- make sure to break in the tape hinges by moving them back and forth by hand before linkages and servo testing. Otherwise they will not move down with the servo. I found this out the hard way. The rudder hinges appear to be nylon pin hinges and are good to go. Also make sure the control surface horns are tight, mine weren't. 
|
|
|
Last edited by BrentP; Sep 03, 2009 at 07:51 PM.
|
|
|
|
|
Thread OP
|
No control throws were suggested in the instructions. So I went with roughly-
Ailerons 3/8" up down elev 3/4" up down rudder 1" left right Did a static test with a fully charged 4s 2200mah 20c lipo Results: 14.3 volts 550 watts 39 amps 3 lbs 5 oz thrust Model weight RTF with battery: 3 lbs on L/G 3 lbs 11 oz on floats Looks like lots of power to weight for this type model. My 8 lbs cub is only 630 watts. It does not appear there is any degree of incidence between the wing and floats, may need to add a shim to the front float support to get some attack angle on the wing if it has trouble getting off the water. Maiden on L/G next I guess. 
|
|
|
|
|
|
|
|
Thread OP
|
It Flies
Flew it 3 times today (sorry no vid yet) in some pretty crazy wind.
It flies nice. There is tons of power and the 1st takeoff was mostly vertical. There is a lot of torque to the left so right rudder is a must on takeoff. I tried a takeoff at about 1/2 throttle and in about 15 - 20 ft it was airborne and climbed out scale like. It slows down crazy like for landing, honestly touching down like a helicopter with no roll out. This was in a head wind and to get a more normal landing I had to fly it in under almost 1/2 power. She's a floater. Loops were normal. The roll rate was incredible slow, slower than anything I've flown. The 2nd flight was cut short and I did not make the runway and landed in weeds. No harm done. It turns out one of my new Turnigy batteries must have a short or cold solder or something as the batt was extremely hot and puffed up. 1st bad batt from HC. Should have ooddles of power for the floats. 
|
|
|
|
|
|
|
|
|
great to hear it flys nice. Sounds just like I would like it to. Guess I was wrong in the you tube video it looked like it was struggling on floats. Maybe was just really windy. Think I'm gonna have to get one. Want a second fpv plane something bigger then my old mini mag. Will prolly get the 185 to so can have an unobstructed forward view (from under) no forward gear. The price with floats is really hard to beat even with the shipping. Think it was 230 something to Florida.
Sorry to hear about hobby city. There my best online friend lol. Spent SOOOO much cash there in the last year it's not funny. Out of like 20 batts had 2 bad out of the box( bad cell on both) but for the price even with the EMS everytime you just can't beat it anywhere, really. For the price of a name brand batt I can get 3-4 there so I figure if one goes bad who cares. The first time I ordered from them I thought it was a scam...... Just Couldnt be that low price I thought. I didn't even both contacting them about returns I already new they would want it shipped back to much money just to get a replacement. Would love to see a video if you can sometime. There's just really none out there of this model. That I could find anyways. Glad the build went well. Congrats. |
|
|
|
|
|
|
|
|
Brent,
How did this thing ever work out? I just acquired one from a friend and I'm trying to make sense of the power system. 4 cells and a 10 x 6 3 blade prop with a relatively high kv motor like this seems way wrong for a big draggy floater like this. Trying to draw 39 amps from 2200 cells doesn't sound like a good thing to do either. No wonder it puffed your pack. I don't think this airframe can even reach 1/2 of the pitch speed of the prop. Huge inefficiency here. I'm thinking about an 11 x 4.75 2 blade prop on three cells, but I dont have any big 3s packs. Spinning a larger diameter, lower pitch prop at a slower speed should give much better performance while drawing only about 300 watts. This motor doesn't have near enough mass to run near 500 watts anyway. The stock set up sounds like a prescription for disaster. Let me know how the plane works out for you. I'm hoping to have a good kick-around plane for shooting touch and goes on a lake. I'll be adding flap servos for extra entertainment. This is a pretty cool looking package, but isn't really well thought out. |
|
|
|
|
|
|
|
Thread OP
|
Mike, yes I guess your right about all. But the puffed pack was due to stupidity.
I was using some foam to help keep the pack move front or back and chocked the air flow. I don't want to invest any time or money in this one but I may do a prop switch to amp down as it doesn't need the power. I haven't flown it since the 1st day. This sunday will be the float test. I will go with the stock setup and see how it goes with throttle management. |
|
|
|
«
Previous Thread
|
Next Thread
»
| Thread Tools | |
| Similar Threads | |||||
| Category | Thread | Thread Starter | Forum | Replies | Last Post |
| Discussion | E domodel Cessna 182 with floats | panamarenko | Foamies (Kits) | 0 | Apr 19, 2009 12:41 PM |
| For Sale | Cessna 185 on floats... | JerryHall | Aircraft - Electric - Airplanes (FS/W) | 1 | Dec 21, 2005 12:18 PM |
| Cessna 185 with floats in foam project.. | JerryHall | Foamies (Kits) | 48 | Nov 09, 2003 03:29 PM | |
| Colorful Cessna 185 | Ron Williams | Scale Kit/Scratch Built | 4 | Jul 17, 2002 02:12 AM | |
| Source for GWS micro retractable l/g? | PeterH | Vendor Talk | 5 | Dec 18, 2001 12:49 PM | |


