|
|
||||||||||||||
|
Thread OP
|
Discussion
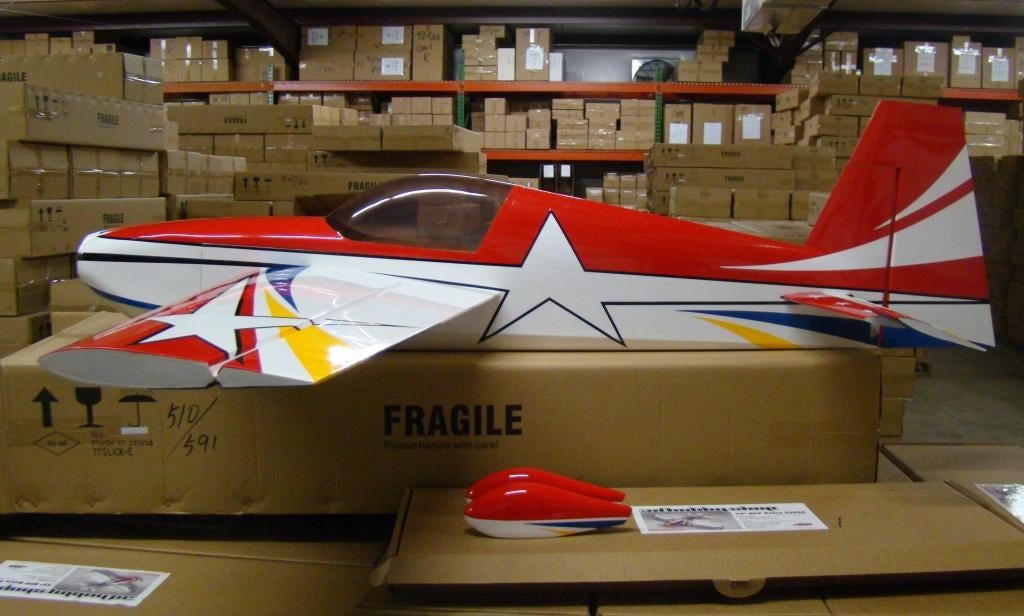
3D Hobby Shop 71" AJ Slick - Build & Fly thread
Newly updated:
OK, here they are. Per Ben from 3DHS Quote:
        BUILD VIDEOS Another fine work by IPSMotors
VIDEO 70 AJ Slick Video #1 - AJ Uncut
70 AJ Slick Video #2 - 2009 IMAC Sportsman Sequence 70 AJ Slick Video #3 - First Huck Component weight in grams / oz Bare fuselage 767 / 26.4 Hatch 190 / 6.6 Cowl 142 / 4.9 rudder 70 / 2.4 Wing tube 54 / 1.9 Hstab+elev+joiner 193 / 6.7 Wheel pant 35 / 1.2 Carbon main gear 86 / 3.0 Wing, hinged w/ aileron 390 / 13.4 Tailwheel assembly 23 / 0.8 Parts List Added Courtesy of Matt (DaLoaf) SLICK COCKPIT (Thanks to GP!!) http://www.3dhobbyshop.com/assets/im...kpit_pilot.jpg http://www.3dhobbyshop.com/assets/im...-corrected.jpg http://www.3dhobbyshop.com/assets/im..._dashboard.jpg http://www.3dhobbyshop.com/assets/im...ck_headest.jpg |
|||||||||||||
|
|
Last edited by BoneDoc; Mar 03, 2012 at 03:00 AM.
|
|||||||||||||
|
|
|
|
|||
|
|
Note: We have made a few changes to the kit since IPS did the build videos. These few changes are reflected in the "build thread" posts below.
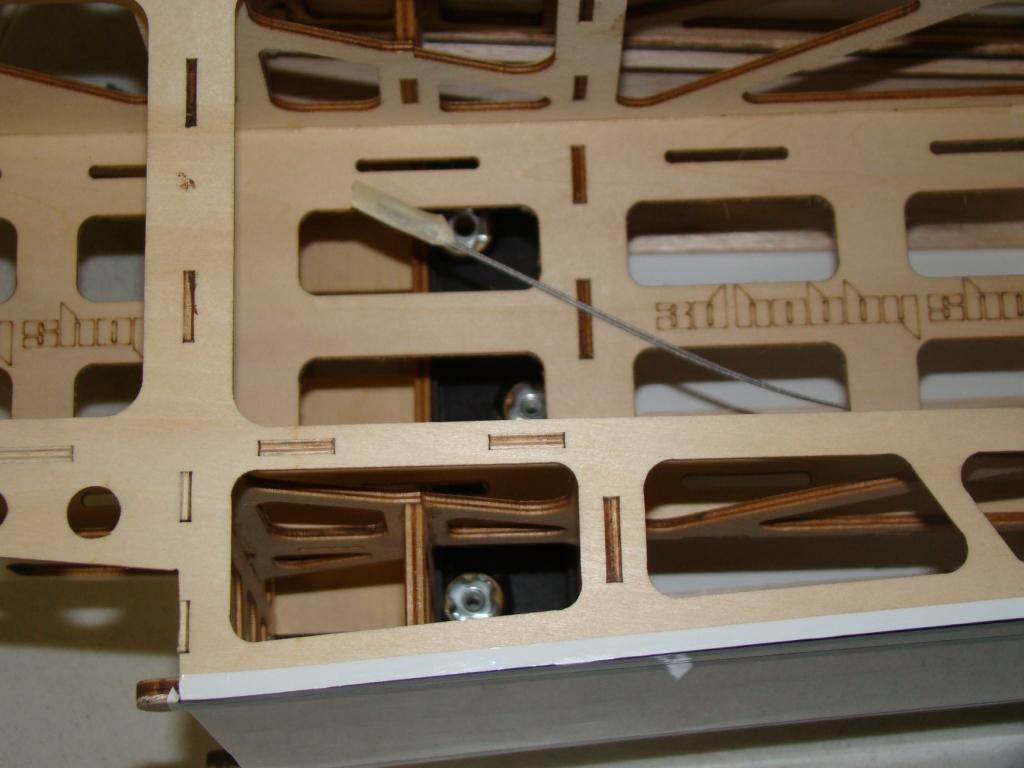
Instruction manual: The 70" Slick manual is available for download as a .pdf file below. NOTE about servo arms: Make sure that your ball links do not contact your servo arms as they travel. We want to have smooth action and low servo-current draw. As pictured below, when using stock Hitec GRP servo arms, one way to do this is to cut or sand away the corner of the arm as shown. Photo of Fantasy Blue: Below is also a photo of the Fantasy blue color scheme on the 70" Slick, a 51" Slick is shown in the photo for size comparison. Video added: First video of Blue scheme added below. Setup: Reaper GR60-XL Xoar 18x8 Castle Hv-85 Turnigy 6S 5000mah 15C
------------------------------------------- SPARE PARTS LIST Canopy Hatch - Blue http://www.3dhobbyshop.com/detail.aspx?ID=2517 Canopy Hatch - Red http://www.3dhobbyshop.com/detail.aspx?ID=2518 Cowl - Blue http://www.3dhobbyshop.com/detail.aspx?ID=2515 Cowl - Red http://www.3dhobbyshop.com/detail.aspx?ID=2516 Motor box http://www.3dhobbyshop.com/detail.aspx?ID=2524 Wing spar tube http://www.3dhobbyshop.com/detail.aspx?ID=2522 Landing Gear http://www.3dhobbyshop.com/detail.aspx?ID=2519 Pants Red/White http://www.3dhobbyshop.com/detail.aspx?ID=2521 Pants Yellow http://www.3dhobbyshop.com/detail.aspx?ID=2520 Tailwheel assem. http://www.3dhobbyshop.com/detail.aspx?ID=2523 Main Wheels http://www.3dhobbyshop.com/detail.aspx?ID=2525 ImagesView all Images in thread |
||
|
|
Last edited by blucor basher; Aug 06, 2010 at 12:45 PM.
|
||


 because do want the glue to stick to those parts.")
 into the hinge holes in the rudder and the vertical stabilizer. Use several drops in each hole. Wipe away any excess on the surface.")


. In this bag are two control horn sets. Both are used (one on each side of the rudder) for pull-pull rudder installations. Using 30 minute epoxy or polyuretha")


|
|
|
|
|
70" Slick build thread pt. 3
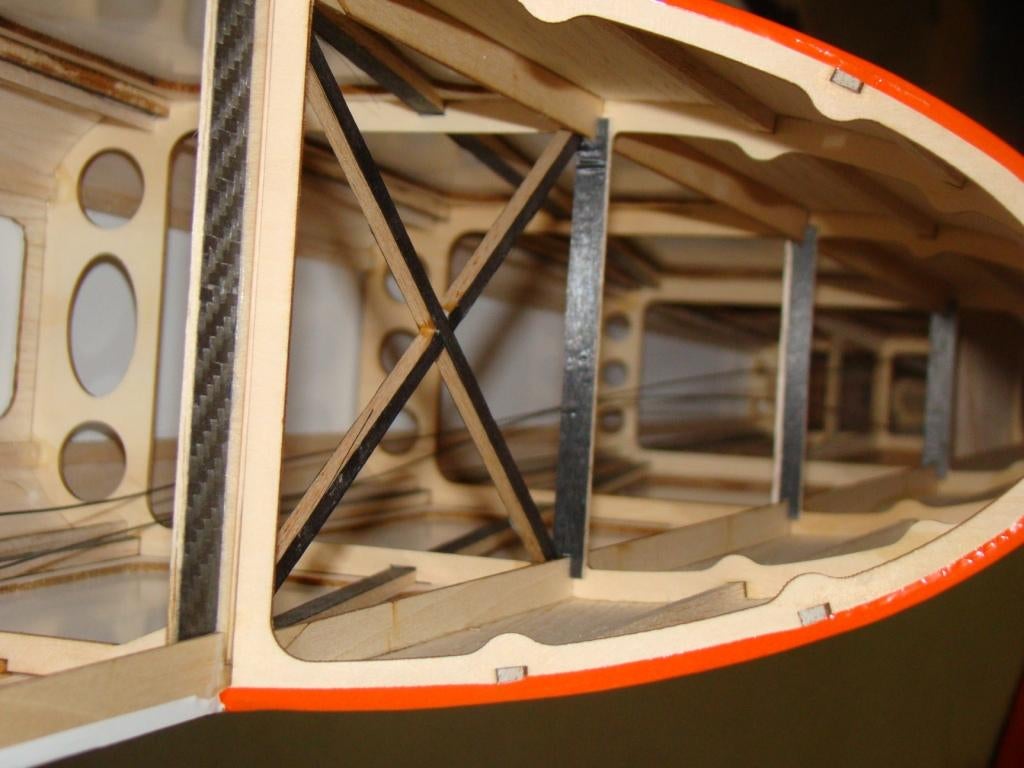
Hstab and elevators.
Cut out the holes in the fuslage covering as shown. Slide the horiztonal stab into its slot. Align side to side with a ruler. Temporarily install wing tube and wings onto fuse and measure form the Hstab tips to the rear aileron tips, equalize this dimension to make sure stab is perfectly aligned (illustration coming). Drip thin Ca glue onto the Hstab-to-fuselage joint. Again, we DO NOT remove any covering from the Hstab. Thin CA binds very well to both covering and wood. Allow to dry. Clean up any leakage with Ca debonder. Install the hinge points on the elevators in the same manner as on the rudder. Install the elevator with the joiner-rod first. Put some thick CA, polyurethane, or epoxy into the joiner slot on the other elevator before installing it. NOTE: the joiner slot is TIGHT. Trial fit once before doing it for real. Install elevator servo, horn, and linkage as shown. If you use a very heavy power system, you can use a second elevator servo, this system can be done a second time on the other side, everything is mirror-image and the hardware is included. Our test aircraft use ONE elevator servo and we fly them hard. ImagesView all Images in thread
|
|
|
Last edited by blucor basher; Aug 30, 2009 at 09:17 PM.
|


|
|
|
|
|
70" Slick build thread pt. 4
The aileron installation is very simple.
Cut out the covering over the servo hole and the control horn slots as shown. Use epoxy or polyurethane to glue the horn in, just as on the rudder and elevator. Install the servo, using the pull-string inside the wing to pull the wire through. Assemble and install the pushrod as shown, using the allen-screws and nylon locknuts. Check for free motion, and make sure the ball-link is not rubbing the servo arm. Cut away servo arm as needed. ImagesView all Images in thread |
|
|
Last edited by blucor basher; Aug 30, 2009 at 10:30 PM.
|


|
|
|
|
|
Reserved 6
|
|
|
|
|
|
|
|
|
Hey Ben took all the front row seats. LOL
|
|
|
|
 It is going to be off the hook.
|
|
|
|
Thread OP
|
Here's a relatively simple way to install the Neu setup for those interested. Basically, just drill / enlarge the hole to allow the motor to fit (but not too large as to allow you to still drill the four supporting hole.
 Then you mount the Neu on an aluminum plate (I just modded one of my other motor's X mount for this purpose)  Also measure out how long your mount needs to be. Use an appropriate length nylon washer and rods found at Lowe's, and you're set   
|
|
|
Last edited by BoneDoc; Oct 06, 2009 at 04:30 AM.
|
«
Previous Thread
|
Next Thread
»
| Thread Tools | |


| Similar Threads | |||||
| Category | Thread | Thread Starter | Forum | Replies | Last Post |
| Poll | 3D hobby shop 51" slick or 55" SHP? | appleflyer | 3D Flying | 24 | Mar 24, 2009 06:29 PM |
| Video | 3D Hobby Shop's AJ Slick | Clark Warfel | Electric Plane Talk | 3 | May 08, 2008 07:31 AM |