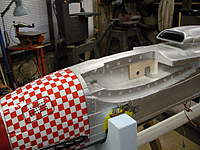
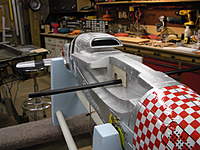
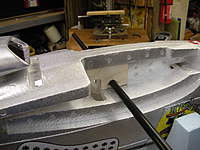
Sticky:
P-51D: The Rudder Hinge
-
 Views: 377
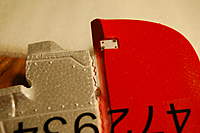
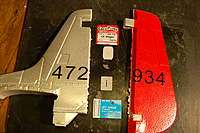
You can see here where the foam hinge is starting to deteriorate. This is a critical mod, and it's not that difficult to perform. -
 Views: 475
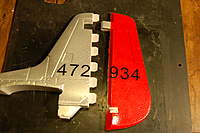
I used the Great Planes hinges on this mod, but upon further advise I should have used the Goldberg Jet hinge with the slit. -
 Views: 473
It was brought to my attention that 6 hinges was a bit "Overkill", so maybe 3 would suffice. -
 Views: 415
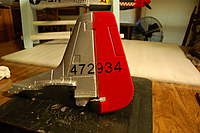
The finished deal, and working like a charm! Next!... the elevator & ailerons.
Comments (0)
Add Comment
Sticky:
P-51D: Fpv!
-
 Views: 297
I GG'd 2 blocks of Blue foam together and started carving away. Tom Hunt wouldn't loan me his "Star Trek Replicator"! -
 Views: 260
With precision skill, and the help of an exacto, a Hot Wire, a Hot Knife & the Dremel, of course, this is what I came up with. -
 Views: 285
A defective canopy that Tower Hobbies sent me, and didn't want back, worked great for this applicfation! -
 Views: 290
The Turnigy DVR mounted in the Pilot's seat! -
 Views: 256
I painted the Blue foam with Krylon H2O Latex Black -
 Views: 296
The POV is "Great", looking directly thru the spinning yellow tipped 4-Blade prop! -
 Views: 235
This is the Mini Spy Cam mounted in the cockpit. -
 Views: 219
-
 Views: 376
I liked the WWII British Pilot from VQ Warbirds. -
 Views: 360
The Canopy is from Tower Hobbies, and is much more to scale as Tom H. stated. -
 Views: 385
This is the result of the Tom H. recommended 5 sec. dip, but instead of 3 dips in the Ritz dye, I went for 5! -
 Views: 330
Because of head clearance issues I had to move the pilot back a bit, but I think he came out looking pretty good! -
 Views: 310
-
 Views: 334
The trim work was done with Silver 1/8" & 1/2" pin stripping. -
 Views: 322
Here are the WWII fighter pilots.
Sticky:
P-51D: Battery Options!
-
 Views: 397
Here is a size comparison of 3 of my Lipo options. -
 Views: 409
The Turnigy 4s 2200mAh 20c is the LiPo I have used to date. It too can fit in the cockpit with ample room. -
 Views: 384
The Turnigy 4s 2200mAh 20c will also fit nicely in the forward compartment. -
 Views: 310
The Moxie 4s 3300mAh 20c is my newest addiction. It will fit in the cockpit or battery compartment also. -
 Views: 353
The Rhino 4s 4000mAh 25c -
 Views: 332
The Rhino 4000 as with the Turnigy 5000 will only fit in the cockpit area, and with the Rhino there is very little room between it and the floor of the cockpit module. -
 Views: 359
The Turnigy 4s 5000mAh 25c I have for the B-2 will work in the P-51 also, but can only fit in the cockpit area. -
 Views: 295
There is little room for adjusting proper balance for the CG
Sticky:
P-51D: Wing Spar Mod
-
 Views: 474
I used a CF strip .070x.437 cut to 19.5" long. -
 Views: 473
-
 Views: 437
I removed the .090x.265 fiberglass spar -
 Views: 700
You can see here how far I brought the spar out -
 Views: 428
I ran it up just shy of the flap servo wire channel -
 Views: 408
I dug out the channel so the spar would fit flush with the wing surface -
 Views: 805
Here you can see how deep the .437 spar sat in the wing -
 Views: 396
After GG the spar in place, I covered it with masking tape to prevent the glue from expanding on to the wing surface.
Sticky:
P-51D: Elevator Mod
-
 Views: 471
I'm using a single 2-56 linkage rod soldered to a connector and attached to a 2-56 Gold-n-Clevis. Note that I changed out the original control horn to a much bigger and stronger one. -
 Views: 428
I applied the same configuration to the rudder also. -
 Views: 381
Note the bends in the linkage to alleviate any binding.
Sticky:
P-51D: Servo Tray
-
 Views: 258
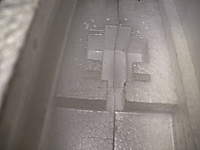
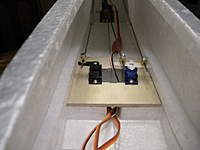
Tray is made from 3/32" Birch ply -
 Views: 246
I drilled holes in the backside for additional grip for the epoxy -
 Views: 250
The foam wouldn't handle the torque without reinforcement. -
 Views: 321
Elevator servo on the left, rudder/tail wheel steering servo on the right. I have since replaced elev. with the HS-82mg, and the rudder/tail with the Hex 14mg.
-
 Views: 371
I cut an opening, and then carved a ramp up to the channel where the ESC would be housed. -
 Views: 311
This is the ramp I cut for better air flow. -
 Views: 345
Applied some Gunmetal gray for effect. -
 Views: 356
Cut the opening in the cowl so now there is added ventilation to the ESC. -
 Views: 317
You can see the opening leading into the tail wheel bay on the V3 I have. -
 Views: 252
This is the push rod exit guide that I had on hand. -
 Views: 261
A 1/4" hole drilled into the open fuse area would direct the towards the guide/vent. -
 Views: 237
Nice flush fixture that looks clean.
-
 Views: 348
I didn't like that open channel left from the absent linkage. -
 Views: 373
I wanted access to the wiring without having to perform surgery over and over! -
 Views: 387
I took a plastic box with just the right dimensions I needed, cut 2 sides out, used them to fill the gap, and hold the corner piece in place. -
 Views: 358
I used the 2 servo cover holes to hold everything in place. So now I have an access hatch for all the wiring (which came into play later with the Nav. light mod) -
 Views: 355
With the stripes painted on, the hatch is now functional and inconspicuous.
-
 Views: 365
"Auntie Samantha" nose art on the P-51D -
 Views: 289
-
 Views: 288
-
 Views: 266
-
 Views: 376
I like her so much I even made decals for my iMAC! -
 Views: 542
-
 Views: 450
This displays the various materials on a Krylon Bright Silver background. -
 Views: 626
This is my updated Bomb insignias. Ya' gotta send the message with a twist!
-
 Views: 154
-
 Views: 339
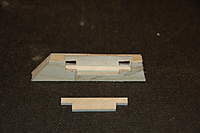
The pylon assembled and ready for shaping and sanding -
 Views: 329
The 2 tank halves in the gluing process -
 Views: 363
Pylons sanded and ready for sealer and paint. The 3/32" aluminum tube is what I use to manually operate the release. -
 Views: 391
Both Pylons assembled and ready for install -
 Views: 378
Note the footing I added to contour to the Mustang's wing profile -
 Views: 329
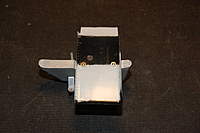
It is a simple attachment to the wing. Here I have screwed the Pylon into the cover I made for the access hatch. -
 Views: 351
The stock servo cover will work as well for an easily removable attachment point.


