Heli Pad's blog View Details
Posted by Heli Pad | Jan 31, 2013 @ 02:05 PM | 32,624 Views
Most of us are here because we enjoy flying RC models. Waiting for the batteries to charge, not so much. If you have a model that has swappable batteries, extending the flight time is really not a big deal, just get more of the same batteries and a good charger and you're set.

But some of us has RC toys with internal batteries that are not readily swappable. To extend flight times, people have been trying two main approaches. Supersize the battery, or lose weight.

In my experience, supersizing the battery does not pay! I'll use the Syma S107 as an example. The stock battery is 150mAh. Naturally, people go look for 180mAh, 200mAh, 240mAh, or even a pair of 180mAh!!! And the results are marginally better flight times. Why, because of the weight you're adding when you supersize the battery. You end up wasting all the power to lift the weight you added. The motors are over worked. And weight distribution (CoG) is off. In general, this is NOT a good approach. People are doing that with their Quads also. While most of the quads have swappable batteries. It is located dead center under the frame. It is very easy to supersize their batteries, but the results are the same. Doubling the capacity of the cell would not double your flight time. You are just giving more work to the motors.

Therefore, weight loss is a much better approach. It is the opposite of supersizing stuff. Loss weight, and the flight time naturally extends. But losing weight sometimes means losing aesthetics...Continue Reading
Posted by Heli Pad | Dec 28, 2012 @ 04:34 PM | 34,125 Views
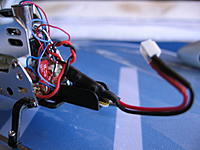
For the price and the features, the well perform Syma 3 channel coaxial helicopters cannot be beat. These includes the S107G and its siblings. One of the biggest criticisms though is that it only flies for 5 minutes, then it is back to charging. Most of us are impatient. So, people attempt to extend the flight time by adding a 2nd battery or get a super sized battery. While the capacity is increased, so is the weight. The S107G is now lifting a heavier load, overtaxing the motors. It is a heavy price for slightly extended flight time.

About a year ago, my buddy Daryoon and I sat down and brain stormed a different approach, and we came up with a battery quick change system. Swappable batteries is not a new idea. It is employed by all hobby grade helicopter, but not so much in toys. And others have made similar swappable battery scheme for the S107. What makes our approach somewhat unique is that we also address the quick change canopy. So that at the end, the finished product is completely stock like, no rubber bands, no battery dangling between the skids, etc. No tools is required for the battery change.

We have posted about the mod. But it is buried deep in the thread now. I am not sure if I could even find it. Therefore, I'd like to make this blog entry for easy reference. I'm going to include a few self-explanatory photos here. But for a complete write-up, please visit Daryoon's web page:
http://www.hacksmods.com/2011/12/sim...le-canopy-mod/

Thank you for looking. You comments are welcome.
Posted by Heli Pad | Jun 29, 2012 @ 04:44 PM | 41,661 Views
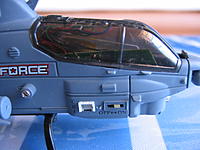
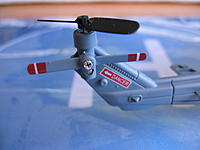
This is my review for the SYMA S108G Marine Cobra. The S108G is not a new model, but it is new to me. I just received it yesterday. I've been a long time fan of SYMA sub-micro 3CH coaxial helicopters, mainly because of its stability, durability, and low cost. Before this S108G, I have already owned a Firebird (R3), a S026G, a S105G, a S110G, and a handful of S107Gs. I also had a S109G for a short period of time.

Anyway, I have always admired the cobra. It's current price is probably at the lowest I've ever seen. So, I went ahead and collected it. I hope that you are somewhat familiar with the popular S107G, because I would be making constant comparisons with it in this review.

If you think that the S108G is the S107G with a military scale fuselage, you would be partially right, but mostly wrong. The two do share some common parts. For instance the drive train is completely interchangeable. However, the electronics are completely different.

If you are familiar with the SYMA 3CH helicopters, you would know that there are basically two families. For instance, the S105G, S107G, and the S109G belongs to one family. The S026G, S110G, and S108G belongs to another. Within the same family, electronics are somewhat compatible. In most cases, you could use a single remote to control all the models within the family. But you can't use the remote across family lines. As you can see, I could use my S026G remote for itself, the S110G, and this S108G. But my S107G remote would not work...Continue Reading
Posted by Heli Pad | Mar 10, 2012 @ 02:29 PM | 52,600 Views
TBE defined
What is the infamous “Toilet Bowl Effect” (TBE). It means that while hovering, your helicopter is flying in a circular pattern with the nose holding its heading. That last part is important, because if the nose is not holding its heading, it is something else; it is not TBE.

What causes TBE?
There are many things that could contribute to TBE, including any imbalance, misalignment, tracking, and binding issues. That’s why it seems to come from nowhere and it’s hard to track down the real cause. This article is not intended to be comprehensive. Rather, it aims to discuss only what I believe is the most probable cause, and its fixes. I my humble opinion, the most likely cause of TBE is binding issue between the flybar and the rotors that it is connected to.


Unless you have a flybarless helicopter, TBE is most likely associated with your flybar system, whether you have a coaxial, or a single rotor. The flybar is a weighted stabilizer. When spinning, it has an inherent stabilizing effect of a gyro. It is connected to a set of rotor via connect buckles (or links that look like a dog-bone). The flybar and its connected rotor need to pivot freely around the shaft or at the top of the head, depending on the design of your helicopter.


Any binding that slows down this pivoting action causes a delay in the self-correction of the stabilizing flybar. As a result, the helicopter is chasing a delayed correction and therefore, begins to fly in an endless circular...Continue Reading
Posted by Heli Pad | Feb 10, 2012 @ 04:46 PM | 104,600 Views
This is one of the most common complaints or questions I get in the forum. Even though the title says S107, the contents here apply to most, if not all coaxial helicopters. I have decided to make this blog entry, so that pilots in the future could easily use this reference to narrow down the issue(s) and hopefully fix their own helicopters. I’ll be speaking about the S107, specifically, but the principles are applicable to all coaxial helicopters.

When a user complains that his helicopter has no lift, I assume that the helicopter is not completely dead. The blades (rotors) are still spinning, but it doesn’t have enough power to lift off, or barely hovering inches off the ground. I would also assume that the user had at least charged the battery.

Think about it, there are only two board possibilities why an S107 suddenly has no lift. It either has an electrical problem, or a mechanical problem. Your first job is to determine which of these problems you have. By electrical problems, I mean a bad battery, or a bad motor. By mechanical problems, I mean bad gears, shafts, or blade holders, etc.

Is my helicopter spinning out of control?
This is the first and single most important diagnostic question every pilot should ask themselves. By that, I mean place your helicopter on a smooth surface, something like a glass top, or even on a magazine, but nothing rough like carpet. Since your helicopter won’t lift, give it full throttle. While the blades spin...Continue Reading
Posted by Heli Pad | Feb 09, 2012 @ 05:16 PM | 38,292 Views
Motivation
The 9958 stock swash plate has just one pair of ball links. The distance between the balls (end to end) is 12.4mm. By contrast, the stock swash plate of the new comer, v911, has two sets of ball links. Even the short ones are 16.4mm apart, and the long ones are 20.4mm apart. In theory, the v911 swash plate will provide a lot of throw for the cyclic actions.

Parts Required
One v911 swash plate assembly, which consists of an upper swash, and a lower swash. The bearings in the swash plate do not come with the replacement part.

Hurdles
It would be nice if the v911 swash plate directly replaces the 9958’s, but that is not the case. For starter, the guide pin in the v911 swash plate is in a different position. Fortunately, it is very easy to simply swap out the upper swash and retain the lower swash and bearings; therefore, no change to the guide pin configuration. However, there is another issue. The v911 upper swash is much lower than the 9958 swash, effectively pulling the lower plate up. When connected up to the flybar and the head assembly, the new combo rides too high around the shaft and the pin guide from the frame cannot effectively guide the anti-rotational guide pin from the swash plate.

Previous attempts to do this mod (using a similar swash plate from Solo Pro) involves either extending the pin guide taller by gluing on carbon fiber rods, or making a custom shaft that is shorter. This mod uses a different approach to solve the same problem.
...Continue Reading
Posted by Heli Pad | Feb 07, 2012 @ 12:46 PM | 48,756 Views
The Delrin gear is a drop-in replacement. Replacing it is quite simple, especially if you could remove the skids. Loosen the locking screw on the original gear. It is one long screw through the shaft. Then you would wiggle the gear downwards, while pulling the shaft and everything attached to it upward. The original gear comes off, and you could just install the new gear in reverse steps. Make sure the screw is at the bottom. While the gear is out, it is a great opportunity to lube the lower bearings and the motor if you so desire.

As MassiveOverkill has shared, the Delrin gear is thicker but barely heavier. See post #2650 of the v911 thread, and Daryoon's comparison below. It is less wobbly than the original. I still detect a tiny bit of wobble.

One interesting feature is the fan spokes of the Delrin gear. By your comments, you've all noticed that the spokes are arranged like a fan, drawing air away from above and pushing it down. It is designed to do that and even if I could reverse the gear (as some of you has suggested) the direction of the air flow would not be changed, and it shouldn't be. Because the air flow is from top to bottom. You don't want that changed.

The most interesting question then is: Does the design of the fan spokes do anything? To answer that question, I setup a small experiment. I benched my v911 on a digital scale and I removed the head of my v911, thereby removing the blades and the flybar. With the v911 benched on the scale, I reset it to zero....Continue Reading
Posted by Heli Pad | Feb 06, 2012 @ 05:56 PM | 37,874 Views
First Blog entry. Be Kind...

In my experience, the breaking of the pivot pins in the S107 rotor head assembly is perhaps the most common problem of this model. However, because the pivot pins are hidden from plain view, it is difficult to see that they are broken at first.

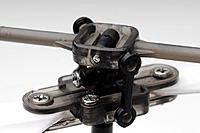
Figure 1 shows the inner shaft and the rotor head assembly. The very top bar, sitting at 45 degrees angle with the rest of the assembly is the housing for the fly bar pin. Just below that you will see two locking screws that secure the rotor head to the inner shaft. And below them are two plastic pins extending from the shaft. Those are the pivot pins. Their purpose is to hold the upper blade holder at 90 degrees with the shaft, while allowing it to pivot side to side about the pins.

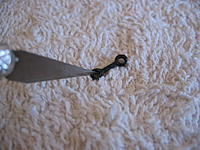
Figure 2 shows that one of the two pivot pins has been broken. It is very common for both pins to break off in a single "fatal" crash. With these pins broken, it is a guarantee that your S107 would not be able to fly.

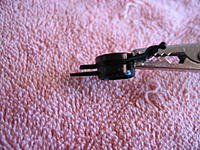
Figure 3 shows that it is easier to inspect the pins when the helicopter is turned upside down, so that the fly bar does not obstruct the view of the condition of the pins.

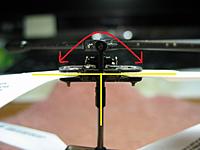
Figure 4 shows where the pins should go. If you look closer, you should be able to see from this angle whether the pins are intact or if they have been severed.

Figure 5 shows that when in this orientation, with the upper blades pointing directly at you and away from you, the blade holder should have freedom to rock from side...Continue Reading