VicT's blog View Details
Archive for June, 2018
Posted by VicT | Jun 17, 2018 @ 09:57 PM | 7,151 Views
The reverse thrust after touchdown works great with wheeled floats. However I wanted to try the reverse thrust with conventional taildragger gear. To avoid reverse in the air and possible loss of control its recommended the reverse arming switch (I’m using the E switch on my iX12/DX9) only be activated after touchdown. The ESC directions recommend using reverse only when the prop stops turning. So I activated the prop brake following the ESC programming directions. After closing the throttle the prop does not windmill but stops turning in about 1-2 seconds. The stopping distance is greatly reduced without the use of wheel brakes and without the risk of nose overs and prop strike damage.

Maule with Turnigy AeroStar 60 amp RVS ESC (0 min 13 sec)

Posted by VicT | Jun 14, 2018 @ 07:42 AM | 5,737 Views
My flying buddy is rough on his Maule and surprisingly she is more rugged than compared to his Timber. Of course the Timber does not have struts because Timber has a full length spar. The Maule has a partial spar that is 46 CM long.

I installed a full length plywood spar in my Maule to reduce downward deflection upon touchdown and I have no stress cracks even without struts. I can add struts for maximum strength for dropped in full impact landings but my floats and wheels are not designed for that.

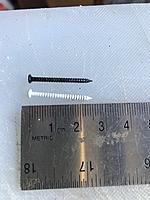
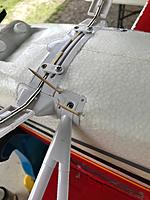
When my buddy had a seperated strut mount I used Kicker on the foam and Locktite Prof. CA on the plastic. I used Monocote backing to keep my fingers from getting glued and to feel the exothermic heat. I the used a drill the same diameter of 4 round toothpicks and drilled 4 holes in the plastic. I used CA on the toothpicks and pushed them in about 1.5 inches. Small aluminum white nails would be better because of the nail head. See pics:
Posted by VicT | Jun 08, 2018 @ 12:05 AM | 5,943 Views
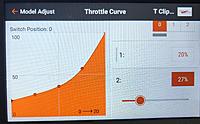
I use switch C to determine which rate I like best. If one rate and expo can be used for all phases of flight I change my he switch from C to “always on”. This frees up switch C for 3 different throttle curves. They are all pretty much the same except where the lowest throttle position starts.
Posted by VicT | Jun 07, 2018 @ 11:52 PM | 5,466 Views
The SIG T Clips 60” wing span model has a very fast glide and because she has no flaps or spoilers other techniques must be used. I did not want to have a long slow dragged in approach but a normal 3-5 (or steeper) degree glide slope.

I figured out a way to use 3 throttle curves using the 3 position C switch just above the throttle stick on the Spektrum DX and iX transmitters.

The lowest position (2) is a normal throttle curve where the lowest throttle position stops the prop using the ESC PROP BRAKE. The middle switch position (1) is the windmilling prop throttle curve. The lowest throttle position of 15% was determined on the ground by gradually increasing throttle until the prop just started to turn. The highest switch position (0) is a throttle curve where the lowest throttle position is 20%. This was determined by flying an approach with power on that would look like a 3-5 degree normal approach and then noting the 20% throttle setting on the transmitters display. After landing the curves were programmed and audio alerts created.

Throttle cut is still used as additional safety against accidental selection and a warning upon transmitter turn on can be created. A pre-flight Checklist can also be created in the DX TX as a reminder for the specific model. Here is a link to the You Tube video.

Throttle curves for approach and landing (0 min 15 sec)

Posted by VicT | Jun 04, 2018 @ 07:03 AM | 5,305 Views
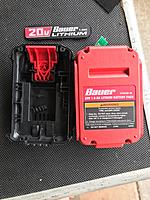
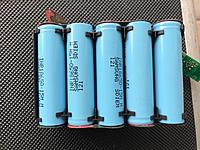
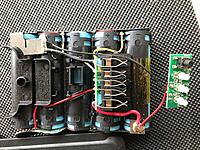
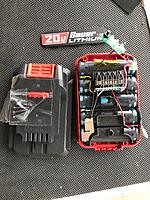
Some RC planes are tail heavy and moving the 3 or more lipos forward does not balance the plane at the 25-33% point. Rather than adding lead to nose or prop spinner I plan on using the cylinder shape of the LiIon type cells. I purchased a spare 5 cell pack from Harbor Freight and carefully removed the plastic. A better way would be to cut the metal connectors to each cell before removing them from the plastic holder. This would avoid shorting and allow the cells to be mounted in a radial pattern. Soldering either at Batteries plus or at home would be required. A permanently mounted battery pack could be designed as these cells can be quick charged.
More to come.......