Gary Morris's blog View Details
Posted by Gary Morris | Jul 07, 2010 @ 03:39 PM | 11,520 Views
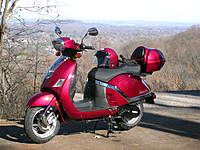
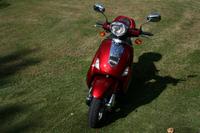
I now have 1300 miles on my Carino 150 LE and have had no major issues with it thus far. I have replaced a few light bulbs and a 12" section of fuel line but other than that no problems.
I now have less than a $1.00 a mile cost since I paid $1100.00 shipped to my door. Fuel cost is very little since it averages nearly 80 miles per gallon. I've had a great time this Summer riding all over Nashville with it.

Gary
Posted by Gary Morris | Feb 22, 2010 @ 12:57 PM | 12,897 Views
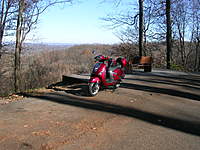
I now have 450 miles on my Chinese scooter, the Carino 150 LE from www.gsmotorworks.com and I'm very happy with my purchase. The weather here in Nashville this past weekend was wonderful with the high temperature yesterday of 67 degrees. I took a ride out to Warner Park on Saturday and on Sunday I rode over to Percy Priest Dam. It seems the scooter is running better and better as it gets broken in. Soon the weather will be fantastic and I look forward to cruising around on my new scooter and enjoying the fresh air.

Gary
Posted by Gary Morris | Nov 28, 2009 @ 03:44 PM | 13,820 Views
Today, November 28th, 2009 I took my second ride into Percy Warner Park here in Nashville Tennessee. Percy Warner is one of our nicer state parks with scenic views, hiking and biking trails, and lots and lots of nature. Since the temperatures were predicted to be warm, mid 60's I started my ride early and hoped to meet up with some other scooter riders. Unfortunately, no one made it to the meeting point so I went it alone and just slowly cruised through the park. I ended up driving 37 miles and had a fantastic time. I even had a surpirse towards the end of my ride at the park.


...Continue Reading
Posted by Gary Morris | Oct 11, 2009 @ 03:14 PM | 14,414 Views
It's been a very long time since I posted to my Blog here on the zone, a lot of water has went over the dam since my last post here. For starters I'm back where I started, more or less. With the economy going down the tubes, I am no longer at Hobby Lobby, that ended nearly two years ago. I haven't flown in months and seems all I do is work and Honey Do's!
Years ago I rode motorcycles, dirt-bikes and scooters and I missed getting out and seeing nature close up and personal. That being said I started looking for something small to cruise around the neighborhood. I checked out Craig's list with no success, everyone wanted to much for mostly junk. I started doing searches on the Internet for scooters since I rode a Vespa many years ago. Have you seen how much a new Vespa sells for??? Over five grand for a new one and nearly as much for a used one! So, I did more research and found the exciting world of China scooters. Oh I know, everyone says they are junk, break down all the time and won't hold up. Well that's not necessarily the case. Case in point, Znen makes a very good scooter at a remarkable price point. They are know for being the best builders in China and now after getting one, I'd have to agree. I ordered my Carino 150 LE from a US seller, click HERE, and paid, get this, $1100 shipped to my door! For that price you could buy four and have change left over before you could buy one Vespa! One thing that is required when purchasing a Chinese scooter and that's a PDI! (...Continue Reading
Posted by Gary Morris | Jul 22, 2008 @ 10:18 AM | 19,448 Views
Some of you may have already heard about the new Horizon Hobby Vapor micro indoor airplane, it's one of the best products I've seen in a very long time! It's not often you find something new and exciting that really does perform as well as all the hype but the Vapor is all that and a lot more.

Specs
Wing Span:14.75 in (375mm)
Overall Length:15.25 in (387mm)
Flying Weight:0.5 oz (15 g)
Radio:3-channel 2.4GHz w/Spektrum DSM2 technology (included)
CG (center of gravity):Front wing mount 23mm back from front edge of fuselage; battery tray 13mm back from front wing mount
Recommended Battery:3.7V 70mAh Li-Po battery (included)
Charger DC single-cell Li-Po
Minimum Age Recommendation:14 years
Experience Level:Intermediate
Recommended Environment:Indoor
Assembly Time:Less than 1 Hour
Is Assembly Required:No

Weighing in at less than 1/2 oz. (just over 14 Grams to be precise) ready to fly it comes with the new DMS2 technology which means you can use your Spektrum DX-6i, DX-7 and any other DMS2 transmitters with this model. It comes in either the ready to fly version or, BNF or bind and fly version. Retailing for just over $129.00 for the ready to fly version and just $99.00 for the BNF version. Both versions come with battery, Lipo charger, and charger batteries. The ready to fly version comes with a nifty little transmitter and it features digital trims.
The Vapor is a three channel aircraft with rudder and elevator on the right stick, throttle on the left. You can...Continue Reading
Posted by Gary Morris | Apr 13, 2008 @ 07:45 AM | 26,595 Views
Recently I tried several times to update my Acme Flycamone2 with the newest firmware update, version 3.03 with no success. The included read-me file was vague at best and it did not work the way it was described. I finally did get the update to work using the following procedure.

1. Turn on your FCO2 camera and press the second button from the top once, it will now have RY in the LCD display. Now press the top button until it shows PC in the LCD display. Turn the camera off and set it aside.

2. Download the new 3.03 FCO2 update, it will be a zip file, once downloaded extract the files into another directory or for simplicity you can just extract the file into the same directory that the update was placed in.

3. Once it's extracted click on the STK02H.exe file, this will install the drivers for your Flycam2 on your computer. (Note: you do not want to have your camera connected while installing this software.) Once it's finished, reboot your computer.

4. Now it's time to plug in your Flycam2 using the supplied USB connector, on the instructions it says to press the top button on the camera, the mode button as you plug in the camera into the USB cable. This worked for me so I would assume that this is the correct procedure. The power switch does not need to be on.

5. You should get a message that new hardware is found, it will say new Camera found and a box will open giving you the option to install the drivers. Next let Windows find the correct location for the...Continue Reading
Posted by Gary Morris | Mar 02, 2008 @ 03:45 PM | 20,731 Views
Today I was finally able to maiden my new Graupner Trueblue sailboat. This is a one meter sailing boat and it replaces the Graupner Saphir sailboat. Here's the link for the video click HERE.
Posted by Gary Morris | Feb 12, 2008 @ 02:49 PM | 20,446 Views
Graupner recently has introduced a new sailboat to it's line-up, the "Trueblue". Weight is 8 lbs 4 oz. ready to run, length is 1000 mm, height is 5-1/2 feet, width is 8-1/2 in. This is a one meter boat that uses GRP (glass reinforced plastic) for the deck and hull. This boat replaces the "Saphir" and requires much less building. Since the hull is colored in a beautiful shade of blue no painting is require. The interior of the boat is roomy however all of the electronics are packaged into a small space which is accessed through a hatch in the deck. Once the receiver, battery and servos are installed the deck is glued to the hull and this seals the deck to hull for water tightness. There are three brass tubes inside the hull which you glue in place using either the provided Epoxy or, as I chose to do I used PFM, or Goop to seal the rudder tube, mast tube and keel tube to the boat. Once these are lined up and glued in place you then apply Epoxy, or Goop to the deck openings where the brass tubes enter and attach it to the hull. The hull is sealed to the deck using a special solvent that Graupner provides that melts the plastic and forms a permanent bond or weld. "Trueblue" uses two high torque servos ganged together to provide enough power to work the mainsail and jib. All of the necessary hardware is provided in the kit as well as glue. The instruction manual is in French, German and English with illustrated drawings. The only confusion I had was...Continue Reading
Posted by Gary Morris | Dec 24, 2007 @ 04:57 PM | 20,905 Views
Lately I've been working on adding more and brighter lights to my Slow Stick for night flying. I read here on Ezone where someone found some suitable lights at Walmart. I took the plunge and went to Walmart and found exactly what I was looking for. They sell a string of 10 super bright LED's for, get this, $3.89! I bought about 8 strings and went to work on my Slow Stick. I have been using some old Wingo lights but they are far to dim. I used the existing wires from the Wingo light set and connected my new super bright lights to them and WOW, are they bright. I now have 40 lights, 4 strings, of green and red and red and green lights. Two sets on the wings one on each panel and two on the tail. At 500 feet it looks extremely bright and at 20 feet you can read a newspaper under them. So far I've had two nights flying with the lit up Slow Stick but I'm sure there will be many more flights using this system.
I got tired of using rubber bands to hold the wing on my EPP Eagle so I went ahead and made a bolt down system using some scrap plywood, plastic wing bolts and some Goop to hold it all in place. Today I tested it out and it works fine, no problems now taking off the wing to change the battery and, it's far faster and easier than the old rubber band wing hold down.
I flew my XPG Autogyro today, but I have to say that trying to keep that thing oriented is really difficult. With it's very thin profile, it's really hard to tell whether it's coming or going. Twice today I...Continue Reading
Posted by Gary Morris | Nov 08, 2007 @ 02:17 PM | 26,470 Views
Today I was testing some new scale canopies made by E-Sky for their Belt CP line of helicopters. The Canopy comes in three pieces, a bottom, top and a battery access hatch in the bottom. The quality and engineering has to be seen to be appreciated! The colors, gloss and design are some of the best I've seen in a ready to install canopy. It comes -painted in gleaming gel coat in red, green, white and yellow. Weight is approximately 5-6 ounces. I'm including a few pictures of the red one I put on a Belt CP Carbon and Metal edition. The pictures don't do it justice! It's made of fiberglass in case your wondering. The street price will be around $125.00, expect them to be available around Christmas time.

Gary Morris
Posted by Gary Morris | Nov 01, 2007 @ 11:32 AM | 22,237 Views
Today I maidened my new XPG Autogyro from www.foamfly.com a very nicely crafted kit. I painted mine, most just paint the blades but I wanted mine to look nice. It's powered by a 125 Watt Brushless outrunner motor, provided in the kit, and I elected to have the pre-rotor as well, also included in the kit for additional fee. It uses three HS-55 servos, two for the aileron and elevator, one for the rudder/nose wheel steering. I am using a Spektrum AR6100 receiver and a 1300 mAh 3-Cell Lipo pack which provides plenty of power. The kit comes with laser cut plywood parts, bass wood main spars and depron for the tail feathers. Wheels are also included as well as all of the necessary hardware. I've included a few pictures, the weather wasn't so good but it was maiden day so I was lucky enough to have someone shoot a few pictures, Thanks Max!

Gary Morris
Posted by Gary Morris | Oct 24, 2007 @ 09:08 AM | 22,412 Views
There have been many big changes since I last posted to my Blog. Since my last post I have changed jobs and careers, and at a major milestone in my life as well. I recently celebrated my 60th birthday!
I now work in product development for Hobby-Lobby Intl. located in Brentwood, Tennessee. I am responsible for RTF aircraft and all helicopters. These two different areas encompass quite a huge amount of different models from ready to fly airplanes to ready to fly helicopters.
I have been and avid modeler for over 30 years and during that time I have been involved with just about every facet of modeling from Nitro planes to electric cars to sailplanes to sailboats. During the last 4-years I have been focused primarily learning everything I can about helicopters. This was a result of the 911 incident whereby I lost my flying site because of national security concerns. Back in 2001 after the attacks, Homeland Security noted that some of our resources were not protected well enough. As a result of these findings Percy Priest Dam now has very tight security in and around the dam it's self. We used to fly off of the dam with our slope airplanes and when the winds were calm we would fly down in the grassy areas below the dam. All that changed as I said on 911 and I had no where to fly my planes. I wanted to be able to fly close to home and the local sanctioned flying fields were out of the way. That's when I started to get involved with helicopters! As a result, I have spent all...Continue Reading
Posted by Gary Morris | Jun 18, 2007 @ 08:59 AM | 25,379 Views
After many many hours of trial and error I finally have the blade tracking issues solved with my Eco 8 Royal. With the help of several folks here on Ezone it was discovered that turning the blade grips around 180 degrees and reversing the pitch levers solves all tracking problems. Prior to makes these changes the blade tracking would go out as much a 3/4" during flight. You could land, adjust the tracking and get it perfect and again, it would go out of track on the very next flight. Apparently changing the blade grips from trailing edge control to leading edge control makes the head more stable and keeps the blades in track better, in any event I'm a very happy camper now that I have my Eco 8 Royal flying again. I also installed the new AR-6100 Spektrum receiver in it and had to make a few changes on the pitch lengths in order to get the proper pitch. I love the way the Royal flies now, very sensitive, stable and just a great sports flier! For anyone thinking of buying the Ikarus Eco 8 Royal kit be sure to download the supplement to the manual which covers the changes to get the tracking issues resolved. With those problems solved I can now get around 10 minutes of good sports flying in per 3-cell 4350 Poly Quest lipo pack and still have plenty of reserve power left.

Gary Morris
Posted by Gary Morris | May 30, 2007 @ 12:26 PM | 24,144 Views
Last week I purchased the new DX-7 Spektrum Radio system that employs 2.4GHz technology. I have to say the confidence it gives is wonderful and the crisp fast response is also amazing. I've had a carbon fiber Trex SE that would occasionally glitch while flying and I really never felt confident with it for that reason. I've now flown it about 8 times with the new system installed and it's not had so much as a hiccup flying. Since the response time is about twice as fast as 72MHz systems it also responses much better and it just feels better flying. Yesterday I converted another helicopter, my Dragnous II SA to the Spektrum system and it too now flies even better than before. Another wonderful feature is the fact that no pins are required or needed when flying at sanctioned AMA fields or events. There's no risk now of being "Shot Down" as a result of someone turning on there transmitter that's on the same frequency as yours. The new DX-7 also has a new feature that prevents you from accidentally turning on the wrong model which can be disastrous. The Spektrum DX-7 transmitter has a 20 model memory so you can have your entire fleet on just one single radio. Before I had to drag along as many as 4 transmitters to the flying field if I wanted to fly several different planes and helicopters. Now with this one Transmitter I can have more room for models and not have to worry about keeping track of which model goes with which transmitter. My only suggestion would be to add...Continue Reading
Posted by Gary Morris | Mar 12, 2007 @ 07:37 PM | 25,737 Views
I just finished building the new Ikarus Eco 8 Royal, this is the updated version of the old tried and true Eco 8.
The frame is totally new along with the head and tail feathers. The weight is remarkable in that it's so light. The build went well with only a few minor glitches, i.e., the tail boom did not have a hole drilled to hold the tail rotors on, and the horizontal tail wing didn't have the holes drilled in it either. It was a simple matter to drill the holes so no harm done. The kit comes without and auto-rotation bearing, this is something that should be included in the kit. The street price is expected to be $199.00 and you still need a motor, pinion, and electronics. Attached are a few pictures, I hope to get some video this coming weekend. This kit will be offered by Hobby Lobby Intl. I used and Axi 28/20/8 outrunner motor, Jeti Spin 44 amp speed controller, Hitec HS-225 BB servos, and an Art-Tech heading hold gyro. Battery is a 4350ma 3-cell lipoly which should give 15 minute duration or better.

Gary Morris


Gary
Posted by Gary Morris | Jan 06, 2007 @ 05:27 PM | 27,109 Views
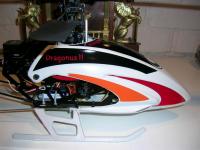
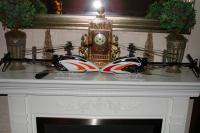
I just completed building my second Dragnous II, did a test hop in the driveway and all went well. I had to adjust blade tracking one turn, all trims were spot on with no other trimming needed. I really like the Dragnous II's they look so different and fly extremely well. The belt drive design is superior to the Trex belt drive and has far less drag. The Dragnous also has a programmable head whereby you can adjust it from mild to wild, a very nice touch if you want to advance into 3D performance.
The weather here has been extremely warm but most days have been windy or rainy or both. Tomorrow looks like a washout so there will be no flying on Sunday! I worked a little more on the E-Smart, doing a little fine tuning and adding a second antenna tube so the antenna won't get caught in the main rotor blades. Seems like there are several new 500mm size E-helicopters hitting the market right now, this is great for those wanting to expand their fleet or get into a larger helicopter than the mini's. Here are a few pictures of the latest Dragnous II.
I bought a new Sony digital camera for myself after Christmas, it's a DSC-H5 with 7.2 mega pixels, and a 12X zoom lense. I'm including a picture I shot with it out the backdoor of my home, it's a passenger jet on departure from Nashville, it was about 2,000 feet up when I snapped the picture, I was suprised to see what I captured!

Gary Morris
Posted by Gary Morris | Dec 17, 2006 @ 11:31 AM | 40,185 Views
I've been so busy the past few months building and testing new helicopters and doing reviews. It's been a very exciting year with all of the new mini and large size helicopters reaching the marketplace. Just yesterday I test flew a new E-Sky E-Smart 50 size helicopter. After having flown micro and mini helicopters I have to admit that the size of this helicopter is very intimidating! Those big blades could do some serious damage if they were to contact human flesh and bone so one must be very careful and never loose respect for the sheer power of these machines. The weather here has been just fantastic, yesterday it was 71 degrees and today it's suppose to be in the mid to upper 70's, simply amazing for the late in December here in Tennessee. I am also amazed at the interest that's been generated on the new Falcon 3D offered by Hobby-Lobby. I posted a review over on RCUniverse and there are over 64,000 hits on it and still going. It seems that the lipoly battery has revolutionized small to medium sized helicopters and now even the much larger 50 size. It's truly and exciting time in RC history with all of the advances, one can only imagine what will come in the future if things keep progressing at this pace.

Gary...Continue Reading
Posted by Gary Morris | Jul 17, 2006 @ 08:31 AM | 30,092 Views
I just recently bought a new TREX 450 SE to add to my fleet of helicopters. After reading all the hype I just had to see what all the talk was about. I took a weekend and slowly assembled the new bird on my kitchen table since my workshop is in the garage and it's hot outside. I got it all together without a hitch and did a test hop in the driveway, it flew very well with only blade tracking being out a turn on the blade grips. On Monday of last week I took it to my local school yard for further testing and did a range check and more hovering practice. After landing and checking it over again I took off again and switched to idle 1 I watched in horror as it dove into the ground at full speed, blades, and parts flying in all directions. It all happened so fast I didn't have time to hit the throttle hold switch. As I walked over to inspect the wreckage I realized that I had not programed my 401 gyro in the three idle up settings and the gyro was basically turned off. The crash had destroyed the main gear, battery holder, main shaft, feather shaft, main blades, tail blades and fly-bar. Four days and about $65.00 in parts and it's flying again. On my first maiden after the rebuild I was getting glitching and motor cutouts. I had also installed a miniature antenna on my Electron 6. I took out the receiver and installed my trusty Hitec Supreme receiver with a full length antenna and all is well again. I can't believe I made such a foolish mistake but nonetheless it happened and I guess I learned a valuable lesson, recheck, preflight, check again, read the manual and check again! Hopefully there won't be a second event anytime soon!

Happy Flying!!

Gary
Posted by Gary Morris | Jun 29, 2006 @ 03:05 PM | 30,414 Views
Since my last blog entry alot of water has passed under the old bridge. Here are some of my latest projects!

For the past several weeks I have been testing the new Falcon 3D helicopter offered by Hobby-Lobby Intl. of Brentwood, Tennessee. This new helicopter will be geared towards those that want to get into helicopter flying on a limited budget while still being able to have a Mini sized helicopter that's capable of 3D flight. The street price is expected to be around the $299.00 price range and will be ready to fly out of the box! I will include pictures and dimensions and will try to answer your questions should they arise.

Here are the specifications for the Falcon 3D Helicopter.

Specification

* Main rotor diameter: 630mm 24.8"
* Tail rotor diameter: 152mm 5.98"
* Length: 670mm 26.37"
* Weight: 530g 18.69 Oz


Packaging

The Falcon 3-D comes in a very attractive box that not only protects the helicopter but will also serve as a carrying case if you like, it even has a handle on the top. It is well packaged in foam, which should protect it from anything but a Gorilla deliveryman. The kit contains the following parts.

1. The helicopter and blade holder, 30 Amp brushless speed controller, brushless speed 400 class motor with heat sink, 6-channel micro receiver and heading hold gyro. Four micro servos to control pitch, yaw, rudder, and collective.

2. 6-Channel Transmitter with two switches and two rotary knobs to control pitch....Continue Reading
Posted by Gary Morris | Apr 08, 2006 @ 08:51 AM | 25,756 Views
Yesterday we had over 35 Tornadoes in the Middle Tennessee area with many touchdowns and over 12 deaths reported so far. In all my years living in Nashville I do not recall this many Tornadoes in one day. In Gallatin Tennessee, about 25 miles Northeast of Nashville they suffered two thousand homes damaged or destroyed and at least eight deaths. There were also reports of hail as large as 4" in diameter.
Just last week Tennessee suffered terrible storms which took the lives of over 24 people. The prediction is for more of the same for next Saturday, that would be a total of three weeks with Tornadoes, hail and damaging winds.
I feel for the people who have suffered the loss of their friends, homes, loved ones and livelyhood. I also feel fortunate that I have dodged the bullet so to speak and so far, haven't been touched by the hand of fate.

Gary Morris