wizard of odd's blog View Details
Posted by wizard of odd | Mar 16, 2022 @ 03:14 PM | 15,016 Views
Hi all!

It has been a long and interesting (in the Chinese proverb sense!) time since my last post!

I have updated my blog to include the plans and laser cutting files in .dxf format, for those of you who have access to a laser cutter.

Warm regards

Odd
Posted by wizard of odd | Jun 22, 2012 @ 10:53 PM | 11,653 Views
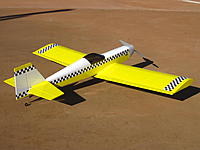
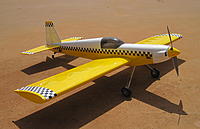
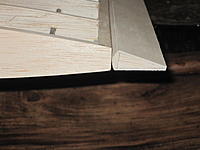
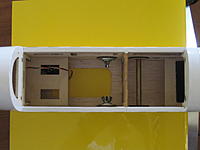
Here are some completed pics of my kit bashed 4*20, with sheeted turtle deck, top hatch modification, new canopy and redesigned D Box wing.

How does the model perform? Well I did not build the original kit wing, so can't compare! The D Box wing certainly performs well, with club level aerobatics including knife edge flight easily managed. The roll rate is pretty fast too. In keeping with the original model design, it needs a bit of down and right thrust to the motor (about 2mm worth of washer standoffs) to fly best. Two clicks of right aileron trim and two of down trim were all that was required for hands-off flight. It just floats on and on during landings, just like the original model is known to do.

My particular model is overpowered really, flying on a Hyperion 3020-08 motor swinging a 10x7" prop off 3S (45C) 2200mAHr Lipo's. The first take-off was made at 90deg to the runway, as I gunned WOT and was too slow on the rudder (Duh-uh)! Gradually feeding in throttle, right rudder while holding the tail down at the start, works much better and take-offs are easily done at half throttle! WOT climbs from level flight produce really long, vertical climbs. Power off stalls are a non-event: a dead ahead mush with no tendency to tip stall.

So when all is said and done, I guess I'm pretty happy with the end result.

For those who may be interested in the D Box kit for their own model, the plans and laser cut files have been posted here https://static....Continue Reading
Posted by wizard of odd | Feb 10, 2012 @ 08:11 PM | 14,073 Views
I've been working on a 4*20 lately. Like most of my kit builds, the original design got kit bashed in all directions to suit my fickle fancy!

First to do was the fuselage top hatch mod for easier battery access, lowering of the battery tray position and extending the battery tray rearwards. I also changed the upper rear fuselage to a sheeted turtle deck. This was all done on the fly- no re-design involved.

Now I prefer D Box wing designs, but altering the kit parts was going to be a major hassle, so: I scanned a wing rib, then imported it into Turbocad and traced the outlines. From there it was fairly simple to re-design the wing to my liking.

The original build methodology was retained, even though I usually prefer jig built wings. The spar web was redrawn, and then I added a 1/8" slotted sub leading edge to keep the ribs aligned and to provide a gluing surface for the 1/16" front sheeting. Two 1/8x1/4" balsa spars were added to attach the trailing edge sheeting, and a nicely curved centre section sheet was drawn as well. Provision has been made for building a clipped wing version if you so prefer.

Simple but effective rib spacing and dihedral fixtures keep everything positioned correctly.

Use the original size and shape of sheet ailerons.

The prototype kit was laser cut by Brad Heller of Laser Cut Kits Australia http://www.lasercutkits.com.au/ and should be available from him soon. If you're in the US or Europe, I'm sure your...Continue Reading
Posted by wizard of odd | Dec 23, 2011 @ 02:24 AM | 12,373 Views
Last week I published the results of the successful test flight of my E Star 25 design: an electric powered sport aerobatic model of similar size and genre as the Pulse XT 25, Super Sportster 25, Four Star 20 etc....

I've since been working on a building manual, using pictures taken during the build process. Here's a rough draft of the manual- it covers the fuselage and tailplane construction, and contains construction pics not published before on my blog wall.

So far it has amounted to 32 pages of mostly pictures, but even so writing the darn manual actually takes longer than building the model! I'm not much of a linguist or computer maestro either- which I suppose slows things down more than they need be.

Since the only prototype has been built by yours truly, I'd probably be looking for a builder/flyer of intermediate skill level to do a beta build thread in the next couple of weeks.

Anyway, 'nuff said. Any comments would be appreciated.

Odd

PS: I have added the plans and laser cutting files, for those of you who have access to a laser cutter.
Posted by wizard of odd | Dec 15, 2011 @ 07:45 AM | 11,466 Views
The opportunity has finally arisen for test pilot Garry Adams to wring out the model in more favourable wind conditions. I'm a pretty happy camper as the model performed really well- what a joy when design meets reality in such a satisfying fashion. Here are the comments from the test pilot:

E Star 25 test flight

Hello, I test flew the E Star 25 last Sunday at our local club, It was a nice day with a reasonable breeze. The E Star is a fantastic model, It fly's very light and has a heap of power on tap. I flew just about every maneuver that I know and it handled it with ease, especially snaps and it does a lovely Lomcevak and spins. Precision aerobatics where just as easy with rolls, cubans and stall turns all easily completed. All in all I would say this plane would make an excellent club sports plane.

Garry Adams


Garry

Thanks for the great job on the test flights- I really appreciate having an experienced IMAC, giant scale, glider, hotliner, gasser, glow, electric aerobatic, electric scale, jet turbine, EDF, pylon racing (did I miss anything?) pilot with flying skills like yours to test fly my designs. Thanks a million also for your comments regarding the E Star 25's performance.

Garry (tragi700 here on RCG) is also doing a beta build of the Aero Star 25: It shares the E Star's basic fuselage layout, but is a tapered mid wing model. I'm looking forward to his comments on the build and performance of that one too.

In the meantime I'm busy writing the step by step instruction manual for the E Star 25.

Odd
Posted by wizard of odd | Dec 03, 2011 @ 11:40 PM | 11,800 Views
Concluding the build of my own design sport aerobatic model called the E Star 25: The maiden flight!

Well, after 2 weekends of waiting for flyable weather (i.e. less wind), I could stand it no longer, said what the heck, and bravely (yeah, right!) headed off to the field. The wind was blowing at 23-25km/hr, so not ideal conditions for a maiden flight- but the decision had been made!

Test pilot Garry was at hand, so we set up the throws in a TLAR fashion and did the necessary range check. Then Garry lined her up into the wind and....

...take off was at half throttle with the E Star tracking nice and straight down the runway. Up to a safe height for trimming- 2 clicks of right aileron and five clicks of down trim were required to keep her tracking as straight and level as possible considering the strong prevailing wind. I had set the CG at 32% of the wing chord, which seemed about right.

Rolls at low rates were just over a second per revolution, and just under a second on high rates. Elevator response was a bit sluggish at low rates and just about right on high, resulting in some satisfying inside loops. A hammerhead and Cuban 8 were fairly decent despite the howling wind. Penetration into the wind was good at about 3/4 throttle. The stall was a farce- in these conditions the model just parachuted down slowly, so not much learned there, except that the wings stayed dead level! No other manoevres were tried, as Garry wisely thought it better to wait for a...Continue Reading
Posted by wizard of odd | Nov 22, 2011 @ 05:18 AM | 11,992 Views
In this penultimate episode in the saga of the E Star 25, we've reached the Ready To Fly stage!

The model has gained some weight, and has gone over the projected weight budget of 1450g. Uncovered weight as noted before was just over 1200g. Covering alone has added 120g. Add to that a DuBro spinner, heavier ESC (CC Ice lite 75 in stead of the 50A version), ailerons, 4 servos, 4 servo extentions, Y lead, pushrods, horns, clevises, a blind nut, 3 nylock nuts, six steel washers, and a couple of ply motor standoff washers. Total weight RTF is 1525g/53oz. This gives a wing loading of 46g/dm2 or roughly 15.5oz/ft2.

The covering scheme is a simple one, as I really don't have much flair for improvising something more artistic. My wife thinks it looks like a Taxi cab, and I must admit she may have a valid point......

Now the doubting begins: Shorter nose/longer tail moment? Thicker wing joiner tube? Different motor/prop combo? Stronger hatch magnets etc. etc.

It'll now be up to test pilot Garry Adams to do the maiden flight and hopefully give a written report back regarding the flight characteristics, and make suggestions regarding inevitable improvements....Continue Reading
Posted by wizard of odd | Nov 18, 2011 @ 05:28 AM | 12,072 Views
Here's one advantage of living in the Outback of Western Australia: A beautiful sunset and a cold frostie! Thank God it's weekend!

(Pity about the Roo's eating up my front lawn though...)
Posted by wizard of odd | Nov 10, 2011 @ 10:57 PM | 11,757 Views
My attempts at carving a Balsa wood cowl have been met with less than stellar success. I just can't seem to get the shape just right to please the eye. Also I've run out of vac vorming plastic after quite a few unsuccessful test pulls. So, I've ordered some hardwood to work with, more plastic, and will try again later when my level of enthusiasm for this job returns.

In the meantime I've butchered a Pulse XT 25e cowl to fit; this also involved chamfering the front bottom fuselage a bit, and I've had to use 9mm standoffs to move the Axi 2826 motor forward to clear the cowl. Not the ideal solution but it'll have to do for now.

The pictures show the cowl after sanding off the factory paint job and application of some white primer. It makes the grade, but by a small margin! EDIT: The Great planes Super Sportster 25 cowl is a perfect fit, though rather less pretty

I'm hoping to get the ailerons built and the model covered this weekend: not sure of the colour scheme yet but I've lots of red, white, yellow, silver and black covering left, so I should be able to conjure up something!
Posted by wizard of odd | Oct 31, 2011 @ 07:30 AM | 15,185 Views
I'm temporarily away from home, so no aircraft building at the moment.

In stead here are some pics of the "Hellen", built from the Artesania Latina kit. It has a plastic hull, with plywood formers and deck. The cabin and deck are planked with Obechi and Sapelia veneer strips. An easy beginners kit.

Power: Speed 600 motor, 7cell Nicad. A good excuse to use them 'ole heavy packs, now obsolete in RC model flying.
Posted by wizard of odd | Oct 18, 2011 @ 05:53 AM | 12,415 Views
Didn't feel like Balsa bashing today, so I proceeded with the canopy.

The canopy started off as a slightly oversized commercial canopy, from which a plaster cast was made to serve as a vac-forming plug. The commercial item was then trimmed down to perfectly fit the model. The resulting template was placed back on the oversize plug, and a sharp object used to trace a shallow groove around the outline.

The plug was then used to vac-form a new canopy, the shallow groove serving as a trimming guide. I hope the pictures tell a clearer tale than this clumsy explaination.

The vac-forming box is a really neat item ordered as a kit from Dynamic Balsa, after my own attempt at building a box from scratch proved to be rather less than successful. This one worked first time though!

Next up: Carving a plug and vac-forming a cowl.....
Posted by wizard of odd | Oct 16, 2011 @ 11:38 PM | 12,419 Views
Had a weekend off work, so made some progress on the right wing.

The wing is built using a combination of a jig and a spar web, which along with a slotted sub leading edge, helps to keep things aligned. Keeping the wing jigged up while sheeting both top and bottom surfaces of the wing prevents built-in warps.

The assembly is pinned to the plan, squared up, and then glued together using Zap medium Cyano- which penetrates the joins well. Top main and both rear spars are then added. The sub leading edge is planed down to match the wing ribs and the assembly given a light sanding to true everything up.

Top sheeting is then added, and when the glue has set the sheeting is trimmed flush with the top of the root and tip wing ribs. The carbon tube, spar web and lower spar are left untrimmed, as they serve to locate the wing jig pieces while the bottom sheeting goes on.

Now the wing is flipped over and re-jigged. The wing tube and wing locating bolts are added, and then the bottom sheeting is glued on. The assembly is un-jigged and the sheeting trimmed all around, after which the leading edge and aileron bay facing are glued on and sanded to shape.

The servo tray and cap strips are added, and the wing is given a final sanding.

Next: Aileronising....

PS: Current airframe weight, sans ailerons, but including prop, prop adapter, motor and mount, ESC, landing gear, receiver and 2950mAhr 3s battery is 1200g. Add servo's. linkages and covering- it looks like...Continue Reading
Posted by wizard of odd | Oct 15, 2011 @ 05:39 AM | 12,303 Views
Continuing the mini build log of the E Star 25.....

Made some more progress today- framed up the tailplane parts.

These are conventionally built over the plan (the first parts to actually utilise the plan!). The vertical stabiliser tabs into the horizontal stabiliser and also the tailplane seat, lining things up nicely. The tailplane fillets posted earlier fit perfectly.

Interestingly the centre section of the horizontal stabiliser was incorrectly laser cut- some lines meant for scribing were actually cut out, leading to a bit of impromptu improvisation, as you'll see in the picture. These are most irritating bugs that creep in when converting Turbocad files to .dwg files- even after upgrading to the latest flash version of Turbocad

The parts now need to be hinged and sanded to profile.

Next time: Building the right wing....
Posted by wizard of odd | Oct 14, 2011 @ 07:59 PM | 12,682 Views
Progressing on the build of my own design E Star 25: Building the tailplane seat

A nifty little sanding jig, which tabs into the tailplane seat, is used to sand the tailplane fillets to fit while on the fuselage.

The jig and fillets are then removed from the fuselage, the mating tab is cut off and the assembly replaced on the fuselage. Waxed paper is used to prevent accidental gluing of the sanding jig to the fuselage or fillets.

Remove the jig and hey presto!

Next step: Building the tailplane.......Continue Reading
Posted by wizard of odd | Oct 12, 2011 @ 11:58 PM | 12,377 Views
A next installment of the abbreviated build log of the E Star 25

In the previous installment the basic fuselage structure was created. Now it's time to sheet and hatch:

The turtle deck has been sheeted with 3/32" Balsa. The access hatch frames are built in situ on the fuselage to ensure a correct and tight fit, then sheeted over with 3/32" Balsa and sanded smooth. The canopy frame is then attached to the rear hatch.

In the next episode: A nifty way to shape those tailplane fillets.....
Posted by wizard of odd | Oct 11, 2011 @ 11:37 PM | 12,291 Views
Some calculated specs for the E Star 25 model:

Wing span: 1224mm/48.9"
Total wing area: .33m2 (Wing 0.292m2, tail 0.0686m2) or about 495sq in total.
Projected weight: 1300-1450g
Wing loading: 42g/dm2 (@1400g/3.1lb)- about 14.4oz/sq.ft.
Wing aspect ratio: 5.29
Tailplane aspect: 3.65

Neutral point: 48.5%/114mm from wing LE
Ideal CG: 33.5%/78.6mm from wing L.E at 15% Static margin

Motor test data: AXI 2826-08 motor, direct drive
Hyperion 2950mAhr 35C 3series Lipo
Castle Creations Phoenix Ice Lite 50A ESC
APC-E 11x7 propeller
RPM: 9700
Pitch speed 103.5km/hr or 64.6mph
Watts in: 565 -that's just over 3W/g of motor weight
W/lb (@1400g/3.1lb) 182.5


Motor test data: AXI 2826-10 motor, direct drive
Hyperion 2950mAhr 35C 3series Lipo,
Jeti Advance 77 Opto ESC
13x7 propeller
RPM: 8700
Pitch speed 93km/hr or 58mph
Watts 454
W/lb (@1400g/3.1lb) 146


It should be adequately powered then.....
Posted by wizard of odd | Oct 05, 2011 @ 04:29 AM | 12,493 Views
Here is a rough plan view of my next design- a 48" low wing sport aerobatic model.

The fuselage is pretty much the same as the "Extra Special" shown previously, but with a few refinements: The fuselage hatches have been slightly modified to include magnetic attachment, and the fuselage side doublers considerably lightened by adding multiple lightening holes. The lower aft fuselage has been lightened by substituting 1/16" ply with 3/32" Balsa. The battery tray has been slightly lengthened rearwards. I have also modified one of the structural members beneath the rear fuselage hatch to incorporate a servo tray inside the fuselage- catering for ease of CG balancing and personal preferences, should future builders prefer not to utilise tail mounted servos. Landing gear mount is 1/4" birch ply as before.

The wing has been moved to a low wing configuration, with fairly thick (16%) symmetrical airfoil constant chord wings and conventional dihedral of 3 degrees (i.e 1.5deg each side). The wing design has been changed from a pure "ladder" jig build to a slotted rib/spar web setup (like in the Four Star 20), and includes alignment tabs on the forward surfaces of the wing ribs- which tab into the sub leading edge. Ailerons are once again built up, with a servo driving each aileron. The wings plug into the fuselage, leaving a pleasing amount of space inside the fuselage for the electronic bits.


I've had this one laser cut as a...Continue Reading
Posted by wizard of odd | Aug 27, 2011 @ 10:41 PM | 10,443 Views
This is a follow up from pictures of two own design sport models posted earlier this week.

The model called "Altius"- an electric powered high wing sport model of 48" span has flown her maiden flight.

The result:

I decided to play it safe and used a static margin of 15% as the CG. This came to about 30% of the root chord. Turns out it was a good decision.

First impression: Power from the Hyperion 3014-12 motor is way too much (9x6 measured at 11210 rpm, 156W/lb). I think the 3009 will do nicely and it weighs 40g less. Even propping down to an 8x6" prop would do .

No rudder or aileron trim was required, but she did want a fair amount of down trim. This was remedied by a 1/16" spacer behind the motor mount, giving an additional 1.3deg down thrust. Now she will climb slowly under full power. Even the inverted flying was improved, requiring only a very small amount of down elevator.

Inside and outside loops were a breeze- and with the mentioned power system as large as I wanted. Hammerheads were pretty tidy. Rolls are actually fairly axial considering it's a high winger with some dihedral. The stall is a non-event: just a slight mush and a nod, no nasty surprises there. Couln't get her to do a flat spin though- maybe with a more rearward CG and more elevator throw?

I must admit though that the most enjoyable part of the two flights was just cruising around at less than half throttle, doing lazy circuits. Though she does not have the self-righting attributes of a trainer, she'd be fine for an inexperienced pilot at reduced power settings.

She tends to float on a bit on the landing approach- most likely due to the low wing loading and fairly efficient airfoil.

So all in all I guess I'm a pretty happy camper!