Sticky:
Brushless Slo-V Conversion
-
 Views: 674
Standard white Slo-V wing painted with a base coat of red craft paint. -
 Views: 585
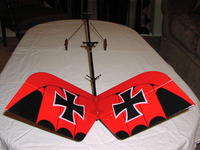
Slo-V wing and tail painted and redesigned. It would have been cool to cut out the black areas, but I believe that it would have made the wing too weak. -
 Views: 588
Finished wing. I decorated the top and bottom of the wings. On a semi-aerobatic plane, it is a good idea to differentiate the top from the bottom for orientation, but with a slow flying model, that is not as critical. -
 Views: 602
Tail and stick fuselage. -
 Views: 616
2.5" spoked wheels. They are smaller than the originals, but I mainly fly off of concrete, so they should be fine. -
 Views: 606
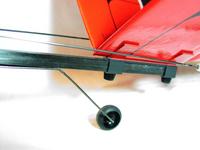
I opted for a real tail wheel instead of the wire loop. -
 Views: 738
This is the BP 9YSS motor. It has a short, 3mm shaft. 840 KV. -
 Views: 607
The Slo-V has many accessory options (sonic module, nightflight module, drop module, etc). The trays come in handy. I used two of the hanging trays...one for the receiver and the other for the lipo. For the ESC, I removed the original battery tray, cut
Comments (5)
Add Comment
Sticky:
SkyFly Hinge Modification
Sticky:
SkyFly Pushrod Modification
-
 Views: 605
Parts on hand for the attempted mod. -
 Views: 431
Fishing line removed forever. Keep the parts though. :-) -
 Views: 435
I tried attaching the fishing line to the rod and pulling it through, but I hit a couple snags. -
 Views: 416
With my first attempt thwarted, I painted the end of the rods and sent them thru the boom once again. This time, it worked. -
 Views: 401
It was tough to get the rods to exit at the holes in the boom. It looks messy due to the carbon dust. -
 Views: 414
Shrink tube was added to the Z-bends to provide a better fit in the EZ 120's. -
 Views: 474
Connectors attached and ready to snap in. -
 Views: 677
Inside the belly of the FLY.
-
 Views: 696
This is the stock photo of the Cox Lazy Bee. Even the "live in person" version didn't look this good. Mine looked far worse when I took it out of the garage. -
 Views: 532
Here is a photo of the top of the wing. I peeled all the decals off of mine since the wing was damaged, the decals were coming off, and I wanted to change the theme a little. I borrowed this photo from http://twwrc.homestead.com/current.html -
 Views: 603
Here we are squirting in the messy fuel to the leaky gas tank. -
 Views: 556
Read to go. -
 Views: 570
She looks and rolls like a schoolbus...and flies like one too. -
 Views: 523
I removed the original decals and then recreated the design on the wing with Krylon H20 paint and Great Planes striping tape. I found a mean bee logo on the net and paint shopped it to fit my purpose. The letter style is called "Magneto". -
 Views: 680
The wing design was created with masking tape, spray paint, and striping tape. It is very similar to the original design. -
 Views: 474
Close-up of the finished logo.


