navigator2011's blog View Details
Posted by navigator2011 | Dec 10, 2023 @ 08:46 PM | 3,973 Views
When I started using a Thrustmaster Hotas with my whoops, using rudder pedals seemed impossible -- the whoop was always sticking to walls or crashing behind tool cabinets and boxes in my garage. But I didn't give up! I've been practicing with the pedals every morning, and now I can fly through RaceGOW gates with intention, albeit pretty slowly.

Whoopin' with Rudder Pedals (0 min 42 sec)


I don't really know if these pedals are preparing me for flying a Jetson One or an Xpeng X2, but this progress makes me want to keep on practicing!
Posted by navigator2011 | Nov 21, 2023 @ 05:56 PM | 8,053 Views
Just a quick progress video, showing me whoopin' around the garage with the HOTAS system. I set up this system so that I can switch the yaw control between rudder pedals and twisting the joystick.

Hotas Whoopin' Around the Garage (2 min 24 sec)


Going into this, I really had thought the twisting motion would be harder to learn than the pedals. But it turns out, the twisting motion is fairly natural while the pedals are a real challenge! I'm steadily coming along with the rudder pedals, but they still reduce me to nearly beginner-level flying, at least when it comes to hitting gates in the garage. I'm sure I would do better in a wide open flying area.

For anyone interested in how I put this together, I posted more details here: Flying Whoops with a Hotas System.
Posted by navigator2011 | Nov 05, 2023 @ 03:50 PM | 5,886 Views
Flying cars like the Jetson One and the Xpeng X2 are coming! So, I had this idea that I could repurpose a Hotas (Hands on throttle and stick) flight controller for use with my whoops. I thoughts this could help me develop the familiarity needed for flying the 'real' thing in the future. I've seen this done with wings, but I found nearly nothing about using Hotas flight controls for quads, and certainly nothing about whoops. But, I've been having a blast using a Thrustmaster Hotas and rudder pedals to fly whoops through RaceGOW gates in my garage! Even with all the quirks that come with making the Hotas work like a Tx, I don't know if I can go back to my Tango 2 and Boxer radios! Have to admit, using the rudder pedals is so counterintuitive that it's like being a complete newb again!

Whooping with Hotas Flight Controls (1 min 38 sec)


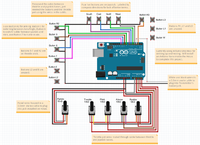
Below, I briefly explain how I setup a Hotas system to fly whoops. As I point out in the video, I programmed an Arduino board to translate PWM signals from potentiometers in the Hotas to a single PPM signal that can be read by an RC transmitter, such as a Radiomaster Boxer. With the Boxer set to Training mode, I can plug the Hotas into the Boxer's training jack, flick a switch, and start flying. I set up each quad in Betaflight, so the Boxer's settings are irrelevant. Moving forward, I may try using the Boxer to experiment with different throttle curves. Currently, I use the Boxer to fly ExpressLRS quads, and I use a TBS JR Module in the Boxer to fly Crossfire quads.

Flying Whoops with a Hotas System (1 min 19 sec)


I didn't start this project with any Arduino programming experience at all -- basically, I started with zero experience and studied tutorials posted by Paul McWhorter (https://www.youtube.com/@paulmcwhorter). Paul is an excellent teacher, and there's no way I could have completed this without his videos!

Here's an attempt at a wiring diagram of the Hotas system.


I relied heavily upon the following videos:
Inspiring to see others' work in this area:

Posted by navigator2011 | May 02, 2022 @ 09:40 PM | 35,016 Views
After years of flying only helicopters, I have seemingly ventured into FPV quads. Every morning, I like to put in a few packs zipping around the house or my yard before going to work. I never thought I would say this, but these tiny whoops are a ton of fun!

It all started with a single iFlight Alpha A65. Since I have some decent skills flying helis, I guess I thought looking through the goggles like a pilot in the quad would be easier. Well, not really. I put on the goggles for the first time and then I immediately launched the little A65 into the ceiling! Now days, the black canopy is covered with white steaks.


With all the packs I was flying, it didn't take long for the motors to start acting up. Many times, I would connect a battery and one of the motors wouldn't activate correctly, it would just sputter. Eventually, I found out that fiddling with the motor wires would get the motors working. In spite of this, it seemed like this A65 was burning through motors much more quickly than I thought it should. It seemed like, maybe, some sort of signal noise was getting to the motors, shortening their lifespan. I have no evidence of this, just a feeling, but what a pain!

Searching around didn't produce a lot of solutions beyond pointing out that the sputtering motors was a well-known problem with the A65. For example, Painless360 discusses his experience in "iFlight A65 1S Whoop: Review and what's wrong with mine." But I also found that many...Continue Reading
Posted by navigator2011 | Oct 07, 2021 @ 02:43 PM | 40,989 Views
Just a short post to share a video where I briefly discuss my experience after installing a TBS Crossfire satellite receiver on an OMP Hobby M1 helicopter. After flying a couple Crossfire M1s for a few weeks, I'm super happy with the results! The Crossfire protocol provides a control link that's super robust, at a frequency that isn't crowded, and the TBS Crossfire Nano RX takes up hardly any space on the M1. Running Crossfire also lets me use my TBS Tango 2 transmitter without a Multi-Protocol Module, which means even less gear in my carry bag! Besides, I think the micro-Immortal T antenna looks pretty cool on the M1.

OMP M1 Running TBS Crossfire (8 min 16 sec)


Parts that I used can be sourced at the following links.

Following are some alternative mini-immortal T antennas that I haven't yet tried:

Posted by navigator2011 | Aug 10, 2021 @ 02:50 PM | 43,809 Views
Since flying my first helicopter, I have been dependent on big, bulky box transmitters for flying all my helicopters. But I've always felt that those box transmitters are heavy, they have many more switches than I need, and they're always difficult for me to transport on vacations. I like to travel light -- super light. I want all my heli gear, including batteries, spare parts, tools, and the charger stuffed into one heli bag. And, not a big bag, either! I mean a small heli bag, like an Oxy2 Carry Bag or a SAB 280 Carry Bag.

For a long time, I've searched for a transmitter that's lightweight and simple to toss in my heli bag without breaking gimbals, snapping switches, or requiring a separate carrying case. So, I immediately pulled the trigger when the Jumper T-Lite started showing up in various videos and posts. Unfortunately, I couldn't quite adapt to the ergonomics of the Jumper T-Lite. I just never felt comfortable using it, there's a rubbery surface coating that slips in my hands, and the lack of a neck strap didn't help either. But I loved the lightweight feel of the T-Lite in my hands, and it's so easy to transport in my heli bag!

Searching for neck strap solutions for the Jumper T-Lite eventually led me to the TBS Tango 2. I then discovered some very informative videos by Joshua Bardwell (linked below). But I also discovered that the Tango 2 costs more than the Jumper, and when you throw in a Multi-Protocol-Module, which is necessary unless you're...Continue Reading
Posted by navigator2011 | Apr 05, 2021 @ 07:22 PM | 37,146 Views
Just a few thoughts about the OMP Hobby M1 and a maiden flight. Straight out of the box, my M1's tail bobs vertically up & down in Idle 1 (i.e., the 68% throttle curve). Seems like the bobbing goes away in Idle 2, but staying in Idle 2 isn't a fix I can live with. I tried loosening the main blades as others have suggested, but that didn't seem to help.

OMP Hobby M1 Maiden Flight (5 min 17 sec)


When I asked others about this issue, I found out that tail bobbing has been a thing for others, too. Eventually, I dropped the cyclic gains by one 'flashing light' and increased the Idle 1 throttle curve to 70%. At this throttle setting, 4 minutes of vigorous flipping and inverted funnels leaves my battery packs at about 3.78V/cell. This works out very well for daily flying!

In general, the M1 is a fabulous helicopter! The M1 is super well built and looks like it should be relatively easy to repair. I found it a bit challenging to position my Spektrum satellite receiver on the M1's airframe, but this is expected with such a small helicopter -- it was a labor of love, to be sure. I eventually de-cased the receiver, heat-shrinked it, and then attached it to the side of the M1's frame. Now, the satellite receiver is hardly even noticeable!

I think OMP Hobby went to great effort to develop an excellent micro-heli, and they nailed it! They deserve every penny of their asking price!!!
Posted by navigator2011 | Apr 05, 2021 @ 07:08 PM | 39,854 Views
Just thought I'd share a short video to demonstrate the relative sizes of OMP Hobby's M1 & M2 as compared with various other popular micro helis and their batteries.

OMP Hobby M1 & M2: Micro Heli Comparison (3 min 40 sec)


It's interesting that the M2 is just about the same size as the Blade Fusion 180 while the M1 is sized roughly between the Blade 150S and the Align Trex 150X. Even though the M1 and the Trex 150X both have 125mm blades, the M1 flies and feels like a bigger, more stable helicopter.
Posted by navigator2011 | Mar 13, 2021 @ 01:26 PM | 43,164 Views
I finally got my OMP Hobby M2 helicopter ready for flying! I thought I'd go ahead and share my very first flight with this M2 and offer some of my initial impressions.

OMP Hobby M2: Maiden Flight and First Impressions (7 min 14 sec)


Out of many, many helicopters, this is the very first heli that I don't use a Velcro strap to hold in the battery. I just couldn't get the straps to work the way I wanted without pushing the battery against the canopy. Instead, I opted to use 3M double-sided mounting tape to attach the batteries to carbon fiber battery trays that slide into the frame of the M2. At first, I wasn't sure I would like the battery trays. But after my 6 flights, I must admit I absolutely love the battery trays! It's just so straightforward to slide out one battery and then slide in another and go fly.

Although I don't mention it in the video, after my first 6 flights I feel like I'll need to increase the cyclic roll rates for this M2. The throttle is very responsive and the tail is quick enough, but I found the M2 was a bit slow during flipping. I have yet to research the nuances of programming the M2.

After watching my own video again, I'm not sure I come across very clearly about mounting the stock battery packs in the M2. When my M2 arrived, it already had a pack installed -- there was Velcro tape and a Velcro strap holding the pack attached to the battery tray. Given that the stock M2 battery has a width that is greater than its...Continue Reading
Posted by navigator2011 | Feb 10, 2021 @ 07:05 PM | 45,859 Views
It's been quite a while since I last posted a video, so I thought I'd post a short video to share some of the tweaks I've done to my Blade Fusion 180. I generally fly my Blade 150S more often since that helicopter is reliable and so easy to repair. But when it comes to tinkering, I love to play around with the Fusion 180!

Blade Fusion 180 with a Micro-Brain FBL (6 min 41 sec)


Probably, the most significant mod I've done has been installing a MSH micro-Brain FBL with a Spektrum SPM9745 receiver. The micro-Brain gives full command of the settings controlling the helicopter's flight behavior. Before, given the settings available in the stock FBL, I had been completely unable to tune out tail shuddering during funnels. But now that I have the micro-Brain installed, there is no tail shuddering at all! No doubt, the Lynx DS-895-hv servos are helping with precision, too!

Another beneficial mod has been Microheli tail push rod guides. As I mention in the video, the stock tail push rod guides tend to move around on the boom, and that is super annoying. I don't really want to do a tail push rod guide adjustment before every flight. The Microheli tail push rod guides stay put on the tail boom, even during crashes!
Posted by navigator2011 | Nov 30, 2020 @ 10:14 PM | 46,232 Views
For a long time, I had been flying my Blade 150S every morning before work, and quite a lot of crash damage had built up. Eventually, I drove the heli into the grass tail first, which snapped the tail fin and chewed up the tail rotor. Surprisingly, the 150S was still flyable though it was no fun to do so. Meanwhile, my backup 150S had at least a bent feathering shaft, maybe more. So, yeah, it was time for some repairs!

After having gone through quite a few stock tail fins and tail rotors, and a pile of stock shafts, I decided to give a Microheli tail unit a try. I also threw a hardened steel feathering shaft into my backup 150S. I have some titanium main shafts ready to go, but I was surprised to find neither of my main shafts were bent ... this time. In the following video, I maiden these parts and briefly discuss my impressions. These parts are available through Microheli and NextRC at the links below.

A Navigator2011 Review - Blade 150S with a Microheli Tail (7 min 26 sec)


Aluminum Carbon Fiber Tail Motor Mount w/ Fin set
Microheli: http://us.microheli.com/helicopters-...html?limit=100
NextRC: https://www.nexrc.com/store/helis/he...html?limit=100

Plastic 3 Blade Propeller 65mm Tail Blade (ORANGE)
Microheli: https://us.microheli.com/helicopters...html?limit=100
NextRC: https://www.nexrc.com/store/helis/he...html?limit=100

Hardened Steel Feathering Shaft
Microheli: http://us.microheli.com/helicopters-...html?limit=100
NextRC: https://www.nexrc.com/store/helis/he...html?limit=100

Solid Titanium Main Shaft/Collar set
Microheli: http://us.microheli.com/helicopters-...html?limit=100
NextRC: https://www.nexrc.com/store/helis/he...html?limit=100
Posted by navigator2011 | Aug 11, 2020 @ 01:17 PM | 47,390 Views
Just a quick shout-out to all the Fusion 180 flyers out there to recommend installing protectors onto your LIPO balance leads. The protectors simplify unplugging the balance leads after charging without feeling like the wires are getting ripped loose from the connector.

Securing LIPO Balance Lead Under Fusion 180 Canopy (1 min 53 sec)


There are a wide variety of sites that sell these protectors. Following is a link to a vendor I went with:

Lipo-Balance-Charging-Port-Protector-Saver

Of course, the protectors are bulky and interfere with installing the canopy onto the heli! As a solution, I zip-tied a small loop of elastic string onto the front of the frame so that I can tuck-in the protector before putting on the canopy. The elastic loop really works well, it doesn't look ridiculous on the heli, and it doesn't get in the way of anything else under the canopy.

I haven't yet tried it, but I bet this will also work well with the Blade 150S, the 180CFX, as well as the Trio 180CFX.
Posted by navigator2011 | Jul 27, 2020 @ 08:19 PM | 49,396 Views
Hey guys, just a quick note to say that if you're tired of trying to fit the stock canopy on your Blade 150S, consider using a 180cfx canopy. The 180cfx canopy goes right on without any modifications needed. As an added benefit, the orange color is a lot easier to see against the treeline!

Blade 150S with a 180cfx canopy (0 min 42 sec)


After pulling the trigger on two brand new 180cfx canopies, I was very happy to discover that the orange canopies fit easily without requiring any modification to the canopy holes. So, from now on I'll be using orange 180cfx canopies and reserving the stock 150S canopies just for a backup.
Posted by navigator2011 | Jun 30, 2020 @ 05:50 PM | 48,894 Views
Hey guys, I had a stock elevator servo die on me, leading to an epic crash. I assume all my recent crashes killed the servo. It's just the electronic part of the servo that's bad, the gears feel fine. I will definitely hang on to the servo gears for future use!

It appears that replacement stock servos aren't going to be available until July 20th, at the soonest? Thus, I can either shelve the heli or pull a servo off my Blade 150S. Not liking either of these choices, I decided to install some DS-895-hv cyclic servos from a crashed Oxy2.

After putting a couple dozen packs through the Fusion 180, I think the Lynx DS-895-hv cyclic servos are a great alternative to the stock servos. It is worth mentioning, however, the Lynx servos seem to have a greater throw than the stock servos. I did observe some binding of the grip links when moving the swash plate to extreme positions during the installation. This didn't seem to affect flight at all, but it may be necessary to reduce the travel of the Lynx servos.

The Lynx servos also seem to affect the required length of the servo links. That is, the servo arms of the Lynx servos seem to be a bit closer to the swash plate. Since I already shortened the servo links when I installed a 180 CFX rotor head, I didn't want to shorten the servo links any more. So I relied upon electronically adjusting the servo neutral positions to center the swash plate on the main shaft. I may do a mechanical adjustment later on, though.

It...Continue Reading
Posted by navigator2011 | Jun 23, 2020 @ 07:12 PM | 47,505 Views
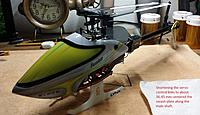
Anyone that owns a Blade Fusion 180 can attest to the fact that replacement DFC follower arms are impossible to find, even a year after the Fusion 180 was first introduced! So if we lose a DFC follower arm, what are we to do? One solution put forth by Horizon Hobby is to just pick up a Trio 180 CFX follower arm set. Well, the Trio arms come in sets of three arms, so I guess one could pick up two sets to get three pairs of arms for the Fusion 180.

Another solution is to install a conventional 180 CFX FBL rotor head onto the Fusion 180. I know many people love DFC rotor head systems, but I prefer conventional FBL systems on my helicopters. I decided to give the conventional FBL system a go after finding my DFC follower arms getting a bit difficult to turn after several crashes.

The first step was to figure out which parts to buy and to make sure they are compatible with the Fusion 180. Although the 180 CFX has been discontinued, it is fortunate that the conventional FBL system now finds a home on the Blade 150S. Also, the Fusion 180 and the 150S both include the original swash plate and feathering shaft from the 180 CFX! At this point, I was pretty sure the FBL system would work on the Fusion 180. Of course, it remained to be determined whether the FBL would simply bolt onto the Fusion 180. To get started, I ordered the following list of parts:
Essential Parts:
...Continue Reading
Posted by navigator2011 | Apr 26, 2020 @ 03:06 PM | 50,635 Views
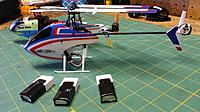
For a while, I've been using a battery cable adapter to run Align 2s lipos from my Align Trex 150X in my mCPX BL2. I have a lot of Align packs, and I didn't want to pull the trigger another bunch of packs for this helicopter. I'm not a fan of storing a lot of battery packs throughout the year, and so I like being able to use the same battery packs in different helicopters.

The battery cable adapter has worked well, but as I have ramped up the amount of flights on the mCPX BL2 the cable adapter has increasingly felt a bit bulky. I've always appreciated the battery tray on the Trex 150X--there are no wires to get in the way, just plug the battery pack right into the tray. The Align 2s battery packs fit so well in the battery tray of the mCPX BL2 that I decided to install a compatible plug into the battery tray and get rid of the battery adapter cable altogether.

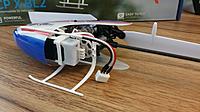
The biggest part of this modification involves mounting a JST-XH 2.50mm (1x3) straight plugs onto the battery tray of the mCPX BL2. I obtained a package of JST-XH 2.50mm (1x3) straight plugs from Hansen Hobbies, Inc. With the tools I had on hand, the only way I could think of doing this is by melting the plug pins through the deepest part of the battery tray. I installed a plug onto an old lipo, loaded the lipo into the battery tray and then pressed the plug against the deep end of the battery tray. Next, I used a soldering iron to heat the plug pins until they pushed into the plastic of the battery tray.
...Continue Reading
Posted by navigator2011 | Mar 04, 2020 @ 10:32 PM | 56,003 Views
In a previous blog about my mCPX BL2, I ended by mentioning that I was going to install a MicroHeli frame, MH-MBL2005. Unfortunately, just a few grass hits was enough to cause all kinds of damage to my mCPX BL2. As to be expected, the usual weak spots include the canopy posts and the boom mount, as well as the boom itself. Once the boom splits and gets loose in the frame, the boom can fall off the heli during a flight! I discovered this firsthand upon wrapping the tail motor wires around the main shaft.

One thing that really is upsetting about the stock frame is that the canopy posts break so easily. I actually had a canopy post fall off while I was removing the servos. I have never experienced more fragile plastic! And, many other people have reported the tips of the canopy posts just shearing off, leaving the canopy free to flop around unattached. I like that the MicroHeli frame includes carbon fiber canopy posts. There's just no way the carbon fiber posts are going to break without putting up a fight!

Unlike the fragile stock frame, the MicroHeli frame includes carbon fiber frame sides that screw onto metal bearing blocks. The boom mount is also metal and includes a screw to tighten the boom mount onto the boom. Coupled with a solid tail boom, this frame should be able to handle a few grass hits with ease. Probably won't be long before I know for sure!

Assembling the MicroHeli frame is similar to any other helicopter frame. The screws must be thread-...Continue Reading
Posted by navigator2011 | Feb 22, 2020 @ 06:28 PM | 50,775 Views
For a long time, I've been waiting for Horizon Hobby to come out with an updated mCPX BL. It's finally here! Horizon Hobby has revived their super successful mCPX BL in the form of an mCPX BL2, which now includes Safe-Z mode and Safe mode. Some people have reported having some trouble setting up the Safe-Z mode and the Safe mode on this helicopter and encountering glitches during flight. I'm not sure whether it makes any difference, but I did avoid the Safe modes and put everything into 3D mode. To get 3D mode all the time, I assigned my DX9's channel 5 to a 3-way switch and then put all the switch values to -100. Aside from going full 3D, I set up my DX9 by the book, and my mCPX BL2 flies just fine. It's unclear to me whether suppressing the Safe modes has prevented the glitching others have seen.

I've had a few months to become accustomed with this model. So far, I've been using my mCPX BL2 primarily as a backup for my Align Trex 150X since they can use the same batteries. For a long time, I've been posting that I like my Trex 150X more than my mCPX BL2. But I have to admit, I've been really enjoying flying my mCPX BL2. Even though the Trex 150X is built like a bigger helicopter, this mCPX BL2 is really growing on me!

Although there are batteries available for the mCPX BL2, I am using my old Align 300 mAh packs from my 150X. They're a perfect fit in the battery tray and they relieved me from having to buy a bunch of new packs. I put a couple of small...Continue Reading
Posted by navigator2011 | Oct 23, 2019 @ 02:04 PM | 51,159 Views
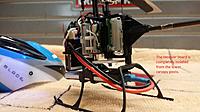
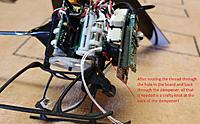
One of the great downsides to owning a Blade Nano S2 are the dampeners that sit on the lower canopy posts and support the receiver board. The canopy posts are prone to breaking in crashes; even minor crashes. Once a lower canopy post breaks off the frame, the board is no longer effectively supported and can wiggle around inside the canopy. This can make the Nano S2 quite a bit more challenging to fly as it flops around in the air! And, once two canopy posts are broken, you can forget about flying the Nano S2 until a new frame is installed. Many times, I've been able to extend the flying life of my Nano S2 by manipulating a paperclip to resemble missing canopy posts, but it's a serious pain!

Another problem is that the dampeners tend to tear loose from the board, owing to their super pliable nature. Once again, this leaves the board free to flop around unsupported inside the canopy. It's not that replacing a dampener isn't easy; it is easy, just slide a new dampener onto the canopy post and coax the rubber through the hole in the board. Done! The problem is Horizon Hobby only sells new dampeners with a replacement board, for $70 before tax, shipping and handling! I hope this policy changes soon. There's no way I'm going to buy a new board to simply replace a torn piece of rubber.

In a previous write-up, I talked about using sewing thread to fasten a torn dampener to the board. Sure, that works, but not all that well. The sewing approach tends to push the...Continue Reading
Posted by navigator2011 | Oct 06, 2019 @ 08:58 PM | 47,475 Views
As many will attest, nano-sized helicopters are excellent teachers. Crashing anything larger can be a frightful prospect, chiefly due to the cost of parts and the time of repairs. One small mishap can end a flying session and leave one with a bunch of fully charged packs to discharge. But not with the nanos -- they just bounce off the lawn over and over again! This level of durability leaves one free to experiment, and thus can greatly improve learning new moves that would otherwise be out of reach.

As with any helicopter, there are some parts that are particularly susceptible to damage. In the case of the Blade Nano S2, the board dampeners can be a particular source of frustration. It's not that the dampeners are particularly prone to being damaged, but rather once they are damaged, the only way to get new dampeners is by purchasing a completely new board! But this makes replacing a simple piece of rubber a nearly $70 endeavor -- on a helicopter that retails for $100! Obviously, Horizon Hobby should be offering the dampeners separately for a much more reasonable price. So, nope, I'm not paying that price when the receiver board in my Nano S2 is perfectly fine.

The other day I had a particularly nasty crash, on concrete, that put my Nano S2 under my parked car! While I was pleased that my Nano S2 was still flyable, I was concerned that, once back in air, the helicopter was flopping all over the place. Back at my bench, I pulled off the canopy and found one...Continue Reading