Spaaro's blog View Details
Posted by Spaaro | Apr 01, 2019 @ 05:05 AM | 4,372 Views
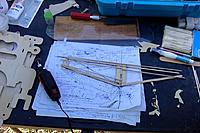
Used last week's good afternoon weather to push through 4 focused build sessions; tried to keep hasty mistakes & dodgy technique to a minimum.

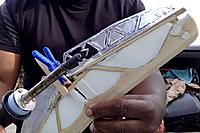
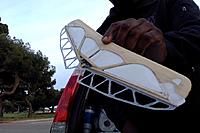
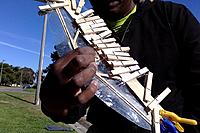
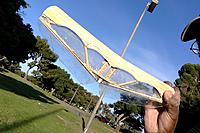
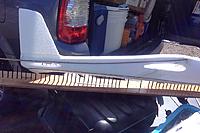
Paid off: Stab + elevators done...now sorting out control horn & link, tying both elevator halves to their cable run atop the vertical. Just a final skin of sanded, foam fairing over the hinge line & a mylar wrap remain.

Wanna weigh this assembly--just out of curiosity, once I get to the post office's scale.

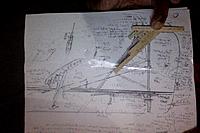
Now to create that "M"-shaped, bridging wire + angled horn mock -up...I really don't want to rely upon some cludgy, exposed "Y"-yoke type dual linkage for the elevator actuation....Continue Reading
Posted by Spaaro | Mar 26, 2019 @ 08:48 AM | 4,004 Views
Made a lot of progress on the weekend, as well as made time to connect with members of the Torrey Pines Gulls Club at their 'Fun-Fly'; much thanks to Mark B, Greg & Chuck for their hospitality & advice. It was a truly great day for all kinds of flying.

The Stab':
- Leading edge sheeting attached; I could have done better/'more thoughtful' approach with it, but worked out okay.
-Sanded, shaped and re-sanded = got the thinness & contours desired.
-Lost my scroll bit, so worked 2x as hard using other grinding heads & cut-off wheels to sculpt 'scallops'.
-Found a few other places to make lightening holes and began cutting away the unneeded, heavy, plastic 'under' template.
-Used food tray foam to make in-fill of all the open area beyond the leading edge sheeting.

More finish sanding/blending(..this bamboo plank sheeting is getting mighty thin!..) to get that seamless transition to the foam skinning and I've started selecting parts for the elevator hinging & foam skins....Continue Reading
Posted by Spaaro | Mar 21, 2019 @ 05:41 AM | 4,394 Views
Part of this project I was looking forward to: using safety pins for hinging. Connected up the rudder post...turned out FANTASTIC!

Having that little bit of metal in there seems more like real, hinged control surfaces than CyA-soaked plastic ones.
They went together in one session/sitting; I don't think it is too much more effort than pre-made hinges either, at least as far as alignment/gapping.

Stabilizer progress:
Its not based on any particular airfoil beyond 'TLAR'--a slab with a modest amount of symmetry, eg: flattened lenticular shape. I had skipped a step that would have imparted more convex curve to the slotted undersurface(..moisture + heat molding..); still possible but a bit tougher this far along in its build. Probably unnecessary.

With 20/20 hindsight, I could have designed a better 'stab-vertical' "T"-interface or mount, likely without the potentially weak, chord-wide slot. At this point, a CF-tow patch & leading edge sheeting should solve it.

I'm not 'seeking' any hobby grade balsa or ply veneer; I've got bamboo flat strips from a thrift store dinner mat: edge-sanded into planks and joined to form sheets. About 20+ minutes of judicious sanding gave me 2, thinned sheets perfect for the task; they will be sanded much thinner once mounted in place.

Spliced them together on a bias to match the mild forward sweep; hoping this crossing of the bamboo's long grain will also improve torsional stiffness.

Aiming to mount later...Continue Reading
Posted by Spaaro | Mar 20, 2019 @ 07:19 PM | 4,419 Views
I've now gotten 1/2 way thru constructing the stabilizer and verifying it's fit/alignment atop the Vertical. Currently sits @+2.5 deg. incidence, but too early for any fixed decalage setting.

I 'DID' cheat here: I've added a couple strips of CF ribbon across thinned wood on its central mounting plate, as the mounting slot has a glaring fracture/stress point.

A bit torsionally flexy, but not after I attach some wafer-thin, bamboo sheeting along its leading edge and a few cross braces. The acrylic plastic base material is rather heavy; it will all be cut/'fretted' out; cover will be either mylar or Tyvek.

Elevators will also be foam & safety-pin hinged and I've only sketched out possible linkage patterns for moving those angled halves smoothly.

I should be working it now, but I've put off posting updates longer than I expected....Continue Reading
Posted by Spaaro | Mar 20, 2019 @ 02:33 AM | 4,548 Views
Having spent January & February hunkered down amidst rain /wind...
...several trips to L.A. & back...the odd bout of sickness & fatigue...and a spending a couple '$$$K's worth & on taxes, unexpected car repairs and vet bills for my dearest, stalwart companion Ehrlah...

I DID slowly get back to modding this FX-706 Glider!
What should have taken a few weeks...along with the inherent 'trial & error' of unconventional building off ill-defined 'plans'--has taken me 2+ months.
Oh, well...I've still 'enjoyed' the journey/challenge.

One issue slowed me down initially: the Vertical Tail as I designed it didn't have enough torsional stiffness. When I mounted the stock, foam stabilizer in position, I could waggle and twist it with my hand quite easily. Aerodynamic flutter--"waiting-to-happen"!

This was after I had routed & embedded the elevator cable guide to its 'exit' point & thought I'd be ready to mount the rudder, stab then skin over everything. I'm still determined to do as much of this build WITHOUT carbon & minimal glassing, as using this shoddy, Harbor Freight 2-part epoxy is a PITAS to get right!
Only '5 min.'-working time--thats when it is cool outside!

Of course, weight budget for this tail end looms over everything. I haven't put it on a scale yet but I'm watching how far the 'CoG' creeps back behind the wing saddle T.E., when balanced on my finger or ruler's edge!

I briefly considered creating an '...Continue Reading
Posted by Spaaro | Dec 31, 2018 @ 02:23 AM | 5,278 Views
Not much to show for my evening & weekend build sessions:

Locked in details of my 'T'-tail internal structure & linkages, as well as its outline/appearance. I'm still 'underwhelmed' by my fin + rudder shape....some 'unique character' element is missing.

Selected & collected my sub-assembly materials/wood parts; just managing to cut out & glue a few of them together by dark fall tonight .

Its a 'beginner'-grade, R/E/F slope & hopefully 'thermal' model, but I'm attempting to give it streamlined control linkages, using flush-fairing interfaces for the horns & wires.
I'll also be applying an idea I've had for years, but never utilized: using safety/'baby' pins as control surface hinge & linkage hardware.

Limited build time/space aside, I'm now 're-dedicating' my drawn, aileron actuation scheme to operate a set of flaps(..I don't think the polyhedral of these wings will serve ailerons well..)--also, trying to choose my surfacing & finish method for the fuselage.

Including all the nicks, gouges & '..still rough..' wood insert contours, its discolored by adhesive & filler....along with dirt & stains from constant handling.

It won't be epoxy + glass ; more likely paper/silk fabric + WBPU...coated with enamel or acrylic.

Never painted & finished EPO before, so now is the time to read & research '..What works?..'

Would a nylon stocking/pantyhose material 'shear skinning' be problematic or redundant over EPO?
Posted by Spaaro | Dec 29, 2018 @ 12:13 AM | 5,003 Views
Dry, clear & warm day; I thought I'd dig into that 'golf bag' conversion some...

It stands roughly 34" - 36" high and has roughly the same 'open space volume' depth inside; inner circumference is 28-3/4 ".

The 'pear-shaped' mouth is 7" across & 8-3/4" high at its widest point; I guess these dimensions determine the widest chord wings I'll be able to fit, eh?

It has[..had..] 3, hard molded PVC dividers to separate the golf clubs and 3 'tiers' or septums--fabric dividers inside that stretched full depth.

I went ahead and hacksawed the plastic dividers out, but I will keep the inner, fabric septums/'shelves', as they might prove useful for protecting the glider parts & wings.

Based on the available volume and the 2, inner steel rod spines supporting the bag between its thermoplastic base molding & velvet-trimmed mouth, I now envision:
- Using Corr-Flute/sign plastic as the inner wall liner that will wrap around its interior. I will try to cut it to be a close, 'tension/friction' fit-

-I don't want to permanently affix it(..likely for periodic cleaning and/or mods..) This will require either 1 piece of sign plastic, 30 x 30 ...or, 2 pieces 30 x 15.

-To further stabilize the slippery-surface Corr-Flute plastic against the nylon fabric without fasteners OR cross pieces, I might try 'splitting' the Corr-Flute so that it is only 1 layer, with the exposed corrugation ridges facing outwards.

- I'll then smear 'Great...Continue Reading
Posted by Spaaro | Dec 26, 2018 @ 12:50 PM | 6,110 Views
For Christmas, I bought a used/derelict 'stand alone' golf bag from a thrift store: $7 bux

I've grown tired of storing my disassembled glider & plane parts in an awkward box...and vaguely remembered seeing pictures of golf club bags that RC glider flyers had modified into field carriers.
Now this was a VERY long time ago[..when RCGroups was still 'The E-Zone'..], but the memory stuck with me. However, I couldn't find any postings or threads on here or on Google--of people doing this nor displaying their conversions.
I DID see dedicated, larger sport tubes & boxes especially converted ski carriers for traveling competitors.

Without too much modification, I can see such a bag holding a 2m sailplane's parts, including it's vertical fin height(..for example, my modded & modest 'FX-706' fuselage in pic #3, Length: 885 mm, Span 1635 mm..)

I've not started cutting/cladding onto it yet, due to the holiday but envision creating an additional, 30 - 40cm extension lid/'radome'--to fit on top, kinda like at giant cap on a ballpoint pen.
I'll also likely put sign plastic/Core-flute all along the inside as wing chambers and circumferential stiffening, as the lightweight bag is fabric over a sparse frame.

Its zippered compartments aren't quite big enough for my transmitter, so I may have to velcro strap a piggy back atop it.

Anyone have pictures or 'How-To'-links of similar golf bags->into->RC plane field carriers?

Hopefully this will facilitate any future air travel[re: baggage rules & handling], that the golf community has leveraged so deftly...
Posted by Spaaro | Dec 19, 2018 @ 10:32 PM | 7,364 Views
While passing through Carlsbad on the Pacific Coast Highway in August, I saw some people slope RC'ing off the side of the road, overlooking the walking path & beaches. I soon learned the spot is called 'Dave's Beach'.

One guy had a really neat & simple, bare bones configuration foam glider of about 48 - 50" span. He told me he had just received it mail order for ~$19 bux off eBay...had stuck some old, basic servo gear inside it and was testing it that very day...the first time he'd slope'd in a few years time.

He saw it marketed as an extruded foam chuck glider for park tossing, but that it was proportioned & airfoil'd to be a proper HLG or sloper. It was nice shaped & balanced than an AirHogs Titan and flew extremely well.

So I verified its type/brand name & sourcing from him and mulled ordering one as I drove south to San Diego. After watching fliers at Torrey Pines a weekend later, I decided I must have one too.

A bit of search & wrongly entered keywords/specifics gave me 'FX-707', 1.2 metre EPO gliders; some perspective photos, dimensions and 'clip-art'-grade pics of a happy child throwing one...not much else. I also failed to 'see' Google links of anyone else posting pics or experiences with these, not on RCGroups or other forums.

They were now more expensive than the price he quoted too(..$31 - $45..)

By Monday, I saw them advertised for $21, plus a slightly different variant called the FX-706, with arc'd 'swifts wing'...Continue Reading
Posted by Spaaro | Mar 05, 2018 @ 12:31 AM | 5,915 Views
I've been on the road and across 3 states since the middle of January. Relocating cross-country...resolving old property issues...and, by the grace of God and very, very dear friends, including exciting and adventurous experience as well[..several national parks, Pacific Coast scenery & outdoor wonder sites!..].

Is it truly too much to fervently desire/seek aviation & aeromodelling amidst it all??

I had packed all my tools, projects and R/C stuff into storage and carried only the simplest necessary for an extended 'road trip'. Out of that, only: tape, superglue, a hot melt glue gun, metal ruler, tape measure and pens/pencils might pass for 'hobby' equipment!

The wide, open landscape, clear skies and mild weather of Central Valley, CA pushed me over the edge, though.

I've bought a couple of EPO foamy HLGs(..One R/C-ready, minus rec'vr & batts; the other--'T-tail 'Blaze'--qualified for R/C conversion by others..), 2 foamy 3-channel/2.4 GHz 'Champ'-clone trainers from a seller in Bakersfield...some extra batteries, receiver and 2nd-hand transmitters.
All for less than $175!

I also couldn't resist scavenging potential, 'scratch-build'-grade odds & ends from some thrift stores I wandered into and now have the elements for an ambitious glider.
Most of this will depend on whether I can learn that arcane 'art' some on RCGroups are familiar with: "Build-Inside-Your-RV/Camper/SUV"!

Best encouragement has been the folding table...Continue Reading
Posted by Spaaro | Jun 05, 2017 @ 04:48 PM | 6,882 Views
Just about finished with building this fuselage pod...yesterday and this early morning fabricating...assembling...sanding...filling...rep eat.

Almost ready to surface, just digs & dinks in the tapered tail area to level.

The Composites and Slope forums are incomparable treasures of learning 'how-to'; I have to try that method of using a tinted, color under-layer of filler--to properly gauge sanding & surface prep before sealing.

Now...do I start work on the tail boom & feathers or the wings?

General arrangement/plan drawings to follow......Continue Reading
Posted by Spaaro | Jun 04, 2017 @ 07:12 AM | 7,039 Views
My orbital sander crapped out while I was modifying a cabinet organizer for additional shelves.

I used the time in between repairing it to do further work on the glider plug I crafted from a Wii controller adaptor.

- Filling in the gaps & openings in this Adaptor Body to achieve the desired 'Pod'-shape.

- Used white styrofoam blocks carved roughly to fit the two, gaping openings in the underside.

- Sand to contour.

- Mix up a filler compound of Gorilla Glue, saw dust & diatomaceous earth...spackle it in.

- Wrap with cello-tape & compress until fully cured.

Repeat using Xylene-thinned G.G. and more DTE versus saw dust each time...sand...fill...repeat. I also applied a UV/'black light' grow light during my build to speed the cure of the adhesives I used; I found it effective upon CyA, polyurethane adhesive and epoxy, greatly improving the rapidity with which I could push ahead.

- Sanded the tail boom wood cladding into a more uniform/symmetrical & refined shape. Added a turtle deck receiving notch on the 'Forward' wing-saddle end.

- Reinforced the sidewalls w/additional wood braces...to prevent crushing/flex when subject to vacuum when bagged.

-Added hoops of steam-formed bamboo rod to support the top cover/turtledecking.

I fixed the orbital sander in time to use it to aid all this contouring and filling. I hope to complete building this plug and start 'fine' finish sanding/surfacing later today.

I am really happy with...Continue Reading
Posted by Spaaro | May 28, 2017 @ 10:09 PM | 6,702 Views
Finally have some time to dedicate to plane building & project development again!

I didn't do much hobby stuff during winter unfortunately but I did organize my work space, creating:
- Dedicated tool shelving, caddies & cabinets...

- Wall-mounted tool organizers(..its FANTASTIC giving everything a 'home' beyond cluttering counter space, plus knowing where it all is!..)...

- A dedicated vacuum laminating table & wing building forms

I did do lots of doodling and fleshing out details for my builds underway(..the 1930's biplane plug, several approaches to wing building, some glider fuselages..).

One new idea that sprang up was a novel fuselage plug that grew out of a discarded Wii controller adaptor. I think it is a Wii 'Fishing' or 'Sword Fight' rod/wand housing attachment...possibly a generic brand.

It just screamed 'glider forward fuselage pod' to me.

So...with a length of wood as an axial armature and pieces forming a tapered tail brace + wing saddle...plus a deodorant bottle's conical lid for a nose fairing, I'm quickly shaping a good size plug.
I'll finish forming over its gaps & openings with scrap plastic & veneer wood; then surface seal, tape & wax. I think this will be my first glass shell test prototype...before the biplane.

This makes 3 gliders I have without wings and only 1 with tail feathers. I just might bash up a Dollar Tree foam board set of wings to get something flying sooner than later.
Posted by Spaaro | Sep 24, 2016 @ 03:15 AM | 10,248 Views
Cannot believe there was a surreptitious, angry/vengeful targeted shooting of 3 Cosmetic's Sales Women in the Macy's department store at the large mall in the next county over!?
http://www.dailymail.co.uk/news/arti...ocial-facebook

I considered going there to watch a movie tonight at the adjoining multiplex, too!?

PoS is still at large...

Every 10th or 11th person in this country now seems to feel they have the 'right' to solve their personal gripe or spurned affections with gun violence!

Wherever you go this weekend and this whole fall season approaching the Elections, please be on your toes and 'Situationally Aware'...of your surroundings AND of those milling around you!
Posted by Spaaro | Sep 22, 2016 @ 04:07 PM | 8,575 Views
Finally scored some necessary additions to my bagging set-up:

-A gauge, down to -30 mm Hg... $8 bucks!

-A proper-sized & ported, brass 'Tee'...to accommodate it and the compression fittings that accept my tubing size...$4 bucks.

At least 3 bags I can run simultaneously. Now to actually clear table space for dedicated resin & 'lay-up' prep, instead of shuffling my sundry 'junk' around with each task!

After having read thru the "Electrifly/Great Planes 'deHaviland Tiger Moth" thread from 2010 - 2014, I see it was a kit prone to brittle foam fractures!

Mine happens to be immaculate, but I've reviewed how its flight handling tolerates 'weight gain' well.
I want to give it's thin, undercambered wings some CF spars and a 'veil-weight' glass cloth-skinning...along with the fuse and tail.

This to fly it outdoors and mod it for disassembly the way others did.

Anyone have a direct link to 'light glassing' tips for micro-size planes?
Posted by Spaaro | Sep 20, 2016 @ 09:53 PM | 7,347 Views
Between running errands, household repairs and car do-dads, I haven't touched my J-3 Cub....which I fear might become more involved than just mounting a replacement prop adapter.

However, my browsing of the 'F/S Forum' pages and eBay connected me with sellers willing to part with these beauties below!

The DH Moth came from a gentleman in N.C. and the Aerobird-3 resulted from a generous transaction courtesy of 'Stanbur', out of TX, here on RCGroups!

For 6 and ~8 year-old kits, respectively,--N.I.B.-- they are both pristine...and reveal design and materials/construction indicative of this hobby from that time.

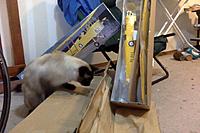
My QA Director, 'Erhlah Greye' and her son and my Security Chief, 'Halley', helped perform the Receiving Inspection and 'Bill of Lading' inventory.

They are actually eager for me to construct more 'Bird toys' for them to chase, as they're not sure what to make of the Cub taxiing along the driveway.
...Its small AND it DOES fly, though?......Continue Reading
Posted by Spaaro | Sep 13, 2016 @ 01:45 PM | 7,468 Views
While I take a break from crafting my biplane fuselage plug, I now focus on creating my first vacuum bagging system.
I found a sufficient, cheap/used Chinese-made pump on craigslist last fall and it has gathered dust all year until now.

Over that same span of time, I've slowly studied 'DIY vacuum system' tutorials, including:...the incredible "Telos Build" & "$10 Aquarium Pump Conversion" thread...'what works/doesn't'-discussions from slope & sailplane crowd and composite fabbing.
Then, if I couldn't source accessory parts from Home Despot or the excellent composite suppliers nearby--at least at bargain cheap pricing--I'd scour thrift stores, salvage yards and garage sales for the remaining odds and ends, tubing, diaphragms and plastic connectors.

No hurry...time to wrap my head around this while pursuing other projects.

So...
I'm finally ready with:
-Chinese RS-1, 3 CFM pump for $10, craigslist.
- 4 mil. plastic sheeting roll from the Orange Store: $9.00
- Tacky caulk from Fibreglass Supply, near Bayview/Burlington Regional Airport.: $5.45
- 1/4" plastic tubing from a CPAP kit in a thrift store; 25 ft for $2.00!
-Assorted lengths of extra tubing, plastic & brass connectors, nipples & tees
from Commander's Salvage Yard for $7.00
-One 3.2 Gallon steel reservoir tank from a discarded water purification system @Skagit Salvage Warehouse: $10.00

= $43.45...call it $50 after sundry Dollar Store and mocha latte stops.

I don't have a pressure gauge or vacuum switch to monitor my system yet; I haven't researched if there are cheaper, 'DIY alternatives'...versus a new unit from the Fibreglass Shop for $44!

I'm open to recommendations...
Posted by Spaaro | Sep 11, 2016 @ 01:58 AM | 7,507 Views
I've always been fascinated with biplanes and more recently the 1930's era military biplanes:
the Hawker Hart & Fury series...the Fairy 'Fox' and 'Fantome'...Gloster family ...Curtiss, Arado, Heinkels, Koolhovens, WACOs, Bleriot-SPADs, Czech Avias and lesser-known Japanese Aichi and Yokosuka-types.

Instead of picking a known, scale subject to model, I decided to 'approximate' the look and feel of one. Combine some of their most appealing aesthetic character in a 'made-up' design...like the drawings I made in my school notebook margins. Epic air battles that '..may have taken place..'.

I also let this be my opportunity to try a construction approach that has been on my mind for a long time:
Could I use generic, household items to form a crutch, over which I could create a proper model fuselage?

Something with more character than a combat SPAD or slope soarer--the simple plastic, 'Whiffle Bat' & cartoonishly simple proportions.

After looking through web images from various companies and countries that built prototypes and actual production aircraft, I sketched up something that took advantage of some of the shapes I had lying around the house.
Detergent & toiletry bottles and beverage cups.

The goal is a stable, solid plug that I can detail, wax and create 'layered-up' monocoque shells with vacuum molding/bagging...something light, attractive and 'potent-looking' when done.
In an Imperial War Museum way...[..see profile diagram..]

It...Continue Reading
Posted by Spaaro | Sep 10, 2016 @ 09:29 PM | 7,206 Views
High time I posted in my blog space!

Having started and stopped 4 different airplane projects since last summer without completion, I decided I couldn't let THIS ONE go by without enjoying SOMETHING FLYING!

I've managed to get my 'fix' with an E-Flight/Horizon UMX - AS3X 'J-3 Cub' for the last 3 months. Well...2 months or so, between repair downtime--both for my car, residence AND the R/C model!

Resilient...smooth...pretty to look at and full of wonderful performance for its size & price-point, it is my first NIB, aileron plane! A BIG help cutting my teeth on becoming a skilled R/C pilot.

I recommend this plane for just about anyone, including ambitious beginners with good intuition for model flying.

Flying models is 'pleasure' I've put off many times over the years, while 'real life' & USN duties got priority!

I have to thank 'E-ZoneMag/RCGroups' for "..being there.." this past 20+ ...for modeling community, innovation, education and endorsement of this amazing hobby & science.
I was a scratch builder of static and free-flight since childhood, but I only seriously considered R/C when I learned electrics had become viable in the late 90's.

The articles, forum discussions and build threads...and collective wisdom of dozens of other enthusiasts and professionals has given me the confidence to keep pushing ahead.
...and finally mature my own builds, methods and projects, now that I have shop space! You've helped keep me SANE!

Aiming to have two, home-brew gliders and a biplane RTF by the end of winter.