Posted by UBILDIT |
Jan 07, 2014 @ 08:11 PM | 12,509 Views
Well, Since I work at a hobby shop, sometimes I get a good deal on stuff. I happened to be able to buy a 1Si quad copter that was having some issues despite having not been flown very much. We have sold a lot of them and they seem to be very nice, but I like the very small 720P video camera on board and the fact that you can stop and start the video from the tx that comes with it. So, I mounted all the "guts" on a piece of foam and scotch taped it to my LaTrax Alias ... which is just for all out fun flying and flipping and stunts...especially at night... and I took this video from my driveway. I will make a few changes if I do it again to make sure the wavy lines don't happen again, but the quality of the video is actually pretty good. It was very cold and I did not want to have it up for long, but the Alias handled it quite well. So hopefully I can upload this video and people can watch it and go..... oooooh.
Bo... looks like I will have to post it somewhere else and put a link in this blog to the video.
Posted by UBILDIT |
Dec 04, 2012 @ 10:35 PM | 11,639 Views
Well,
It's been a while since I've made a blog entry, but I think this one is worth doing. Working at a Hobby Shop I've been presented with a great number of planes that simply don't need to fly again. For that matter, I've created a great number of planes that don't need to fly again, but that's not the point.. the point is..now I have a way to keep the plane alive almost forever.... well, part of it anyway.. I think that I'm probably not the first one to do this, but I may be the first one to do it and enjoy being creative with it!.. Who knows...
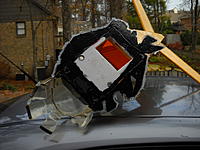
I like to call it RC Taxidermy. Mounting and preserving what's left of your favorite plane when it's simply beyond repair. In both of my first two examples, it is the tail section that survived mostly intact and then I realized that with a few magnets and a little creative paint and glue, I could create an illusion that the plane had just hit the roof of my car or gone through the side of a door. What a great way to mark your car at an event or even just at the club field. Or if you're like me and sometimes fly in large public areas, you can attach an Estes rockets parachute to the tail and have an instant wind sock.. So here are my first to attempts.... outside the hobby shop they have both received many long hard looks and even some close investigation.... (by guys only...no women...big surprise there). If anyone is interested, I can be a bit more specific about the materials I use and the type of magnets.. etc... The large T-34 with Darth Vader at the helm was difficult as it was much larger than the foam tail of the Flyzone FW190 and it's weight alone...at the angle I wanted to mount it made it a real project... but I'm happy with the results. Hope everyone who reads this enjoys the funny idea of keeping your planes... even when they're dead... LOL..
Bo
Posted by UBILDIT |
May 07, 2012 @ 01:55 PM | 10,786 Views
I was going through my pictures of SEFF... I was only there on Tuesday. When I came across a picture... taken by one of the nice Canadian guys... of me with a bunch of guys, just after I had competed in the "Circus Peanut" challenge. While looking at one in particular. I noticed that Crash was being visited by the fabled "Pink Poodle Fairy" during this picture. His luck is going to be phenomenal from this day forward because they say that visits from the PPF...are rare but extremely valuable. Unfortunately they only help in the areas of dog show judging and pod cast hosting... so well, you get the picture... If anyone else knows anything about the Pink Poodle Fairy and what it does... and why it might have visited Crash... post your replys ... please..
Bo
Posted by UBILDIT |
Apr 25, 2012 @ 11:47 AM | 10,252 Views
pics from a windy tuesday ... and accomodations with Hippo Monday night.
Posted by UBILDIT |
Feb 12, 2012 @ 11:22 PM | 10,937 Views
Finally the Icon is out and I obtained a PNP version on Friday. Since I know how much I like to fly off water and at night and at night over water.... I had to put some LED's in it. the headlights are from my local Autozone and the lights on the sponsons that light the wing and the side fuselage are those strip led's from... well I know what plane they came out of but not where I got the lights... anyway. Inside the canopy there are 2 of the 3 strip lights shinning through the floor up under the instrument panel and they are all connected to a single 3S lipo inside. I'm pretty happy with it.... just too cold for a maiden flight.
Keep on flying.
Bo
Posted by UBILDIT |
Oct 09, 2011 @ 12:13 PM | 11,499 Views
Last Saturday, October 1st. Lmopar69, his wife Kmopar and their son, The Camanator came to a memorial fun fly I was in charge of at the Alabaster RC club just outside of Birmingham. We had a great time Friday night, flew in the really windy conditions on Saturday and Lmopar won the Bomb Drop competition and a $30.00 gift card, then back to my house for the Nebraska Wisconsin game. Just before the game started, Laine went out to his trailer and came back inside to "give me the bird". He cuts them out with a CNC Hot wire cutter and had an extra one for me. His flew fantastic at the event earlier that day so I was super glad to get one of my own. I've been working on it a little bit here and there ever since and had it ready to fly last night, but looks like the maiden will be today.
I documented parts of the build as there are no instructions needed, it's hard to mess it up. A carbon spar of some type behind the built in foam spars in the wing and some hot glue is all that's required to get it going. Everything else is "use your best judgement " to make it straight and is up to each person. I will share some of the things I tried.
First some of the Specs..
Leading Edge Width : 42 inches
Wing Tip to Wing Tip: 64 inches
Weight with 1350mah 3S : 24.4 oz.
Using a Frio 9 (950kv) motor, a ChingLau speed control from someone's wrecked EDF twin Jet thing. Throwing an 11X3.8 APC SF prop with a 12 Amp draw at WOT.
Hope everyone enjoys the
...Continue Reading
Posted by UBILDIT |
Jul 24, 2011 @ 10:11 PM | 12,723 Views
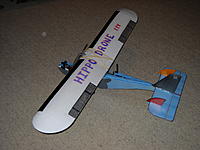
Well, after weeks of building and testing different FPV systems, I finally flew the "Hippo Drone" - named after RCG user "Hippo" since the design draws partly on his orignal plane "The Frog" . The front end draws some of it's characteristics from RCG user name "Lmopar69".... and his plane the N2. The plane is a super stable flyer. It uses a Hobbyzone SuperCub Wing that I cut ailerons into and re-inforced. The motor is a Hoffman Magnetics "The Rocket" throwing an 8 x 3.8 SF APC prop for tons of thrust and an E-Flite 20A ESC on a 1350 3S pack. The camera and transmitter for video .... Camera is a Sony KX 131 NTSC color miniature CCD and the video is fed to the goggles via a Foxtech 2.4 GHZ transmitter and receiver. The camera is capable of 720P so the picture should be pretty good. It looks good taxiing around on the ground but the air will be a different story. Going to fly it Monday morning and find out... weather permitting. The receiver has an extra "video out" port, so if I can figure a way to hook up something to capture the video off the receiver that would be really cool because I should have over 1/4 mile range with clear reception. The plane on the other hand is having to run on 72 Mhz FM due to the horrible effect that the video has on 2.4ghz range. But I have a synthesized Corona 6ch RX and a JR Quattro radio that both seem to be very good. We'll see.
Rock on
Bo
Posted by UBILDIT |
May 14, 2011 @ 07:57 PM | 12,824 Views
Well,
It's been a long time since I've entered anything on RCG.... much less with pictures and a potential scratchbuild... but I felt like this attempt would be more suited to have a blog entry rather than a thread... just so I can see if the thing is going to work out or not. I found some paper model plans that my friend Vyceroy had given me and decided to build from scratch... from the 3 views that the paper model plans offered as they are supposed to be very scale.. They are all about a Nazi plane that was designed but never flown... as far as I know.. never built ... and it has a forward swept wing. Since I still have the FSW from a plane that no longer has a fuselage. I thought I'd scale it to match the span of that wing. So, I drew a profile of the plane and started adding formers to make what will hopefully be an EDF version of a plane that never flew. I guess we'll find out...
Bo
Posted by UBILDIT |
Nov 11, 2010 @ 10:13 AM | 13,118 Views
Here is a 50cc sized Lanier RC Edge 540 that has been raised from the dead. Still needs some minor cosmetic help and a few minor mechanical adjustments, but most of those can be made after a maiden flight... just to make sure. Pictured here with an APC 20 X 8 It now has a Vess 22B wood prop. The motor is an AXI 5345 on 12S. Two servo's per wing half, two servo's for the elevator and one really strong servo for the rudder. All the numbers for thrust, amp draw, watts and so forth are right in line with the HV85 ESC and it pulls hard in static tests... we'll; see this weekend .. I hope.
87" span. Weight unknown.. Lighter than it was... but CG is on the money. Oh, and a custom 2 cell A123 2300mah pack for the rx and servo's.
Bo
Posted by UBILDIT |
Sep 26, 2010 @ 09:45 PM | 14,703 Views
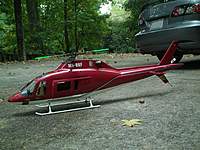
Here's a few pictures of the new Raptor 620E (equivalent to the 50 Titan in size) with the Agusta A119 Scale body on it. The whole package was purchased almost a year ago and I finally got it together. I am using the Thunder Tiger OBL motor for 8-10S and I'll list the rest of the equipment togther in a section. The scale body was definately one of the most challenging things. The instructions for both the heli and the body were pretty good, but I was required to assemble it, fly it as a pod n boom to get everything working correctly, then install it into the fuselage. The cockpit kit was the last of the major "scale" items to go on and really makes a nice difference. Although it's still not fully decalled and weathered like it will be, it's looking pretty good, and those green flybar paddles .."got to go"..
Equipment:
CC Ice 60 HV
3 HiTec 645 MG sevo's for cyclic
1 Airtronics high speed high torque gyro compatible tail servo
JR 770 3D Gyro
Align 6v BEC
Polyquest 4700 MAH 10S 20C Lipo
Rino 1800 Mah 2S lipo for servo's and rx
AR7000
In governer mode "set rpm" on the Ice 60HV, I've set the head speed to around 1900. This netted a max of 23 amps drawn and an average between spool up to landing in a five minute flight of 12-14 amps. Data logging is awesome. Still have a few settings to monkey with and as I landed it right after flying, which was just after these pictures were taken.. I unplugged the battery from the ESC and the negative lead to the speed control came off in my hand.. that was a close one... I'm working on uploading a video of it hovering, but may wait until I actually fly it in a nicer environment.
Down with the sickness!
Bo
Posted by UBILDIT |
Jun 25, 2010 @ 09:27 PM | 14,489 Views
Well,
Lately, I'm not sure what the heck has been going through my mind, but I've done the un-thinkable. I've built and flown two nitro powered models. The first one, a Sky Raider Mach II is a club 40 pylon racer from World models. If you want to race with th eother guys, it's either that or the L.A. Racer. Either one has to have 1 of three approved motors and each has to use every part that comes with the ARF kit. I have to say, I'm having a blast with it. Then, as if denying my electric heritage.. I said yes to a "like new" Saito 82 four stroke motor. Well then of course I have to have a plane to put it in. So, now I'm flying the Seagull Models Decathalon with a four stroke slimer in it. I still hate the mess, but the power and the noise is definately fun.. and it's different. But, to make it all up, I kept all the 50CC electric equivalent stuff that used to be in the Pitts S12 I bought from Lmopar69... it passed away in spectacular fashion at SEFF 2010. So, I just made a deal with a friend of mine for a 87' Lanier Edge 540. Can't just have all these 10 and 12S lipo packs sitting around doing nothing... right?
Down with the Sickness
Bo
Posted by UBILDIT |
Mar 22, 2010 @ 01:47 PM | 14,008 Views
Well, Master Mopar,
By your command and per our conversation yesterday, I have enclosed pics of the Losi Strike and the batteries that you wanted to come with it. I'm also including some extra deans plugs... even though truck and batts already have them on it.. I soldered the one on the car without even taking the car out of the box... heh heh... the pic of the bats is of them receiving a storage charge from my TP charger for the journey there. The radio in the background with the Strike is also coming your way. I have included a great selection of extra parts, some AA batteries, some rechargable AA batteries and their quick charger ( 4 at a time) and there will be several surprise goodies for you and your buds to enjoy while serving your country... I don't know if I can get it all in the postal service today, but it will be by tommorow at the latest. I'd like to try to get it all in one semi-large box. Heck the Strike by itself is big enough so I figured what the heck... Hope you like it. Talk to you later..
Bo
Posted by UBILDIT |
Mar 05, 2010 @ 10:50 PM | 14,303 Views
I got a couple of new planes... all due to the efforts of Lmopar69. The A-10, now finished and weathered... looking great.. came from the Hobby Lobby sidewalk sale while he was in attendance. The Pitts is his former Bi-plane and it's now working for me... I'm loving it.. and will take good care of it.. Here's a few pics..
Bo
Posted by UBILDIT |
Jan 30, 2010 @ 08:41 PM | 15,682 Views
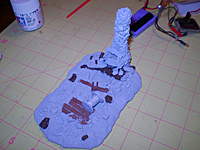
I was approached by a long time family friend who also happens to be one of my town's local scale train enthusiasts. C.B. McArthur, a former Army General, is a hard man to turn down. So when he asked me if I would be up to the challenge of painting and weathering a static model for the railroad modelers club layout, I accepted the challenge. Since I am starting a special project I hope to have ready in time for SEFF, and have never really weathered a plane before, I was glad to get the opportunity. Even though it is a resisn cast static model it incorporates many of the techniques I'll need to weather the special project plane, and from what I've been told, my first attempt at weathering and scenery is actually very good. It started out completely unpainted and a creamy yellowy white color and it now looks like a rusting old heap, which is what the pictures I was folowing looked like, so I guess I can call it a success. Several customers at the hobby shop I work in are award winning model builders and they gave me some excellent tips, as well as a big thumbs up on the finished product. So, even though it's not RC, I submit for your approval the "Rusty Little Steam Tender" from rustyrail.com for your approval. BTW. Lmopar69 is the only one who's allowed to disapprove.... LOL...I think it is a scale model of a product that was partially produced by .. someone other than Dodge... LOL..
Bo
Posted by UBILDIT |
Jan 18, 2010 @ 10:09 PM | 30,673 Views
I put a maiden flight on the F4 Phantom I got from Ready To Fly Planes.com and RC Groups member Hippo earlier today. The F4 is one of two planes that I purchased. The other is the F-86 Sabre. Both are complete with servo's, air retract system, ESC, and 90mm EDF unit with brushless motor set up for 6S Lipos. No external BEC needed. For the F4, there are only two servo's in the rear on the full flying tailerons and these are the only two surfaces that control it in flight. On the ground, the steerable nose wheel is pushed around by a neat little servo, mounted directly to the retract gear assembly in the nose.
Although the plane came fully painted and ready for decals, I decided to put a special paint job on it. I found it on the box of a plastic model we sell in the hobby shop. The model, by Accurate Miniatures, was a great resource for the paint scheme, even though I could not follow it's example to the last detail.
Flight from the F4 was very scale with a more than reasonable take off run and plenty of power. It is a very smooth flyer. The only negative thing that happend was that one of the quick connect style connectors on the left taileron became slightly loose in flight and wanted to allow the plane to drift right all the time. This happened 4 or more minutes into the flight and since trimming was not helping much, the maiden flight was cut short for me to figure out what was going on. I've attached a few pictures of the plane... just before the maiden. I've made a few adjustments, added a small amount of weight to the tail and she's ready to go again. Enjoy... I sure did.
Bo
Posted by UBILDIT |
Dec 31, 2009 @ 11:48 PM | 14,649 Views
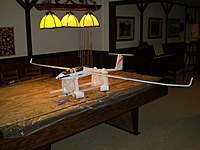
Here is a picture or two of a DG1000 glider which I purchased from a customer / friend of mine. He built it and powered it with an AXI motor and custom mount. He sold it to me with everything but the motor, speed control and battery, but I just could'nt justify buying a new motor when I've got 20-30 just doing nothing. As it turned out, none of them fit the custom aluminum mount he had made for the AXI, so I just fabricated one that would and it's ready to go. I ended up using an Extreme Flight Torque 2814/900 or something like that. It throws the very nice Graupner 13 X 7 folding prop with tons of thrust and pulls 35 amps static at WOT. on 3S. Can't wait for a nice day in 2010 ... it's almost the new year as I type this.. to try it out and take it up for a nice long flight. Fingers are crossed.
Bo
Posted by UBILDIT |
Dec 01, 2009 @ 11:11 PM | 15,236 Views
O.K. So, I'm in the process of cleaning up and cleaning out. The shop I've had my planes in for 2 years is going to become my daughter's bedroom and the larger, but more out of the way and "junkier" room down the hall get's to become my shop. I'm glad because the kid gets a better room and so do I, but it means I have to do one of the things I hate most in this life. Move. I know.. whine, whine, whine.. it's just down the hall, but it's still moving.
Truthfully though, it needed to be done. After the JR indoor, I had so much stuff in the shop and in other places in my downstairs that I was actually mad at myself for letting things get in the condition they were in. But enough about how this came about. I discovered how relative the word scale is .. as it relates to this hobby. In the process of moving, I decide to get everything that is a kit, still in the box, open it, arrange it, and throw away any un-needed packaging or containers for said kit. So in the middle of a room full of stuff ... none of it where it's supposed to be, I come across the 1/7th Scale model of a P-47 that I purchased several months ago. So I began unpacking it and discarding the extra stuff, not needed for shipping and so forth. When I got it out of the box, it was much larger than I remembered when I took a 1/2 glance at it before taking it home. As it turns out, when you put wing halves together, they become a whole wing. Can you believe that? And, even though it had
...Continue Reading
Posted by UBILDIT |
Aug 24, 2009 @ 09:19 PM | 15,289 Views
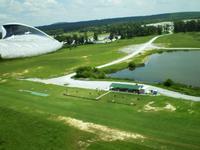
Had a chance to fly with some of the club members this morning. At the invitation of Mr. Napo, (his idea) we went early and flew even after everyone else had left. I had my EasyStar with me and the nice digital camera, so I took a few pretty high res digital shots with it before the wind made me come down... near the swamp...btw.. but all was recovered and I thought I'd show off the field. It is the Alabaster Rc Association field in Alabaster Alabama. Great club. Great looking field. I should know, because I mow it on a big riding mower about once a week. It's fun.
Bo
Posted by UBILDIT |
Jul 07, 2009 @ 12:33 AM | 15,971 Views
I had to post several pictures of this plane. It turned out so well .. not that it's ready for a scale competition or anything, but for what it is.. it's Fan Tastic. In fact it's a Fan Tastic Models GeeBee R-1. I inherited the kit from Mr. Vyceroy who simply asked me to build it and fly it. I finally got around to finishing it and putting the decals on. The kit itself was amazing. Moulded depron type material and all the supports and structures for the landing gear, motor mounts, even the tires and the special rudder to aileron linkage that this model requires to actually turn while flying. It's powered by a Feigo brushless inrunner on a GWS C gear box and a 10X8 prop on 3 Cells and only 2 servo's operate the surfaces. 1 for aileron and rudder and the other for elevator. Flys great and looks ... well like a GeeBee.
The Swamp Boat is another project I'm working on and was given to me by a customer whose wife had him empty the garage. I've added the motor mounts and decking, but everything else had already been done. It's a Dumas kit and made for a .19 nitro motor with an 8 inch pusher prop. I've decided that since it's major function, other than the have fun tooling around on the grass or the water, will be to help retrieve downed water planes with it's nice flat front end, I'd like to have forward and reverse, so I've incorporated a Traxxas speed control and motor with a 3 blade 8x4 pusher prop. No where near complete, but not too much more to do on it. I'm really looking forward to seeing this one scoot around a pond here pretty soon.
Build on...
Bo
Posted by UBILDIT |
Jun 12, 2009 @ 10:29 PM | 17,027 Views
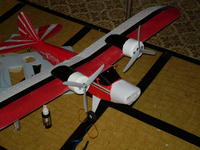
The transformation of the SuperCub is nearly complete. I have the clipped wing twin motor version ready to go, complete with fabricated nose cone. Now the only part of the transformation to comlete is to make an outrunner mount detachable so that I can remove the solid nosecone, put an outrunner on the stick mount that's under it, put the original cowl over the outrunner, then replace the twin engine wing with the original wing. I should be able to make the SC into two different planes within a matter of minutes. I'll add pics as I make the transformation.. Hopefullly will get some flying pics of it tommorow. Anyone have any ideas about what kind of plane it looks like with the twins and the new nose on it... I can't quite place it...
Bo
 Views: 293
  Views: 315
  Views: 311
  Views: 307
  Views: 254
  Views: 232
  Views: 224
  Views: 235
  Views: 233
  Views: 229
  Views: 213
  Views: 238
  Views: 315
  Views: 294
  Views: 296
  Views: 375
  Views: 337
  Views: 319
  Views: 325
  Views: 388
  Views: 331
  Views: 499
  Views: 375
  Views: 389
  Views: 526
  Views: 391
  Views: 395
  Views: 399
  Views: 443
  Views: 433
  Views: 521
  Views: 432
  Views: 450
  Views: 453
  Views: 372
  Views: 446


