hifinsword's blog View Details
Posted by hifinsword | Sep 15, 2019 @ 07:20 AM | 17,380 Views
Anyone interested in the Freewing F/A-18C 90mm EDF should post questions for it on the MotionRC forum here:
"Freewing 90mm F/A-18C 90mm EDF Jet - Official Thread"

The model I bought is listed at MRC as "Freewing F/A-18C Hornet Blue Angels High Performance 90mm EDF Jet - PNP". The HIGH PERFORMANCE MRC puts in the title or description, refers to the 90mm power setup I believe. As of March 2020 MRC has also come out with a ULTRA PERFORMANCE power system for the FW F-22 and the FW F-4. The Ultra performance refers to an8S power system. It may be a drop-in system for the F-18? See my POST 11 "Upgrade to 8S HV power system analysis, worth it?" below.

My maiden flight is posted below the MotionRC flight review video.


Freewing F/A-18C Hornet 90mm EDF Jet - Flight Review - Motion RC (17 min 14 sec)


FREEWING / MotionRC F-18 90MM Upgrades video By: RCINFORMER (11 min 28 sec)
...Continue Reading
Posted by hifinsword | May 31, 2017 @ 04:58 AM | 24,825 Views
INDEX: Links to Posts in this thread, my BLOG entry

POST #1. "Reviews/Data Reference Source on Aircraft & Buggies" AT BOTTOM OF POST #1.

POST #2. LINK TO Data comparisons on select EDFs and LG dimensions i.e. alternatives to stock Nose Landing Gear for the FMS F/A-18 EDF primarily.

POST #3. LINK TO "Spektrum DX18 Setup for Throttle Cut for electric models" (also applicable to other Spektrum AirWare Radios)

POST #4. LINK TO "Spektrum DX18 Secondary THROTTLE CUT for electric motors"

POST #5. LINK TO E-Flite Inductrix Switch Air BLH9680 with mCPX connectors

POST #6. LINK TO E-Flite Inductrix Switch Air BLH9680 as AIR or QUADCOPTER TYPE

POST #7. LINK TO How-To do a Spektrum Tx Screen Capture

POST #8. LINK TO ESC Calibration

POST #9. LINK TO TIMERS 1 & 2

POST #10. LINK TO Some SERVO videos I did on YT

--------------------------------------------------------------------------------------------------------------

OTHER THREAD POSTs I've started

LINK TO "Overview of Some Stabilizers" - This covers the most popular stabs, including the Spektrum AR636 and the latest addition, the AR637T as well as the Lemon stabs, and Eagle Tree, Hobby Eagle, HiTec, Detrum, and the AURA 8 brand of STABS. It is only an overview post, not a detailed source for programming them.

LINK TO "The Beginner's Guide to RC Protocols"

LINK TO "Lemon Stab Plus (+), & Lemon Stab/Rx setups"

LINK TO "What is the Center of
...Continue Reading
Posted by hifinsword | Jan 20, 2017 @ 02:18 PM | 25,694 Views
Indicator lights 1 (LEDs nearest antennas) - Blue and Green

Indicator lights 2 (LEDs nearest pins)
STAB OFF
- Red & Green SOLID colors
STAB GYRO ON - ONLY GREEN LED ON
STAB A/L ON - RED & GREEN ALTERNATING ON/OFF

STANDARD 6-7 Channel Stab+ setup:

This POST is linked from here the "Lemon Stabilizer Plus configurations" thread.
This is a standard T-THR, A-AIL, E-ELE, R-RUD, GER- FLAPS, FLPS-GEAR setup. It could also be abbreviated as TAERFG.

NOTE: If your retracts have an impedance problem on Ch7/AUX2, the BIND port, POST #4 below has the flaps and retracts swapped on their port assignments. Also note I switched mode control in that post to SwG versus SwE in this post.

The setup below is an 8Ch setup. Ch5 is used to switch modes inflight. If you only have a 6Ch Tx and want to switch the modes inflight, please refer to the DX6i thread here for more info on setting that up.

Or you can go to the Lemon "The Official Lemon Instructions thread" HERE, POST 4. Open the PDF document "Lemon Stab Plus Essentials Instructions" attached at the bottom and read the Section titled "Using the Stabilizer PLUS with a DX6i" on Page 12.

If you have a 7Ch Tx, you will be able to set this up using Ch5 for the mode select. If you have a 8Ch Tx or higher, you will be able to use Ch8 for Master Gain control. The setup includes flaps and retractable landing gear.

This setup cannot be used with flaperons or dual ailerons. To use the Stab Plus...Continue Reading
Posted by hifinsword | Sep 06, 2016 @ 02:15 PM | 23,119 Views
1. GENERAL CG DISCUSSION
I'm no engineer or aerodynamist. I'm sure there are technical differences for the different Center of Gravity (CG) terms that are tossed about. But to simplify this discussion, I am going to use the following terms - CG range, ideal CG, designed CG, published CG and measured CG.

-- A. The "Ideal CG" is that CG which achieves hands-off straight and level flight with no trim to the control surfaces.

You don't pick a CG point and make it balance there. You balance your plane and find out where that point is.

The recommended CG is a good starting point, not the ending point.


Airplanes have a "Designed CG". The engineers designing the airplane take into account what they want to achieve and design the airplane around those parameters. They know mathmatically where the CG should be based on their design. They design around a "Datum Line". You won't usually find a "Datum Line" in the RC model's stats. A common substitute for it is the horizontal stabilizer.

-- B. What is the "CG range"?
We'll leave helicopters and multirotors out of this discussion. In real airplanes, a "CG range" is usually discussed with the terms forward and aft CG limits used. It is a range of measurements that give you the best flight characteristics for the mission or phase of flight you are flying. The CG point moves as passengers embark or disembark, fuel is burned or received, cargo taken on or discharged, weapons...Continue Reading
Posted by hifinsword | Dec 29, 2015 @ 02:36 PM | 28,779 Views
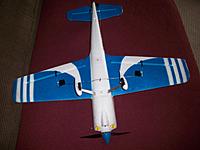
This is my build of the PZ F4U-1A Corsair PNP (PKZ6075) version. The BNF is PKZ6080. The kit version is PKZ6070.
Link: http://www.horizonhobby.com/f4u-1a-corsair-pnp-pkz6075

MAJOR POINTS
- 1) Discontinued
This model has been discontinued. It is one of the best looking RC Corsair models in my opinion. As of late 2016, parts are still available.
- 2) Three-section flaps
This model is set up for scale-like 3 section flaps as did the real Corsair. You must add the servos yourself but everything else is there in place.
- 3) Rectractable LG
The LG mounts are already molded in place and the wires are installed for retractable landing gear (LG) as well. You just need to buy and install Retractable LG.

I hope to find this blog useful to follow its progress as I mod it. I also find having my planes on my blog helpful to quickly retrieve facts about them. This was my Christmas present for 2015. It was bought from ReadyMadeRC.com on sale for $124.99. On 27 Dec 2015 I started putting it together and finished in about 7 hours, including the flaps but not the retractable LG.

DATA
- ParkZone F4U-1A Corsair PNP
- Wingspan 44in 1120mm
- Length 36.0in 915mm
- Weight 43.4oz 1230g w/drop tanks;
- Weight 46.6oz 1320g w/retracts/flaps 30A ESC w/flaps hardware, retract-ready, tanks installed
- Servos used for flaps are TowerPro MG-90
- Battery used for COG measurements - 11.1V 3S 2200mAh 25C LiPo
- Motor - 15-sized 950Kv BL motor (PKZ5116 15 BL Motor)

GENERAL NOTES
The build...Continue Reading
Posted by hifinsword | Feb 21, 2015 @ 03:33 PM | 32,130 Views
Main discussion thread here: https://www.rcgroups.com/forums/show....php?t=1540050

My Experiences:
After reading the main discussion thread on this Dynam SBach 342, it was obvious some mods would be needed to get it right for flying. But I'm not the type that typically cuts into brand new airplanes and starts over with new parts. I prefer to take the slow road and replace parts as they break or wear out.

On this one I did a little of both. On the maiden flight my pilot ejected 3 times. A close inspection revealed the canopy only had 1 pair of magnets in place. The 3 in the canopy were there but the 2 matching magnets on the side rails were missing. My pilot also didn't fare well on the ejections so a mod was required to keep her in her seat.

On the 2nd flight the plane hit a divit (grass field landing) and the gear came off during rollout. Except for some small dents under the wing where the LG hit on the way off, and of course the foam tear where the gear used to be, there was no damage.

On the 3rd flight the left AIL came back jammed in the down position. That was fun getting her safely on deck with half flaps (pun), i.e. full down, but on only 1 side.

The fuselage was modded prior to flying by covering as much as possible with clear packing tape. That included the plastic cowling, which got a layer of Extreme packing tape inside and clear on the outside. By some accounts, it is prone to breakage and not be in stock very often.

Where to buy:
NitroPlanes....Continue Reading
Posted by hifinsword | Jan 13, 2015 @ 01:49 PM | 30,705 Views
TABLE OF CONTENTS
POST 1 - Dynam Rapid STATS, WHERE TO BUY, OTHER THREADS
POST 2 - Dynam Rapid Parts and alternate sources
POST 3 - Dynam Rapid Receiver and Stabilization systems
POST 4 - Dynam Rapid batteries
POST 5 - Transmitter (Tx) settings
POST 6 - Dynam Rapid Landing Gear, Wheels, Pants
POST 7 - Cowling and forward fuselage battery compartment modification
POST 8 - Dynam Rapid motor mount mod
POST 9 - Link to Dynam Rapid Assembly
POST 10 - Link to Dynam Rapid landing gear mod
POST 11 - Link to Recommendations

What this plane is not:
I was looking for a small plane (under 30in wingspan) so I could fly around the yard without going to the park. This is not that plane. It is fast and not that easy to land in a small space. The motor is a peppy 1500Kv BL motor. The recommended battery is oversize for this small an airplane at 3S 11.1V 850mAh. It has unlimited vertical and amazing acceleration. This is a park flyer and not a back yard flyer unless your backyard is acres and acres of land.

What this plane is:
I already have the UMX E-flite Carbo Cub SS, but I was hoping for something I could yank and bank a little more in that small size class. This Dynam Rapid is that type of plane! It is also sturdy enough to take a hit. I've been flying planes for a year so I also didn't want a small profile requiring a lot of cutting and gluing CF rods. I wanted a plane that is fairly simple and easy to assemble. This is that. It goes together quickly and easily.

Comparisons:
I've...Continue Reading
Posted by hifinsword | Dec 09, 2014 @ 09:13 AM | 116,096 Views
This THREAD is about why you cannot use just any Transmitter (Tx) with just any Receiver (Rx) or model you decide to buy. The Tx & Rx protocols must match.

NOTE:
This thread also assumes you already know the differences between RTF, BNF, Tx-R, Rx-R, RR, ARF, KIT, PNP, PNF, etc. and the implications for your Tx and Rx combinations. If you do not understand these terms you may find my blog entry Some Basic beginner terms, Small & Medium battery connector types, links helpful.

BACKGROUND:
I have tried to write this thread for others like me, i.e. non-geeks or non-hackers. I use that term affectionately. I admire the ability to understand software code and write it. And I admire those that understand electricity and how to wire things with diodes, transitors, etc. so they will do whatever you want. I have very little understanding of writing code or how to do much software installation unless it is written very plainly in English and in great detail. Wiring diagrams help very little unless they are very basic, but I really need actual pictures. I can solder enough to change out a battery terminal, but not much more. As I pick up bits & pieces of info here and there I will add it to my blog here.

If you are new to the hobby, and are interested in getting a multiprotocol Tx and Rx setup, RadioMaster's TS-16 and other Open Source protocol capable Txs are MULTI-PROTOCOL capable. I suggest doing searches for "MULTI-PROTOCOL modules" or go to a FORUM here at...Continue Reading
Posted by hifinsword | Sep 25, 2014 @ 06:02 AM | 19,569 Views
The primary thread on this A-4 Skyhawk is HERE, Freewing 80mm A-4E/F Skyhawk.

MotionRC.com - as of March 2019, MRC's prices for the A-4 Skyhawk went up.

The Freewing 80mm A-4E/F Skyhawk PNP version is available at MotionRC for $329.00 $359.00 after the price increase. The ARP Plus version is also available at MotionRC for $249.00 $309.00 after the price increase. It comes without the BL motor and ESC.

RC-Castle.com - as of 9 April 2019, RC-Castle has not had a price increase. Prices still show the same as before MRC's price increase.

PNP version plus a battery $395.96 + $89.50 = $485.46 shipping to East Coast United States Product Code: FJ21311PWB at RC-Castle.
Included Battery: Wild Scorpion 6S 22.2v 4200mah 60C Li-Po

PNP version $319.99 + $84 = $403.99 shipping to East Coast United States Product Code: FJ21311P at RC-Castle.

ARF Plus version $259.98 + $78.50 = $338.48 shipping to East Coast United States Product Code: FJ21311A+ at RC-Castle.

--------------------------------------------------------------------------------


Why I chose the Freewing 80mm A-4 Skyhawk:

1. The primary reason I chose the A-4 is the NOSEWHEEL assembly has a TRAILING LINK (TL), not just the OLEO strut found on most other EDFs I've considered. I fly off grass exclusively. Unless you are sporting a nosewheel at least 3 inches in diameter, the nosewheel strut will not withstand the forces trying to rip it off when it hits a divot in a grass runway. Oleo suspensions can take upward forces,...Continue Reading
Posted by hifinsword | Sep 25, 2014 @ 05:57 AM | 15,767 Views
I follow half a dozen EDF threads hoping to pick up some useful about these EDF motors, fans, housings, etc. I am starting this thread as my documentation for the research on medium sized EDFs.

Sometimes comparisons of EDFs do have a little something in them about all the items in the 'system'. But rarely do they contain much about the fans or housings. It seems to be all about the motors. It's nice to know the Kv rating (but not that useful), if it's an inrunner or outrunner, its diameter and length, the shaft diameter and mounting metrics. But the amp draw and power/thrust doesn't tell us much about the motor without knowing which system on which that motor was run.

When comparing prop power systems, the prop is one of the primary items affecting the system. The diameter, pitch and number of blades are of primary importance. With these EDFs the diameters are fairly well fixed. But the number of blades are sometimes referred to, but usually not. Only a passing reference has been made to blade pitch or shapes. Knowing the number of blades tell us nothing about the pitch of the fans or their shape, of if they even differ.

I go to the web pages of the vendors selling them, but there is little useful info there for the most part. Can anyone speak to the major fans and housings we are comparing on these 80mm EDFs? Do the fans all have the same shape, i.e. pitch, shape, i.e. straight vs scimitar? Can somebody specify what shape and pitch fans WeMoTec, FMS, FW, JetFan (...Continue Reading
Posted by hifinsword | Sep 15, 2014 @ 07:01 AM | 17,295 Views
GENERAL DISCUSSION:

DEFINITIONS:
1) 3-AXIS stabilization - means the stab uses 3 gyros, 1 for each axis, ROLL, PITCH, YAW for RATE stabilization. This is commonly referred to as RATE STABILIZATION. In general, it corrects for unwanted inputs such as wind. The most widely known of these are the Spektrum AS3X family of Rxs the and the RATE stabilizers from Lemon-Rx.

2) 6-AXIS stabilization - means the stab uses 3 gyros and 3 accelerometers, 1 gyro for each axis, ROLL, PITCH, YAW for RATE stabilization and 3 accelerometers for Auto-Level (A/L) stabilization. It is generally referred to as ANGLE STABILIZATION. It can do A/L. The best known in this group is the family of Spektrum SAFE Rxs.

TYPES:
1) Integrated - a receiver (Rx) is integrated with the stabilizer.
2) Standalone - the stab can be added to any brand of Rx. * Special note on the Spektrum brand

CATEGORIES: There are several categories of stabilizers based on the most common features available.

1) RATE - give stabilization of at least 1 axis of the 3 axis (ROLL, PITCH, YAW). It counters uncommanded inputs such as wind. Hobby Eagle uses the term GYRO stabilized. Eagle Tree uses the term 3D. Spektrum uses the trademarked term AS3X. Lemon uses the term RATE stabilized.

2) Heading Hold (HH) - gives a stabilized control surface and locks the aircraft's attitude for the HH axis being stabilized. Usually the lock is effective as long as the stick for the stabilized control surface is not moved. Eagle Tree...Continue Reading
Posted by hifinsword | Jul 22, 2014 @ 10:58 AM | 27,178 Views
This is a short description of types of foam used in the RC hobby. I've also included a link to a great forum for foam suppliers.

Foam suppliers. https://www.rcgroups.com/forums/show...11&postcount=2

Types of Foam

Depron - very light weight, brittle; NOT contact cement safe. DO NOT use Welders Adhesive or forms of contact cement with Depron. The only glues I have used with this and with EPS foam that don't dissolve them is Gorilla Glue and the Foam-Safe CAs. Recently I've even found that too much Foam-Cure or Foam-Tac covered in a restricted spot on a surface will generate heat and/or gases that dissolve EPS/Depron. Don't cover Foam-Cure or Foam-Tac with tape or a covering immediately after applying it, if it does not have the ability to let the heat or gas off. I have recently heard of a new glue that is safe on EPS/Depron. It's Loctite Go2 Glue. I haven't tried it. Home Depot carries it. It's cheap and flexible when cured, both important features I find attractive. http://www.homedepot.com/p/Loctite-1...4417/203437879

Elapor - blended EPS & EPP

EPO (Expanded Polyolefine) - Horizon Hobby (HH) calls their form of EPO, Z-foam. Takes clear packing tape well. OK to use regular CA.

EPE (Expanded Polyethelene)

EPP Expanded Polypropylene - (pool noodles) low structural strength; covers with low temp coverings; clear packing or shipping tape does NOT stick to very well; use a spray adhesive or FoamTac with 3M Blenderm, fiberglass tape (drywall type), ...Continue Reading
Posted by hifinsword | Jun 10, 2014 @ 02:45 PM | 31,456 Views
LINK TO MY BLOG entry on some "Chargers I have known".

Recharging LiPo batteries - the 80% rule applies to the storage capacity or AMPERAGE of the BATTERY, NOT THE VOLTAGE of a battery. For a 1500mAh battery that means it should not be discharged more than 1200mAh (0.8x1500 = 1200, or 80% of 1500mAh). You won't know that until you recharge the battery with a charger capable of showing you that, or you have a meter capable of reading those values before charging. A good charger will tell you how many mAh it took to completely recharge the battery back to 4.2 volts per cell. It should then be at the full capacity of 1500mAh. HERE is a link to my BLOG entry "Parallel-Charging-batteries-101" that may help.

TIP 1: DON'T GO BELOW Low Voltage Cutoff (LVC).
LVC is not necessarily at 80% of your LiPo's capacity, but it is a good standby most of the time. A good rule of thumb to use for how far to discharge a battery, is the nominal voltages associated with each cell, i.e. 3.7 volts per cell. If you don't go below 3.7 volts per cell, you probably won't go below (80% capacity) and damage your LiPo battery. Go below the LVC and you will most likely be putting back more than the 80% amp carrying capacity of your battery - NOT GOOD!

TIP 2: GET A GOOD COMPUTERIZED BALANCE CHARGER.
If you think you will be staying with this hobby, I recommend buying a quality BALANCE charger and stop using the cheap stock chargers that come with most RTR, RTF, ARF & BNF combos....Continue Reading
Posted by hifinsword | Jun 03, 2014 @ 02:29 PM | 16,371 Views
FMS Yak-54 Groupe Tranchant: (disclaimer - disregard the post date. This is a reclaimed BLOG entry from a previous model. Post date for the Yak-54 is 11 March 2019.)

I bought my Yak-54 at a swap meet in Feb 2019, years after production of the model was stopped. I wanted one when I first saw them due to the color scheme. As of 11 March 2019, I have yet to maiden mine.

Statistics:
Material - EPO foam
Wingspan - 1300mm / 51.2in
Length - 1270mm / 50in
Weight - 1780g / 4lbs

Motor & Electronics:
FMS 3948-760Kv brushless motor
ESC 60A with 3A BEC
Recommended battery - 2600mAh 25C 4S LiPo
Servos - ?
Prop - 3-blade 13x5
Steerable tailwheeel

Transmitter and Receiver setup
I use a Spektrum DX18. This model already had an AR636 installed when I bought it.
I set it up with FLAPERONS, separate ailerons on channels 2 and 6. I used an E-flite Extra 300 SRM file for basic RATE GAINS and HEADING GAINS. Flight Mode 1 (FM1) has all stabilization OFF. FM2 has only AS3X enabled. FM3 has the SAFE Auto-Level (A/L) feature enabled.
Posted by hifinsword | May 13, 2014 @ 05:08 AM | 29,211 Views
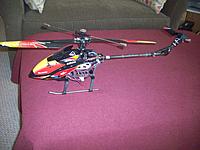
Although your comments here are welcomed, anyone interested in the V913 should post questions about the the V913 on that forum here: https://www.rcgroups.com/forums/show....php?t=1791676

These are the mods made to my #1 V913.

1) Swashplate mod. Hot glue and paper clip mod discussed in detail here: https://www.rcgroups.com/forums/show....php?t=2139667
The new Heli-Factor aluminum swashplate (and main rotor hub & main blade holder) are discussed in my blog here: https://www.rcgroups.com/forums/show....php?t=2258539

2) A new extended carbon fiber (CF) tail boom with raised tail motor mount was installed to be parallel with main motor shaft.
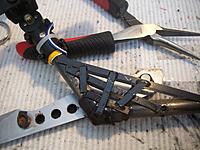
Boom and reinforcements to angle are CF tube and strips. The tail boom was extended about 1 inch, has 1mm thick sidewalls and is 10mm in diameter. The CF reinforcing strips are 4mm wide and 0.6mm thick. Horizontal stabilizing rods and vertical fins were removed initially but were reinstalled after about 5 months to deal with stress fractures. The torque from the tail motor twisting the CF boom resulted in stress fractures starting to show up.

I reinforced the stress fractures with dental floss wrapped around the boom and CA'd in place with thin CA.

More details are discussed in my "IDEA" blog entry on "Swapping the V913 tail motor & gear assembly for the FX052 tail motor & gear assembly" here.

3) Tail motor and gear assembly are from the Feilun FX052 helicopter. Some more info can be found here in...Continue Reading
Posted by hifinsword | May 13, 2014 @ 04:30 AM | 15,314 Views
Although your comments here are welcomed, anyone interested in the V913 should post questions about the the V913 on that forum here: https://www.rcgroups.com/forums/show....php?t=1791676

This CAUTION is about removing and reinstalling the shaft collar upside down. When you replace the main shaft bearings or any part on the main shaft in most of these RC model helos, you may end up removing the shaft collar too. It's very easy to put the shaft collar back in upside down. One side has a small ridge and the other is flat. The ridge side goes down against the upper bearing in the upper part of the frame. When I say a small ridge, I mean very small, like about 1mm. If installed the wrong way, you will get too much vertical play in the main shaft.
Posted by hifinsword | Apr 23, 2014 @ 01:47 PM | 15,432 Views
Although your comments here are welcomed, anyone interested in the V913 should post questions about the the V913 on that forum here: https://www.rcgroups.com/forums/show....php?t=1791676

I used carbon fiber (CF) tubing with 1mm sidewall thickness to make my V913 tail boom lighter and at the same time raise it to the same level as the main rotors. This should give the tail motor more authority because of more leverage against the main motor torque. Due to both rotor shafts being at the same level, the right lean has been eliminated. Less work for the tail motor means longer motor life as well. In flight the tail motor actually torques the tail assembly to a slightly left angle, similar in appearance to a H-60 tail inflight. At a hover the torqued angle is not there. With the bracing it would go away I think but I like it with the angle inflight.

I used the FX052 tail motor and assembly rather than the stock V913 motor and assembly. The parts for the FX052 tail motor and gear set are becoming hard to find. Here's a link to my post on where to find them as of June 2014. https://www.rcgroups.com/forums/show...postcount=2530
The FX052 tail assembly main and pinion gearing allows the tail motor to work more efficiently. I'm hoping it will last longer than the stock motor. I already feel the better control the FX052 tail motor gives me. The V913 tail boom is 10mm and the FX052 tail boom is 12mm so the replacement assembly was shimmed onto the 10mm boom. Steve_ discusses the...Continue Reading
Posted by hifinsword | Apr 04, 2014 @ 07:03 AM | 16,661 Views
Although your comments here are welcomed, anyone interested in the V913 should post questions about the the V913 on that forum here: https://www.rcgroups.com/forums/show....php?t=1791676

Discussion: These mods or ideas to improve FF (or FFF) in the V913 can be applied to most helos. They fall into either adding movement to the servos, or moving the Center of Gravity (CG or COG). Either the servo movement is enough to force movement in the intended direction or adjustments can be made to bias the movement in the intended direction. It can be done by adjusting, modifying or replacing servos that do not have enough force or movement to do the job, mechanical adjustments elsewhere, or by moving the CG.

1) Push the rate button on the upper left shoulder of the Tx. This will give the servo arms more movement. Pushing the TURBO button on the upper right shoulder of the Tx also gives the servos more travel but it is only as long as it is pushed. It can be modded by making it a switch thereby enabling it ON permanently as long as the switch is in that position. See the post here on modifying the V912/913 Tx. https://www.rcgroups.com/forums/show...postcount=6889
Paragraph 5 (c) below applies.

2) MECHANICAL TRIMMING: Adjust (extend/lengthen) the ELE servo connecting rod for a forward bias of the elevator travel. This is my favorite method for improved FF. This can be done with the trim switch electronically or mechanically by adjusting the servo connecting rod or both. To...Continue Reading
Posted by hifinsword | Apr 04, 2014 @ 06:03 AM | 29,947 Views
EDIT 4/11/2016: I did a review of the Heli-Factor aluminum upgrades here.

Although your comments here are welcomed, anyone interested in the V913 should post questions about the the V913 on the main V913 forum. Those with much more knowledge than I have will be better able to help. The link is here: https://www.rcgroups.com/forums/show....php?t=1791676


I have included this Post also as Post # 28 in my BLOG entry, "WL Toys V913 helicopter Reference Source". Link: https://www.rcgroups.com/forums/show....php?t=2255975

Update: As of August 2014, Heli-Factor has the aluminum upgrades to the V913 swashplate. It is available thru HobbyDirect. Also available are an Aluminum Main Blade holder and a Rotor Head or Hub.
Aluminum upgrade swashplate link:http://www.hobby-direct.com/v913-cnc...late_g371.html

If you haven't modded the V913 swashplate, the odds are you will sooner or later, or give up flying the V913. This is a "MUST DO MOD" in order to fly the V913. I've tried to consolidate the most popular ones here for future reference.

1) The ever popular paper clip + hot glue mod by nmemennth
https://www.rcgroups.com/forums/show...6#post25163313

2) The copper tubing and wood screw mod by dan2pkheli
https://www.rcgroups.com/forums/show...postcount=1564

3) The CX4 CNC swashplate mod by fuzzyguy. This link is to his post in modding the V913 top frame plate and the anti-rotation bracket.
https://www.rcgroups.com/forums/show...postcount=1185

Two aluminum swashplates are available for fuzzyguy's swashplate mod.

Link to the LynxHeli.com aluminum swashplate
http://www.lynxheli.com/product_info...ducts_id=23005

Or if you prefer, a link to the Xtreme.com aluminum swashplate
http://www.xtreme-production.com/xtr...oducts_id=8378
Posted by hifinsword | Mar 30, 2014 @ 02:53 PM | 29,709 Views
Although your comments here are welcomed, anyone interested in the V913 should post questions about the the V913 on that forum here: https://www.rcgroups.com/forums/show....php?t=1791676

BACKGROUND:
I wrote this blog hoping it might help others when using a 3S batt on the V913. This blog entry is for using a main motor that is designed to run on 3S batts instead of the stock 2S batts. That means I did not use the stock motor or any of the F45, E-1003, or any of the stock brushed 370/380 size 2S voltage rated replacement motors we have been using. They are all designed for 2S voltages.

Finding a 3S voltage rated motor is not the problem in converting a V913 to 11.1 volts. I found some main motors compatible with 11.1 volt. The V912/3/5 PCB cannot operate on 3S voltages. That is still the limiting factor in this conversion. Anyone wanting to fly the V913 on 11.1 volts might want to convert the Rx/PCB over to a compatible one such as found in some of the Feilun FX series of helos. The newest ones such as the FX070C also have a FBL feature that might make them the ideal candidate. But you will need to purchase a Tx compatible with it as well.

A. THE Xtreme 380X vs SUPER 370 MAIN MOTOR
I used both the Xtreme 380 BB motor and the HB Super 370 motor. Even though both motors have improved power over the stock motor when using 3S batts, the 370 Super motor seems to be the more powerful motor. I ran the Super 370 main motor for 10 flts on 3S. In a crash it burned up the...Continue Reading