JustPlaneChris's blog View Details
Posted by JustPlaneChris | Jan 14, 2008 @ 09:50 PM | 60,579 Views
Okay, some people will understand the name of Project Flat Blue, some won't. Yes, it's made from flat blue foam, but the original stealth fighter project was code name Have Blue. Have blue foam, will make project Flat Blue... Get it? Yeah, it's lame. But JustPlaneLiz got it (and without an explanation, which scared her. )

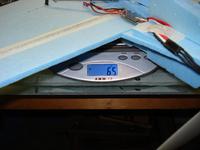
Anyway, this is my first flat foamie. I just cut it out, glued it together and stuck some servos in it. Plans? We don't need no steeenking plans. Power is the tiny little BP Hobbies outrunner, on 2S 800. The flight you see below consumed 220 mah out of the pack, so that calculates out to almost 30 minutes of safe run time!

Enough chitchat. Here are some pictures and video. Enjoy.

-Chris
Project Flat Blue (10 min 0 sec)

Posted by JustPlaneChris | May 24, 2007 @ 10:51 AM | 57,083 Views
I have now settled in with the perfect "yard bird" to fly at my house. It started out as a barebones Honey Bee FP, which then got a Freestyle-Hobby belt drive conversion and some modified blades. The results are great! While it's not cheap (the airframe + conversion ends up costing as much as a T-Rex bare airframe ) it is, IMO, the best small-area heli I've yet flown.

Belt drive FP fun! (4 min 45 sec)


And here's some footage after installing Kyosho M24 blades and making a small modification to the main gear/shaft connection to eliminate wobble. Boy, it it smooth now!

Freestyle Honey Bee FP Hybrid (3 min 22 sec)
...Continue Reading
Posted by JustPlaneChris | Jan 27, 2007 @ 09:36 PM | 58,869 Views
My Compy 300 is flying well. I was experiencing louder-than-normal gear noise until I realized I had to set the mesh tighter than my usual practice when running the high-cogging ARC motor with an 8T pinion. It's meshed tighter now and is quieter, but I have ordered some HPI steel pinions to use since running the brass pinion loose has caused slight damage to the teeth.

Here's a link to the video I posted in the forum.

-Chris
Posted by JustPlaneChris | Jan 27, 2007 @ 09:31 AM | 59,943 Views
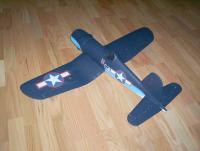
A few weeks ago I took a short break from heli tinkering and put together a GWS Corsair that JustPlaneLiz was kind enough to get me for Christmas!

AUW with CSRC 1650 pack, BP-12 motor, CC T-Bird 18 ESC is 17 ounces. Flies great! Paint is Wal-Mart craft section acrylics, custom mixed for color and applied with a brush. The results are amazing! If you're interested, I'll share the brand, color, and mix ratios I used. For now, enjoy a few pictures.

-Chris
Posted by JustPlaneChris | Jan 15, 2007 @ 12:39 AM | 59,186 Views
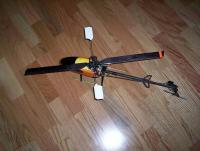
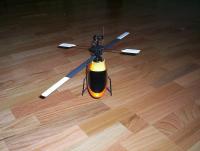
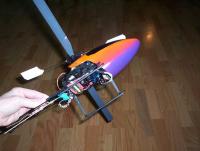
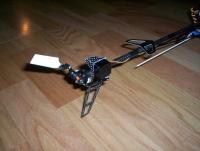
For me, one of the big problems with these little guys is orientation in forward flight. One hindrance to visibility is the stock landing gear; Those little carbon sticks are invisible at any distance, so I had a brainstorm... I took the lid from a tub of Cool Whip and cut it into strips about 1/4" wide, clipped them to length and hot-glued them to the landing gear legs. The bright white plastic (painted yellow on the CP2) really aids visibility! Friday I flew my CP2 during absolutely horrible lighting conditions (dark, overcast skies) and it really helped me keep track of the orientation. The weight penalty? 1.5 grams (estimated .5g for the hot glue).

It might look a little funky, but it works. And of course, it's an excuse to eat a tub of Cool Whip.

-Chris
Posted by JustPlaneChris | Dec 31, 2006 @ 08:00 PM | 59,638 Views
It's been a while since my last entry. I've been too busy flying and tinkering to write.

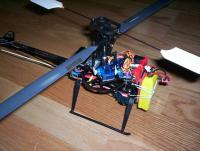
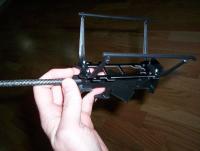
Here are some pics of my latest CP2 modification. I used CF rod, CF sheet and E6000 adhesive to build a battery frame to relocate the battery further forward for CG reasons, as well as to raise it up higher, more like a T-Rex SE. The theory is that the higher center of mass will make for better flips. We'll see.

Also note that I've reinstalled the ARC 110 brushless motor + Phoenix 10, since I've got two different motors to test in the Hornet X3D (400DB outrunner, formerly used in my King, and a new ARC 130 from www.lightflightrc.com). These motors are a lot more powerful than the 110, and should really wake up the Hornet!

Speaking of waking up, removing the brushed motor, revising my battery tray, and installing a LightFlight D6 receiver has reduced my RTF weight to 297g with a TP730 or 310g with the Apex 850. Considering the power level with the stock motor and 320g weight, it should be ballistic with the ARC at 297g!!! EDIT: I've flown it. It is ballistic.

Pics follow. Let me know if you have any questions on making the frame, but it's pretty self-explanatory and quite easy.

-Chris
Posted by JustPlaneChris | Nov 27, 2006 @ 05:46 PM | 59,985 Views
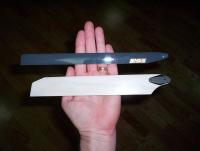
I got the carbon blades from Helidirect today. Wow, are they beautiful! They were within .1g of the same weight, though the CG was about 3mm off. I added one trim monokote strip to the light blade at the tip to move the CG out. It's close, within 2mm now. I don't know how they perform yet, the weather isn't cooperating!

-Chris
Posted by JustPlaneChris | Nov 25, 2006 @ 10:05 PM | 59,704 Views
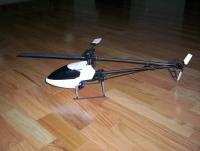
Just a few pictures of the fleet as of today. Not shown is the Genie open class glider under construction.

-Chris
Posted by JustPlaneChris | Nov 20, 2006 @ 09:32 PM | 59,828 Views
I received my order from Tower, and now my Hornet has Venom. Landing gear, that is. I also ordered the Venom aluminum head block (and plastic blade grips) but probably will just keep those as spares instead of considering it an "upgrade".

Anyway, the taller Venom gear and pale green skids looks pretty good, I think. Oh, and I relocated the antenna to the right front skid to get it as far as possible from the ESC. I was getting some very mild "twitches" that might have been caused by its close proximity.

-Chris
Posted by JustPlaneChris | Nov 19, 2006 @ 12:05 PM | 59,844 Views
Here are a few images of my Hornet X3D after painting the blade tips and canopy this morning. It's my now "standard" scheme of purple-red-orange-yellow fade.

-Chris
Posted by JustPlaneChris | Nov 18, 2006 @ 11:33 PM | 59,771 Views
The Hornet X3D took to the air this morning. Nothing really exciting, just the usual trim adjustments, and I still need to tweak the throttle and pitch curves. The gyro was misbehaving because of the large temperature swing from house to outside (typical Telebee behavior), so a better gyro is on my wish list. EDIT: They gyro was misbehaving because I had REVO mix enabled! That doesn't work well with a HH gyro.

Here's a link to a short video clip.

-Chris
Posted by JustPlaneChris | Nov 17, 2006 @ 09:50 PM | 60,038 Views
The Hornet is finished! I actually finished the major setup last night, but this evening went back over everything and moved some equipment around (put the BEC behind the main shaft). I also went back over the radio setup and tweaked some settings here and there.

The first spool-up was in the studio. I got it just past half stick to check tail direction and gyro settings, but that was all my nerves could handle! The head speed and sound was more akin to my T-Rex than a Honey Bee!

Yeah, I know... you guys have flown your Hornets indoors. But I bet it wasn't in a dance studio with floor to ceiling mirrors on the walls either.

Anyway, enough rambling. Here's the specs:

Motor: ARC 20-34-110
Pinion: 16T
ESC: Phoenix 10 with latest firmware
BEC: Park BEC
Battery: Apex 850 15C
Servos: HS-55 (3) HS-50 (1)
Gyro: Telebee HH
RX: Hitec Electron6 (de-cased and shrink-wrapped)
TX: JR 9303
AUW: 344g

First flight tomorrow AM!

-Chris
Posted by JustPlaneChris | Nov 15, 2006 @ 11:09 PM | 60,252 Views
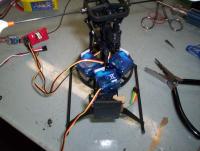
Now that the airframe is together, it's time to install the servos. The Hornet uses servos attached with foam tape. Ordinarily I would be leery of this, having had a taped servo let go in the past in a plane, which caused a crash. However, since then I have discovered the sticky goodness of 3M automotive trim adhesive tape. This stuff just will never let go, and when you do decide to remove it (usually by sawing through it with dental floss or kevlar thread) the remains will come off without leaving a gooey mess. Neat stuff!

Anyway, here's a pic of how the servos fit. They are not stuck down yet in this picture, I was checking the layout. Note the mounting ears have been cut off to make more room.

-Chris
Posted by JustPlaneChris | Nov 14, 2006 @ 07:22 PM | 60,428 Views
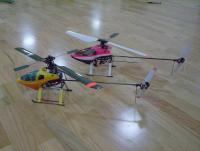
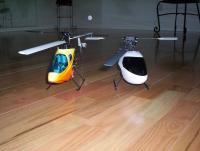
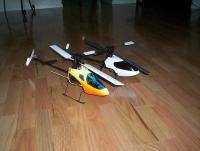
By special request, here are some photos to compare the size of the Hornet X3D to the Honey Bee CP2. It looks really tiny in the other photos, but in reality it is only slightly smaller than the CP2. I think the shorter overall height and high-aspect ratio blades contribute to the illusion of tiny.

-Chris
Posted by JustPlaneChris | Nov 14, 2006 @ 12:31 AM | 57,038 Views
Tonight I finished up the airframe assembly of my Hornet X3D! The assembly process was very pleasurable. The only snag I ran into was a main gear that wobbled slightly, but close examination revealed that the one-way bearings were not fully seated in the gear. A few taps with a rubber mallet against my glass workbench seated everything and the gear runs almost perfectly true now. The ARC motor is installed with a 16T pinion, which should give me about 2700 rpm head speed. Yee haaa!!!

Weight of airframe + motor + heatsink is 192g. And hey, I saved 1.8g by removing the stickers from the canopy (all except the black windshield area). I'll squirt it with my "signature" red/orange/yellow fade paint job before it takes to the skies.

Up next: Radio installation! Stay tuned!

-Chris
Posted by JustPlaneChris | Nov 12, 2006 @ 11:07 PM | 56,360 Views
Am I addicted to micro helis? Nope. No way. I can stop any time I want to.

-Chris
Posted by JustPlaneChris | Nov 11, 2006 @ 05:46 PM | 54,376 Views
This afternoon I dug into bag 3-4-5: The rotor head. Assembly was straight forward and simple. The head design is quite different from any of my other helis, but very clever! And there is ZERO slop. Like, none. Tighter than my T-Rex!

-Chris
Posted by JustPlaneChris | Nov 11, 2006 @ 02:07 PM | 53,274 Views
I snuck in a couple of hours of heli-time last night and got through the assembly of bags 1 and 2 (main frame and tail box). The parts quality is NICE. Definitely a cut above the E-Sky parts. I had to put on my reading glasses when working with the tail parts, as they are quite small (and my eyes are getting old like the rest of me ). The tail gear system is simple, and the bevel gears are about the same size as they were on my King, so I don't anticipate it being any more fragile than it was.

-Chris
Posted by JustPlaneChris | Nov 09, 2006 @ 08:39 PM | 53,490 Views
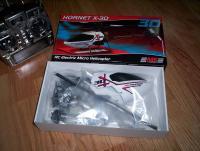
My new toy is here! The postman brought my Hornet X3D kit today. First impressions:
  • There's a helicopter in this tiny little box?
  • OMG, the blades are so skinny!
  • The instructions are boring, because there's no "Engrish" to translate.

Here are a few pictures to tide you over until I get this thing assembled.

-Chris
Posted by JustPlaneChris | Nov 09, 2006 @ 06:44 PM | 47,747 Views
The CP2 is coming back together after the Horrific Crash. The frame is repaired, a new main shaft has been fabricated using 3mm stainless steel tubing (nice!) and a new main gear installed.

I ordered a Hornet X3D over the weekend! It should arrive any day. It will replace the CP2 as my micro CP machine. I'm keeping the CP2 around as a spare "toss about" machine, or in case I feel like abusing something.

I sure hope I like the X3D and the quality of it. If not, I fear (or rather, my wallet fears) that my next micro will be a MaxiR.

I still fly my FP2 every chance I get. I'm using it to practice "uncomfortable attitudes" like nose-in takeoffs & landings, fast sideways and backwards flight. The latter two are very challenging with only a rate gyro!

-Chris