Tom Hunt's blog View Details
Posted by Tom Hunt | Apr 23, 2011 @ 02:38 PM | 62,016 Views
Got to work some today after writing a product review for FLY Rc.

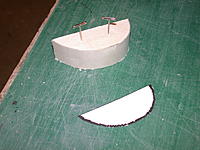
I have decided to drop a single 250Kg (scaled of course) on the centerline trapeze. I did my best to replicate the trapeze based on the info I had. It hinges just behind the chin scoop and attaches to the bomb through a slotted fitting at the CG of the bomb.

I used an old FMA S90 servo for a drop mechanism. It is a simple swing-out-of-the-way pin arrangement through an eye bolt on the bomb. I think the pictures can tell the rest.

I still can't do movies yet, but plan on soon. For now a simulated drop is depicted last....Continue Reading
Posted by Tom Hunt | Apr 22, 2011 @ 03:25 PM | 56,574 Views
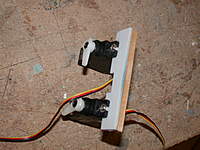
Yanked out the supplied servo plate as it was not quite fitting the HS-81 (rudder) and HS-85BB (elev) servos I used. Mounted them on some hardwood rails and glued them to fuselage relieved some foam to get the servo wires forward.
Posted by Tom Hunt | Apr 22, 2011 @ 01:44 PM | 52,046 Views
FMS installs the antenna mast on the top of the canopy backwards. It should be upright, not aft swept. To turn it around requires a very long small tip phillips screwdriver (with a hole poked thru the canopy floor) or you cut a window in the bottom. Just loosen the screw and turn 180 degrees!
Posted by Tom Hunt | Apr 22, 2011 @ 01:33 PM | 48,331 Views
I desired to remove one elevator pushrod and join the two elevators together. I also needed to relocate the elevator pushrod on the RHS. It just sticks to far out of the model to look good.

Because the tail plugs in from each side, so would any joiner to the elevators. I went thru my brass scrap box and found some telecoping square tubing. A long piece glued to one side will slip into a short piece on the other. Once I glued the tube in, I did not like the load transfer in torsion so I added some doubler plates on the top and bottom with 1/64th ply.
Posted by Tom Hunt | Apr 22, 2011 @ 08:11 AM | 29,918 Views
Guys

My spinner/adapter nut thread (or the thread on the prop adapter on the motor) was a little "tight and rough". If you find yours to be this way too, just rub some soap on the threads and spin the nut down by hand a few times.
Posted by Tom Hunt | Apr 22, 2011 @ 07:04 AM | 29,357 Views
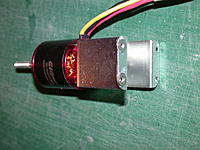
The G+C 600kv motor and mount is a tight fit in the cowl, so I dremeled out the foam a bit. I also enlarged the hole passing the wire through to the fuselage area.
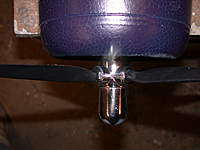
The Motor mount (with the included right thrust) was a bit too much right, so i had to put a couple of washers behind the mount on the right side to get the spinner centered on the cowl. The vertical alignment was right-on!
Posted by Tom Hunt | Apr 22, 2011 @ 06:59 AM | 28,711 Views
Ok Guys

gotta get started... flying season is almost here. This weekend seems to be a real bust here in the NE... too much wind, rain and such, so I am going to get started.

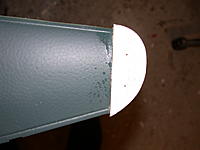
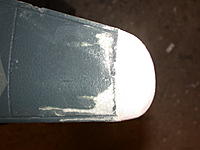
I started by pulling off the decals on the fuselage and checking it for "scale". Lining up the canopy on a scaled three view from a trusted source (Monograph series from the czech rep) I found the cowl area short about 1/2" and the lower radiator short by almost as much. The second I will fix to get my bomb-drop and trapeze in the correct place. All other proportions seem very well represented on the fuse and fin.
Posted by Tom Hunt | Apr 20, 2011 @ 05:37 PM | 29,902 Views
The model arrived in excellent shape, no outward damage on any parts. (kydawg1, sorry about your wing tips!). It does have just one quality issue.

The cowl is missing the magnet on the top front side (though the slot was put there for it) and the slot AND the magnet are missing on the fuselage side.

since I bought the kit, I cannot comment on any of the electical components.

I check the model against a very good czech drawn three view and the model is very close to scale. The only descrepancy I could find is the horizontal tail is slightly large in span and chord than it should be for this scale models. The outbd dihedral is a bit high, but not that noticeable.

I will be bashing mine into a JU-87D3 bomb dropping version. 1 250KG bomb on centerline and 4 50Kg bombs on the wing racks.
Posted by Tom Hunt | Feb 21, 2011 @ 07:18 PM | 25,904 Views
Did not pay attention cutting the horn balance off the model to make it "scale". I failed to realize (until today doing some reseach on the F4U) that the horn balance does not extend all the way to the LE of the stab.

fixed.....
Posted by Tom Hunt | Feb 21, 2011 @ 05:40 PM | 24,187 Views
I was not happy with the CG at about 98MM back from the LE of the wing. It should be closer to 90. I took the supplied plastic with metal insert prop nut/cap and filled it with lead shot, increasing the weight from 18g to 60g. With this much weight so far forward, I easily moved the CG to the 90mm mark
Posted by Tom Hunt | Feb 20, 2011 @ 06:39 PM | 22,224 Views
Well guys... PU glue is dry and I stuck her all together and setup the radio. I also checked the weight and CG.

With the larger motor, larger battery and with 3 slightly larger servos, mine came out at 5.25 lbs. A lot less than either of my highly modified FMS mustangs (6lbs+). The CG is just a bit behind 90mm, where most guys seem to say it is fine (should be, it's a HUGE tail!).

I am going to fill the supplied propnut/spinner with lead shot and epoxy. We'll see if I can sneak it fwd a bit. The 4s-3200 is already as far fwd as I can go with it.

I still need to touch up some of the paint and afix the prop decals, but she's good to go... except the weather!

(PS... goofy stays in this one!)
Posted by Tom Hunt | Feb 20, 2011 @ 02:42 PM | 22,273 Views
I wanted to use Hi-Tec HS-81 servos for the rudder and elevator. The supplied mount in the fuselage is not big enough to accommodate these servos.

I cut the fwd side off with an exacto saw. Added a 3/16" sq piece of hardwood to the bottom of the mount and screwed the servos to this side.

I slipped the servo assembly into the fuselage and glued the fwd section to the fuselage just above the wing.
Posted by Tom Hunt | Feb 20, 2011 @ 02:36 PM | 21,995 Views
Don't like the idea of two small plastic straps and a foam "socket" holding the wing together.

I added two 3/8" carbon tube spars between the wings. Glued in with PU glue. The two halves of the wings were glued with thick CA down the mating crack after the PU was dry.

I also rehinged the Ailerons with live hinges.
Posted by Tom Hunt | Feb 20, 2011 @ 11:31 AM | 22,260 Views
One must add the tailwheel steering servo before adding the vertical tail. Because I bought the "kit" no hardware was given for this. I used an old adjustable length servo arm you find in many larger Hi-Tec servos. I cut it back a bit and glued and screwed it to a servo disk arm (an old FMA PS-100).

I had to remove some foam (fwd and bottom) to get the servo in place. I glued the servo to the foam with the "snot" glue provided in the kit.
Posted by Tom Hunt | Feb 20, 2011 @ 11:25 AM | 22,500 Views
As some of you know, FMS/Airfield decided to "improve" the elevator on the V2 that hit Nitroplanes in the US. This improvement (unverified) destroyed the scale appearance of the empenage. They cut back the elevator substantially in span and in the process removed the aerodynamic and mass balance.

To fix... here is the process
Posted by Tom Hunt | Feb 20, 2011 @ 09:30 AM | 18,571 Views
did not like the idea of no air exiting the cowl. I cannot believe that even in the stock set-up with a battery clogging up most of the channel in the fuselage that much air is going over the motor and thru the fuselage. So..... I took out the dremel and knife and carved some "scale" cooling slots in the semi-openned molded cowl flaps.

I also openned up some more of the dummy engine (between the rocker arms)
Posted by Tom Hunt | Feb 20, 2011 @ 07:45 AM | 12,917 Views
Morning gents...

Mounted motor to Firewall with 1" long drywall screws (to make sure they penetrate both the block and the firewall. pre-drilled with .09 drill to make sure blocks don't split.