Steve_'s blog View Details
Posted by Steve_ | May 11, 2016 @ 06:28 PM | 12,746 Views
This is a Blade Nano CPS slowed down 8x.

Nano CPS Smooth Departure Slow Motion (4 min 51 sec)


Pretty smooth for a 5 inch long helicopter.
Posted by Steve_ | Apr 12, 2015 @ 10:31 AM | 14,600 Views
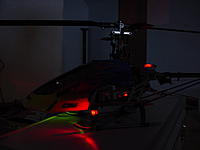
I know this is not scale, and the lights should have blinders, but I'm going for eye candy over scale accuracy.
The tiny enameled wire is from the primary of an old dead transformer. If you look closely you can see the
wires running along the top of the skid tip.

The wire is 36 gauge magnet wire (enameled copper) and is very strong considering
it's only 0.005 inches in diameter.

The LED's were 3mm generics, purchased at the LHS for $0.20 each. They are mounted by trimming the skid tips
so the LED leads slide over the end, and the leads are somewhat flush with the remainder of the skid tube.
White heat shrink tubing holds it all together, but allows the LED to move in the event of a hard landing.

They are fed from the stock ESC battery input.

The red LED was much brighter and more efficient than the green LED, and I had to use dedicated feeds to each one using different value 1/8 watt resistors. To get the apparent brightness to match, the red ended up using a 2200 ohm, and the green a 620 ohm.
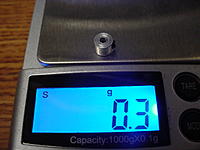
The skid tip lighting project (including wire, heat shrink tubing, LED's and resistors) weighs just over 1 Gram.
Posted by Steve_ | Apr 10, 2015 @ 03:26 PM | 15,723 Views
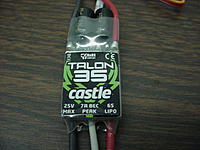
This project cures the random twitches from the tail, and likely cures the POD and
LVC issues.

If your tail motor is not already damaged, this modification will extend the life of
your tail motor considerably.

There is also less strain on the electronics, since the high current tail surges are eliminated.
The stock ESC also runs cooler since it's running one motor instead of two.

I could go on and on, but I will let the videos do the explaining.
It still needs some fine tuning, but it already performs and holds better than the stock ESC.

200 SRX Dual ESC (CC Talon 15 driving tail) Full Flight Demo (7 min 30 sec)


Here is a link to the 200 SRX dual ESC thread, which has wiring diagrams.

https://www.rcgroups.com/forums/show....php?t=2385789

My current receiver settings are:

Cyclic Gain = 100%
Tail Gain = 25%
Filtering = 100%
Main motor = 150%
Posted by Steve_ | Jan 22, 2015 @ 04:37 PM | 14,764 Views
Here is a quick clip from the park today.

200 SRX Funnels and Ultra Smooth Flight (0 min 51 sec)


Good stuff, love this bird !!
Posted by Steve_ | Nov 23, 2014 @ 05:36 AM | 15,443 Views
Flying 450's in both CP and FP configurations.

Me flying the HK450 with the V913 head

Giant V911 in some wind (HK450 with V913 head) (5 min 45 sec)


Here is my oldest son flying our highly modified Blade 400 (Basically a full carbon & alloy 450)

Blade 400 3D Helicopter - November 22, 2014 (5 min 5 sec)
...Continue Reading
Posted by Steve_ | Nov 21, 2014 @ 01:24 AM | 15,146 Views
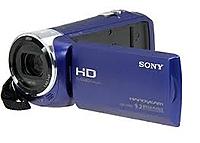
Finally replaced our aging video equipment.

I had good luck with Sony equipment in the past, so I bought another one.

http://www.bestbuy.com/site/sony-hdr...945&ksdevice=c

Here are the specs, for those that are interested:

______________________________________

27x optical/320x digital/54x Clear Image digital zoom - Helps bring you up close to distant objects and scenes.

2.7" Clear Photo LCD display - With 230K pixels resolution displays images clearly and simplifies option selection.

1/5.8" back-illuminated Exmor R CMOS sensor - With approximately 2510K total pixels and 2290K effective pixels with 16:9 aspect ratio (1710K effective pixels at 4:3) lets you capture crisp still images and 1920 x 1080 60p high-definition videos.

BIONZ X image processor - Promotes optimal performance.

29.8-804mm wide-angle Carl Zeiss Vario-Sonnar lens - Allows you to capture large scenes in stunning clarity.

Autofocus modes - Include auto and manual to help bring subjects into clear view.

SteadyShot image stabilization with Active Mode - Compensates for camera shake to promote sharp videos. The 3-way shake-canceling feature adds electronic roll stability for smooth results.

Face detection - Automatically distinguishes between children and adults, can detect up to 8 individual faces and adjusts flash, focus, exposure and white balance to ensure subjects remain clearly visible.

Intelligent Auto mode - Analyzes your shot and automatically selects the appropriate settings
...Continue Reading
Posted by Steve_ | Aug 04, 2014 @ 08:02 PM | 15,518 Views
Some LED's we remounted on the legs.

They used to be in the tips of the skids (which looked awesome) but after two
"rough landings" I got lazy. It takes a while to drill the holes and route the wire.

The extra holes made the parts weaker, further complicating things.

This way also works better as far as orientation is concerned, since my skid
tip mounted lights did not have blinders.

With this mounting position, the canopy blocks the other color when you see
the side of the aircraft.

P.S. I'm still figuring out how I can use this Blade 400 canopy on my 450.

Time to break out the drill...

Love this stuff!


Posted by Steve_ | Jul 29, 2014 @ 10:31 AM | 15,320 Views
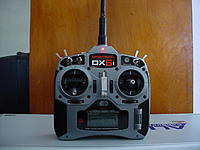
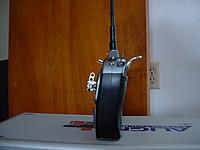
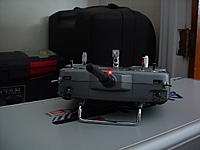
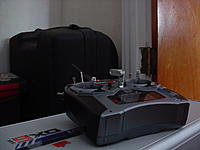
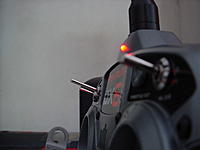
Here is mine.

There are many detailed tutorials posted already, so I will just show the results.

The components were salvaged from scrap, and I even got lucky and found a high
efficiency diffused red LED that runs bright on 0.007 Amps.

You have to unscrew the antenna support to mount the LED. I think my drill bit
was 0.112".

The hole was "started" with a very sharp hobby knife, to ensure precise placement
and no damage to my beautiful case.

It cost some money to heat the soldering iron, and you have to consider the
cost of heat shrink tubing, flux and solder. (Probably around $0.05)


Posted by Steve_ | Jul 14, 2014 @ 12:53 PM | 15,519 Views
I got this one used at the LHS. It needed some TLC, but after replacing
four bearings, the tail shaft, and tail drive gear / pulley she is as smooth as silk.
The rotating assembly should allow for some nice auto's.

It's in the final stages of the pre-flight check list, and should maiden soon.


The current configuration includes the following upgrades:

Alloy head and tail assemblies
CF boom and main / tail blades
Metal gear cyclic servos Hitec HS-65MG (http://www.servocity.com/html/hs-65m...l#.U8QUvEDpiOE)
Digital coreless tail servo JR DS3400G (http://stores.aeromicro.com/jr-ds340...ni-tail-servo/)
Futaba GY-520 Gyro ( works awesome ) (https://www.hobbyking.com/hobbyking/s...y520_gyro.html)
Blade 450 3D canopy and stabilizers (slightly bigger and easier to see)

Here are some pictures of the work in progress.
Posted by Steve_ | Oct 20, 2013 @ 02:38 PM | 19,825 Views
There have been so many questions about my 250 conversion, I decided
to document this build, so others can share my joy with this awesome bird.

HK250 FP Conversion Flying like a crazy person. (5 min 0 sec)


There are a million ways to build it, this is just how I did mine.

Much editing was done, so I probably repeat myself in places, so please forgive
me if I don't catch the mistakes.

_______________________________________________

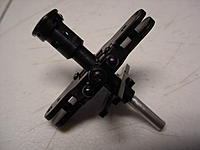
Today we will shim the head to allow a mounting to the smaller 3.5mm 250 shaft.

The FX059 (E-1003) head is designed for a 4mm shaft, and requires a custom
made shim to fit properly.

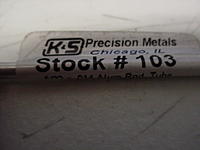
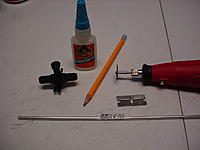
Pictured are the things we need to start. ( 3rd picture )

A small hobby size pipe cutter can be substituted for the Dremel and cut-off wheel.

In a pinch, a saw with a fine tooth metal blade would work, but you would have to
clean up the edge, and you might bend the weak aluminum shim.

The super glue is so we can glue the shim inside the shaft, and the razor blade is so we
can score the shim, allowing small crevices for the glue to "grab".

Brass tubing would be stronger than aluminum, but I also used aluminum on my
larger 300x conversion and it works fine, even with the higher stresses and loads.

Aluminum is also much easier to drill, and lighter.

First, cut a piece of tubing about 40cm long. It will stick out the end of the head when inserted,
so we have something to grip, and the excess will get cut off later.

Take your razor blade...Continue Reading
Posted by Steve_ | Feb 28, 2013 @ 03:15 AM | 18,065 Views
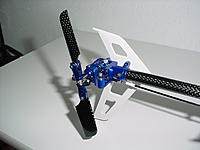
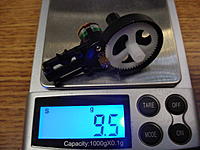
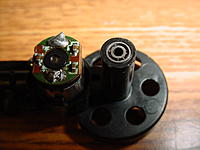
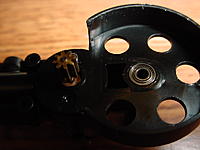
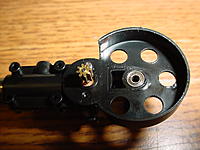
Just pictures. You can figure it out from here.

Bearings are 2 x 5 x 2.5 mm.

You need a 5 mm drill bit to enlarge the bearing mount.

Shaft is 2 mm, and 35 mm long.

My CF shaft came from the canopy mount for a Honey Bee CP3.

The aluminum collar is a chopped up CP3 tail prop mount....Continue Reading