TScott1118's blog View Details
Posted by TScott1118 | Nov 09, 2014 @ 10:42 PM | 8,395 Views
Finally had a break in the wind after last weekend's blustery conditions.

I did a few hand tosses and added in a BUNCH of down elevator.

Anyway, this plane flew great and it will slow down in a tight circle, and pick up a lot of speed with a few clicks of down. It got a little breezy as the afternoon progressed and it penetrates into the winds very well.

I did wind up adding a little nose weight, after doing the dive test.

Landings were a piece of cake and I didn't try to stall it, but if you slow down too much in a turn it just noses down until there's enough airspeed to correct it glide path.

It's a great little sailplane.
Posted by TScott1118 | Nov 01, 2014 @ 08:06 AM | 8,374 Views
I added 1 1/4 oz of lead to the tail to get the CG on the spar. It's slightly forward of the spar's center which is a good place to start.

The ready to fly weight is 28.1 oz.

Later today I'll get my wife to help me put a little washout in the wing tips, and if the weather forecast is wrong, I will go fly it this afternoon!
Posted by TScott1118 | Oct 31, 2014 @ 09:30 PM | 8,579 Views
Trick or treaters cut into my building time, but I did get the spoilers rigged and they function just fine

Should I put washout in the wing's tips? My full size BOT doesn't have any, but with this thin airfoil would it be a good idea to add it? Any expert advice appreciated.

So all that's left is.......
-washout?
-balance
-set the throws down a bit on the elevator and rudder for the first flight
FLY
Posted by TScott1118 | Oct 30, 2014 @ 10:38 PM | 8,513 Views
Tonight was spent shrinking the covering on the wing, making cuts in the covering for the spoilers, their servo, and the wing bolts.

Then the spoilers were covered, the string ran through the tubes, and the spoilers taped in place.

Before adding nose / tail weight (not sure what it will need yet) it weighs 26.8 ounces ready to fly
Posted by TScott1118 | Oct 29, 2014 @ 09:50 PM | 8,228 Views
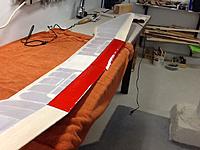
The wing is all covered

My covering iron, while very good, has one fault. The knob turns too easily. Just setting it down and picking it up an cause it to turn itself up all the way So I scorched the TE in one spot. Other than that no issues, but I need to fix the knob.

Next up I'll use the heat gun to get all the wrinkles out!

Here's a few pics
Posted by TScott1118 | Oct 28, 2014 @ 10:24 PM | 8,324 Views
One thing is for sure, I am a slow coverer But that's ok, it's not a race, right?

The red and white color scheme is looking pretty good IMHO.. The bottom will be red with 2 white stripes on each 1/2 as shown in the last picture.

Regarding all of the wrinkles, I always wait until the entire wing top and bottom is covered to shrink everything down as this helps keep the wing flat.
Posted by TScott1118 | Oct 27, 2014 @ 10:34 PM | 8,366 Views
Here's some pics of the control surface hook ups.

Then it was time to tackle the wing covering! The trans white looks cool
Posted by TScott1118 | Oct 27, 2014 @ 10:30 PM | 8,282 Views
I installed the rest of the gear and hooked up the watt meter. With an 11x8 prop it's pulling 230 watts and under 30 amps. Assuming I come in under 2lbs, which shouldn't be a problem, it'll have ample umph. I can also go up to a 12x8.5 which gives 300 watts which would make her go up like a rocket.

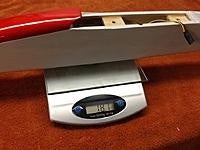
Then I checked the fuse weight and with a 1300 pack it's 18oz.
Posted by TScott1118 | Oct 26, 2014 @ 09:13 PM | 8,563 Views
Happy Sunday!

-I got up early and did some odds and ends on the fuse and got the fin covered.
-Then a bunch of running around like to the Apple Store. I dropped my iPad and apparently they don't fix this problem, so they gave me a new one for $249.00.
-Then I went to fly, but the second I got to the field the wind kicked up like a son of a *#{ch.
-So I came home and covered the elevator

More progress shown in the pictures.

Thanks for reading......Continue Reading
Posted by TScott1118 | Oct 25, 2014 @ 10:52 PM | 8,253 Views
Here's some Möbius snapshots from today's flight at the school yard down the street.
Posted by TScott1118 | Oct 25, 2014 @ 10:47 PM | 8,092 Views
And the covering of the fuse continues!

Just about done, but I need to add a little trim and cut out the elevator slots and pivot tube.
Posted by TScott1118 | Oct 24, 2014 @ 10:15 PM | 8,479 Views
After a few days hiatus I'm back in business.

I decided to use a plywood control horn for the rudder, so I cut a sliver out of the rudder and used thin CA to glue it in. Also added some fiberglass to the back of the rudder horn to firm things up a bit.

I picked up some 400 grit wet dry sandpaper at True Value and gave the whole airframe one more thorough sanding. Then cleaned it with my tack cloth.

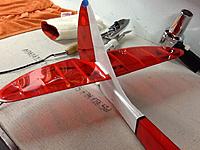
So now it's time to start covering. I'm using Ultracote Lite transparent white and red on the wing. On the fuse I'm using some leftover white Parklite. So I'm going to limit the finish to 2 colors and keep it simple. One of my easiest to see thermal ships is done in this color scheme.

I'm getting the hard part over with first. The area where the elevator goes. There's a bunch of nooks and crannies, and there's also lumpy fiberglass. Most of it will be hidden by the elevator, but I'm covering all of the bare wood none the less.
Posted by TScott1118 | Oct 20, 2014 @ 10:41 PM | 8,404 Views
I spent more time sanding, added a bit more wood filler, and then I added the spinner I picked up today for $22.99 These Maxx folder spinners aren't cheap.

There was a gap between the spinner and cowl that needed to be filled in, so I used a trick I learned from Mark F.

Then I had to sand a little off the stab. It rubbed the fin in the front.

Finished off by carving and sanding the canopy to clear the wing.

So, it looks like I need to do one more sanding of the airframe and it's time for covering I need to find some 400 grit sandpaper. The finest I've found is 300.

I am really excited to get this plane in the air where it belongs

Here's a few pictures!
Posted by TScott1118 | Oct 19, 2014 @ 10:32 PM | 8,793 Views
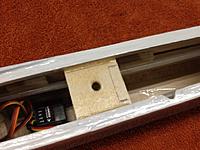
I added some ply reinforcements around the screw holes to keep the screw heads from digging into the balsa. They're a little unsightly but I think they're necessary.

Then I spent some time sanding the fuse. Actually a lot of time sanding. If you don't have 60 grit sandpaper I recommend it as it makes shaping canopies and nose blocks quick(er) work.

Finished up by putting filler in the dings and the fin's seam. One more session with the sanding blocks and the fuse and wing will be ready to cover.

I still need to carve the bottom of the canopy so it goes over the wing, and that should be pretty simple.

Last up, I put the model together and snapped a few pics
Posted by TScott1118 | Oct 19, 2014 @ 01:11 PM | 8,176 Views
I got a few loose ends wrapped up this morning. Hope to get some flying in this afternoon!
Posted by TScott1118 | Oct 18, 2014 @ 11:01 PM | 8,665 Views
Got up early this morning and made more progress on the BOT.

* epoxied the wing bolt plates into the fuse
* drilled and tapped for the nylon bolts
* filled in the gaps between the fuse and the front part of the wing
* FINALLY installed the tubes for the spoiler strings. It wasn't as bad as I thought it would be......Continue Reading
Posted by TScott1118 | Oct 18, 2014 @ 10:44 PM | 8,491 Views
There was about a one hour window this afternoon where the winds were calm and the thermals were popping.

I tagged one, and had I stayed with it my Mirage would probably be in Texas by now. I tried to avoid getting sucked up too high, and I'd guess I was up around 2,000 feet which is plenty high for city flying.

Here's some pictures Aiken with my Möbius. I have it set up to snap a photo every 30 seconds.
Posted by TScott1118 | Oct 17, 2014 @ 10:39 PM | 8,713 Views
I glued on the rest of the fin, and that really firmed things up back there.

Then a cut out was made for the rear rubber band hold down wing dowel and I put the horizontal stab and wing on the fuse to make sure the wing didn't need any shimming to level it with the stab, and ,it didn't

Next step? I epoxied 3/16" sq rails in the wing saddle area, drilled holes in the wing for the wing bolts and used pieces of paper draped over the wing opening to figure out where the plywood plates go. If your wondering why I am going to have the wing bolted on and held on with rubber bands, it's ok. It's explained in the pics below.

The plates that will accept the wing bolts were made from 1/4" ply, and tomorrow they'll be glued in, then drilled and tapped!...Continue Reading
Posted by TScott1118 | Oct 16, 2014 @ 10:32 PM | 8,634 Views
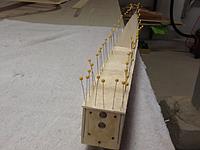
Top sheeting - check
Motor bolted to firewall - check
Cowl fashioned from a balsa block - check

I checked on carbon fiber pushrods at the hobby shop today. Good Lord, they are more rigid than similar sized piano wire. Plus they are a wee bit pricey. I guess the advantage is that they are lighter than steel. Anyway I thought they would have more flex and work in my sharp bending tubes. But they don't have enough flex factor, so I picked up thin music wire and I'll solder some threaded tubes on the ends.
Posted by TScott1118 | Oct 15, 2014 @ 10:07 PM | 8,525 Views
Tonight I got a lot done.....

- Roughed out the hatch and added stays and a dowel up front.

- Glued fuse bottom sheeting down.

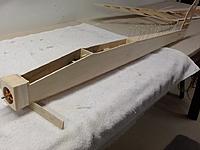
- Reinforced center rib in anticipation of installing servo tubes....Continue Reading