Posted by scruffy1 | Apr 15, 2018 @ 12:57 AM | 28,729 Views
yes, one is never enough

neither, does it seem, are lots more than one

on this occasion it's a slightly bigger one than the micro build in my previous post, but the frame is completely from scratch, and it's way faster and more dangerous - and i have the lacerations to prove it

a slightly more detailed description of the build, and pics are available over here :
https://www.rcgroups.com/forums/show...6#post39510746
Posted by GRW3 | Apr 15, 2018 @ 12:50 AM | 10,379 Views
My long time modeling pal, Jim, and I went to the Weak Signals R/C show this year. We’ve both been before. I’ve been 6 or 7 times since ‘83, he’s been a couple and we last came together in ‘06. This post is to talk about what we did and what you might do for a Toledo, or other show, trip.

Getting There

I fly a lot for business. In general, more flying as a reward for flying isn’t that exciting. Over the years, most my miles have gone to friends and family. This was a good occasion. We decided to do this trip in November so I got two round trip tickets from San Antonio to Detroit, on American for 50K miles, Thursday to Sunday. If you don’t have miles consider Southwest Airlines. They routinely have buy ahead sales and April in Detroit is not high tourist season so Toledo weekend shouldn’t be a blackout time. Jim rented a car.

Staying

The attached to the show Park Inn is convenient but not cheap. I have travel related hotel points so I got us a room at the Marriott Fairfield just inside the state line off Alexis Rd. On a Texas driving scale, Toledo is small so it was fine with the downtown cutoff being two exits down the highway. The free morning breakfast was pretty good. I use Fairfields and Hamptons for routine business travel.

Eating

I put up a post in the Toledo Show forum page asking for recommendations on where to eat, and got plenty. On Thursday, we went to Tony Packo’s. It was great. Friday we went to Jason Cole’s favorite, Shorty’s Roadhouse (...Continue Reading
Posted by Jeffrey Ewing | Apr 14, 2018 @ 11:55 PM | 3,624 Views
Just a little run down video of a new build I'll be showing soon. Hope you like and don't forget to subscribe. Thanks.
How to build a 6s racing drone (10 min 15 sec)

Posted by PlaneAndSimple | Apr 14, 2018 @ 08:28 PM | 3,838 Views
Super Cub is coming along nicely aside from crappy directions...Vintage scale prop from GatorRc really sets it off!!
Posted by RussellRifleRoll | Apr 14, 2018 @ 07:10 PM | 15,322 Views
Fortem DroneHunter (2 min 28 sec)

Posted by Choppahman8 | Apr 14, 2018 @ 06:24 PM | 4,311 Views
Stripped down Airhog turned FPV.
Posted by ronwc | Apr 14, 2018 @ 05:02 PM | 15,649 Views
Two new planes still dialing in and getting used to them.

Freewing A-10 and F-4D Flights (6 min 1 sec)

Posted by unrauv | Apr 14, 2018 @ 04:29 PM | 3,297 Views
Focke-Wulf Ta 152 added to download library.

Downlad at : http://www.rcfbaircraft.com/german-single-engine

Vincent Unrau
All plans are free
www.rcfbaircraft.com
https://www.facebook.com/foamboardaircraft/
Posted by coldblood808 | Apr 14, 2018 @ 04:27 PM | 9,944 Views
To get back into flying again I decided that my old Omega 1.8 would be the best re-trainer for several reasons. It was basically complete, the programming in my old Futaba 8U should still be there (I ordered a FrSky module and receivers for it to bring it up to today's standards), and it would be an easy flying aircraft to get my reflexes for fixed wing going again. My Omega had been sitting on a rack in my garage for over 15 years and it definitely needed a refresh. The old tape hinges had dried out and needed to be replaced and rather than ordering new hinge tape (I didn't like the appearance of Blenderm) I found a thread on silicone hinges. It looked easy enough and should prove to outlast any type of taped hinge. Another plus to this method, I had all the materials necessary, silicone adhesive,isopropyl alcohol, masking tape, and material to make a spreader.

Step one: I cleaned off the dried up adhesive residue from the original taped hinges with some isopropyl alcohol and Goo Gone. After cleaning it thoroughly, it was time to mask off the control surfaces with masking tape leaving the area where the silicone hinge would be formed exposed. I shot for a 1/16" exposed area on both sides (control surface and wing/stab)

Step two: Now it was time to tape the top surface and join the control surface to the wing/stab with the appropriate hinge line gap. I held the ruddervators and ailerons at full down deflection and temporarily taped the top with small...Continue Reading
Posted by FPVsummituk | Apr 14, 2018 @ 01:48 PM | 7,955 Views
I’ve redesigned the Gimbal to take a Runcam 2 camera........if you print off the camera holder, then attach the runcam holder to it........lining up the camera catch to the notch in the printed holder ........it should leave the camera lens about 20mm forward of the Gimbal tilt pivot point and sitting directly above the pan pivot line........

The rest of the Gimbal is the same as the GoPro hero 2 Gimbal that I posted earlier........

There are no other parts required, other that the servos, servo arms and a push rod........once printed, it just needs cleaning up.......then the camera holder is slotted into the yoke, the spacer is dropped onto the lug on the holder and the locking pin is pushed through into the yoke from the holder to form the other pivot, the pin is then twisted through 90 degrees to lock the whole thing into place.........note:- the lower horizontal rib on the yoke base is the front.


Here are the 4 stl files and photos........so just 3D print off the files and assemble the Gimbal...........Continue Reading
Posted by blitzen | Apr 14, 2018 @ 09:40 AM | 6,269 Views
This is the 24 gram, 0703 KV15000 brushless motor version of the Trainer90 BNF kit. In the box of parts I found 2 sheets of paper showing wiring diagrams and the steps needed to bind the receiver to a transmitter. The model is assembled as shown in the pictures. It is important to note that the bottom end of the motor shafts must be supported while pushing on the props. I've already made a few modifications. The 3D printed camera mount was replaced. The receiver board is now part of the stack. And, snazzy new 3 blade props. The power supply is a "Whoop" style stick battery so the fun is interrupted every few minutes. The main board is a combo flight control and a 4 way ESC that eliminates wiring and compacts the setup. Solder connections are on the top and bottom of the board. And, inboard mounting holes let the board fit onto the 16mm x 16mm stack. It overhangs but the ESC solder pads conveniently line up with the frame arms. I’ve tightly wrapped the slender arms with vinyl tape which also protects the motor wiring. Otherwise, the electronics are typical for a micro these days. Using Betaflight OSD, adjusting the PIDS and rates while flying was faster and easier than going back and forth to a computer. I really like that feature. My configurations and transmitter setups have gotten more sophisticated lately but that is a subject for a different post.
Flying around the apartment, it is safe and durable even without propeller guards. But, I fly away from people, pets and delicate items. It has more power than needed. Outdoors, it is light, airy and beautifully acrobatic. Now the Trainer90 name makes sense to me.
Posted by Phoboss | Apr 14, 2018 @ 05:55 AM | 18,225 Views
Recently I switched from linux to windows environment, and I really missed automated ways of building with just one click. Instead of going back I decided to try my luck with keil toolkit and see what I can do.

NOTE: This tool may require tweaking, and is recommended for users familiar with scripting languages.
While it works for me it might not work for you and require editing the scripts to work properly. It was tested on Windows10 x64.

Steps:
1. Clone silverware from whichever fork you prefer:
silverxxx -> https://github.com/silver13/BoldClash-BWHOOP-B-03
NotFastEnuf -> https://github.com/NotFastEnuf/E011-...-H8-Silverware
me -> https://github.com/phobos-/Silverware ( based on NotFastEnuf fork with betaflight rates )
...

2. Download keil mdk_lite:
https://www.keil.com/demo/eval/arm.htm

3. Install keil mdk.
4. Download make.bat from here:
https://github.com/phobos-/Silverwar...aster/make.bat
5. Put make in the main code directory (i.e. into 'E011-BWHOOP-H8-Silverware' folder), and edit it:
- KEILDIR should point to your keil_v5/ARM/ARMCC/bin directory.
- ARM_PRODUCT_PATH should point to your keil_v5/ARM/sw/mappings directory (make sure it contains mdk_lite.elmap).
6. Tweak config, pids and other stuff to your liking in notepad.
7. Double click make.bat.
8. Wait a few seconds until it displays something similar to:
Program Size: Code=13978 RO-data=310 RW-data=524 ZI-data=1804

That's it! Your firmware is built! You can now find a file called BWhoop.hex in your...Continue Reading
Posted by Tazkiller85 | Apr 14, 2018 @ 05:05 AM | 3,698 Views
Yep Les Amis,
Quelle belle surprise !!! Vous étiez nombreux à attendre le test du Eachine QX90C PRO, et vous aviez raison, il méritait bien une mise en avant. Le FLY MORE COMBO est vraiment excellent, un maximum d'accessoires dans une toute petite boite, BRAVO EACHINE rien que pour ça ! Mais ce n'est pas tout, l'engin par lui même est Ultra complet, avec son OSD sous BF, son Buzzer, ses petites leds internes, sa facilité d'appairage et sa caméra orientable, il à vraiment tout d'un grand ! Quelques petits défauts relevés quand même, à mon goût les hélices sont un peu grande et nuisent à la stabilité de l'engin (résolu), sa caméra qui à tendance à descendre un peu de son support (colle a chaud ou mousse, Résolu) et enfin, la petite antenne 2.4gHz qu'il faudra fixer pour éviter les soucis (elastique ou double face , Résolu). En Bref, un appareil incontournable selon moi, que ce soit pour des débutants ou confirmés, pour des sessions de FPV endiablés dans de petits comme de grands espaces !!!

Eachine QX90C PRO Fly More Combo, Review Test Démo / Un Pack très complet ! (31 min 48 sec)


NOTATAZ : 18/20 ULTRA COMPLET pour le prix !

Les + : Stable, Maniable, Très complet (OSD, Buzzer, Caméra reglable, ...)
Les - : Les hélices un peu grandes je pense et la caméra à tendance à descendre dans son support (morceau de mousse ou colle a chaud pour la maintenir)

Les produits présentés sont visibles ici (en cliquant sur ces liens vous soutenez ma chaî...Continue Reading
Posted by Tazkiller85 | Apr 14, 2018 @ 05:03 AM | 3,766 Views
Yep Les Amis,
Dans la famille Razor, je demande le petit frère ! Voici le nouveau petit Brushless de chez iFlightRC, le RAZOR X95 . Petit par la taille mais de bonnes performances de vol, agile et nerveux (selon vos reglages) ce petit Racer FPV est un tres bon appareil pour les petit circuits. Réactif et solide, il sera à l'aise pour se faufiler entre les obstacles et suffisemment puissant pour récupérer après une figure. D'une bonne conception (on a l'habitude chez iFlight) et facile à transporter, vous trouverez facilement des aires de vols dans vos déplacements. Petit HIC quand même, restez à proximité tant que vous n'aurez pas installé un buzzer (si vous trouvez la place ) ! lol .

RAZOR X95 iFlight FPV Racer, Review Test Démo / Bonne Chance ! (20 min 2 sec)


NOTATAZ : 17/20 Très correct dans l'ensemble !

Les + : Stable, Costaud, Vidéo plutôt bonne, Original et fiable .
Les - : Pas de Buzzer, Mise en place de la canopée difficile (manque de place) .

Les produits présentés sont visibles ici (en cliquant sur ces liens vous soutenez ma chaîne) Merci à vous :
CODE DE REDUCTION CHEZ IFLIGHT : TIF5%OFF
- RAZOR X95 : https://goo.gl/KHVWnJ
- Batterie Gaoneng 2S 550mAh : https://goo.gl/QXDHfR
- Batterie XF Power 2S 550mAh : https://goo.gl/m1t8YY

Bientôt en Vidéo :

- Eachine QX90C Pro (Fly More Combo 18.5/20 avant test complet) : https://goo.gl/uUaYkM
- DYS SHARK MAKO : ( BNF 16.5/20 avant test complet) : https://goo.gl/TUuRsP
-...Continue Reading
Posted by Mari C | Apr 14, 2018 @ 04:18 AM | 3,992 Views
Hi everybody,

I had a F450 with a pixhawk and I used to have bad internal vibrations. My pixhawk was over zeal and between the two boards.

I investigated this issue and I realized I should install a vib plate under the pixhawk. I do not like the pixhawk over the quad (over the upper board) because it can get dirty in this site. I like the flight controller between the two boards, therefore I do not have enought room with the new vib plate.

Finally I did this. I installed the vib plate over 3,3 mm height zeal and under 2 mm silicone gel ( 4 squares). The pixhawk is on the top of this system. I had to add four screws to lift the arms and cut a little two arm because I did not have enough room with all this new system (zeal+vib plate+silicone+pixhawk).

Moreover, I had to cut the vib plate because I did not enough room either. I had to build my new vib plate with smaller dimensions (only width and length).

I did the vibration test and the result was amazing. I reduced all xyz vibration but, above all, Z vibration which is the worse in a plastic frame.

I did the two vibration test with the same conditions. I added load in order my quad to carry about 500 g. It really is a 1,8 kg auw.

You can watch the vibration log photos and photos about my quad.
Posted by cuavlindy | Apr 14, 2018 @ 03:38 AM | 6,253 Views
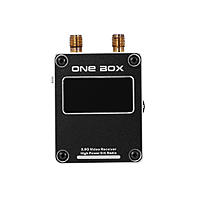
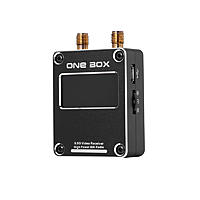
CUAV wireless data transmission Integrative Receiver ONE BOX Mavlink 5.8G servo for Flight Controller UAV quadrupter

ONE BOX is composed of CUAV autonomous flight controller developed for mav link digital image transmission integrated receiver
Built in 500MW sik data transfer (915mhz/433mhz)
Built in 5.8G 42 channel high sensitivity video receiver
The built-in OLED 128*64 screen and microprocessor, can display the flight condition and the state of vide
Through the micro USB interface to access the phone or computer, you can simultaneously obtain real-time flight video and UAV mavlink data
Compared with the digital link, it has a lot of advantages.
It's simpler:
The original data transmission and video transmitter can be used
Use a OTG USB line to connect your cell phone and your computer
It's more convenient:
The size is only 49mm*39mm in size (3 points per size for an ordinary cell phone)
He's cheaper
System communication framework diagram:

you can order here :

https://www.aliexpress.com/store/pro...77a9109duGnLaO
Posted by Australian Image | Apr 13, 2018 @ 10:14 PM | 2,369 Views
My main interest is photojournalism, documentary and historical photography and writing. I do a lot of bush travels in the area where I live and my interest in drones came about because I wanted to include a different perspective to the regular video and photography that I take on our bush trips.

Being completely new to drones, I've started off cheap with an MJX Bugs 3 and consequently going through a much more difficult learning curve than had I bought something like a Mavic Air. Hopefully the forum will help to fill in gaps and give me ideas on how to get the most out of my Bugs 3, especially when it comes to modifications etc. I'm a bit like Tim the Toolman and can never leave anything unmodified.

Australian Image

YouTube

Cheers

Ray
Posted by Australian Image | Apr 13, 2018 @ 10:02 PM | 2,316 Views
The easiest way to describe what I do is provide a link to my Australian Image blog and YouTube channel. These are ongoing activities describing my life and times, amongst other things, in South Gippsland, Victoria, Australia.

I joined the RC Groups so that hopefully I can gain a lot more information about drones for the stuff that I do, lots of small steps before the big ones.

Australian Image

YouTube

Cheers

Ray
Posted by alex111 | Apr 13, 2018 @ 10:02 PM | 3,235 Views
Boondall model club navy day