Posted by DismayingObservation |
Apr 07, 2021 @ 04:11 PM | 11,804 Views
What do you do with a UMX F-16 crashed on its first flight by an inexperienced pilot and then given to me by a hobby shop about to close its doors?
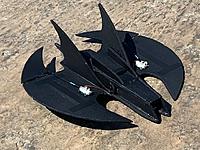
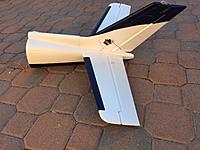
Simple. You build a micro Batwing!
Chris Allen at Foam Concepts Jets sold the plans to me a few years back when I'd gotten the wrecked UMX and Greg Tanous at RCDepron.com recently sent me the sample sheets of 3mm and 6mm Depron per my last blog. It's a bit rough around the edges, but dang if it don't fly. I'm very happy with this first attempt to cut parts from Depron and glue them into a functional model.
The sound and overall cool factor are off the charts. So is the fun! It flew great! The battery was the stocker from my UMX Gee Bee and the discharge rating is a bit lower than what Chris recommended. The motor was stuttering a bit at full throttle; same problem with my UMX F-16 when the batteries are getting old.
So, if you have one of these gathering dust in a closet or you have a 28mm or 30mm micro EDF system from an E-flite model gathering dust, get the plans, get the foam, and get a Batwing.
Posted by DismayingObservation |
Feb 28, 2021 @ 05:47 PM | 16,613 Views
Foam builders, rejoice!
Just when you thought all was lost and foam aircraft projects would forever be limited to paper-backed poster board from a dollar store or blue foam insulation board , a resourceful inventor and modeler by the name of Greg Tanous has done the unimaginable.
Through his company,
Greg Tanous Lasering and website,
rcdepron.com, genuine German-made
Depron is once again available in the US! Tanous is the inventor of 1:1 scale RC flying superheroes, a scaled-down RTF toy version from
EB Brands depicting Marvel's Iron Man and the
Playmates Super G free flight toy wingsuits which I reviewed elsewhere.
Greg took it upon himself to contact the manufacturer to inquire about shipping a container of Depron to his new home in Lorena, Texas. All was not as easy as it seemed. Communications between the factory and a shipper proved difficult; even his choice of customs agent was denied. Shipping from the docks required a specific type of trucking company. Greg called the ordeal "tougher than imagined times 10."
What's more, Greg shipped, on his own initiative, several sheets of 3mm Depron to me on his dime which in turn gave me a really cool idea.
Some time ago, I'd purchased plans for a micro EDF model of Batman's Batwing jet from
foamconceptjets.com. That's because I was given a crashed E-flite UMX F-16 from a local hobby shop about to close its doors. The model had been sold to an inexperienced pilot who insisted on buying the thing..
...Continue Reading
Posted by DismayingObservation |
Oct 16, 2020 @ 06:57 PM | 14,651 Views
I admit it. I can't pass up freebos or bargains.
This is readily apparent by the two critters which followed me home last weekend.
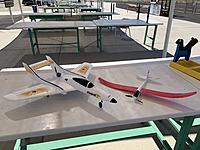
The big one on the left is an SD Model Condor originally sold by Nitroplanes. The little glider is an E-Flite UMX Radian. The latter set me back an entire four dollars. It needed some love, to be sure. Lots of really heavy tape held it together, the rudder hinge was torn and the linkages needed adjusting. Add to that some really ugly red spray paint on the wing which even covered the decals(!) along with a really big strip of the wrong hook-and-loop meant a project model was imminent.
As luck would have it, the electronics worked perfectly and it flew well after a bunch of transmitter trimming. Peeling off the packing tape and replacing it with small pieces of very lightweight invisible tape made a huge difference as did adjusting the linkages. Rather than buy a tail set right away, I tried making a glue hinge with some foam craft glue...which worked! For four bucks, I have a marvelous little fun flyer!
$25 netted me the Condor with all of the electronics less the receiver. It sported a 2650Kv outrunner and factory-installed 9g servos, but no nose wheel servo. Got me a new Flite Test servo with the proper arm to allow the wheel to steer, although the arm needed a bit of modifying for the throw needed. I finished it off with an APC 5x3 pusher prop per the motor specs. Guidance is via a Futaba receiver and a Castle Creations Phoenix-25 ESC, both of which came out of a totalled model from the week before. It already had an Emax 20-amp control on board, but I wanted to go with the CC which worked far smoother on the bench. I'll be updating the firmware soon since it's been a long time since I've done so.
This should be fun and if anyone has any suggestions on CG, I'd appreciate them. Seems to balance well on a 1300 3S li-po and although there's room for a 2200, it seems to be incredibly nose heavy. I'll report in soon!
Posted by DismayingObservation |
Aug 18, 2020 @ 08:44 PM | 15,939 Views
I've been busy!
My club placed me in charge of taking care of the sale of both an estate and the equipment of a gentleman exiting the hobby. It was up to me to gather the equipment, bring it to the field and conduct the sale. To sweeten the deal, I could keep whatever I wished. To fast forward ahead, the club wound up making several hundred dollars!
As for me, well, I managed to walk away with several models!
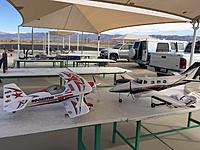
I've attached some photos below. That E-flite Timber X was assembled but unflown, the little Parkzone T-28 was complete but in need of some attention and the Hacker Master Stick was brand new but unboxed, but no one wanted it! The club president gave it to me and I paid only five bucks for its E-flite Park 450 and ESC. Lastly, I had the pleasure of flying that Hobbico Spectra at an unannounced visit by family members of our late friend. She's an oldie with its Speed 400 motor.
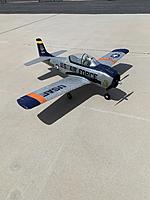
Completing the Master Stick only required four inexpensive digital servos to go with the Hitec Maxima receiver I had on hand, the Hacker hardware kit and an APC 11x5.8E prop. I have an 11x7 I might try. The T-28 was one I remembered seeing at the field years ago. It was dusty and in need of a good cleaning, some minor repairs and a new horizontal stabilizer, still available in white from Horizon. Took care of the color issue with a spray can of Aggressor Gray Testors Model Master. Once I touched up some of the paint issues, I had a presentable and great flying model.
I've had nothing but fun with the Timber X with its only limitation being single-position flaps since I'm flying it on my trusty old DX6i. I also treated it to a new set of window decals from Callie Graphics since the picture below was taken.
A old 30cc Super Chipmunk ( I don't remember the brand) with pneumatic retracts from the estate is up for its turn at the workbench after the weather cools off. It has a fuel leak, so some new Tygon might be in order.
Posted by DismayingObservation |
Apr 01, 2020 @ 08:46 PM | 19,625 Views
I simply could not resist.
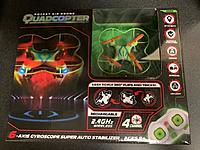
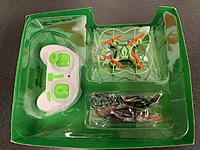
Yes, I already have several nano sized quads. However, thanks to Harbor Freight's frequent 20% discount offers, I was able to score their new Pocket Air Drone for well under twenty bucks.
It's an RTF - naturally - in the mold of such predecessors as the Cheerson CX-10.
And boy, is this thing fun. If one's local hobby shop doesn't stock nano quads for these strange times of isolation, I can't recommend this highly enough. It's not only a kick to fly, it's downright fast. It's just the thing for blasting about the living room for practically pocket change. Three control levels, automatic flips, spare props, what more can one ask?
Well, a slightly less sensitive throttle control might be nice. Other than that, not much else.
I'm reminded of a $20 toy helicopter with IR control I bought at a San Diego convenience store as a blog subject. Fun but difficult to fly and it eventually fell apart. I got my money's worth for sure.
That same twenty bucks nets a really nice little machine complete with Harbor Freight's 90-day guarantee.
It might be time to dust off some of those other nano quads of mine, but for now, I plan to put a lot of flights on this thing.
Posted by DismayingObservation |
Nov 27, 2019 @ 08:04 PM | 19,239 Views
Recent trips to the field have seen me with some older review subjects in tow.
I put my
Wattaplane Edge 540 through its paces this past Sunday. Seven years after I reviewed it, it still stands out as an outstanding aerobatic model. My only regret is that the company seems to be out of business. It's very disheartening since it was a pleasure working with Max Xu of Wattaplane. If one of these kits in Wattaplane or Skywing livery ever comes up on eBay, Craigslist or whatever, grab it. It's still in as-tested condition with, I believe, a new propeller somewhere along the line. Over the years, many of the outer glue joints became yellowed and even weakened. The seams along the top of the canopy had also receded, exposing the white foam beneath.
Easy fixes all! All it's missing is a locator tab at the front of the canopy, something I lost a long time ago.
A couple of weeks before that, my big
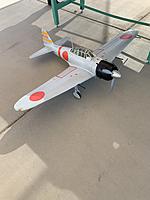
Airfield RC A6M Zero took a ride with me. I'd swapped out the factory radio for Airtronics control not long before; that initial test flight was cut short when a wheel strut cover came loose. Now repaired and dialed in, this big model left me with a bigger smile on my face than when I first flew it in 2013. The factory radio which came with this ARF from Nitroplanes worked, but control was very touchy. With far more accurate control with an Airtronics SD-10GS - not to mention exponential - the Zero is now one of the best flying warbirds in the hangar and it'll be going with me a lot more. It too has been discontinued, but I believe it's patterned after an FMS.
Like the Edge, the Zero is in as-tested condition with the only changes being a repaint of the cockpit to its proper zinc chromate color and a repaint of the original propeller blades. I still have the spare blades new in the package!
Here are the links to the original reviews:
Wattaplane review
Zero review
Posted by DismayingObservation |
Aug 22, 2019 @ 05:35 PM | 19,222 Views
Yep. Another orphan followed me home a couple of weeks ago, but it isn't a basket case.
It's a brand new, plan-built model done by my friend, Buzz Waltz. Buzz, if you'll review my previous entries, used to be a kit designer and manufacturer who gave me a beautiful, one-off prototype called
The Sparrow.
The new model is the
Dragon Fly, a large, gas-powered free flight design from 1936 adapted for three-channel RC. Buzz built it for electric power with a pull-pull rudder and the workmanship is beyond incredible. Wings and tail are covered, but the fuselage is bare, planked wood.
It'll soon get a light coat of water-based Varathane for a more finished look. Callie Soden at
www.callie-graphics.com has a Golden Age air racer decal scheme in mind which I hope to get soon.
Here are the plans:
https://outerzone.co.uk/plan_details.asp?ID=5531
Posted by DismayingObservation |
Jul 08, 2019 @ 04:37 PM | 22,158 Views
No, really!
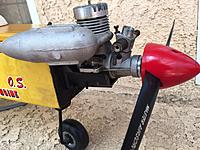
Well, ok. Maybe not, but it did come home with me. "It" is a well-used Seagull Models Space Walker II complete with an O.S. Max .55 two-stroke and a full set of Spektrum digital servos.
I've seen this plane on a number of occasions at the field and I know it to be a great flying model. Unfortunately, the original owner is now in assisted care. A member and the man's daughter sold off his entire collection via Craigslist...except for this poor Space Walker II. No one even made an offer.
You can see in the photo below my resurrected The Wings Maker Wingman II which prompted the member to ask whether or not I wanted to take home the glow-powered Space Walker. I tend not to say no to el freebos. I recognized Flik from "A Bug's Life" on either side of the fuselage as well as the pilot busts including the rear seat passenger with a chunk taken out of her helmet; I knew right away which model this was.
Pretty it is not. I described it to a friend as an "ugly little spud." The landing gear has been reinforced rather crudely and the red covering on the fuselage repaired equally crudely. One windshield is missing and the other is broken. Parts? Uh-uh. Not available. Other than that, it's all there with a full set of servos and a $180 engine in like-new condition. The flight battery is shot, but it took enough of a charge to allow me to test the workings. I have two new Hitec receivers which are digital compatible and I've been looking for an excuse to use one. This would be that excuse!
The fuel tank is in good shape and it naturally needs new tubing throughout. Fuel filters were present not only on the line going to the carb, but on the pressure and fill lines as well.
It's so complete that it just might have moved to the top of my project list. More to come.
Posted by DismayingObservation |
Jun 24, 2019 @ 06:03 PM | 24,710 Views
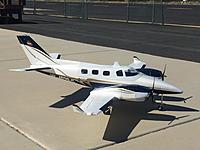
After a whole lot of assembly, detailing and waiting for the new ESCs, the new/old FlyFly Duke B60 lives!
Like the original, it took nearly a half a pound of lead up in the nose to balance it out. The factory recommendation would have made for a horribly tail heavy model. Not surprising; that was one of the worst manuals I've ever encountered and I mentioned that in the
review of the original model. For the record, it balances just fine a few millimeters in front of the wing spar.
To recap, the one you see in the photos was the original review kit less the electronics and the prototypical pull-pull retractable nose wheel. An ESC failure wadded in that original, so out came this version after languishing for five years.
What the photo also shows is the very first decal set for this model by the one and only
Callie Graphics. I sent the original sheet to Callie Soden and she was able to create a color-corrected custom set which included separate drop shadows for the tail number and a far more accurate Colombian flag on the vertical stab.
The new ESCs are fresh new
E-Flite 50-amp units with the BEC disabled on one of them. On the original, both BECs were active on a single channel which may have led to the failure of one of them at the PC board. Propellers are from
Master Airscrew and the remainder of the electronics are off of the original model. I'd stolen the main retracts some time ago for another model, but there wasn't anything wrong with the ones
...Continue Reading
Posted by DismayingObservation |
Jun 12, 2019 @ 06:10 PM | 22,202 Views
Wouldn't you know it.
After ordering a new thrust washer, I found the old one! No matter. I now have a spare!
I remember how much fun this little model used to be back in the day. Faster than heck yet wonderfully controllable. It tracks straight on takeoff and is as easy to land as a trainer. I never bothered setting the high rates - something I'll do soon - but even on low rates, this Great Planes Spitfire 25 sport/combat plane was every bit as much fun to fly as I remember.
It blew a lot of rust colored oil out of the muffler of the O.S. .25 Max when I started it at the field, but that quickly stopped. After its first start-up in several years a weekend or two ago, the crank bearings sounded noisy, but they're fine now. The bearings were, in my opinion, almost certainly the source of that small amount of rust.
Once airborne, the Spitfire sounded a bit too rich in flight, but no matter. Blasting laps around the pattern was simply, well, a blast! I only flew one flight this morning; it was a kind of "shakedown" to see how it would do. I was also down to about a pint of fuel with two more models waiting for completion and flight testing.
Sadly, the canopy managed to get broken! There are lots of parts still available for this discontinued model and a canopy is among them. On its way next week. Maybe I can track down a small pilot bust by then.
Posted by DismayingObservation |
Jun 10, 2019 @ 06:10 PM | 24,228 Views
Back in 2010, I was lucky enough to review
this model on behalf of RCG. Great model which, unfortunately, met an untimely demise shortly after this review was published.
Fast forward to mid-2019 for a partial return of this model to operating status, namely the engine, power switch and spinner.
The engine I got with this castoff sport plane was too large; I blogged about it not long ago and I posted its photo from that blog below.
What did it take to get this model back on the cusp of flying once more?
-The O.S. Max AX 46, glow plug and muffler from the P-40. No cost.
-A new/old Great Planes adjustable motor mount which I already had on hand. No cost.
-The newly repaired heavy duty power switch from the P-40; it had some torn wires at the receiver plug. No cost.
-The Great Planes spinner from the P-40. No cost.
-A new/old 11x6 Master Airscrew propeller given to me along with the model. No cost. Even the factory safety warning sticker was intact.
-Fuel tubing. Mere pennies.
-Mounting hardware. $2.89 from Ace Hardware.
The Thunder Tiger fuel tank which came with the model was in fine shape and only needed a new klunk line.
A new slanted fuel tank is waiting at the hobby shop for installation into the Rat Clanger. That'll make it model number five returned to operational status for very little money and only a bit of time. Flight report and updated photos to follow; I'm told it's a big, lazy and fun flyer with its 6' wingspan. We'll soon see!
My next project might be a long dormant, kit-built Great Planes Ultimate biplane, given to me with minor crash damage and originally set up as an electric. No telling which end was up; the wings have the same pattern top and bottom! I repaired the damaged landing gear a few years back, I have the parts to finish the build, so why not? A good, used K&B Screaming 48 purchased from a friend might go onto that firewall. Haven't flown that engine yet!
Posted by DismayingObservation |
Jun 07, 2019 @ 05:45 PM | 23,331 Views
Some real props are due to my dear friend Jeff out in northern Georgia.
Jeff is not a hobbyist, but he enjoys the work and the blogs I do here and elsewhere and he coined an interesting new synonym for an R/C model plane.
"Clanger." After all, do model planes not crash - or clang - on occasion?
Therefore, it's my pleasure to update my blog with a progress report on the newly christened Rat Clanger.
The engine was a wee bit gummy, although some WD-40 and a bit of exercise with an electric starter loosened it up. The glow plug was good, compression nice and high and the carburetor worked freely.
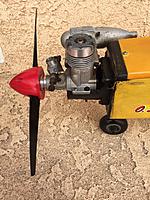
The engine is an O.S. Max 28F two-stroke from the 1980s. Most of the patina is likely from sitting rather than use and it looks perfect on this model. I've had it for about four years and heaven only knows when it had last run. Today would be the day that I would connect the fuel tank and throttle rod from my test stand, set the carb and give 'er a go.
That little O.S. fired up with a small blip of the starter and idled beautifully! It even ran up to full throttle perfectly. Here was an engine which was at least thirty years old returning to life as if nothing had happened. That's a real testament to the quality of O.S. engines and now I feel confident to proceed!
Posted by DismayingObservation |
Jun 06, 2019 @ 06:21 PM | 22,026 Views
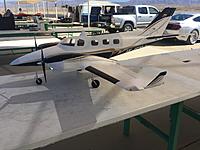
While doing the wiring this morning on the FlyFly Duke B60 with its Callie Graphics decals, I couldn't resist sending a beauty shot to a friend.
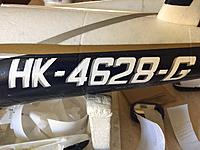
The factory decals and paint are anything but prototypically correct for the full-scale HK-4628-G, but Callie Soden did her usual magnificent job based on the original decal sheet which I forwarded and color correction based on photos of the real thing. The tail number is a bit large (same as with the factory decals), but again, Callie came through not only with a font closer to the original, she made separate drop shadows as well. Instead of the vague, three-color Colombian flag on the original decal sheet, Callie came through with a perfect representation including the device in the center of the flag. Just beautiful!
The new E-flite ESCs are waiting at the hobby shop and some red and green LEDs for the nav lights are on their way. More and better pictures to come when it's finished.
Posted by DismayingObservation |
Jun 03, 2019 @ 06:03 PM | 24,948 Views
Reviewed ten years ago.
A faithful, fun model afterwards despite a hard landing.
And...it's back!
My Wings Maker Wingman II,
reviewed here in 2009 and again in 2011 as a test bed
for a new GWS servo has been sitting for far too long.
It's now back. The fuselage and wing were replaced after a hard landing (the parts were too cheap to justify fixing the old ones), it was flown a few times after that and was relegated to a garage shelf.
I'd swapped in a Thunder Tiger .40 at some point, but it needed work, not to mention parts. The needle valve had an o-ring reduced to goo and the retaining ratchet broke. In went the original Thunder Tiger once I freed up the crank and carb.
Except for a new prop for safety's sake, a new fuel tank, new lines and guidance now provided by a Hitec Flash 8 radio, it's the same as when I parked it. I also have to thank a member of the club for giving me a new glow plug! I flooded the engine while filling it and I lost the gasket when I went to empty it with the starter. Darn thing went flying off, never to be seen again. I thought it had come off with the plug which was already in the engine.
The opaque black plastic canopy had long ago warped in the sun and was replaced by an off-the-shelf clear canopy. That meant I had to install a pilot bust. I don't like ghost ships. An Ace R/C Cap'n Eddy from a crashed Thunder Tiger park flyer was not only a perfect fit, he just seemed right in a model powered by a Thunder Tiger
...Continue Reading
Posted by DismayingObservation |
May 22, 2019 @ 06:14 PM | 20,478 Views
That critter in the photo below was one which came with two other models, both of which have been mentioned in previous blogs and are pictured below. Both are decade-old E-flite examples and both fly great after some loving. One is an Adagio 280 motor glider and the other is a Mini Ultra-Stick.
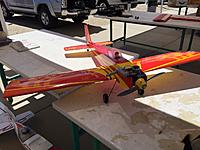
What this .55-powered model is is anyone's guess. It's a sport plane, obviously kit built and fairly good sized with a 6' wingspan. More importantly, it came with an O.S. .55 which is still very much in production! New o-rings for the needle valve are on order and while the crankcase as a small chunk taken out of it near the rear muffler mounting bolt, it doesn't appear to be critical. Even the fuel tank appears to be in good shape and it'll get a new pickup hose.
Incredibly, it has standard Futaba servos! Three in the fuse and one on the wing working torque rods for the ailerons.
I bought a strip of self-adhesive Monokote trim so that I can easily fix some small rips in the covering. I also bought a new tail wheel. I already had a brand new motor mount on hand. To sum up, this will be a seriously low-buck project!
UPDATE: The new tail wheel is in place. Better still, I had two new/old 2.25" Du-Bro wheels with rubber tires on hand which replaced the narfed-out 2.5" Du-Bro foamies. All of the servos work and the little rips in the covering have been patched. I even covered that bare wood behind the pilot bust! On to that torn covering visible on the right wingtip. I'll do it in more of that Insignia Blue trim.
Posted by DismayingObservation |
May 06, 2019 @ 09:06 PM | 19,831 Views
You'd think that cleaning old castor oil off a glow engine would be no big deal, right? Conventional wisdom states that the engine be torn down and baked in a crock pot full of antifreeze.
Thanks to a thread here at RCG, I solved the problem for a buck.
A concentrated spray cleaner is sold at Dollar Tree under the unlikely brand of LA's Totally Awesome.
Guess what? It is. Some of that cleaner with help from an old toothbrush cleaned the O.S. .25 on the Spitfire like new! It also did an incredible job of cleaning the little "rat plane" .25 high wing in my last blog. I'm going to buy an soft scrub brush and really give it a once-over.
The FlyFly Duke build is proceeding nicely and I was reminded of a couple of things. For starters, I recall scrounging the main retracts for use in another model after they both stopped working. The ones from the crashed model worked fine and just for looks, I'm using the three new struts from the kit.
One of the motor cowls had a small chip in the paint; the inspection number is from the review model. I used one from the kit for looks so that there wasn't a little white spot jumping out in the photos. Some small disc magnets from Harbor Freight will hold those cowls in place once I get the ESCs. The magnets work perfectly!
Photos on the way. Getting these models ready has been a ton of fun so far!
Posted by DismayingObservation |
May 02, 2019 @ 07:16 PM | 19,810 Views
While waiting for the parts for the FlyFly Duke about which I've recently blogged, I decided to do another project which has turned into two!
By the way, it was a failure of one of the ESCs which led to the crash of the first Duke. The signal wire and its PC board pad lifted clean off the board and there's no trace. Besides,
something caused the problem in the first place, right?
Project number one is a Great Planes .25 Spitfire sport plane with its inverted O.S. Max 25. I bought the airframe after I stuffed in my Nitroplanes Zero and I haven't flown it in many a year.
It's complete down to the Futaba FASST receiver which somehow avoided being scrounged for another model at some point. The carb is now free and parts to complete it are on order.
The big news is the mystery .25 which I got several years ago from an RCG poster. It was either come and get it or it's going in the trash! The OP lived near my brother who picked it up and brought it to me. Prior to today, I hadn't even tried to clean it. Fabuloso is great stuff if you don't mind a model which smells like lavender potpourri and old wood...but it isn't quite strong enough in diluted form to cut the crud on this poor little plane. The engine has like-new compression and a freely moving carb. I'm going to keep the "rat rod patina" but I'll replace all of the hardware, install a fuel tank and install new electronics. The airframe is wonderfully solid and well built. A friend sent me a couple of stickers which depict a truly bizarre online cartoon character which can be found
here. One might find its way onto the wing, but we'll see.
Posted by DismayingObservation |
Apr 29, 2019 @ 06:41 PM | 19,920 Views
Normally, blogging about the assembly of a foam model would be something I probably wouldn't do. In the case of my new/old FlyFly Beechcraft Duke originally from RC Aerodyne, it's interesting to see how far such models have come in the last few years.
It's an interesting mix of nice molding, not so nice wooden parts and just plain bad instructions. The paint job is nowhere near the quality of a Horizon or Multiplex product, let alone the nice paint jobs which have been appearing on HobbyKing offerings. Let's just say it's stand-off scale. Way off.
In fairness, RC Aerodyne had the ARF versions with retracts done at the factory and the manual didn't reflect that. Even so, it didn't show such important details as the orientation of the motor firewalls. Found a photo on an old Duke build log right here on RCG and sho'nuff, I did it right! I checked using the surviving cowl from the wreck and the prop shafts lined up perfectly.
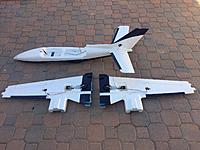
Since the photo below was taken showing the completed fuselage and partially complete wing halves, the wing has been joined and it's nearly complete. I have some E-flite 50-amp ESCs on backorder. Those should be here in a couple of weeks as will my new Callie Graphics decal set!
This model is being assembled with far greater care than the review unit and it will feature such niceties as magnetically attached nacelle tops. The kit came with eight disc magnets which are perfect fits in the dimples between the tops and bottoms. I hadn't noticed them until just yesterday! The rear of the tops are held by the magnets and the fronts are held by the firewalls and cowls. The cowls look as if they can be attached magnetically as well, so I'll play with that. Worst case would be having to attach them with a bit of foam glue.
I have a pair of nav lights from an FMS warbird, but they glow steadily and don't flash like those on a civilian aircraft might. I'll get some E-flite LEDs so that I can plug them into the E-flite controller I bought.
Posted by DismayingObservation |
Apr 22, 2019 @ 05:57 PM | 19,941 Views
The instruction manual for these models is, at best, a guideline. Lots of out-of-the-box thinking is a must when assembling one.
So, I took it upon myself to wire together the tail before attaching the forward halves of the fuselage. Since taking this picture, I've completed the entire fuselage save for a few minor details. I changed out the ez-connector on the rudder left over from the wrecked Duke to a new/old Great Planes part. Much better setup which does a superb job of holding the pushrod in place. It was slipping through the original no matter how tight I cinched down the setscrew.
The really alarming thing was the poor quality adhesive used by the factory. I'm surprised the thing didn't self-destruct in midair!
This is no longer a problem.
Fresh thirty-minute epoxy is the main adhesive of choice and it's all going together nicely. Lots more to tell soon!
Posted by DismayingObservation |
Apr 11, 2019 @ 05:51 PM | 26,785 Views
...all is not lost.
The model in question is the FlyFly Hobby Beechcraft Duke B60 once sold by the great folks at RC Aerodyne in Kent, Washington. The original review is
here.
The first flight that day was on the same old 2DogRC.com packs from the original review. The second was on two newer packs, but which I knew were in questionable condition. Turns out I should have listened to that little voice in my head because one of the batteries cut out early turning from base to final and caused this wonderful model to spiral in. Ker-splat. So close, yet so far.
Here's the good news.
RC Aerodyne mistakenly sent a kit version without the electronics. The model in the review is the PNP version which was forwarded as a replacement. Shipping the first kit back would have cost a fortune; RC Aerodyne let me keep it! Since then, it's been in the box in case the unimaginable were to happen. Turns out it did.
Since the review was published, no one seems to carry the model anymore, let alone replacement parts.
Rather than fly a glue bomb, I made the decision to strip the electronics from the crashed model for use in the new one. FlyFly did, quite honestly, a horrible job of opening up the holes at the tail for the twin elevator servos and single rudder servo. Good thing the openings were hidden since they looked as if they'd been done with a dull butter knife.
Except for a couple of decals I stole from the kit's decal sheet, it's a complete kit which includes a bunch of extra hardware, almost none of which are for the model.
That decal sheet is going to be mailed to the one and only Callie Soden of Callie Graphics and some spare LED nav lights are going in the wingtips. The ridiculous multicolored LED serving as a tail beacon will be replaced by a proper unit.
I have one chance to get this one right, so wish me luck!
Views: 405
 Views: 414
 Views: 377
Views: 397
Views: 421
 Views: 448
 Views: 477
Views: 475
Views: 465
Views: 492
Views: 478
Views: 479
Views: 450
Views: 528
Views: 497
Views: 519
Views: 487
Views: 491
Views: 482
Views: 516
Views: 509
Views: 476
Views: 482
