-
 Views: 71
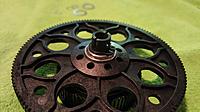
Parts needed to assemble the main gear with the belt drive. -
 Views: 98
The one way hub is screwed into the main gear with the supplied screws. -
 Views: 100
Make sure to wash the oil from machining off the hub and one way sleeve so the loctite cures properly. I used acetone. -
 Views: 88
I used the provided green loctite. Use a generous amount on the threads and the hub. -
 Views: 95
Thread the hub onto the one way sleeve. This is a reverse thread, so lefty-tighty, righty-loosey. Use your hands so you don't damage the fine thread. Let the loctite sit for one hour and wipe off the excess. Let cure for 24 hours. -
 Views: 99
The belt drive gear is screwed into the hub. This assembly is then pushed onto the main gear. Use the thin washers to ensure it spins without binding. -
 Views: 94
The one way sleeve attaches to the main gear with a circle clip. Using circle clip pliers will make your life much easier. With the right tool, it takes seconds. -
 Views: 86
Insert the main shaft through the bearings on the servo mounts and through the main gear. The bottom of the shaft is the end with the hole closer to it. Use the washers between the top of the gear and the servo mount to prevent any up and down play.
Comments (0)
Add Comment
-
 Views: 84
Left side of frame assembled. -
 Views: 80
Tail belt rollers before assembly. Note the orientation of each sealed bearing and the small gold colored washers. -
 Views: 90
Roller assembled and mounted to the tail boom mount. I used a thin layer of white grease on the bearings. The bolt is tightened to allow the roller to spin without any binding. -
 Views: 95
Frame complete with skids attached.
-
 Views: 76
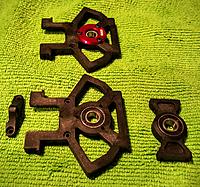
Parts laid out to begin the first step. Not shown are the small screws. The small support shown in the bottom left will not be used with the belt drive tail. It supports the torque tube drive shaft with the standard kit. -
 Views: 80
These sealed bearings press easily into the plastic mounts. They fit well and I did not use any glue to keep them in place. This will make any service easier if it is needed. The machined red cap screws into the top mount with three self tapping screws. -
 Views: 73
Servo horns and ball links shown with the orientation pictured in the manual. I did not use threadlock yet, I will probably change the horns out for the breakaway horns before the build is complete. -
 Views: 82
Proper orientation of this carbon fiber piece. I believe it helps hold the canopy in place. -
 Views: 63
Each servo is loosely screwed in place to the top mount with self tapping screws. -
 Views: 94
The bottom mount and front support are screwed into place. Everything is machined well and fits perfect. Each screw was tightened to ensure the assembly remains square.


