Sean Moloney's blog View Details
Posted by Sean Moloney | May 10, 2013 @ 09:03 AM | 9,631 Views
I never did finish the vac-bagged Deepend story in this blog. For those who weren't following the story in the DS forum back in 2011 a group of Aussies - myself and two flying buddies went on a trip to Califonia to fly their world record setting dynamic soaring sites. I took the Deepend and maidened it at Weldon, which was the world record setting site at the time. This was something I never planned to do and something I could never have dreamed of during its construction. Jason Lilly took the image below shortly after the maiden. It got a little over 250 on the maiden which was pretty cool in my books.

The wind for most of our stay wasn't particularly strong. I flew the Deepend several times, each time it got a little faster until finally it got just over 300mph - 301 to be exact. It looked like that might be the best it was going to get for the trip, but then only a couple of days before we were set to leave a significant weather event hit Weldon and we saw wind speeds as high as 70mph. The Deepend flew magnificently in these conditions to 397mph. I tried hard to crack 400 but it just wasn't there. It was a long flight with most laps not reading on the gun, and speeds consistently over 360mph. We're pretty sure it went over 400 on some of the faster looking laps but that's DSing and most people are in the same boat when it comes to missed reads at these speeds. At the time only four people had flown faster than 400mph, and to this day it remains a record for a vacuum-bagged wing.

AvB, one of my Aussie companions for the trip wrote a much more detailed and entertaining post on the day here:
https://www.rcgroups.com/forums/show...&postcount=480

The final part of the tale as of this writing is I'm building a bigger fully moulded version of the Deepend. It is quite a different beast with a T tail and an airfoil by Dirk Pflug. The build thread can be found here:
https://www.rcgroups.com/forums/show....php?t=1505794

Sean.
Posted by Sean Moloney | Jul 23, 2010 @ 04:31 AM | 16,047 Views
The fuse plug is progressing. After a lot of work this week it got a coat of 2k high build primer this afternoon. What a difference a bit of paint makes, looks so much better now.

There are still a few minor lumps and bumps to smooth out so it'll get a good sand and another thick coat of the high build primer before a finish coat of 2k black.

The fuse plug has been more work than expected to get it to this stage, but it's getting close now!
Posted by Sean Moloney | Jul 20, 2010 @ 06:02 AM | 13,330 Views
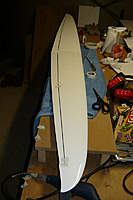
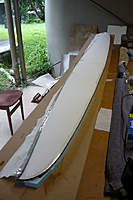
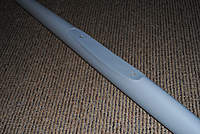
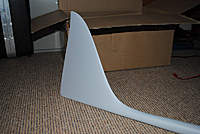
It's been a while since I posted some progress shots of the Deepend, so here's a few to show that progress is being made. At the moment I'm working on the fuse plug. It's taking a while, the photos below show the second fuse plug, I wasn't quite happy with the shape of the first one. It's pretty rough in these pics, the fin has just been glued on so a bit of attention needs to be paid to the fin-fuse fillet.

In these pics the wing saddle has been covered in a thick layer of filler, and the wing has been pressed down onto that filler to make a moulded wing saddle. The underside of the wing has a layer of zagi tape acting as a very basic release agent. This area is going to need a lot more work before it's finished. So still a long way to go on the fuse plug, but at least these pics give an impression of how it will look when finished. There's a touch of PNF in the nose . Nice long nose is to counteract the anticipated heavy tail boom/tail feathers.

I had a change of heart on the tail config, it'll be a fairly standard one-piece moulded fuse with cross tail now, rather than the Drela style pod/boom cross tail of the original design (see first few blog posts). Should be a bit quicker to make new fuses this way (once the mould is done that is), and it will look a fair bit better too I think. Also felt the sub fin of the original design would have been a bit susceptible to landing damage given the high weight of this plane. A T-tail might have looked a bit sexier but the cross tail will put less torsional loads on the tail boom, though with the layup I plan to use that might not have mattered. Fuse is as skinny as I thought I could get away with while still being fat enough to be nice and stiff given the right layup (ie lots of carbon ).
Posted by Sean Moloney | Jun 15, 2010 @ 04:05 AM | 13,664 Views
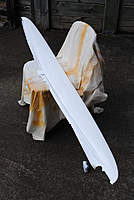
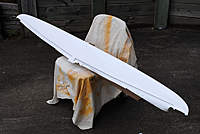
Just had to post a couple of pics showing the Deepend wing after sanding and polishing the paint. Very happy with how it turned out. Lots of elbow grease required to cut some gloss into the paint - several hours wet sanding and buffing with cutting compound to get it to this stage. I know some of my flying buddies think I'm insane for spending this much time getting a good finish on a DS plane that may well have a very short lifespan, but I do get a kick out of creating something that looks nice, makes it feel like it was worth the effort.

I'll add colour to the wings by applying sign vinyl. I decided to use vinyl rather than paint for the colour becase it gives really good results when you're careful, you can change the colours if they're not visible enough, and it's much faster than painting.

Sean.
Posted by Sean Moloney | Jun 11, 2010 @ 10:02 PM | 13,583 Views
Haven't made much progress on the Deepend in the last couple of months thanks to work and other things. Also, even though the wing came out of the bag a couple of months ago there has been a lot to do. First fixing the leading edge took a lot of work (10 hours or more I'm guessing). Hard to believe it took so long but there was a lot of filling and sanding to do.

I've had to respray the top of the wing - it turned out the paint was a little too thin on the top. When I sprayed the filled/sanded LE, and feathered this into the main paint, the carbon started to show through. Bloody spray can paint - I must have put four or five coats onto the mylars and it was still too thin to withstand some very careful sanding with fine sandpaper.

I really didn't want to have to respray the whole wing but I could see it was going to be the only way to get a decent finish. This again took quite a while preparing the surface for painting, masking, spraying etc. Now it's sprayed it's simply a matter of letting it harden for a week or so before attacking it with fine sandpaper and polish to bring out some shine. Paint used is acrylic lacquer from a can. I hate using this stuff but I have no spraygun. Seems such a shame to put in lots of work with top quality materials then cover it in chalky spray can paint. I'm using reasonably good quality lacquer (K&H) but it's still not very good for this application. It buffs out to a nice shine but stays soft and comes off way too easily. This...Continue Reading
Posted by Sean Moloney | May 06, 2010 @ 05:01 AM | 15,233 Views
Here are some shots of my first attempt at making a splooge wiper. Never done this before so had to make a lot of it up as I went. I think it's going to turn out OK but not perfect (I can see some bubbles between the splooge and the tape used to shape the wiper). If it's not as good as I like I can grind it off and start again I guess, didn't take all that long. Only did one flap to see how things went before going and doing the rest.

To make the wiper, I ran some Scotch Magic Tape along the LE of the flap, sticking out maybe 7 or 8mm. Then a mix of epoxy, cotton flocks and Q cells was applied to this tape with a syringe, and shaped as neatly as I could manage. Then the flap was taped to the wing as if it was hinged, the tape that the splooge was applied to was tucked into the wiper pocket, and the flap was set at a slight angle to make a curve in the tape. The pics will show how this was done a little more clearly.

To make the wiper pocket, I installed a carbon drag spar into the cores prior to bagging. After the control surface were cut out it was a simple job to gouge out the foam between the control surface cut and the drag spar (first pic shows this more clearly than my description).
Posted by Sean Moloney | May 06, 2010 @ 04:41 AM | 14,396 Views
The control surfaces have been cut on the Deepend wing. Amazingly I managed to take something like five hours, maybe more doing it. Not sure how it took so long but it's fiddly work and can't be rushed.

A razor would never get through the skins on this wing so I made a simple jig for my Dremel to do the job. Pictures show how this was done.

The cuts needed to be made in just the right spot - as close to the pre-installed control surface leading edges as possible, and it's impossible to tell were they are by just looking at the wing. Knowing that would be the case I traced the locations of everything buried in the wing onto tracing paper prior to bagging, but it's not possible to perfectly position this tracing paper plan over the bagged wing, so I drilled a few little (1.5mm) exploratory holes in the skins to double check the locations. This worked quite well but again it was slow and probably one of the reasons the job took so long.

The pictures show how it was done. Nothing much more to add, except the control surfaces are ultra stiff in torsion . Next job is to add wipers.
Posted by Sean Moloney | May 05, 2010 @ 08:00 AM | 14,653 Views
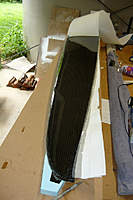
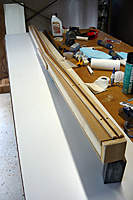
Here are some pics of the Deepend wing when it came out of the bag. These were posted in another RCG thread a while back but have only just got around to posting them here.

Mostly it turned out very well though the LE came out square... Since taking these photos I've filled and sanded the LE to shape. All up weight of the wing is 2950g.

The wing has progressed a bit more since these pics were taken, will post further progress shots shortly.

Sean....Continue Reading
Posted by Sean Moloney | Apr 08, 2010 @ 01:17 AM | 15,248 Views
The wing went into the bag last night. The layup went smoothly, it wasn't difficult handling the long mylars, heavy cores etc. A fair amount of forward planning was required to make sure the whole process went without a hitch.

The layup process did take a couple of hours though - largely because I spent a fair amount of time rolling each layer of carbon. Unfortunately I didn't take any pics of the process as I had my work cut out just doing the layup.

Three layers of carbon were used on the top and bottom, as well as a 25g glass finish layer. The layup was (from the outside in): 25g glass, 200g twill carbon on bias, 400g uni carbon, 200g twill carbon on bias. The uni carbon stopped just forward of the hingeline. To make sure there isn't a step where the uni ends I feathered the edge by spreading the last couple of tows out with fingers and the roller, which worked better than expected. About 500g resin was used in the layup! Not sure how much got squeezed out or otherwise left behind.

The LY3600 resin has a very long gel time which is very handy with such a lengthy layup - it means you can relax and do the job properly. I mixed four batches of epoxy during the process to keep it nice and runny on the roller. Even after 2 hours the first batch of epoxy was still runny enough to get squeezed out under vacuum.

I thought the dihedral might makes things tricky when it came time to lay the mylars onto the cores but in the end it was a complete non-event.

Placing the mylars...Continue Reading
Posted by Sean Moloney | Apr 01, 2010 @ 08:29 AM | 14,910 Views
There's been a bit of a delay on the Deepend build due to inevitable distractions, but I've been able to get a fair bit of work done this week preparing the cores for bagging.

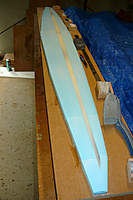
There's quite a lot of work to do on the cores before they're ready to bag. Here are some pics showing what has been done so far.
Posted by Sean Moloney | Mar 01, 2010 @ 08:44 AM | 15,894 Views
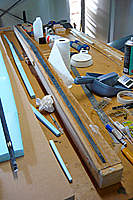
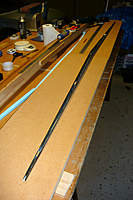
The spar has been glued to the wing cores, and filler has been applied above the caps to recreate the shape of the wing above and below the spar. Pics show the process in a little more detail.

I'm very happy with how it turned out using the specially moulded sanding blocks (see blog Feb 21). Sanding the filler above and below the spar is a job I'd been dreading since the start of this build, but it turned out easy and reasonably quick thanks to the custom blocks. The filler perfectly recreates the shape of the aerofoil, and all I had to do was sand back and forth along the span! Big thanks to Shane (PlayinInThePark) for the idea on that one. Shane did it a little differently (and probably with much greater precision) from memory but the idea was the same.

There's still a bit to do before the wing is ready to bag, but at this rate that shouldn't take too much longer! This constant rain is probably going to slow things down - have to wait for a dry day before I can paint the mylars.
Posted by Sean Moloney | Feb 26, 2010 @ 05:37 AM | 15,424 Views
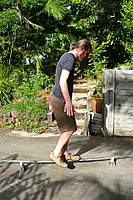
Here are some pics of the spar being stood on. I have it supported at 2/3 of the way out, so there's 1.4M between the supports. With it completely taking my weight, I measured the deflection at 40mm (I weigh 80-85KG). A bit more than I thought before. Trying to balance on the spar I could feel it flexing up and down as my weight moved around. The spar is undoubtedly very strong but I must admit I thought it would flex a little less than this under my weight. The bend in the first pic looks more extreme than it is - the spar has 2.5 deg dihedral (per side if you know what I mean). The second pic shows the spar upside down, so the bend doesn't look nearly as bad.

When built into the wing, the wing skins should contribute some extra stiffness.

Posted by Sean Moloney | Feb 25, 2010 @ 04:14 AM | 16,288 Views
The Deepend's wing spar was completed today. In order to add weight to the wing and to simplify the spar's construction, the web was made from epoxy resin mixed with chopped glass. About 350g of resin was needed to make the web, and this resulted in a finished spar that weighs 930g. With such thick caps and a solid resin web I see no need to wrap this spar.

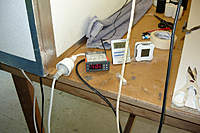
The completed spar was post cured at 60 deg C for 8 hours then overnight at 45C.

I did some tentative strength testing on the finished spar adding weights and measuring deflection. It's not completely rigid but you do have to place a lot of load on it to see any flex. Also, most of the flex is out towards the tips where the spar tapers down to be only 8 or 9mm high, the centre is very stiff. If you try to bend it across your chest (the standard measure of wing stiffness ) you can't get any deflection at all.

The last test involved placing the spar on blocks spaced 1.3M apart and standing on the middle of the spar. I weigh about 80-85KG and it felt like it deflected about 15mm or so, though I couldn't get an accurate measurement on that! It may stiffen up a little more over the next few weeks - right now the resin in the web is only 48 hours old, and the top spar cap 72 hours.

See pics for info on how the spar web was constructed......Continue Reading
Posted by Sean Moloney | Feb 21, 2010 @ 07:51 AM | 15,832 Views
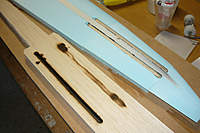
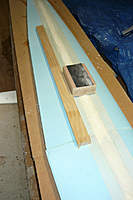
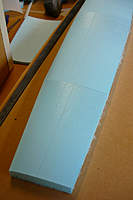
A little work was done on the wing cores today - the dihedral angle was cut into the root (where the left and right panels meet), the spar slot was cut into the cores, and some custom sanding blocks were moulded to help when sanding the filler above and below the spar slot to match the shape of the wing.

More info accompanies the pics...
Posted by Sean Moloney | Feb 15, 2010 @ 09:52 PM | 15,887 Views
The lower spar cap came out of the bag this morning and thankfully all went according to plan. This is one chunky piece of carbon! Very satisfying to see such a large lump of continuous carbon fibre . The vacuum flattened the cap very nicely and the top came out flat and smooth. I was half expecting the top to be a little wavy and not perfectly flat (which would have still been usable). Overall though it's good to have a usable part on a first attempt.

I can definitely see areas where I can make improvements when moulding the top cap.
Posted by Sean Moloney | Feb 14, 2010 @ 11:20 PM | 16,049 Views
Today's job was moulding the lower spar caps.

To do this, I made a very basic and cheap mould from spare MDF and pine. This allows the caps to be moulded from uni carbon with dihedral, meaning there are no breaks in the spar cap across the dihedral break. Also, the mould had to be able to fit into a vacuum bag while the caps were curing. The mould I came up with should do the job, though I admit it's not the simplest or most ideal way to go about this... I'd probably do things a little differently next time. The dihedral angle can be varied by drilling new holes for the centre brace, and the width of the spar cap can be varied by repositioning the 12mm square timber that forms the edge of the caps on the top of the mould. This means, provided it works OK of course, I can use this mould on future planes, not just this one.

The spar caps for this plane are pretty beefy.... the centre of the spar is 30mm wide tapering down to 10mm at the tips. For each cap there are 15 layers of 400g/m uni carbon in the centre tapering down to 4 layers at the tips... This should be overkill for this plane, but I thought I may as well add weight as carbon. A wider spar with less layers of carbon would be more efficient but being a bagged wing you don't want to cut too wide a slot for the spar - as it is it will need a lot of careful sanding above and below the spar to get an accurate aerofoil shape.

Laying up this many layers of carbon was a long, tedious job! It took two hours in the end,...Continue Reading

Fin

Posted by Sean Moloney | Feb 12, 2010 @ 06:58 PM | 15,392 Views
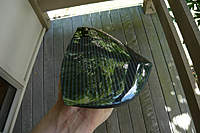
Here are some pics of the completed fin... AUW is 62g. It's virtually impossible to twist it, even by the slightest amount...
Posted by Sean Moloney | Feb 10, 2010 @ 04:32 AM | 16,034 Views
I layed up the fin and put it into the bag today. The fin is pretty simple, no spars or hingeline necessary (this plane won't have a rudder).

The rx I'm using in this plane is a 2.4GHz Spektrum AR9300, and I'm going to put the remote receiver in the fin. To accomodate the extended carbon friendly antenna I've embedded a plastic tube into the core. The rx will go somewhere near the centre of the fin and the antenna will get pushed up inside the tube, leaving the short non-shielded section of the antenna right at the top. To avoid blocking the 2.4 signal, I've made the top 50mm of the fin from glass rather than carbon (see pics).

Another 48 hours to wait!
Posted by Sean Moloney | Feb 07, 2010 @ 10:19 PM | 17,686 Views
I removed the stab from its mylars today. The results are as good as I could have hoped for, thankfully. This is a relief as I had some dramas prepping the cores, and this is also the first time I've tried prefacing the hingeline on a bagged part so was worried it would come out wavy across the hingeline.

Weight is 85g, which doesn't sound too bad I guess. Should take about 190g in the nose to balance though... It's great making parts for a DS plane, you don't have to worry about adding weight, just have to make it strong.

I was going to leave it in its mylars for 48 hours but didn't quite make it - I pulled them out after about 40 hours. It's so hard to leave a vac bagged part that long before getting to see how it turned out! They got lots of time in the hotbox though - I left them overnight at room temp for the inital cure, then put them in the box for maybe 4 hours at 40C, then ramped it up to 65C for about 10 hours. At this point I turned off the vacuum then left it in the mylars for another 12 hours at about 35C. This seems to have done the job, the resin was nice and hard when I pulled it out. Right now the finish is very smooth and glossy - I'm hoping the resin won't shrink back to reveal the fibre pattern over the next few days. I'm hoping that the extended time in the hotbox will help minimise any shrink back, but that's just a hunch. Will know for sure over the next week.

Next step is to cut the elevator off and prep the hingeline.
Posted by Sean Moloney | Feb 06, 2010 @ 04:43 AM | 16,068 Views
Finally some progress has been made. The Deepend stab went into the bag this evening. Motivation is now high to get this plane finished, and all the materials and radio gear have been bought so there's nothing holding it back now. Progress should be fairly steady from this point on.

Some notes on the stab: The elev LE and stab drag spar were prefaced with 2 layers of 200g pre-cured carbon on bias with 100g glass wrapped around (visible in pic). Spars are 2mm carbon rods. Skins are two layers of 200g carbon top and bottom... Spars aren't really necessary with this layup, they're only there because I was originally going to use a single layer of carbon to save some weight in the tail. I'm now hoping for an AUW in the 4-5KG range for this plane, so I changed my mind and went with the two layers.

The carbon with the larger tows in the first pic is some cheap ($20/M) 200g I picked up. There are huge gaps between the tows and it takes a heap of rolling to close the gaps. I may not be able to use it on the wings - it'll take so long to roll the epoxy might even start to harden before I can roll out the gaps (the wing will be bagged in one piece so lots of area to roll). The finer carbon in the first pic is 200g twill with a nice tight weave.

I'll leave the stab in the mylars at least 48 hours so a long wait before I get to see how it looks! LY3600 spec sheet says to do the initial cure at around 25C (room temp today). They say that heating during the inital cure causes excess shrinkage and therefore creates stresses in the part. I'll do as they say, and will post cure at an elevated temp tomorrow.