DismayingObservation's blog View Details
Posted by DismayingObservation | Nov 23, 2017 @ 06:00 PM | 49,508 Views
There are so many fun, albeit seasonal, goodies which only seem to appear at Christmastime.

This happens to be one of them, but it’s so much fun that it would be relatively simple to convert it to year-round use. That goodie is the JJRC H67 Flying Santa Claus quadcopter from GearBest.com. Jolly old Saint Nick is represented by a clone of a LEGO mini figure which either stands or sits atop the quad itself.

The real buzz surrounding this little Christmas confection is the fact that it’s based on the Eachine H011 quad, itself a prime candidate for conversion into a Tiny Whoop. Doing a “Claus Conversion” to the H67 is just as easy since its 7mm coreless motors provide the extra oomph needed to fly the roughly 4-gram Santa “brick figure.” The cost is incredibly low as well, coming in at well under twenty bucks ready to fly.

At the time of this writing, a "flash sale" is underway which lowers the cost to only US$13.89 with free shipping to the US via unregistered air mail.

What makes this a Christmas item isn’t so much the removable Santa Claus figure so much as it’s the first RTF quad I’ve ever seen which plays music.

Christmas music. Loud, tinny Christmas music. Two songs, ad nauseum. “Jingle Bells” and “We Wish You a Merry Christmas” sung by a children’s chorus. There’s no way to switch it off short of desoldering the sound module’s power leads atop the flight control board or installation of a microswitch.

That said, the music adds so...Continue Reading
Posted by DismayingObservation | Oct 06, 2017 @ 08:17 PM | 15,300 Views
...and a little voice kept telling me that a heavy model like the reborn HobbyKing C-47 was going to be underpowered with my choice of motors, battery and props.

I was right. Too much control throw as well.

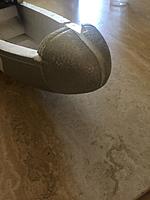
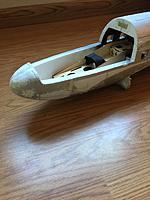
My club president did the honors and all of that combined with what seemed to be tail heavy balancing resulted in a very minor crash, since repaired. It nosed into the sand at the edge of the runway resulting in little more than a scraped nose, broken props and a bent landing gear strut. I ordered replacement decals from Callie Graphics and I did the "nose job" waiting for them to arrive.

I'll go up a size in everything including the ESCs. The factory units are only 20A and I didn't want to strain them. Props and motors were kept small as a result after research and, well, I now know where I have to go.

It could have been a lot worse, believe me!

One good thing to come out of all this is that Callie has introduced the decal set to her ordering page and she emailed me to say that she immediately sold two sets!
Posted by DismayingObservation | Sep 25, 2017 @ 07:22 PM | 11,747 Views
My friend powered up the Victor Engineering charger given to me by another friend and doggoned if it didn't work! Even the reverse polarity function worked. He tried it with an emergency jump starting unit. The input range is up to 16VDC, so an ordinary battery or a jumper pack will have plenty of oomph.

Next step is to connect it to my car's battery and give a discharged ni-cad a try. It accepts standard banana plugs, so that's not an issue since I have connectors. I'll even try the meter function with a digital multimeter just for giggles.
Posted by DismayingObservation | Sep 15, 2017 @ 05:48 PM | 12,253 Views
An old friend dropped off a bit of R/C racing history earlier today here at work.

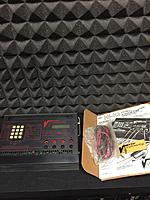
I am now the proud owner of a genuine Victor Engineering HI-IQ Sr. ni-cad charger. This computerized beauty made right here in Southern California was the creme de la creme of chargers at one time. This little fella is complete down to the original, unused Victor Engineering sticker.

My coworker got a real kick out of the unit; she was born and raised in San Clemente!

I'll ask my friend the broadcast engineer to put some power into the thing. I'm certain it'll work and I may use it to charge batteries for my grandson's Arrma Granite truck, that is, once I pin down a power supply.

This may turn out to be a lot of fun and I'll blog more about it later.

PS: If there are any collectors interested in this unit once I determine how it operates, please feel free to PM or email me.
Posted by DismayingObservation | Aug 30, 2017 @ 01:48 PM | 12,253 Views
First, the sad news.

Our area's remaining brick-and-mortar hobby shop is no more due to the sudden and unexpected death of its last owner a couple of weeks ago. Uncle Don's Hobbies began as Uncle Don's Toys in Palm Springs, California in 1955. Original owner and founder Don DuBose, who passed away this past June, was literally the toy vendor to the stars. Red Skelton and Elvis Presley were among his regulars; DuBose was also the caretaker of Frank Sinatra's extensive toy train collection.

The good news is, the employees are regrouping to open a new store in a new location. I wish them well as do all the members of our local hobby community.

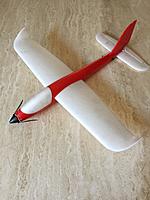
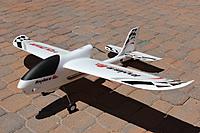
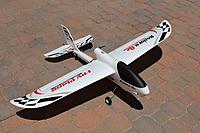
The free glider in question is a Hitec Weekender eHawkEye three-channel complete with its box, instructions and decal sheet, not to mention both servos, the brushless outrunner, the prop and the ESC. Mostly shopworn and dirty, this little glider which served as a display model at the hobby shop has been flown, but very little. It's cleaned up nicely and everything works. A test flight will be coming soon once the desert heat cools down.

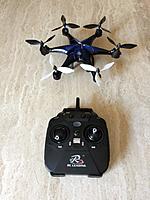
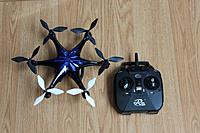
I'm particularly happy that I was finally able to get that RC Leading RC126 hexacopter in the air. The new transmitter I purchased had a bad power switch and it finally quit working. Duoduogood.com cut me a pretty good deal on a new transmitter and FC board. When they finally arrived, the new transmitter powered up - and wouldn't bind to either board! My friend, a top-notch broadcast engineer, had installed some new components in the first replacement transmitter. I transferred those parts to the original transmitter and bingo! It's flying on the new FC board and I've kept the original as a spare.

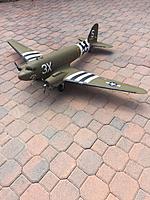
The piece de resistance of all this is the completed HobbyKing DC-3, reborn as a C-47. I have some more decals to add to the wings, but I'll double-check the prototype at the Palm Springs Air Museum before I proceed. I admit to having some fun taxiing it in front of my house! No room for takeoff, though.
Posted by DismayingObservation | Aug 05, 2017 @ 05:53 PM | 11,287 Views
This has been a heck of a lot of work on a foam model, but it's been nothing but fun thus far! What's more, I'm still ahead of the game with the cost of all of the supplies compared to starting with a new ARF or bare airframe.

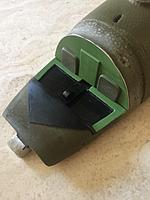
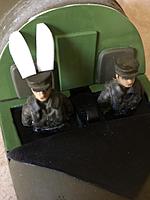
As of today, some details are now in place including the windows, oil coolers and skylight dome. The new Park Flyer Plastics cockpit kit was installed last weekend and it looks absolutely stunning. I'm not going to use the radial engines; according to Keith Sparks at Park Flyer Plastics, the heavy cowls with their out-of-scale engines help with the CG. The cowls themselves are painted and once I dress the damaged hubs with my Dremel, I'll tackle the remaining engine detail.

Repairs are down to the removal and straightening of the main landing gear struts and painting is down to the wheels. The prototype What's Up Doc? has natural aluminum wheels and the model, interestingly enough, had wheels painted olive drab from the factory.

The museum staff members have been a tremendous help and I was fortunate enough to get a lot of detail shots of the aircraft while it was in a hangar being overhauled. I've also been offered a ride once repairs are complete and believe me, I'm going to take them up on that generous offer.

I can almost see the light at the end of the tunnel! Stay tuned for more....Continue Reading
Posted by DismayingObservation | Jul 23, 2017 @ 08:12 PM | 11,878 Views
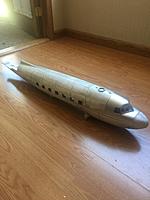
It's taken a month of fairly steady work, but the repair/refinish of the HobbyKing DC-3 I'd reviewed for RCGroups is advancing nicely.

As of this writing, I've laid down and sanded two coats of primer since completing the repairs, filling and sealing the model. Summer heat is a problem; despite the Polycrylic sealer, the EPO bubbled up in places very quickly when I was working outside. I've fixed the bubbled areas and I'll be doing the final coat(s) of primer one part at a time - and very quickly!

I'm sharing the mocked-up model and the fantastic Callie Graphics decals. A few more detailing decals are on their way from beautiful New Mexico and it won't be long before I'm ready to wet sand the primer - and apply the paint!

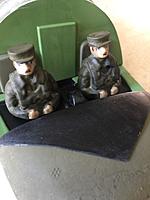
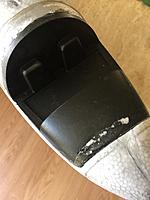
Pictured as well is the DC-3/C-47 cockpit kit from Park Flyer Plastics. Owner Keith Sparks has an assembly and painting thread posted here at RCG which I'll use to paint and assemble my kit. I ordered a couple of dummy radial engines from PFP, but per my recent entry in the classifieds, I'm looking for at least one intact cowl to replace the one whose "engine" was damaged in the crash.
Posted by DismayingObservation | Jul 14, 2017 @ 08:59 PM | 16,786 Views
I've had the pleasure of dealing with Banggood.com for several years and if anything, their choices of real hobby-grade models has become very impressive.

Such a model is the new Ranger G2 757-6 from Volantex RC. No, I'd never heard of the company prior to my Banggood contact "BG Tobey" offering this model to me as a blog review subject. If I may be so bold, I believe we'll all be hearing from Volantex more and more in passing months.

For an incredibly low $72.99 with free shipping, Banggood will deliver a PNP Ranger G2 with all electronics mounted and ready to go. All one needs to get flying is a suitable radio and batteries. Banggood's ordering page has a link to the recommended batteries, but those recommendations come with XT60 plugs while the ESC in the Ranger has a Deans Ultra-Plug clone.

No matter; this is a very nicely done all-EPO model with a wonderful finish, good fitting parts and quick assembly. Even the control surfaces are hinged! If I had it to do again, I'd pick up some servo extensions for the receiver and Callie Graphics decals.

Assembly is quick, made easier by a well-written manual. Decal application was a real bear; getting them to lie down properly took a lot of work. Again, I highly recommend Callie Graphics.

Two canopies are provided, one "bubble" and one which will accept an adhesive-backed action camera mount. FPV is no problem since the Ranger G2 is purpose built for FPV with an opening in the nose for a...Continue Reading
Posted by DismayingObservation | Jun 30, 2017 @ 09:27 PM | 13,382 Views
"Project C-47 Rescue" hit a milestone earlier today.

I finished the filling and sanding.

That, friends, was a big job. I plan to hit a couple of curved areas with a sanding needle, but other than that, every part is repaired and ready for sealing. I may go the Minwax Polycrylic route since it's less expensive than Foam-Tac Foam Finish. I should have more than enough in a half pint of the Minwax to cover this rather large model...and I don't want to weigh it down. The YouTube thread I've been using as a reference showed the example model being sealed with something like eight coats. I don't think I'll need quite that much! The prototype is intentionally rough looking, but I'll still keep my model reasonably smooth. It just doesn't have to be that smooth.

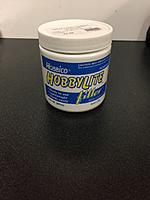
Most of the Hobbico HobbyLite filler was sanded off with the recommended 180 grit sandpaper and the remainder did a stellar job of filling the numerous scratches, gouges, cuts and countless injection marks. I didn't weigh the parts before or after, but all of the components including the fuselage weigh practically nothing.

Pix and more to follow.
Posted by DismayingObservation | Jun 21, 2017 @ 04:28 PM | 13,992 Views
Lots of work done, but lots more to come.

At this writing, the fuselage is complete and initial filling and sanding has begun on the wings and tail thanks to Hobbico HobbyLite filler. Beats the heck out of drywall spackle and it's lighter.

The new wing spar from Francis and Wane Custom Cabinetry in Palm Desert is a perfect fit and the What's Up Doc? decals from Callie Graphics are masterpieces. A trip to the Palm Springs Air Museum will happen when the weather stops being 120 degrees at midday....Continue Reading
Posted by DismayingObservation | Jun 14, 2017 @ 07:10 PM | 13,618 Views
That's actually closer to the truth given the accepted way of expanding a crushed EPO model. Boil it.

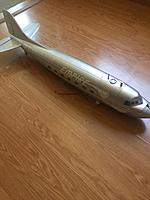
After languishing for far too long in my garage, the repairs of the crash damaged HobbyKing DC-3 which I reviewed here and which met with an untimely demise due to a tip stall on final are well underway.

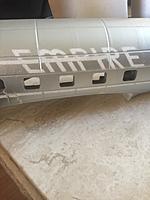
With some help from online photos, videos and some detail photos courtesy of Greg Barry, education director of the Palm Springs Air Museum, Callie Soden of Callie Graphics was able to produce a stunning set of decals which I'll use to replicate the museum's amazing, fully functional C-47.

Those decals were my motivation; I purposely ordered them before I did any work on the airframe. Damage to the fuselage consisted of a crushed, split nose, a couple of small pieces of missing EPO, a clean break above the wing saddle and a few scratches and gouges.

Following the example of a series of YouTube videos, the fuselage is repaired, the panel lines filled and it's ready for some water based polyurethane before priming and painting.

Taking apart the wings was a real challenge, but since the factory put it together with soft glue, the job was easier than it might have been. The various foam pieces are repaired and awaiting the same treatment as the fuselage. A local cabinet shop near where I work was kind enough to cut a new plywood wing spar using the broken original as a template and it fits beautifully. No charge! The owner's dad, as it turned out, was a model aviation enthusiast.

Photos, links and more to come. This is an exciting project!

UPDATE: Panel line and gouge repairs are underway on the rudder and vertical stabilizer. One of the rudder hinges was broken in the crash and both will be replaced. Speaking of hinges, the ailerons were attached with glue hinges! That was one heck of a shock, but they'll be properly hinged down the line.
Posted by DismayingObservation | May 26, 2017 @ 08:36 PM | 13,899 Views
There's nothing quite as frustrating than to have a small, off-brand model which not only doesn't work, it never really worked properly from the start.

Late last year, I posted a blog entry regarding an RC Leading RC-126 hexacopter which arrived partially inoperative for an RCGroups review and eventually, totally inoperative.

Since then, the model has been sitting in its box, making it the only inoperative multirotor in my collection. I concluded that the transmitter is bad - or I'll soon see - since I actually found a parts source at long last! I had to order from overseas, but it's via PayPal and the company seems to have a good online reputation.

I also ordered the decorative propeller caps while I was at it since the poor little model often wound up crashing on its back. If this doesn't work, although I have every reason to believe it will, they also have the flight controller.

So, another resurrected model should soon be flying properly very soon.

Should anyone be interested in learning which outlet I used, please send me a PM since it isn't the same place which sent it in the first place.
Posted by DismayingObservation | May 22, 2017 @ 06:04 PM | 14,056 Views
Time and weather finally stopped conspiring against me; it only took a month and a half for me to finally maiden my rebuilt E-flite UMX F-16 with its custom Callie Graphics decals.

Yesterday was that day along with another resurrected model, my 980mm FMS Ki-61 high speed foamie. That was a case of "dumb thumbs" which could have been a lot worse. I was landing with the sun in my eyes, I let the speed drop too low and I stalled it in. All I needed were the fuselage, a spinner, the simulated pitot tube and removal and straightening of the landing struts. Other damage to the wing was cosmetic and easily repaired, so I really lucked out. I already had a prop and holy mother of speed, I missed flying that bird! It sat for a long, long time before I finally started the repairs a bit at a time.

I did some homework regarding the F-16. Others have written that it likes a lot of runway before liftoff and such was the case. Tracking was laser straight and when it lifted off, was it ever a thing of beauty.

As is the case with other UMX models I've flown which feature Horizon's excellent AS3X stabilization, the F-16 went exactly where it was pointed. It's also the fastest UMX I've ever flown; that little EDF gets really small really quickly!

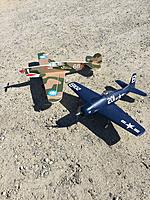
Naturally, I couldn't resist getting a picture of the F-16 next to a Boomerang turbine in Thunderbirds livery!

Next project: The crash damaged HobbyKing DC-3 I reviewed for this site is being repaired and redone as...Continue Reading
Posted by DismayingObservation | Apr 11, 2017 @ 09:09 PM | 14,358 Views
One man's trash is...well, you know the rest.

Last year, I blogged about an E-flite UMX F-16 which I witnessed on its maiden flight and maiden crash at the club. Conditions were kind of windy and while the little EDF did a great job of handling the conditions, a loop too close to the ground resulted in that dreaded smack of shattered foam on the runway.

The gentleman who owned it decided to toss it out and buy a new one rather than rebuild the wrecked model. I discovered that fact when I walked by a trash can and there it was! Not only did I take the wreck with his blessing, he also gave me the box and the rest of the accessories less the batteries.

A quick test at home via my Spektrum DX6i showed all of the electronics to be in perfect working order; had they not been, I wouldn't have set it aside in anticipation of rebuilding it.

Last month, I decided to take the plunge despite the exorbitant cost of the parts. I saved some money via the loyalty program at my local hobby shop, so the overall cost wasn't too bad and even with the purchase of two new batteries - I used an existing UMX battery for the tests - I was into it for less than a third of the cost of a new one. No way I was going to use a factory decal sheet, however.

I've had the pleasure over the past few years to have cultivated a wonderful working relationship with Callie Soden, the driving force behind Callie Graphics, the preeminent provider of model graphics and believe me, anything you might have heard about Callie, her incredible products and peerless customer service are absolutely true.

Callie was able to take her existing "Thunderbirds" scheme, shrink it to 1/32 scale and the results are just below.

I haven't yet maidened it, but I will soon. Fact is, anyone considering this model would do very well to drop Callie a howdy and get a set of these fantastic decals.
Posted by DismayingObservation | Mar 03, 2017 @ 03:16 PM | 15,659 Views
"Finally" is right!

The little Thunder Tiger Bearcat RTF foamie I'd purchased at the AMA Expo about three years ago finally flew its first successful flights. The original gearbox, brushed motor and four-blade scale prop didn't have nearly enough power to even get it off the ground. That radio and electrics were given to an other RCG member.

From there, I went to brushless power...and it crashed on takeoff due to poorly taped ailerons from the factory. Minor crash, so I purchased a new cowl, repaired the fuselage, installed CA hinges on the ailerons and elevator (it's a three-channel) and touched up the paint. Ready to fly once more.

The motor was a no-name generic of uncertain Kv rating...and I managed to burn it out in flight due to too much propeller, although it flew very well despite being incredibly touchy due to my use of a simple sport radio. It happened rather fast and I didn't have time to shut it down and bring it in. Lesson learned.

An inexpensive brushless outrunner from a subsequent AMA Expo was next...and when the landing gear caught on grass as I was ready to take off, the motor shaft was sheared off!

What to do, thought I. Then, I had an idea.

I had an almost new Turnigy 1050Kv Park 450 outrunner and an APC 8x6E prop on hand from another project. The motor is larger than the ones I'd been using and I thought I'd try it out before shortening the E-flite stick mount since it stuck out a bit too far for my taste. I plugged it...Continue Reading
Posted by DismayingObservation | Feb 19, 2017 @ 08:11 PM | 15,560 Views
My, how things have changed in this hobby in five years.

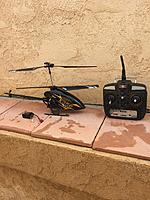
It was January 2012 when my review of the Extreme-Flyers X350 5A2 coaxial helicopter was published here at RCGroups. Since then, Global Hobby Distributors have, sadly, ceased operations and the X350 seems to be all but discontinued through other outlets.

Time hadn't been particularly kind to my X350. I spent more time crashing than flying and I turned my attention back to standard CCPM helicopters and early quadcopters, not to mention a lot of airplanes. Since long before moving from the place where I'd written the review and taken the photos, the X350 had been sitting in closets in both my previous house and my new house ever since.

After five years which included a great deal of flying a variety of models, I thought it was time to look at this chopper once again through the lens of history and some more polished flying skills.

I had everything I needed to get airborne again with one exception. I couldn't find the transmitter. I checked some boxes in my garage without success and that's when I thought to look where I'd once stored a couple of other oddball transmitters. Bingo. Still wrapped in the plastic grocery bag I'd used to protect it during the move. Even the transmitter's batteries were OK.

The original li-po had long since been discarded; I had one which I'd gotten as a gift from Max Ettinger at Park RC Models. It was almost totally discharged from lack of use, but I was able to get...Continue Reading
Posted by DismayingObservation | Feb 17, 2017 @ 10:54 PM | 18,372 Views
When I reviewed the JYU Hornet S RTF quadcopter last summer, I lamented the lack of documentation and firmware updating software in English. I did find out that their customer service is excellent when the flight battery wouldn't connect with the charger. Kitty Zheng at JYU forwarded a new battery and charger and all is now well.

JYU is getting their act together with very good online documentation and, thankfully, some good software and new firmware updates. The key word is "getting" since the firmware updating procedures are not too well documented. I sure found that out when I went to upgrade the firmware in my model and transmitter much as I'd normally do in an open source program like Cleanflight. My Hornet went from one of the sweetest flying quads I own to something, well, not so nice.

The fun part? These here interwebs. I found a video on YouTube where a user followed the thread started by our own SeByDocKy which can be found here. By the way, SeBy also shared a way to make a wiring harness which allows the flight battery to be charged via a standard computerized charger. Although the original pack won't allow for balancing because of the internal issue, it charges just fine without balancing. So, I have two batteries!

It seems that unless things are followed in a certain (and seemingly undisclosed) order, the thing simply isn't going to work. This is where this video becomes invaluable:

JYU Hornet S - Firmware Upload, Calibration
...Continue Reading
Posted by DismayingObservation | Feb 12, 2017 @ 05:22 PM | 15,050 Views
In addition to the resurrected Twister Police Helicam converted into a Blade CX4 presented in my last blog, these six micros are also refurbished and flying once more. The Skyartec Wasp Nano CP helicopter at left and the Helizone Thunderbird to its right are previous review subjects. So too was the green Cheerson FX-10 nano quad.

That Estes Proto X was my first ever micro quad and it's been rebuilt a few times over the years. Only the frame is original; I gave its transmitter to my son to replace the missing unit from his own. I'm flying it on a discarded transmitter given to me by my local hobby shop. Everything else is brand new and it flies like new as well. Once those motor mounts get tweaked, these little quads won't fly properly until they're replaced.

What looks like an orange FX-10 started life as an Estes Proto N used as a demo sample from that same hobby shop. It was less than a year old per the transmitter's date code, but it already had a burned out battery, a broken shell, three burned out motors and three missing propellers. At least it had a working transmitter with batteries and the FC board worked perfectly. That was given to me as a possible parts source for the green FX-10 and while the motors and props are available as service parts, the shells and flight batteries are not. I got those from overseas as well as a new shell for the actual FX-10 once it needs its battery needs replacing.

The little Helizone coaxial chopper was in need of...Continue Reading
Posted by DismayingObservation | Feb 08, 2017 @ 06:32 PM | 14,780 Views
OK, so resurrecting a coaxial helicopter isn't that big a deal, but dang, was it fun.

To wit, this centered around a "what if" thought I had when I dusted off my rebuilt Twister Police Helicam coaxial helicopter per a previous entry. That made me think of the incomplete model I'd purchased several years before but never operated.

A check of the freezer bag in which I'd stored it revealed a like new frame, all electronics except for the receiver (removed in order to test another model soon after I bought the helicopter) and all of the accessories including double-stick tape pads, tie wraps, screwdriver, used blades and a new, unwrapped set of blades. Since the Blade CX4 hadn't been released prior to the model being stored, I didn't have a US-based parts source, so away it went.

My worry was that the 3-in-1 mixer unit might not be working; I don't recall ever powering up the frame. To my utter delight, everything worked once I reconnected the receiver!

A very small infusion of money for the fuselage which I bought for half the retail price on Amazon plus the battery tray, skids and fuselage mounts from the local hobby shop resulted in the little green beauty pictured below. It is literally a brand new machine and I figured it deserved the new blades instead of the used ones. Naturally, it flies like a coaxial helicopter. Easy to fly and hover indoors; impossible to fly outdoors in wind.

I should have done this ages ago! Next on the list is another battery. For now, I'll enjoy the battery I have.
Posted by DismayingObservation | Feb 03, 2017 @ 06:37 PM | 14,946 Views
The new Blade CX4 fuselage in bright green arrived today! Like the old Twister Police Helicam fuselage, the new fuse has LEDs both front and rear which plug in the same way as the light system on the previous fuselage. Mocking it up to the frame this afternoon showed me this big buzzard of a coaxial helicopter is going to look really, really nice. It will be a brand new indoor/outdoor model for a total outlay of about $25. From scrap to superb, as it were.

Problem: It didn't come with the mounts. They're sold separately.

The good news is, they're still in stock. My hobby shop ordered the mounts today and they'll be here on Tuesday.

True, this is an incredibly simple rebuild as if it were being rebuilt after a crash. It's just that it had been returned to the original retailer for whatever reason, cannibalized for some parts and discarded. For nearly six years, it sat unused, but no longer. I'm even going to get a second Lectron Pro battery for the three models!

It's as I'd written; there's a great feeling taking a pile of parts - any pile - and turning them back into a fun, functional and like new model!