CorvetteC5's blog View Details
Posted by CorvetteC5 | Dec 06, 2023 @ 04:46 PM | 5,899 Views
What this RC model is:
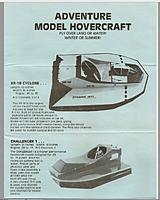
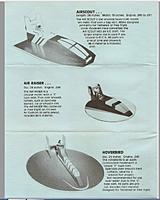
Venture Aero-Marine, in Ohio USA, had my full attention back in the 1980’s when I learned of them! They sold directly five-model hovercraft sized from .049 to .60 glow engines. Out of wood and foam construction materials. Attached are my scans of their catalog listings, flying instructions, and order form page.

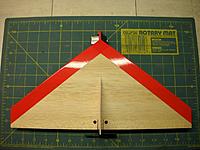
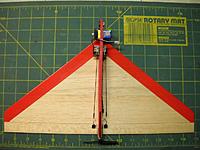
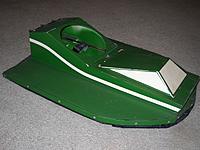
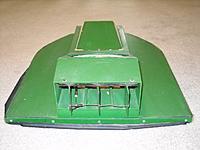
Having my RC fun using electric motor propulsion in 1982, I purchased the mid-size Venture Aero-Marine 24-inch long by 19-inch wide Challenger 1 RC hovercraft model for .09 to .15 engines. This model has three rudders for directional control by one servo, and throttle response by a second servo. Hover height is defined by an inflatable skirt.

Assembly Highlights:
Looking back over my workmanship from 1982; it isn’t terrible! Fortunately I had been crafting RC wood boats for a few years before tackling this hovercraft, and was fairly adept at shaping pieces to fit tightly with creative clamping to hold them in place during glue drying. My teenage-self assembled the model kit per the instructions using epoxy glue between, and on, the decking pieces and tack-rails for liquid-proofing. Warming the glue during applications with a monokote heat gun thinned it some for absorption and greater coverage.

The rudders are mechanically linked together with cotter pins and bent music wire. Which are still in tact, slop free, and in use 40+ years later!

Next steps had me adapting the engine area for an electric motor mount....Continue Reading
Posted by CorvetteC5 | Sep 03, 2022 @ 10:13 AM | 10,004 Views
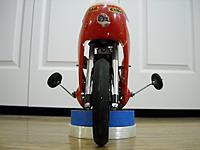
This R/C model is very special to me. One of my earliest hobby grade and most unique toys from 40 years ago. It is a Kraft Systems Inc Eleck Rider R/C Motorcycle. Which is a re-branded Kyosho.

It was purchased with my big bro in 1979, or thereabouts, for $100 from Tower Hobbies store. Kevin let me buy him out in the 1980's after losing interest. I continued to run it until it lost stability. I recall it eventually wobbling severely side-to-side, and my attempts to reduce the movement were unsuccessful. Fortunately I have kept it safe ever since!

In September 2017 I did a full tear down, cleaning, repairing, painting, and reassembling in a full restoration. The frame was painted black. The transmission bushings were replaced with small ball bearings. Slop in the steering bell-crank was removed with tubing. Phillips head screws and nuts were replaced with hex head screws and lock nuts. A Tactic 2.4GHz receiver was installed for glitch free operation.

The cowling and seat plastic pieces are cracked and chipped and look terrible. No luck finding new old-stock online for them. From this research I learned that this R/C motorcycle was first sold in 1974, was designed by Kyosho, and also sold under the Graupner brand name.

Yes, the 'training wheels' can look quite odd. These are my addition done way back in the 1980's to minimize additional damage to the cycle. They are attached in the same positions as the 'crash bars' included in the OEM kit. My brother...Continue Reading
Posted by CorvetteC5 | Mar 18, 2021 @ 09:52 AM | 26,606 Views
This is my third paramotor aircraft and a very beautiful one. Hand made to my order by Tong Rayong, it is new for 2021, a Butterfly model with 1.5m wingspan single-skinned sail with 0.5m^2 of area, complete with pilot gondola. Tong's thread in RCGroups.com for this model started May of 2018 and may be found at:
https://www.rcgroups.com/forums/show...5m2-paraglider

Having been enjoying my two larger paramotors outside during the non-winter months I began looking for an indoor friendly size one that could be flown during our indoor RC sessions. These videos from Tong sold me on his design:
Aerobatic indoor flying mini paramotor (3 min 0 sec)

Rc paramotor indoor flying (4 min 3 sec)
...Continue Reading
Posted by CorvetteC5 | Jun 27, 2020 @ 10:28 AM | 17,640 Views
This is a build with ulterior motive!

My goal is to have a paramotor that can fly in winds and for it to handle reliably in gusting and swirling air currents. I'm not talking about tropical storm or hurricane level forces, of course, just more than dead-calm overcast-sky conditions. This motivation of mine developed from an unforced crash landing: My single-skin parasail by Hobby King folded in flight on a dead calm day in 2019 with micro thermals. The unexpectedly turbulent and choppy air was bobbing adjacent sail-panels deforming the airfoil enough to make the trike hanging underneath it look like a bobble-headed toy! I suspect it flew into a downdraft because both wing tips of the sail collapse suddenly together and the ball shaped rip-stop nylon, that had been the wing, simply dropped from the sky.

With damaged landing gear wires and steering servo arm repaired, I resumed researching parasail designs looking for something with a chance of more stability. This lead me to double-skin sails that utilize forward motion to compress air into the cells pressurizing them, and consequently maintain their airfoil shape. This seemed like a great next step for me to explore. At least until I learn otherwise! Fortunately, my RC club's treasurer, Ned, has a family member who has flown the same paramotor for about 15 years. And I was treated to a flight of it at our club flying field in winds well above 10 mph. Glow engine powered, it flew very well never losing...Continue Reading
Posted by CorvetteC5 | Mar 03, 2020 @ 02:47 PM | 22,442 Views
This is a special build, for it is a tribute to my dad who passed in 2015. Within the first couple of years after his death, I restored his two Zagi 400x wings to flying order and find it a treat to channel his flying through them These nearly 20 year old wings endured my antics until summer of 2019, when the patriotic red-white-blue one crashed itself in a near vertical nose dive, after the ESC/BEC shut off during a high speed pass, through mature corn stalks onto the dry clay soil. The right half of the foam wing shattered under the tape finish, the center plastic battery holder fractured and hinged forward, and the twin fins sheared away.

All this damage could be repaired, of course, but not without loosing the original finish work from dad. Which is annoying to me. Instead, his Zagi 400x RWB wing is presently in retirement, and my search for a similar wing yet assembled using modern design techniques is finished. Among the abundance of prefabricated, and kit, wing designs that I researched, the models from Crash Test Hobby stand out. Cut from EPP rubberized foam in one density for the wing, and a heavier density for the control surfaces, I was drawn to their use of string (shock cord) and 3 mil laminate reinforcements. Plus the RC gear is embedded into the foam for protection, streamlining, and simplicity. All new techniques, to me, that peaked my interest.

From the abundant choice of wing sizes and shapes from CTH, I selected the Rebel S14 because of its...Continue Reading
Posted by CorvetteC5 | Mar 01, 2020 @ 10:48 AM | 18,552 Views
This is my first foray into para-anything and I had a good maiden flight with it so worth sharing!

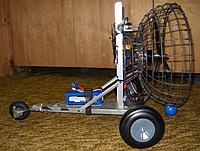
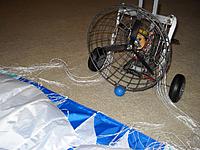
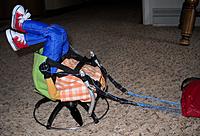
I bought the Hobby King parasail about one month before the cart PNP version became available, and continued with my plan to create my own motor unit for it. I was very inspired by Paradude's gondola designs where the servo arms are off to the sides and not to the front. This makes sense to me as effective servo protecting during tumbles. With several weeks of thinking about my initial gondola design, yet not started with building, a video appeared by britinoz on June 19th, 2019. This showed a brilliant and low risk ROG of the Hobby King trike paramotor. Wow! Much nicer than a newbie tossing a 2 kg gondola and hoping for the best, so I incorporated wheels in my paramotor design and share the result with you.

My trike/cart was built mostly from spare parts on hand. Only 2 parts were bought special for the paramotor: The wire fruit basket for the prop guard from Walmart for $7.44, and the 3/16" bow shackles from Ace Hardware for $3.99 each. Everything else was stuff in the shop. The trike chassis is a 40-plus year old 1-channel land sailer vehicle that my older brother and I used to steer around the driveway in the wind. The motor is an E-Flite 480-1020KV. Servos are JR analog oldies at 6.48 kg/cm. Propeller is 9x6x3 for glow engines. Wheels/tires grew dramatically in size when flyers of the HK paramotor recommended more and more weight. Up to 2.3 kg at last reading!...Continue Reading
Posted by CorvetteC5 | Feb 29, 2020 @ 04:59 PM | 18,830 Views
WOW! What an intriguing build I am having with my Microaces DH.2 airplane! This is my first kit by Microaces and I am fascinated by the mix of wood, foam, plastic, stickers, cord, and carbon fiber materials.

Without knowing what the DeHavilland/Airco DH.2 airplane was at the time, I actually voted to encourage Jon at Microaces to design and market this pusher airplane. This is the vote thread from January 2017:
https://www.rcgroups.com/forums/show...-Microaces-kit

There are quite a few threads on RCGroups already dedicated to the DH.2 by Microaces. This appears to be the main thread:
https://www.rcgroups.com/forums/show...ces-Airco-DH-2

I've always been drawn to unusual and creative looking aircraft so it was easy to buy this kit from Microaces. As my first build from them I look forward to following in their steps and learning from their techniques. Also understanding more of the benefits and limitations of working with prefinished parts.

Most of my Airco DH.2 build will be shown in pictures with selective commentary along the way.

Here is the fuselage:
For better or for worse, I have installed two rotary servos in place of the linear ones. They are the 1.9 gram digital ones from Hobby King. The pictures show the steps. I am not far enough along in the build to tell if I will have unforeseen geometry problems with the control cord rigging. LOL!

Part of the fun and challenge of my build is in the using of Super Phatic and UHU Por glues, which set slowly...Continue Reading
Posted by CorvetteC5 | Apr 23, 2019 @ 08:30 AM | 18,157 Views
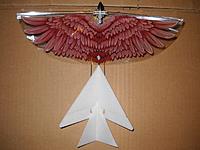
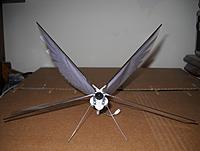
This is a fun conversion of an 11 inch wingspan toy bird ornithopter to hobby grade RC. I bought the Electric Flight Bird on sale and chose the 1-channel version, versus the 2-channel one at a higher cost, thinking of a conversion to 3-channel control. After a few months of experimenting, I landed at the V-tail version-five presented. Not complete, there is still detail to add to the tail and reshaping of the battery mount.

My creation consists of:
- replacing the stock fuselage and tail feathers with balsa, carbon fiber and foam.
- installing a Spektrum circuit board 'brick'.
- adding landing gear bent from 0.020" music wire and held in heat shrink tubing pockets.
- a fuselage 'keel' that permits fore and aft movement of the 1-cell flight battery for CG adjustment.
- flying with a 130 mah Lipo.
- adding a rubber nose cone (from Horizon Hobby micro airplanes) for a beak/bumper.
- replacing the stock crank arms, that flap the wings, with shorter versions to reduce binding.


Worth a closer look are the crank arms that I replaced. The stock crank arms worked fine with the wings not installed. The 6mm diameter electric motor would turn the gears very smoothly from fully closed to fully opened. However, after the wings were installed they would press tightly onto one another in the fully closed position, forcing the motor to push through this friction point. Seeing the problem, I replaced the stock crank arms with ones that have a hole spacing of...Continue Reading
Posted by CorvetteC5 | Apr 19, 2019 @ 04:26 PM | 17,981 Views
I discovered this jewel of a wing design on February 12, 2019 when Harri Pihl shared it on RCGroups.com in a new thread. Find it at this link:
https://www.rcgroups.com/forums/show...n-FPV-and-more

It is a 3-channel design with only 3 parts! The videos of it flying looked cool and lots of indoor RC fun. Plus, it fills my interest in building a wing that is indoor friendly and could fly with a coreless motor turning a GWS2508 propeller directly!

The build was indeed a quick 3 days from February 24th to 27th, 2019. I worked from the plan that is included in my attachments. It is intended to be printed on A4 size paper but my printer does a smaller 8.5 x 11 inch. When I printed the plan to the largest scaling, the fuselage profile resulted in a 18cm wing cord! Doubling this got the wingspan. Which I converted to 14.5 inches, versus metric units, since I only have a short 15cm ruler!

I cut thin foam for the wing, and didn't like the cupping that was there so I cut a 2nd wing out of 1/16" balsa wood. This was scrap balsa pieces glued together edgewise. I'm pleased with the look now. There was a small weight gain, so I still used foam for the fuselage and fin to minimize this gain, and for a nice contrast in looks.

The resulting shape of my AD/HD delta wing looks very slick!

The specifications are:
Wingspan: 14.5 inches (36.8 cm)
Weight: 32 grams with 250 mah lipo
Materials: 1/16 inch balsa wing, foam meat-tray fuselage, foam carry-out food-...Continue Reading
Posted by CorvetteC5 | Apr 19, 2019 @ 08:11 AM | 17,151 Views
This is the conversion of my "C17 C-17 Transport 373mm Wingspan EPP DIY RC Airplane RTF" from the stock 2-channel motor-differential control to Spektrum 'brick' 3-channel control with throttle, rudder, elevator. It was started on September 20, 2017 and completed on December 12th, 2017.

Word from the main thread at:
https://www.rcgroups.com/forums/show...an-EPP-DIY-RC-
is that this offering flies very well as designed with gyro stabilization. With the main limitation of a larger turning diameter making it tough to fly indoors in smaller venues like the basketball court sized gym I have access to. Thus my interest in and electronics upgrade of this model! And the finished result looks fantastic and flies very smooth. See video, below.

How the story unfolded:
I started building my micro C-17 by splitting the fuselage into two halves as shown. I hollowed out each half with a Dremel tool and stone grinder, leaving about 1/4 inch wall thickness. Noticeable weight savings of maybe 1/3. However much that is.

Road not taken: I'll probably install the RX and TX from the Horizon Hobby Duet initially. This will maintain the differential thrust, gyro stabilizing, and add elevator control. I have had issue with the gyro drifting during flight with this Duet brick, so if I still hate it for the C-17 then...
Road taken: ....I'll install a AR64xx brick with AS3X. Since I have that handy too.
Posted by CorvetteC5 | Jun 06, 2018 @ 08:52 AM | 22,175 Views
Looking for winter projects in November of 2017, and interested in adding to my RC flying wing collection, I couldn't pass on the size and sale price at Banggood.com for the DW (Dancing Wings) Rainbow 800mm EPP flying wing. The sale was only for version 1 and not the upgraded version 2 design. Comparing the differences, and knowing my plans for it and building skill level, I saved a few dollars by buying the older model. I am very glad I did as the results are excellent! Keeping the build cost low I used as much as I could of what I had on hand. I have less than $50 of new money into this fun flyer!

Listed on the website:

Description:
Brand Name: DW HOBBY
Item Name: Rainbow flying wing
Wingspan: 800mm
Length: 365mm
Flying Weight: About 165g
Propeller: GWS 5030
Version: EDF version, tail push version (optional)

Recommended Parts For Tail Push Version (Not included):
Motor: 1404 2900KV
ESC: 5A
Servo: 5g*2
Propeller: GWS 5030
Lipo Battery: 2S 200-400mAh
Radio System: 3CH
----------------------------------------------------------------
For comparison my build resulted in:
Flying Weight: 295 grams (10 - 3/8 ounces)
Propeller: Graupner 12 x 12 cm CAM
Motor: Racerstar BR2406S-2300KV
ESC: GForce 30A
Servo: Hitec HS-55 Economy Feather Sub Micro Servo
Lipo Battery: Rhino 1050mah 3-cell
Radio System: Redcon 6 channel DSM2 compatible RX

Alterations to the kit are rather extensive to compensate for highly over powering this wing. They include:...Continue Reading
Posted by CorvetteC5 | May 31, 2018 @ 12:40 PM | 18,300 Views
Encouraged by the success of my 1-cell Twirl Tiny gyrocopter, and disappointed in the high loads placed on the motor and battery, I rescaled the Twirl plans by Al Foot and created a 2-cell version. It is still small enough, slow enough, and controllable enough to be pilot friendly during indoor RC flying. I deviated from the design of the Twirl a bit more this time around and didn't follow the geometries quite as closely. An advantage to this was the easier adaptation of my carbon fiber framework. As with my smaller Twirl Tiny, the Twirl Tween has a structural frame with a cosmedic profile fuselage and lightly load-bearing wing.

Originally scaled for a 20 inch rotor-to-rotor span, I left the carbon fiber wing spars long and went with it so the actual span is about 22 inches. Motor is a Turnigy 1811-2900 KV brushless, Lipo is a Nano-Tech 260mah 2-cell, ESC is a Castle Creations 6A, RX is an OrangeRX with Stabilizer, servos are analog 2.2 gram from Hobby King, wheels are by GWS. Weight is 64 grams without battery.

My Twirl Tween was unable to rise off the ground due to the stubby landing gear height. So I hand launched the first flight indoors during January 2018 with very encouraging results! Subsequent flights had me move the CG more-and-more toward the tail allowing for higher alpha and slower air speed. I also increased the right thrust of the motor another degree to compensate for the torque roll while in higher alpha flight. Thrust is not lacking from the GWS5030 propeller with easy vertical climbs and hovering. It is rather cool to see the rotor blades nearly stationary during a hover, only to accelerate again when moving forward.

- Curt
Posted by CorvetteC5 | May 31, 2018 @ 11:42 AM | 18,246 Views
This is my Twirl Tiny 1-cell twin gyrocopter that borrowed heavily from the great Twirl autogyro design by Al Foot. I scaled down his plans to 33.8% for a rotor-to-rotor span of about 10 inches, and adapted a frame work of carbon fiber to his geometries. After adjustments and alternations over several months the power is provided by a 7mm coreless motor with 4:1 ratio gearbox, 4 inch propeller, and a 130-140mah lipo. Weight RTF is 23 grams with a Spektrum Mini-Vapor circuit board for control.

For the first flight, I had installed a 8.5mm motor and gearbox but found thrust excessive and marginally stable. Below is what I wrote on March 29, 2016 to a friend who owns the Twirl:

"Flew the Twirl Tiny this afternoon for the first time in Mom's backyard. Close to dead calm air, but not quite. Took several attempts to obtain stable flight. I added about 25% of the available left rudder trim to counter the right thrust. Plus around 5-6 clicks of up elevator, and moving the lipo fully toward the tail to counter the shallow nose dive. Once flying straight and level the Twirl Tiny is responsive to the tail surfaces. Turning well to the left and right, more or less equally. Throttle needed was only about 45-47%, but even so it was fast. Too fast to be indoor flying friendly. Fun and encouraging!

A strange behavior occurred three times. The aircraft nosed upwards and the rotors slowed until the fuselage was hanging vertically underneath the propeller, and the tail...Continue Reading
Posted by CorvetteC5 | Jul 03, 2016 @ 12:50 PM | 31,581 Views
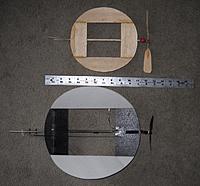
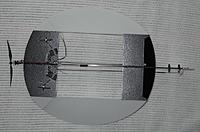
Here is my Saucer 1982 airplane built during January 2016. An early "Nutball" design, if you will.

While preparing for Dad’s celebration of life open house December of 2015 I discovered in the basement a circular balsa free-flight aircraft of Dad’s. I do not remember what he called it, however I found a similar design from the 1950's on AMA plans service called Saucer. Sounds reasonable, so I refer to Dad’s plane as Saucer 1982 because I can trace his plane to that year from a black and white image. It shows our group of pilots holding some of what we built and flew during that winter.

January I created an RC version of the Saucer 1982 and guessed well enough with the motor thrust angles for it to fly very well after trimming! It cruises smoothly at about 45% throttle, is highly maneuverable with strong rudder authority, and slows enough for easy figure eight turns within our basketball court sized gym. With throttle above 75% it will rudder roll in a very axial manner. Glide is nose down with a weak flare, so I land with power.

My RC version of the Saucer 1982 is 3-channel RET and consists of enlarging the 8” diameter balsa version to 11”. I was faithful to Dad’s aircraft, and duplicated the square hole cut from the center of the wing. Which is half the diameter on each side. The wing is cut from restaurant carryout foam containers. The carbon fiber fuselage is from two Ember 2 airplanes that had broken off at the motor/gearbox...Continue Reading
Posted by CorvetteC5 | Feb 24, 2016 @ 11:26 AM | 21,275 Views
I totally intended to build my Micro Max kit, by Stevens Aeromodel, as designed when I bought it. However I spoke with flying buddy, Scott, who built his kit first and doesn't like flying it indoors in the space we have access to. Scott learned the hard way, several times, that his Micro Max has an abrupt and severe wing tip snap roll when slowed down too much. (A behavior I would see from my own build.) And flying it at nearly full throttle all the time in the basketball court size gym isn't his ideas of fun. Mine either.

So forewarned, I tweaked my Micro Max design from the get go to fly slower. I decided to try these changes:
a) Reduce the wing loading by lengthening the wing 25%. I simply added 1 additional rib to each wing half. Keeping the same rib spacing as designed. Stevens made this change a no brainer. He uses a 1/4" balsa stick as the leading edge of the wing. Each stick is 12" long, with only about 9" needed for each wing half. This left me plenty of length to use for my 25% span increase.

b) Lighten the airframe by drilling holes into the sheets of balsa used to form the fuselage and tail surfaces. Forstner drill bits in several sizes did the trick. See images for locations.

c) Route out the underside of the balsa headrest to save a tad more weight. Images attached.


That's all really. Not too much butchering of the original design after all, IMO.

So how did my maiden flight go? In a word: scary! It was...Continue Reading
Posted by CorvetteC5 | Feb 19, 2016 @ 08:18 AM | 21,256 Views
Just couldn't help myself I like unique RC flying craft and this one is very cool. Not the first of its kind for sure, but bought at the closeout price of $15 from Walmart summer of 2014 it is fun to explore

You might have seen these Ironman toys for sale around Christmas of 2013. At full introductory price I couldn't get excited about them. Plus I haven't paid more then $30 (before tax) for a toy RC aircraft yet. This includes my Silverlit 4-motor bomber, and Airhogs Stunt Jet both shared on my blog. But I did stay interested enough in Ironman to watch for the sales.

Inspection of the design shows it to be an important step-up above the Airhogs airplanes I have experienced. The TX has fully proportional control for both steering and thrust! True potentiometers on the control sticks and not the frustrating 2 to 7 steps founds by the other brand. Although still only 2-channels of control (differential thrust) at least the pilot has a fighting chance of holding the sweet spots for altitude and yaw.

Encouraged by the proportional control, I first flew this one stock during the winter of 2014-2015 indoors during a normal flying session. After a little trimming of the rudder (at the TX) and moving the CG by taping metal washers to the feet, I was able to fly circles within the gym. Mostly staying off the walls and out of trouble. Ironman just doesn't like to turn too tightly. That long and narrow body of his is acting like a rudder, of course, and when...Continue Reading
Posted by CorvetteC5 | Feb 17, 2016 @ 09:10 AM | 21,867 Views
Surprised myself just now realizing I hadn't created a thread for my micro S-Pou! model. This is the first Stevens Aeromodel kit I ever built and was purchased by Dad at the Toledo RC show in 2010. It was chosen for the unique look to the original design. Why share now? Because during January 2016 I completed a refresh of my S-Pou! And after 5 and one half years of use (and survival) it was entitled

Unfortunately the flying stabilizer of the original design results is a very pitch sensitive (unstable) aircraft. Flown too fast or in a bit of wind and it would porpoise dramatically. I also found my S-Pou! to turn poorly to the right, with a resistance to the rudder command. It would start the turn just fine, then partway along would rock hard to the left and then resume turning to the right.

I adjusted what could be trimmed with the airplane from summer of 2010 to 2012 and was to the point of either retiring the design out of frustration, or cutting into the aircraft and making drastic changes to the design in hopes of a fine flyer. As seen in the photos I reworked it! Glad I did as it is a very pleasing flyer now.

Summary of my redesigning:
a) Added plywood to the wing support tower to reposition the pivot point toward the tail. This provided a more forward CG and greater pitch stability. This is the first thing I tried to help control the porpoising. Helped a little but not nearly enough.

b) Replaced lifting (under cambered) stabilizer with flat...Continue Reading
Posted by CorvetteC5 | Apr 27, 2014 @ 06:55 AM | 22,657 Views
My latest airplane build is the Diddlerod kit by Stevens Aeromodel. Undecided on what motor size/power to install, I found myself flying the UMX Sbach and Hyper Taxi in weather too windy for my 1-cell planes. Enjoyed them enough for me to select a 2-cell flight system for my new Diddlerod for the performance. With that settled upon I could begin the fun part of assembly!

The model is old school designing by Stevens with threads on RCGroups.com dating to 2005 and an updated copyright on my kit-plans of 2009. Reminds me of the S-Pou! I assembled in 2010 where the wing ribs do not include tab and slot alignment, and the landing gear wire is held by balsa wood and not plywood. This design was also created for a GWS brushed motor system that may not even be offered anymore.

Changes to the design, for my plane, include a new middle piece for the three pieces to the landing gear support. I changed this to thin plywood and reshaped this wood to accept music wire bent square (instead of triangular) so that the landing gear wire is a friction fit and can be easily removed. I have also added a plywood firewall for a motor mount. I will be installing a Turnigy 1811 brushless motor that is the same size that I use in the UMX Sbach, Hyper Taxi, and GeeBee. Presently I only have a 2900KV winding handy, which at 32 watts will be overkill for the Diddlerod. Eventually I may buy another 2000KV motor (good for 18 watts on 2-cells).

Made some nice progress on the...Continue Reading
Posted by CorvetteC5 | Mar 28, 2014 @ 07:12 PM | 24,651 Views
Stevens Aeromodel designs some very nice micro airplane kits. This Sweet Dream classic ultralight is my fourth model for myself. Liking this look so much, I even joined the Stevens Micro Builder Program and retroactively selected this model to save a few bucks and spend some quality time with this RC hobby of ours.

I used this kit as an incentive to finished filing my income tax returns. That completed on a Saturday (March 22nd), the ultralight build began on Sunday while listening to A prairie Home Companion on NPR, followed by Wait Wait Don't Tell Me, plus additional radio shows. Attached are pictures taken of the progress. I bought the Stevens British finishing kit, and applied medium-walnut Danish Oil to the fuselage. Plenty more to be done such as the electronics installation, wire rigging, stickers on the wing, and push rods.

In time my 25mm GWS wheels will be replaced with taller wheels that are more scale, the 2-blade propeller will be replaced with a 4-blade by Parkzone, and I may even replace the pilot with myself since I do enjoy flying with a view from the clouds.

- Curt

Update April 1, 2014:
More progress on my Ultra Light aircraft. It flies! Flew it twice last Sunday (the 30th) outside thanks to winds slower than 5mph yet with light turbulence. Was flown a little tail heavy even with a 240mah LiPo just behind the propeller, likely because I hadn't installed the engine cylinders yet and the wheels are undersized. Dialed in a few degrees of down...Continue Reading
Posted by CorvetteC5 | Mar 08, 2014 @ 10:12 AM | 23,487 Views
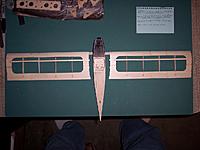
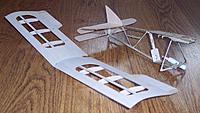
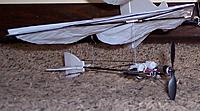
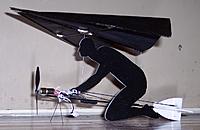
Not leaving well enough alone, I shrunk Dad's and my micro Sandy-Witch design to one half scale. Instead of the 18 inch wingspan of Sandy, Sonny has a 9 inch span. Still in need of the rider, of course. Here is a partial design summary:

- 2mm CF rod for fuselage.
- Mini Vapor circuit board.
- 7mm diameter motor from the Flyzone Super Cub/Albatros. Run in reverse.
- Direct drive propeller from the Hobbyzone Duet.
- 0.020 inch music wire for supporting the wing and landing skid.
- Tail surfaces from foam food tray. I expect changes to the size and geometry of these as I evaluate the control.
- Wing constructed from 1.5mm CF rod (my LHS didn't have the 1mm I was seeking), balsa and plywood, grocery store bag, and clear thin tape. I used heat shrink tubing as sleeve for the music wire supports.

Updated March 9, 2014:
Maiden flew this son-witch this morning during the normal indoor flying session. At half throttle and a gentle overhand toss it was zipping across the gymnasium faster, straighter and more stable then expected! Flight was level but pulling to the right. TX trim is very effective with several clicks straightening the rocket. Elevator was pretty responsive too: with some fed in, and the throttle reduced, son-witch can slow down quite a bit. Still very stable! Rudder authority is sweet with easy figure eights in half of the basketball size court.

During the turns it is dropping the nose more then I like so I land and move the 130mah LiPo toward the...Continue Reading